Your go-to resource center for effortlessly monetizing your apps and websites with InMobi is here. This comprehensive guide will take you through every step of the onboarding process—from creating and configuring your account to maximizing your earnings potential. You'll also find essential information on compliance initiatives and key guidelines to ensure successful and sustainable monetization as an InMobi publisher.
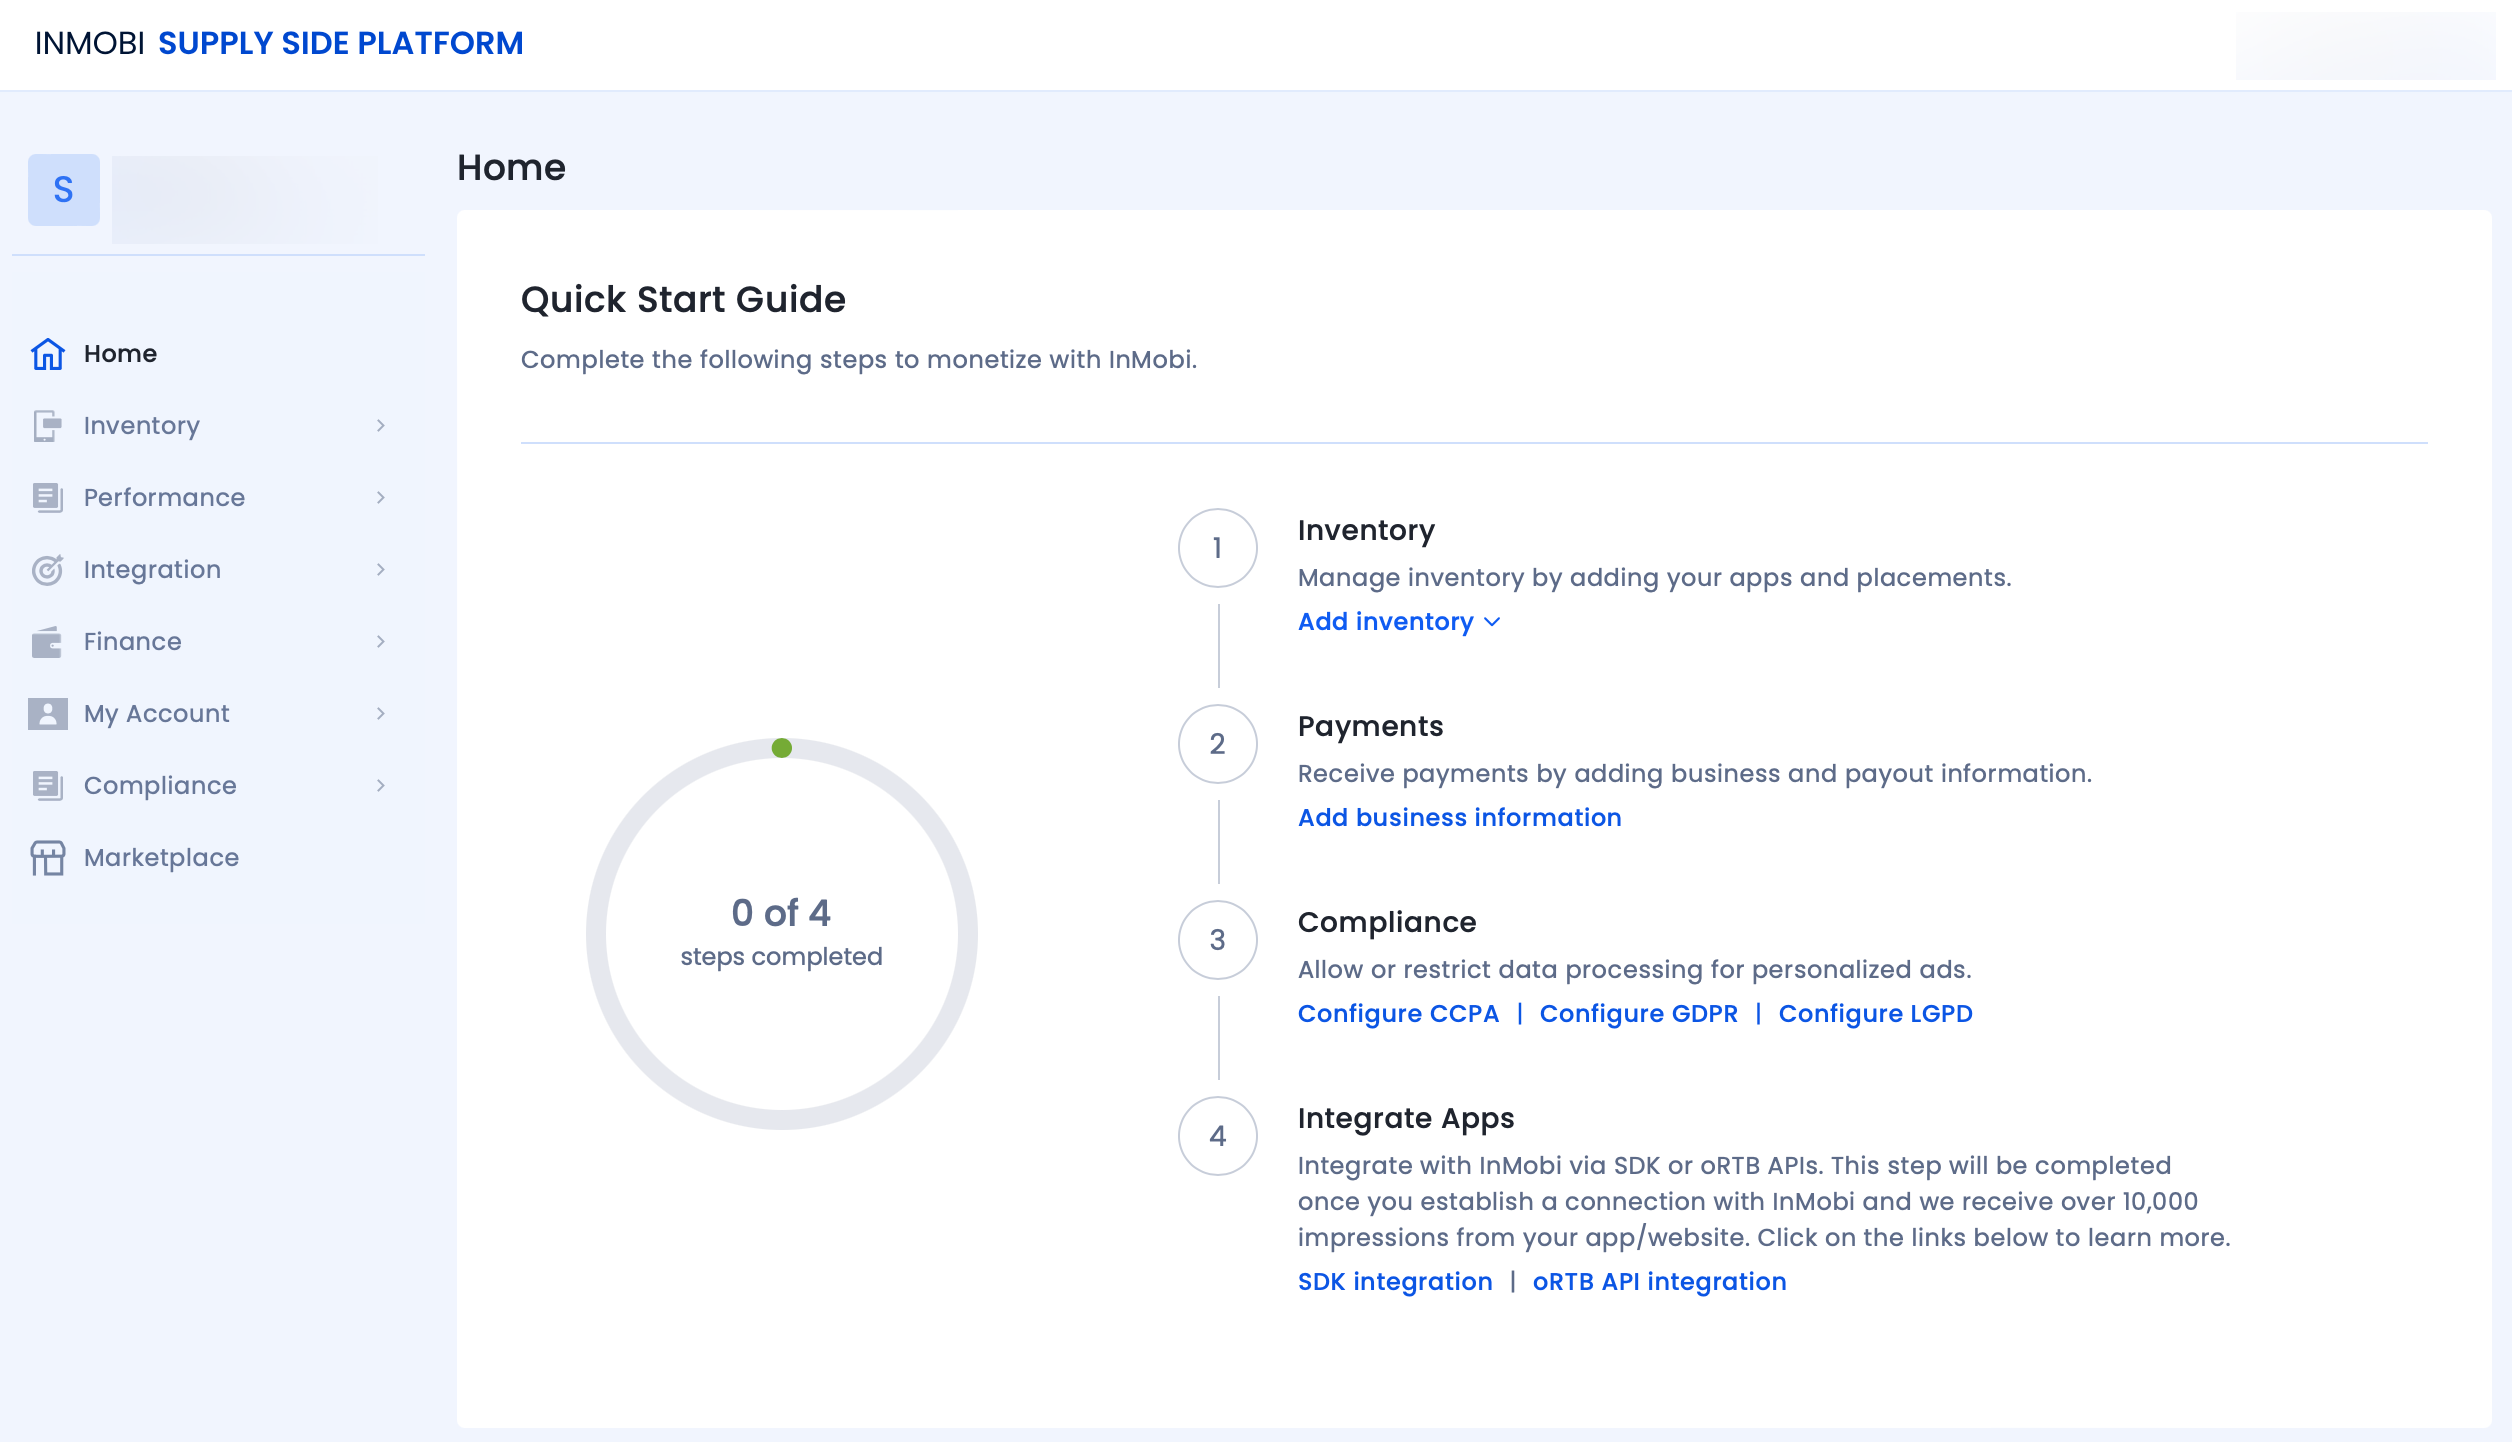
Here is your onboarding checklist:
For any assistance, contact your designated Customer Success Manager. If your account is not being managed by an InMobi representative, submit your query on the Contact Us page.
Now, let's get started.
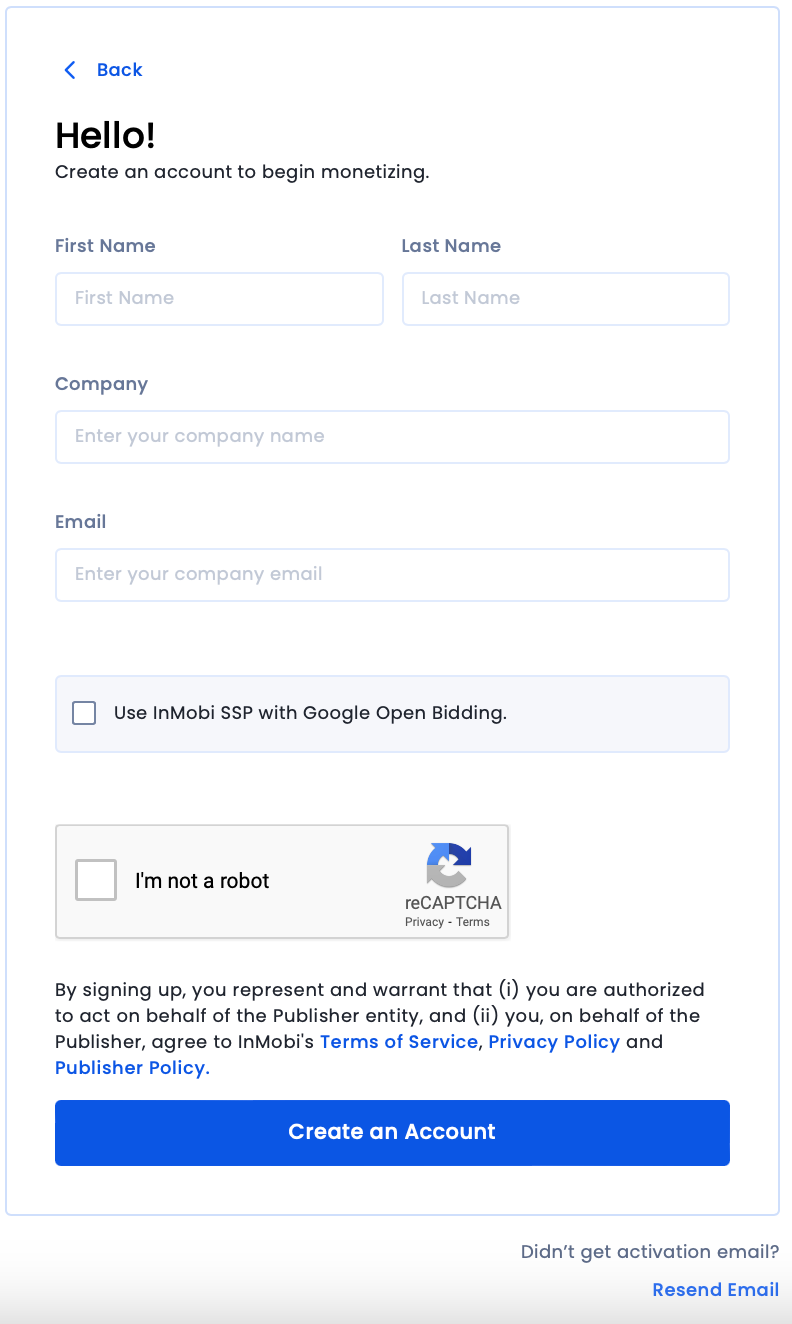
If you are unable to find the verification email in your inbox, check your Spam folder. If you haven’t received it, click Resend Email on the Sign-Up page and enter your email address.
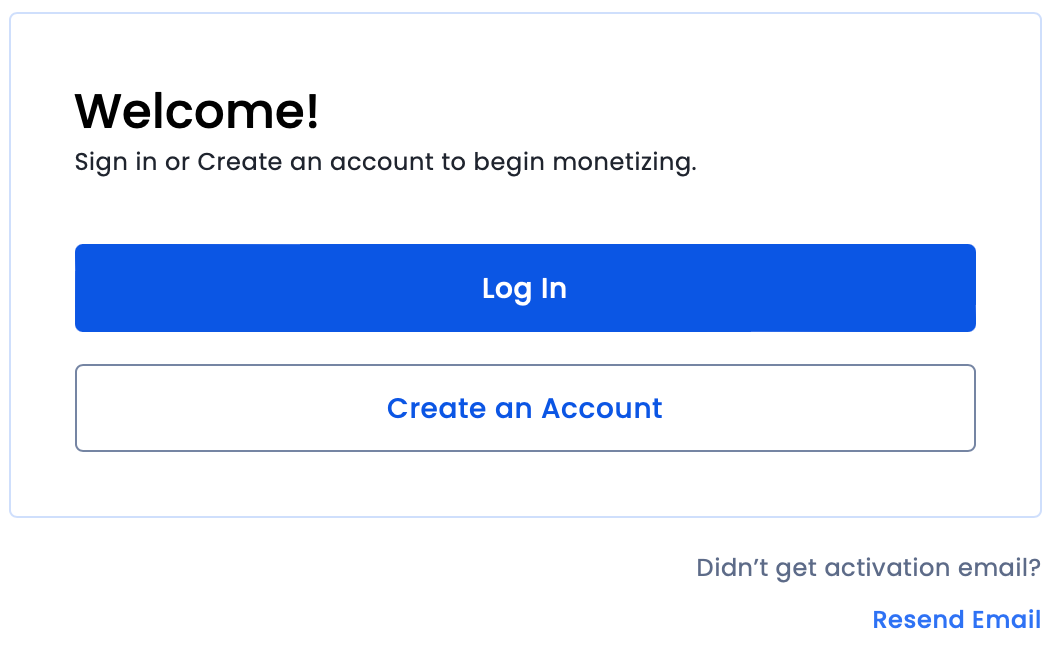
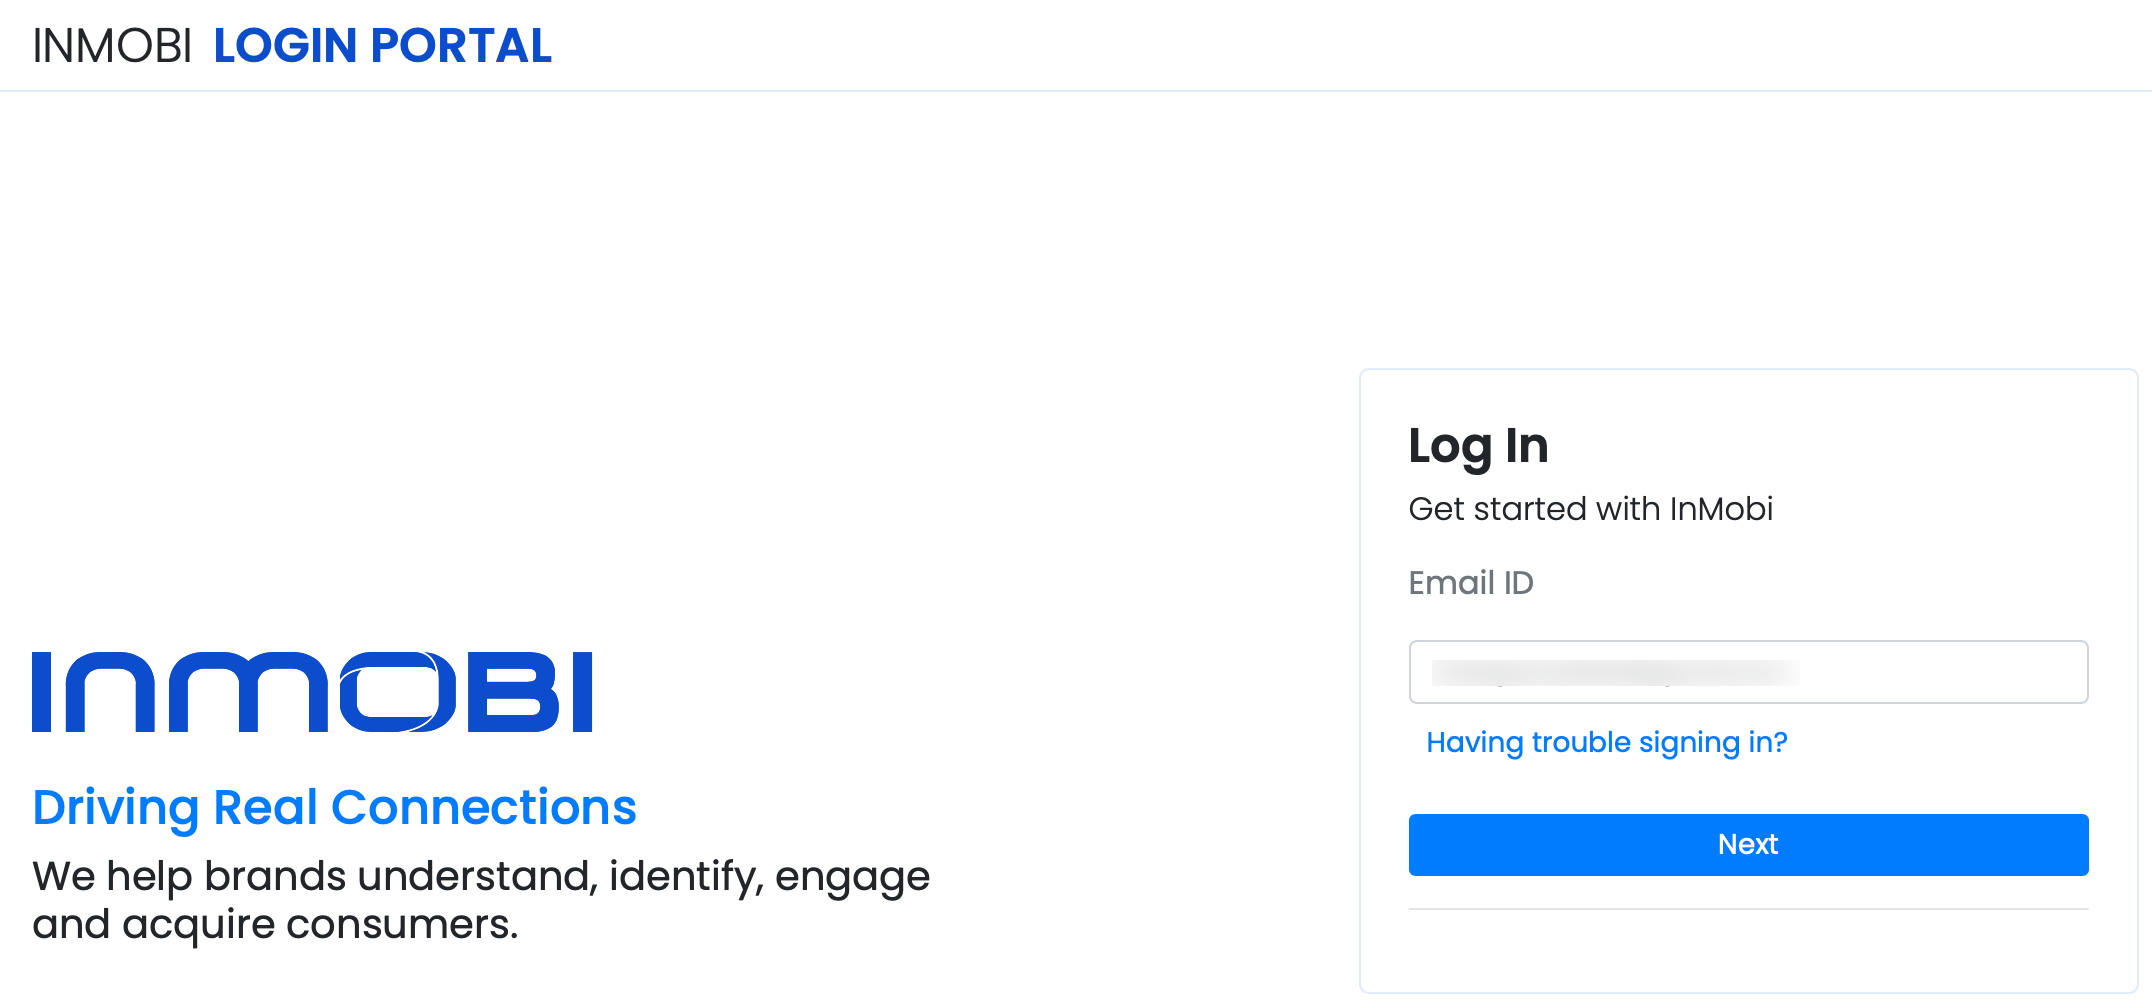
You have successfully signed up with InMobi. You can now login to your account with your new credentials.
You must update your company details and payment information to receive payments from InMobi. Follow the steps below to configure payments.
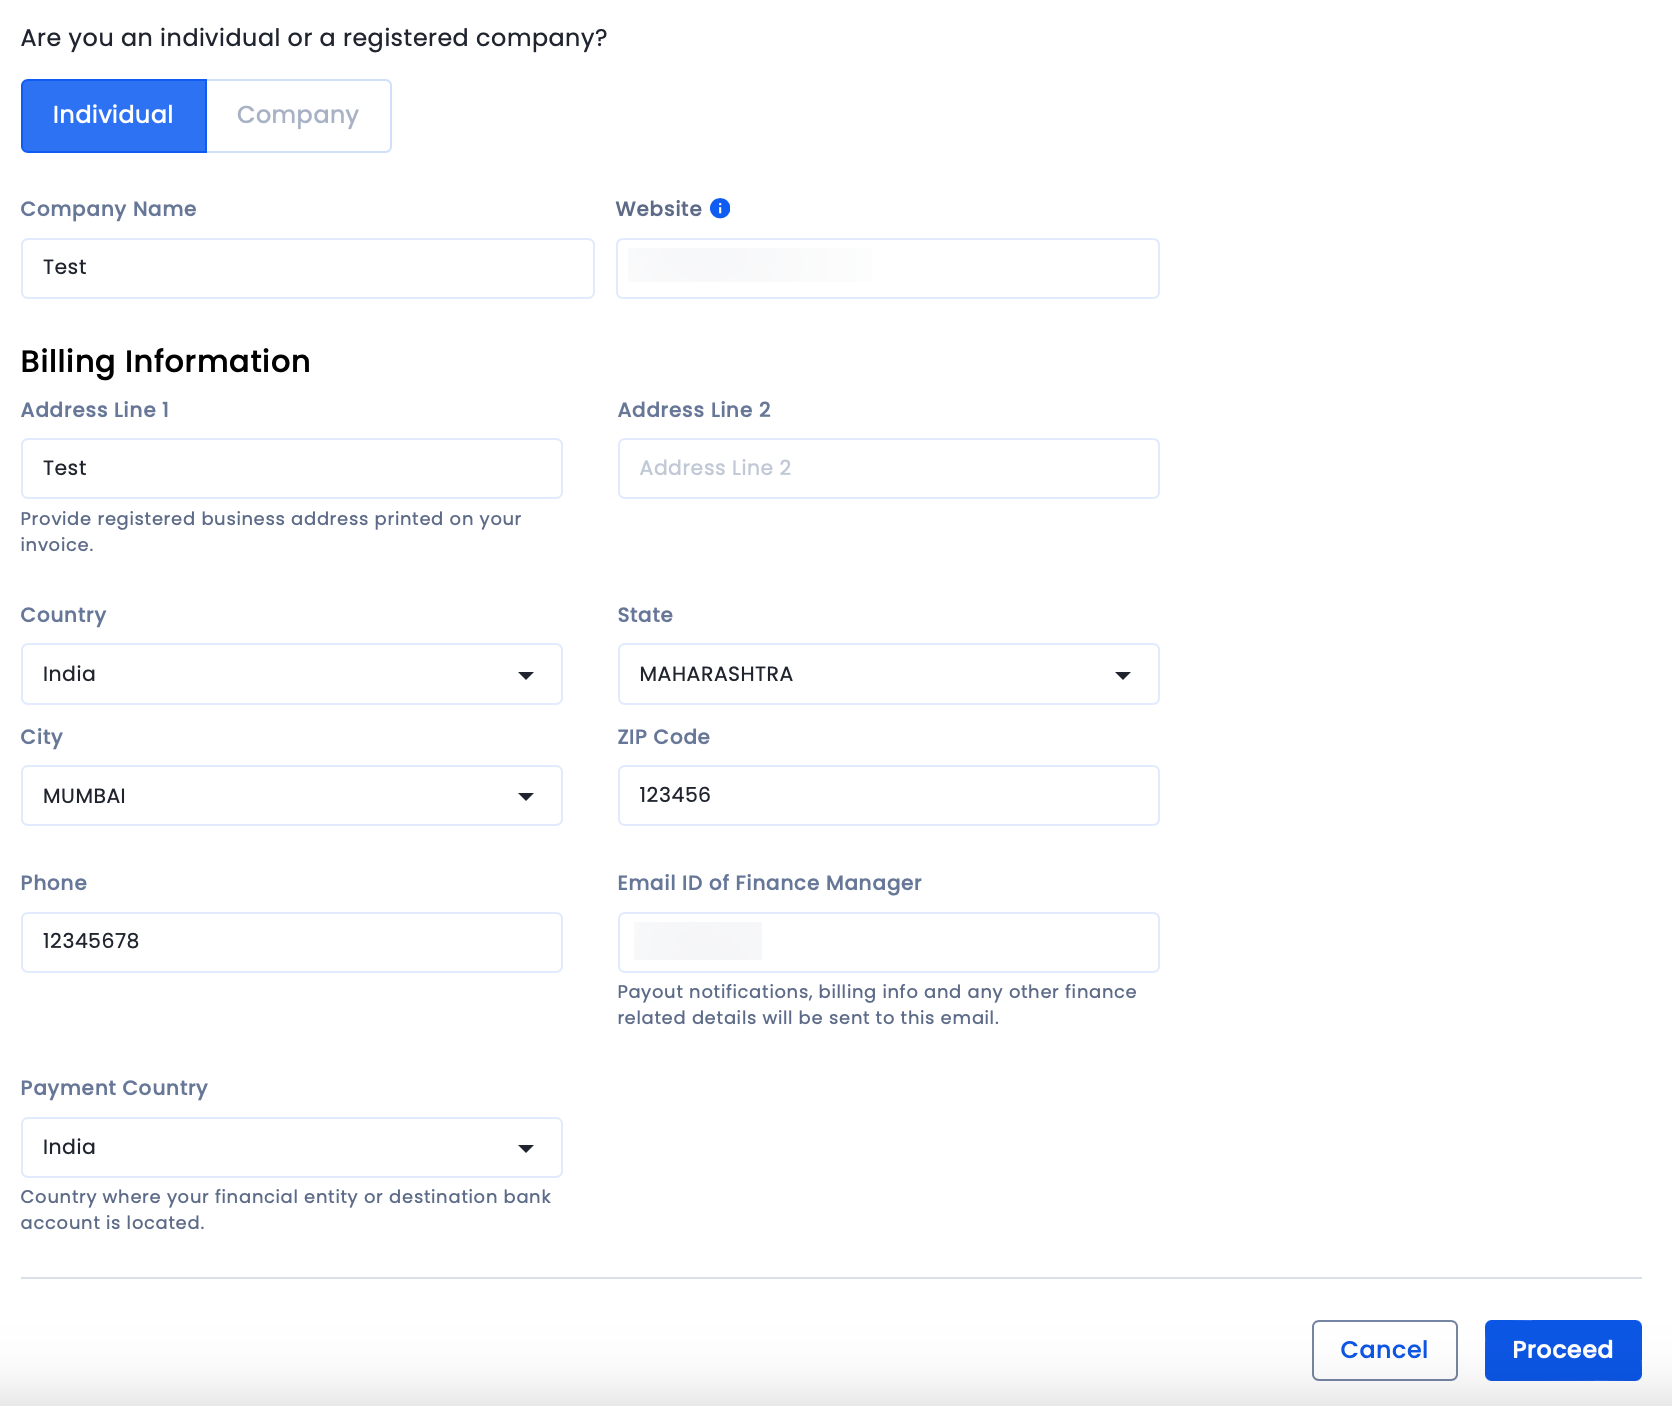
You have successfully updated your company and billing information.
For payments to be made to you, you must add a mode of payment. You can receive your payouts via Electronic Fund Transfer or PayPal. To add your preferred mode of payment, follow the instructions below.
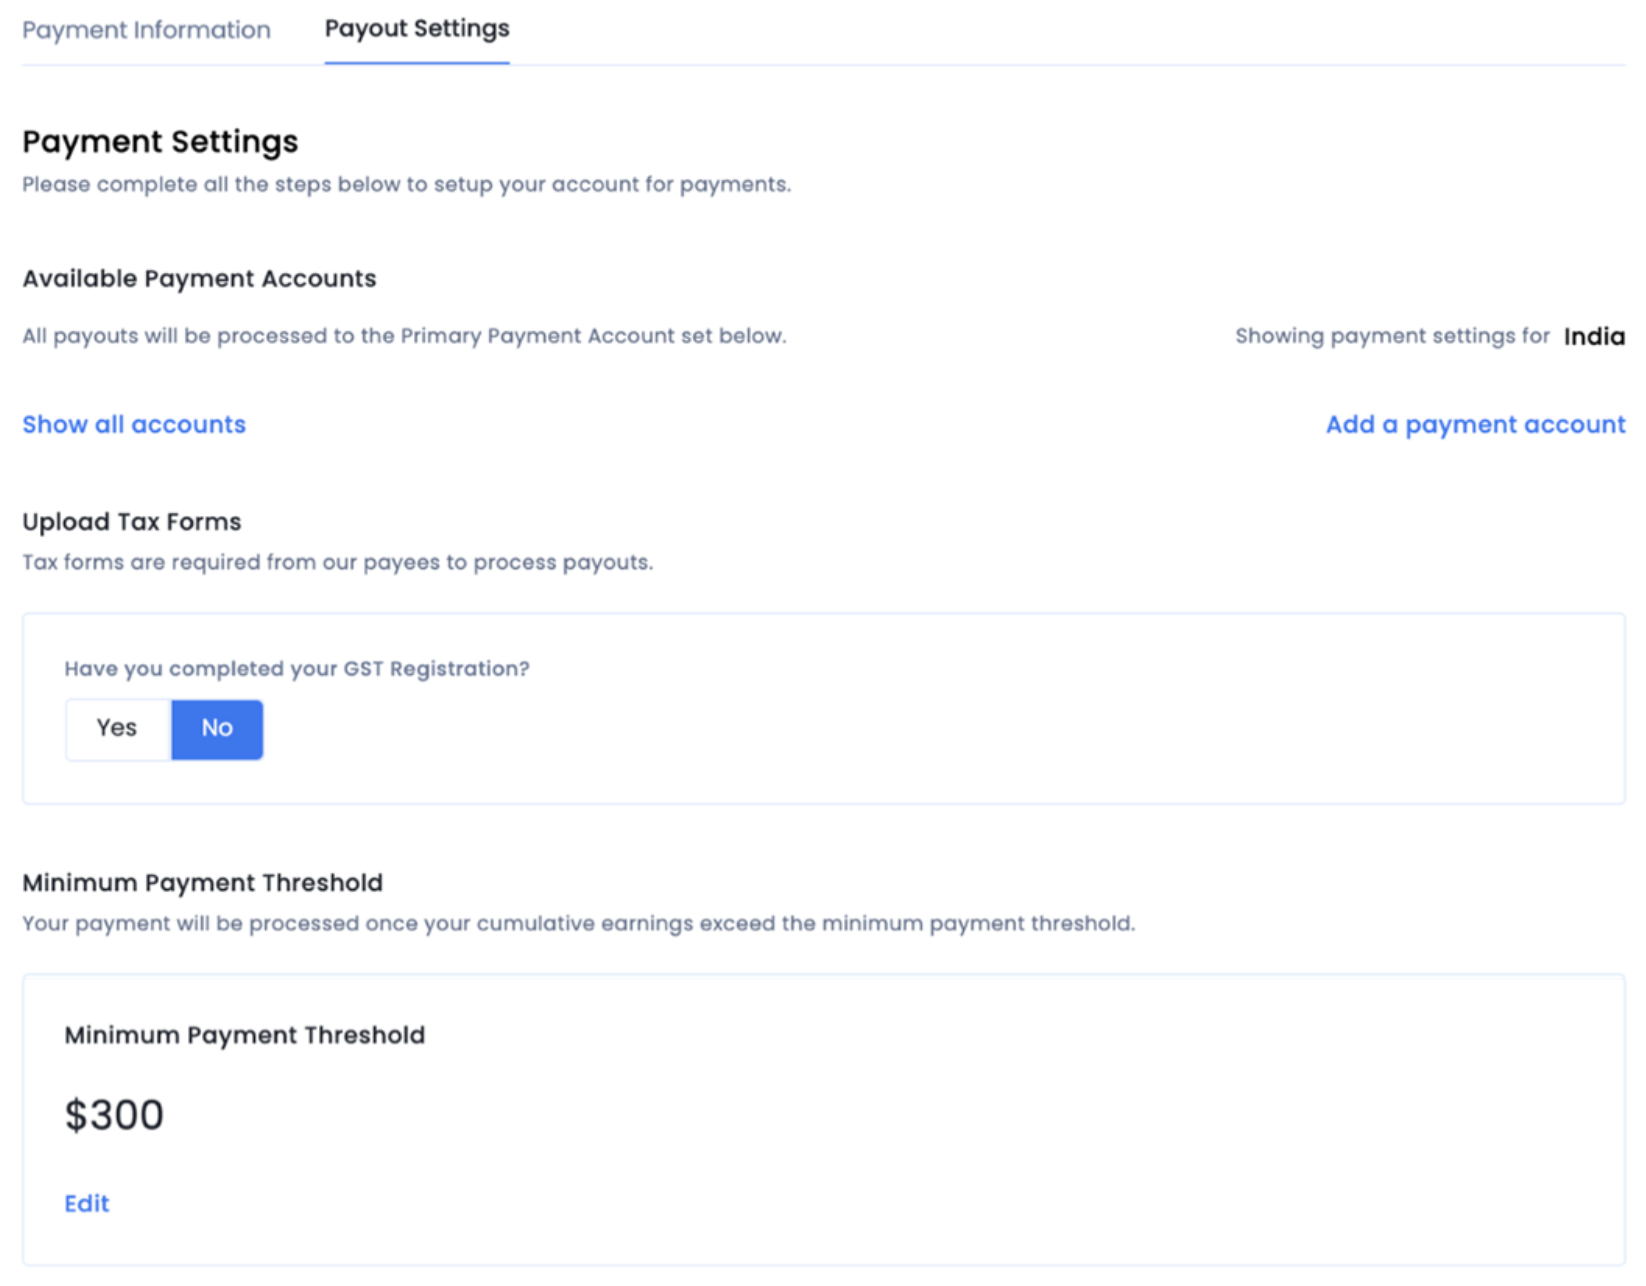
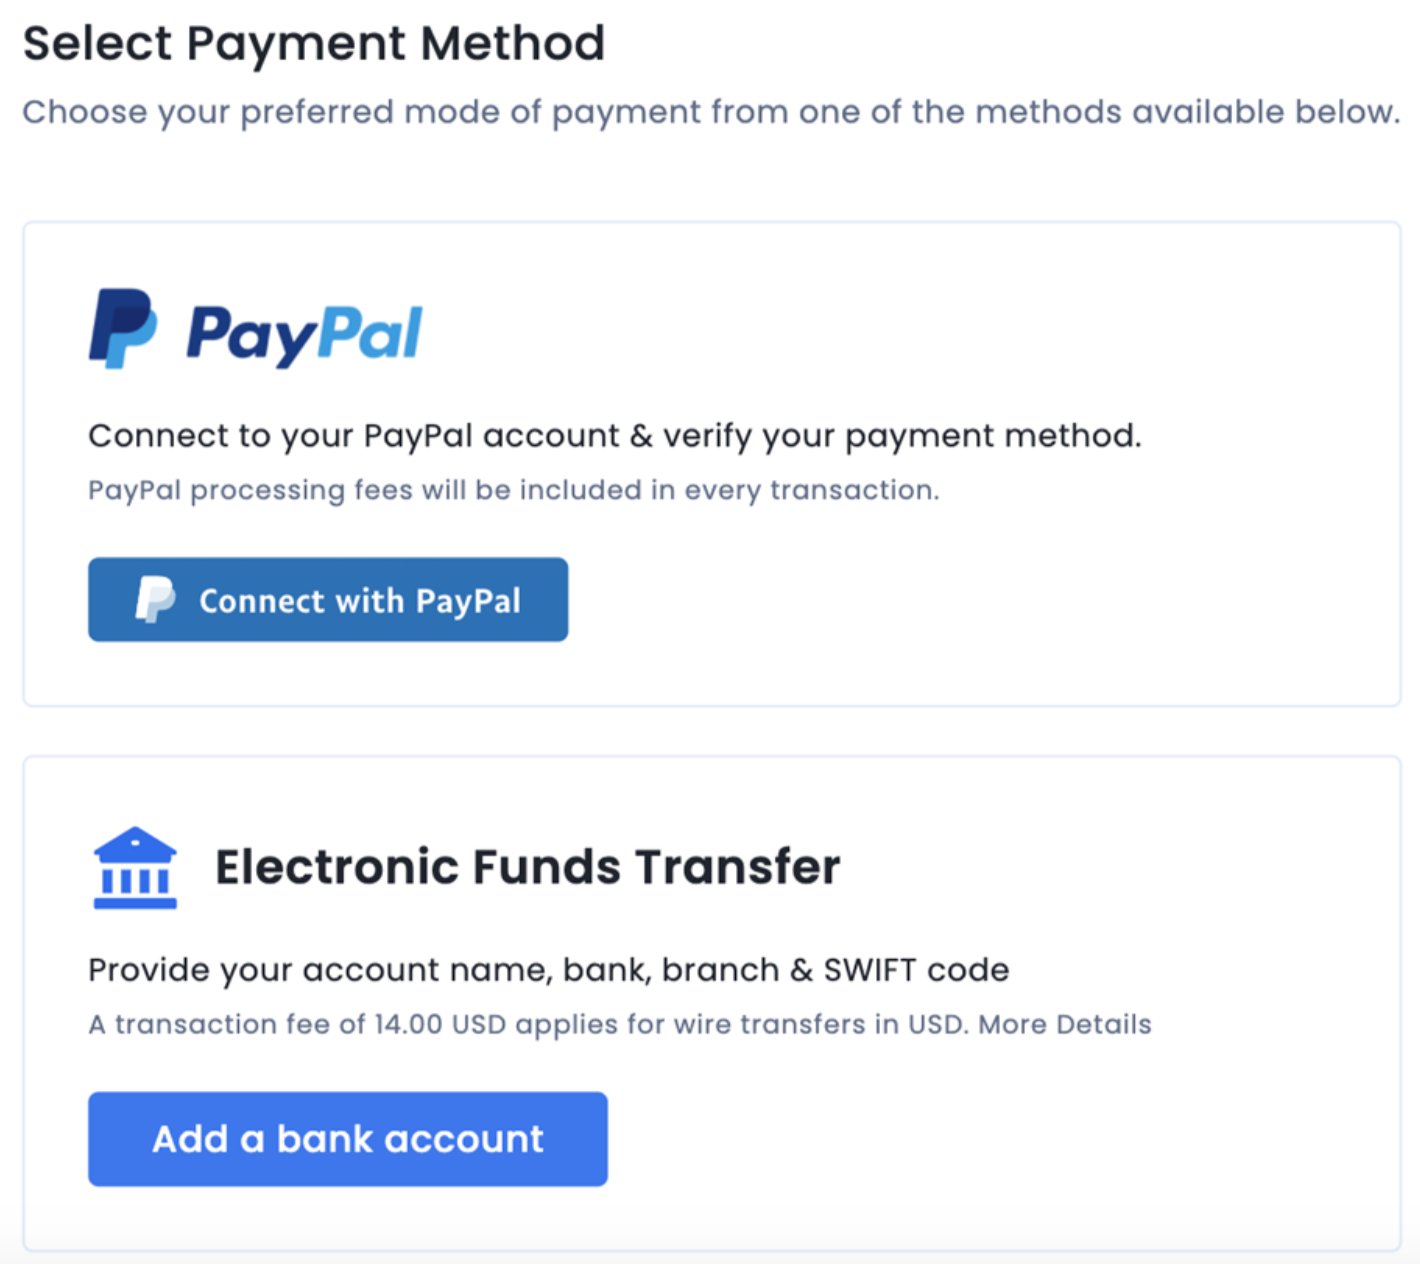
InMobi follows a payout cycle of 60 days meaning your earnings for a given month will be credited to you at the end of the 60-day payout cycle.
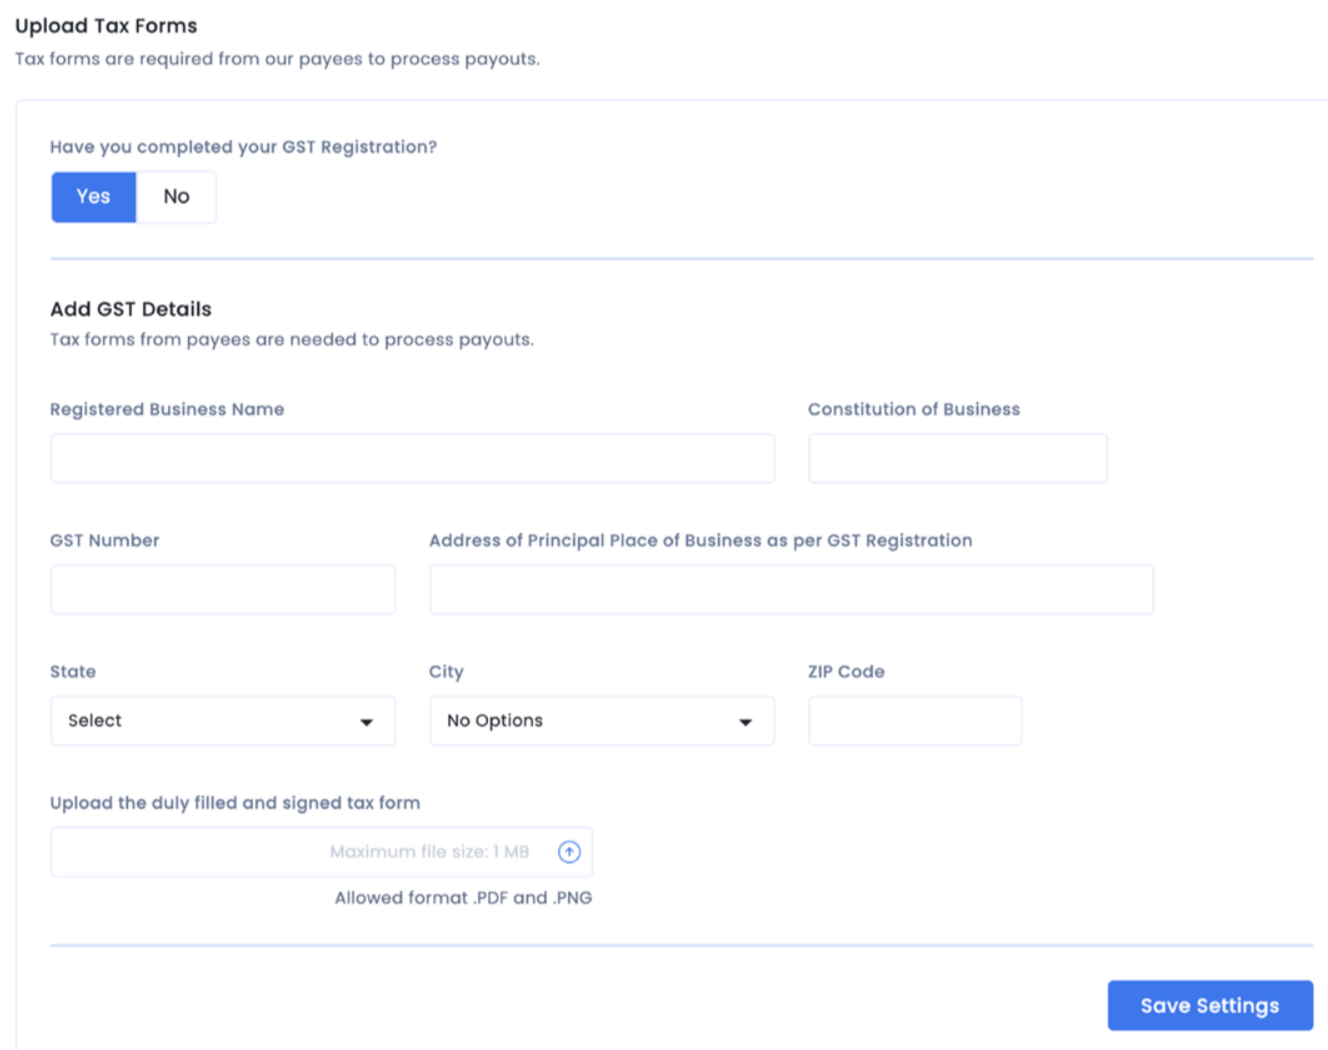
You must upload the tax forms depending on the payment country.
We can process payments once your cumulative earnings exceed the minimum payment threshold set. The threshold range must be between $300 - $10000.
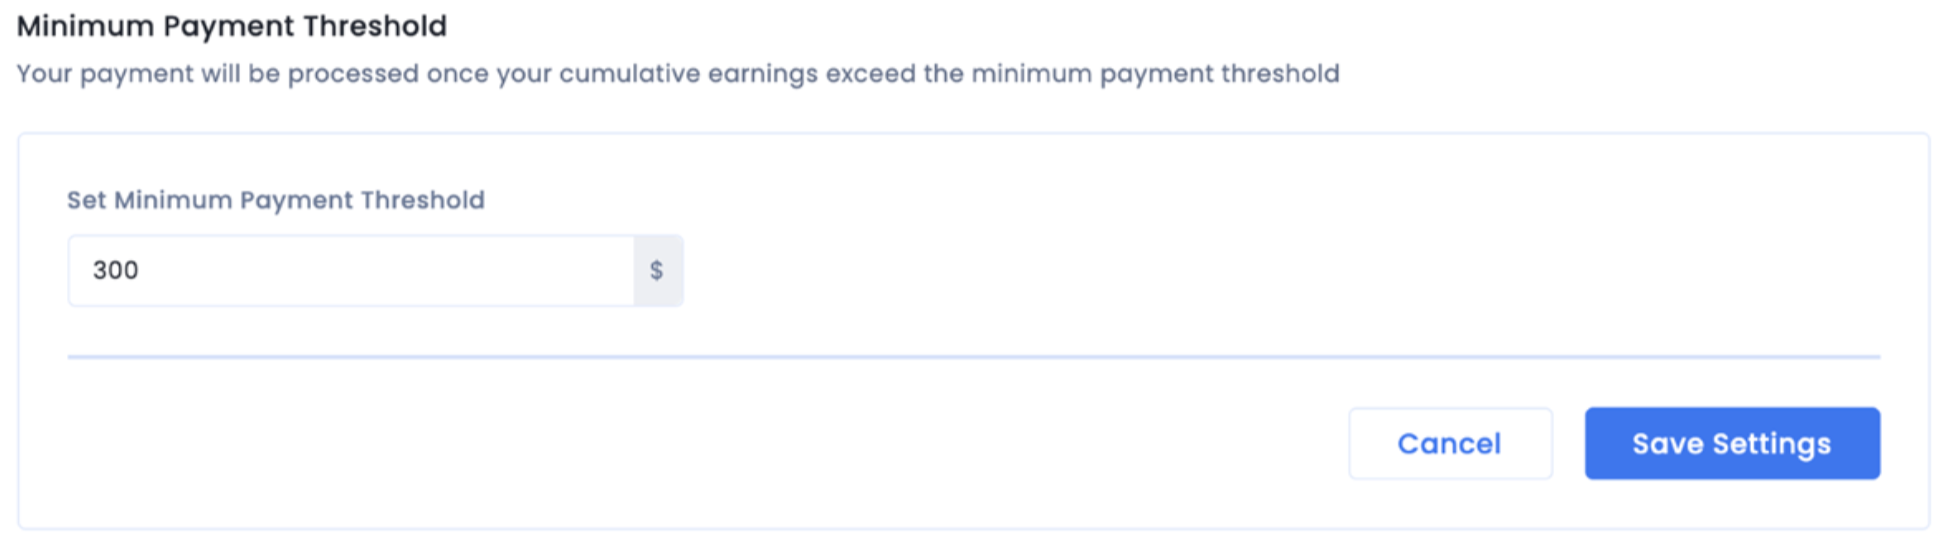
InMobi publishers are paid on Net 60 terms. This means your monthly earnings will be automatically paid within 60 days after the end of that month, provided your account qualifies and you have crossed the minimum payout threshold. The minimum limits are $300 for wire transfers and $50 for PayPal.
For example, earnings from January 1st to January 31st will be paid out in April of the same year.
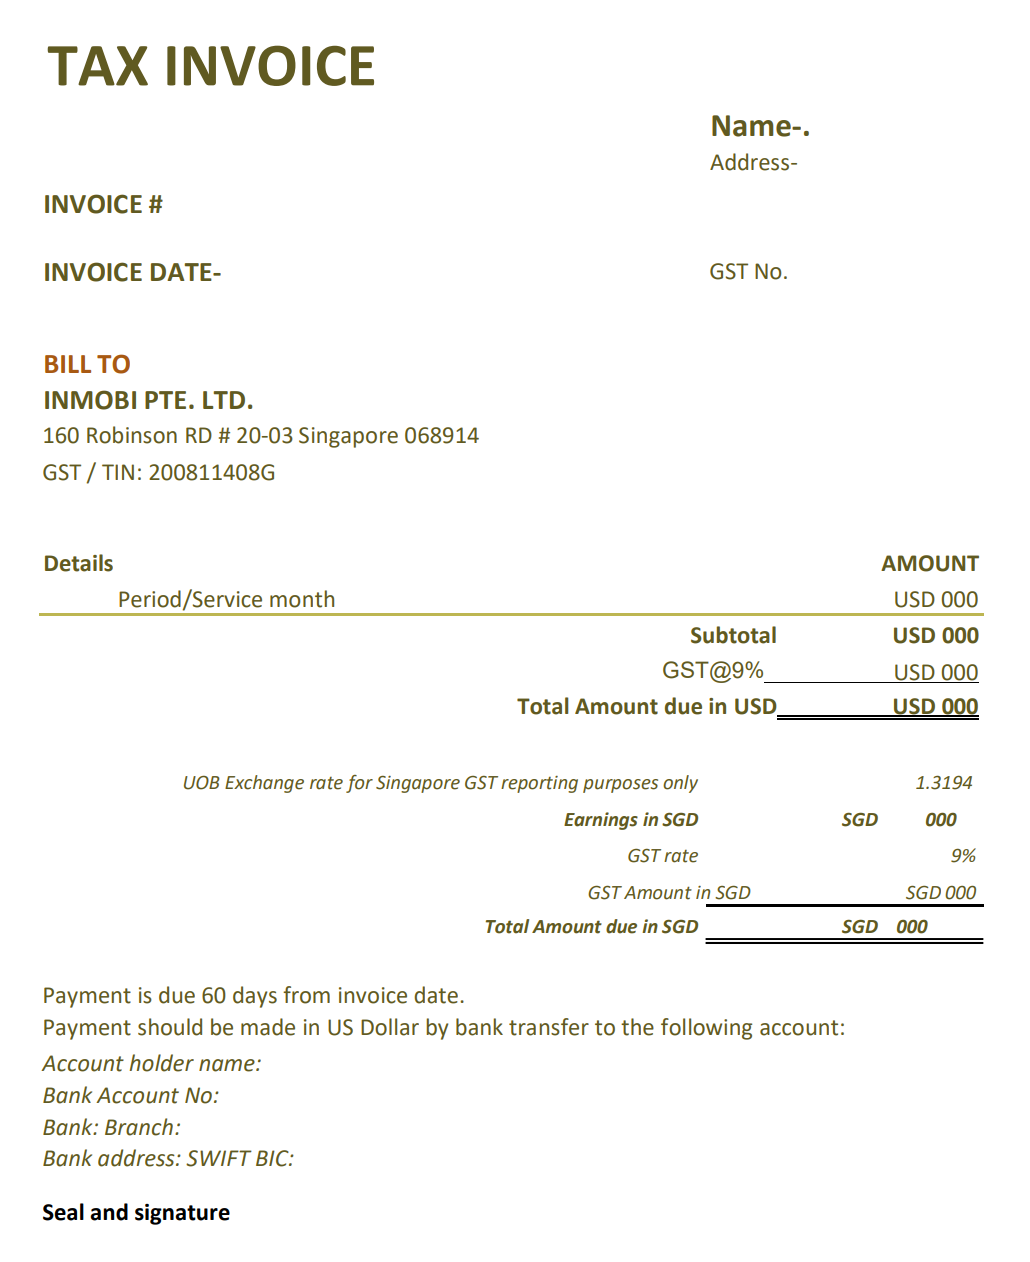
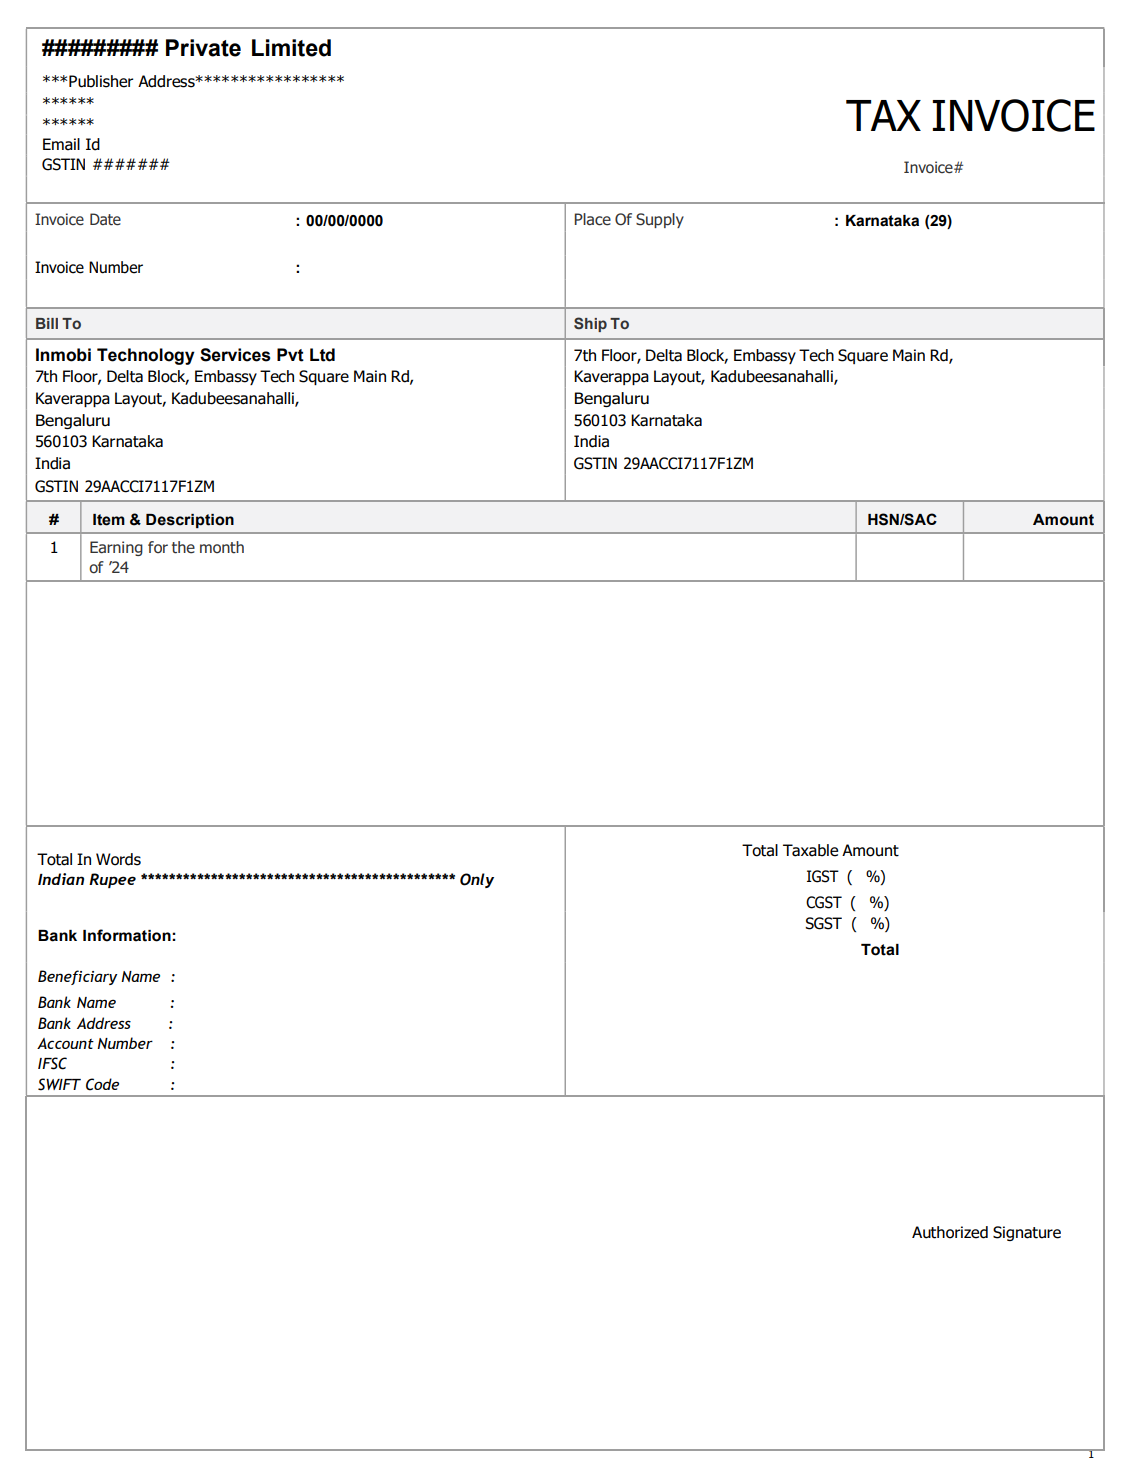
For accounts registered in India or Singapore, uploading an invoice is mandatory. Refer to the sample format below, which publishers need to use to generate the invoices. If your account is registered in either of these countries, send your invoice to: bd-finance@inmobi.com.
You must add at least one placement and ad unit for your apps or websites to generate ad revenue. A placement is a place and time displayed on the ad in your app, and the ad unit is the ad format. It is recommended to create multiple ad units to provide a varied user experience and sell more impressions.
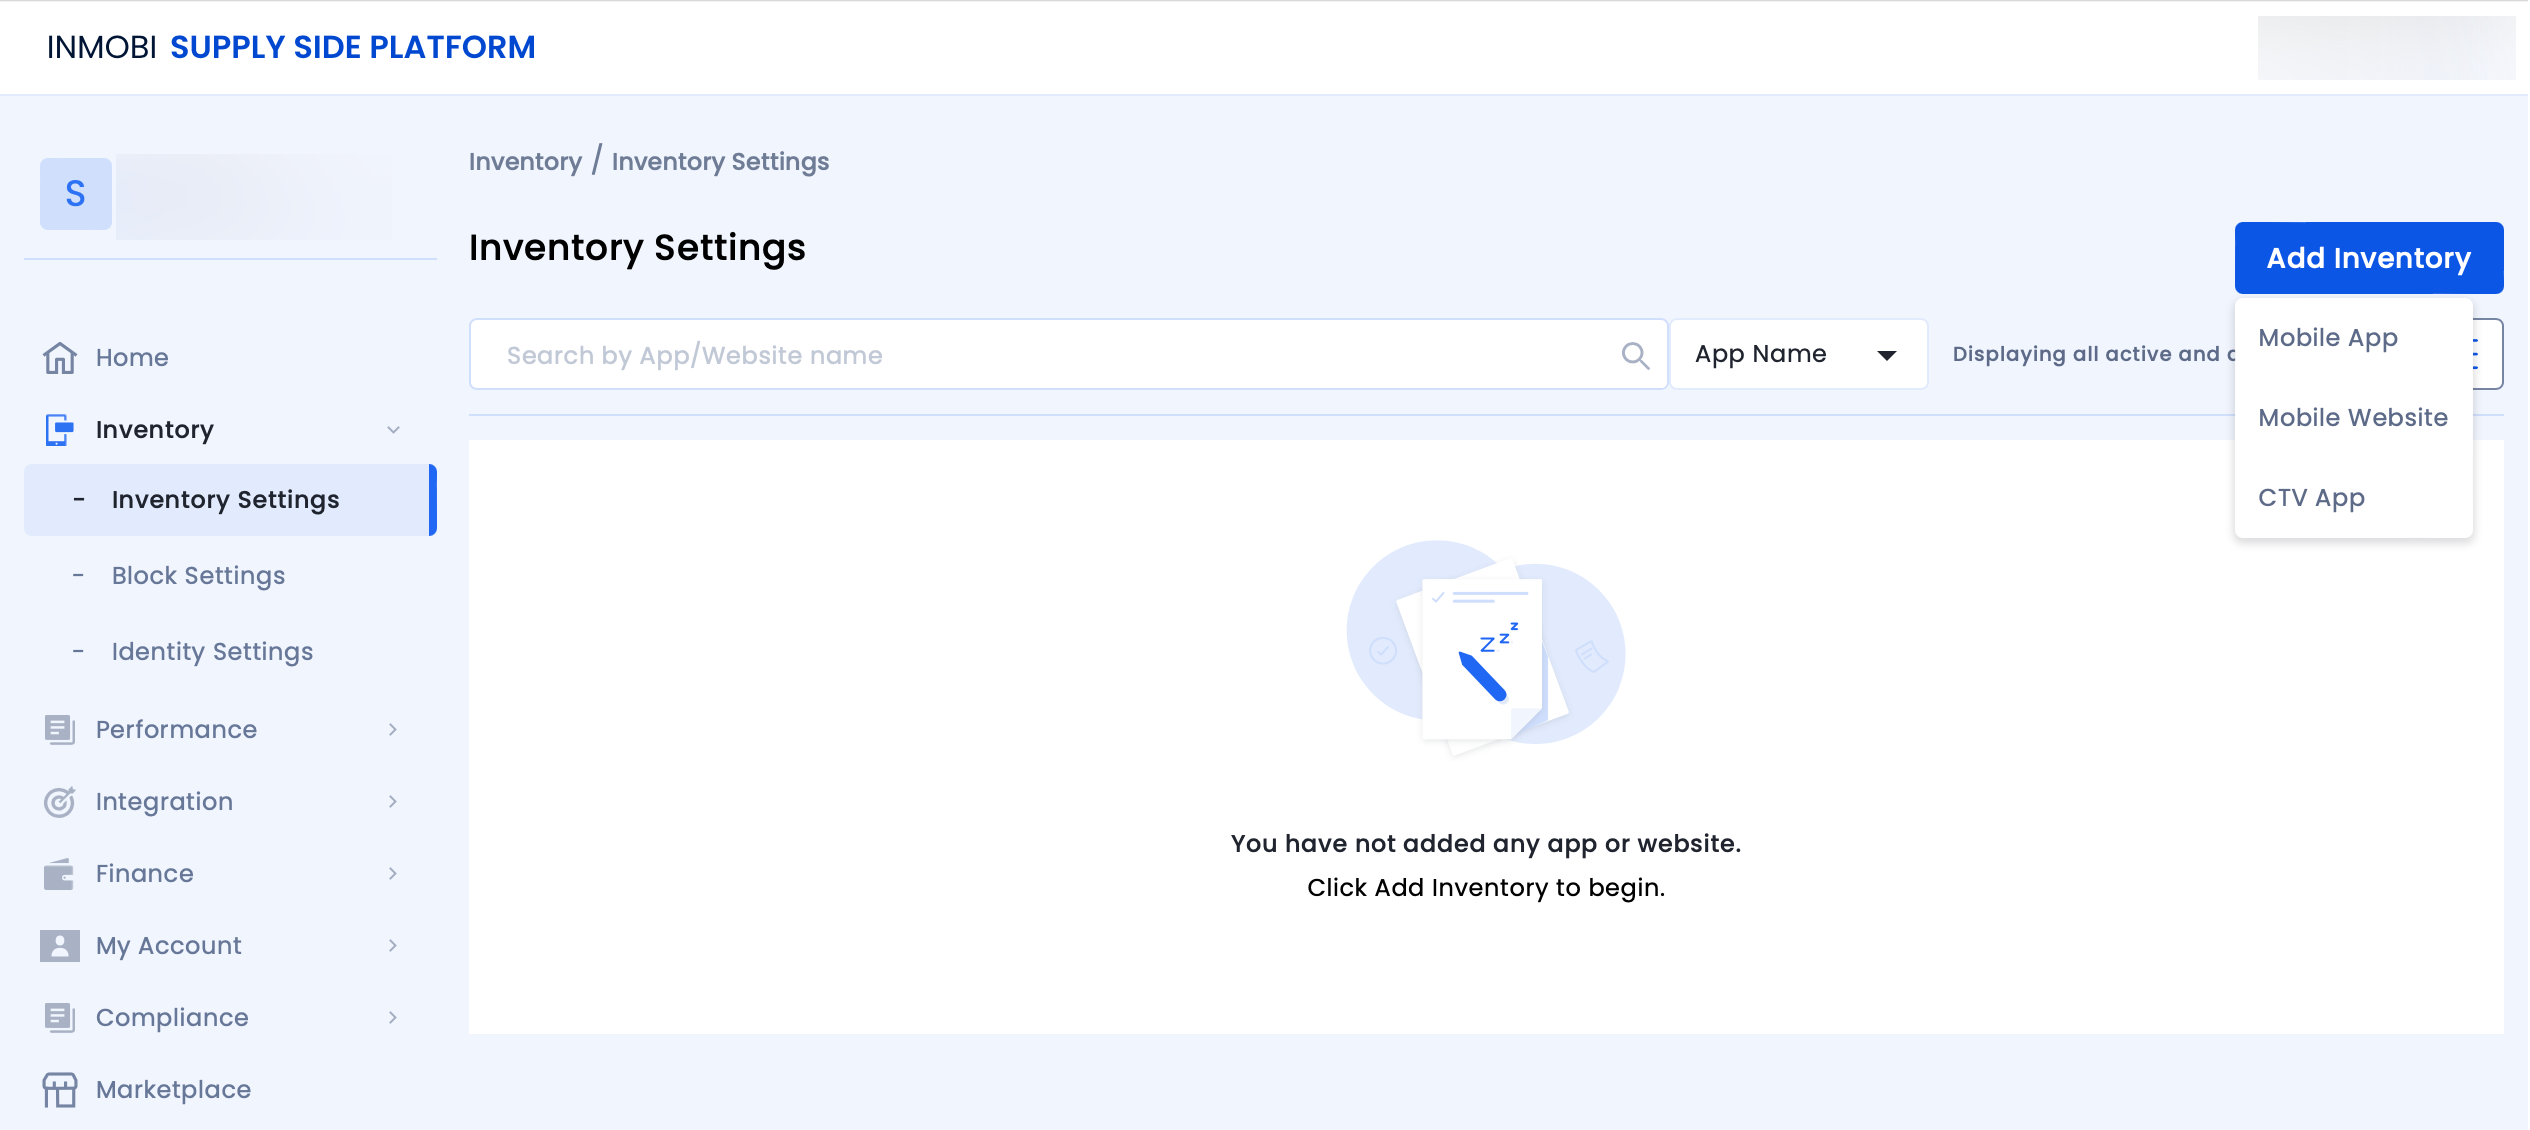
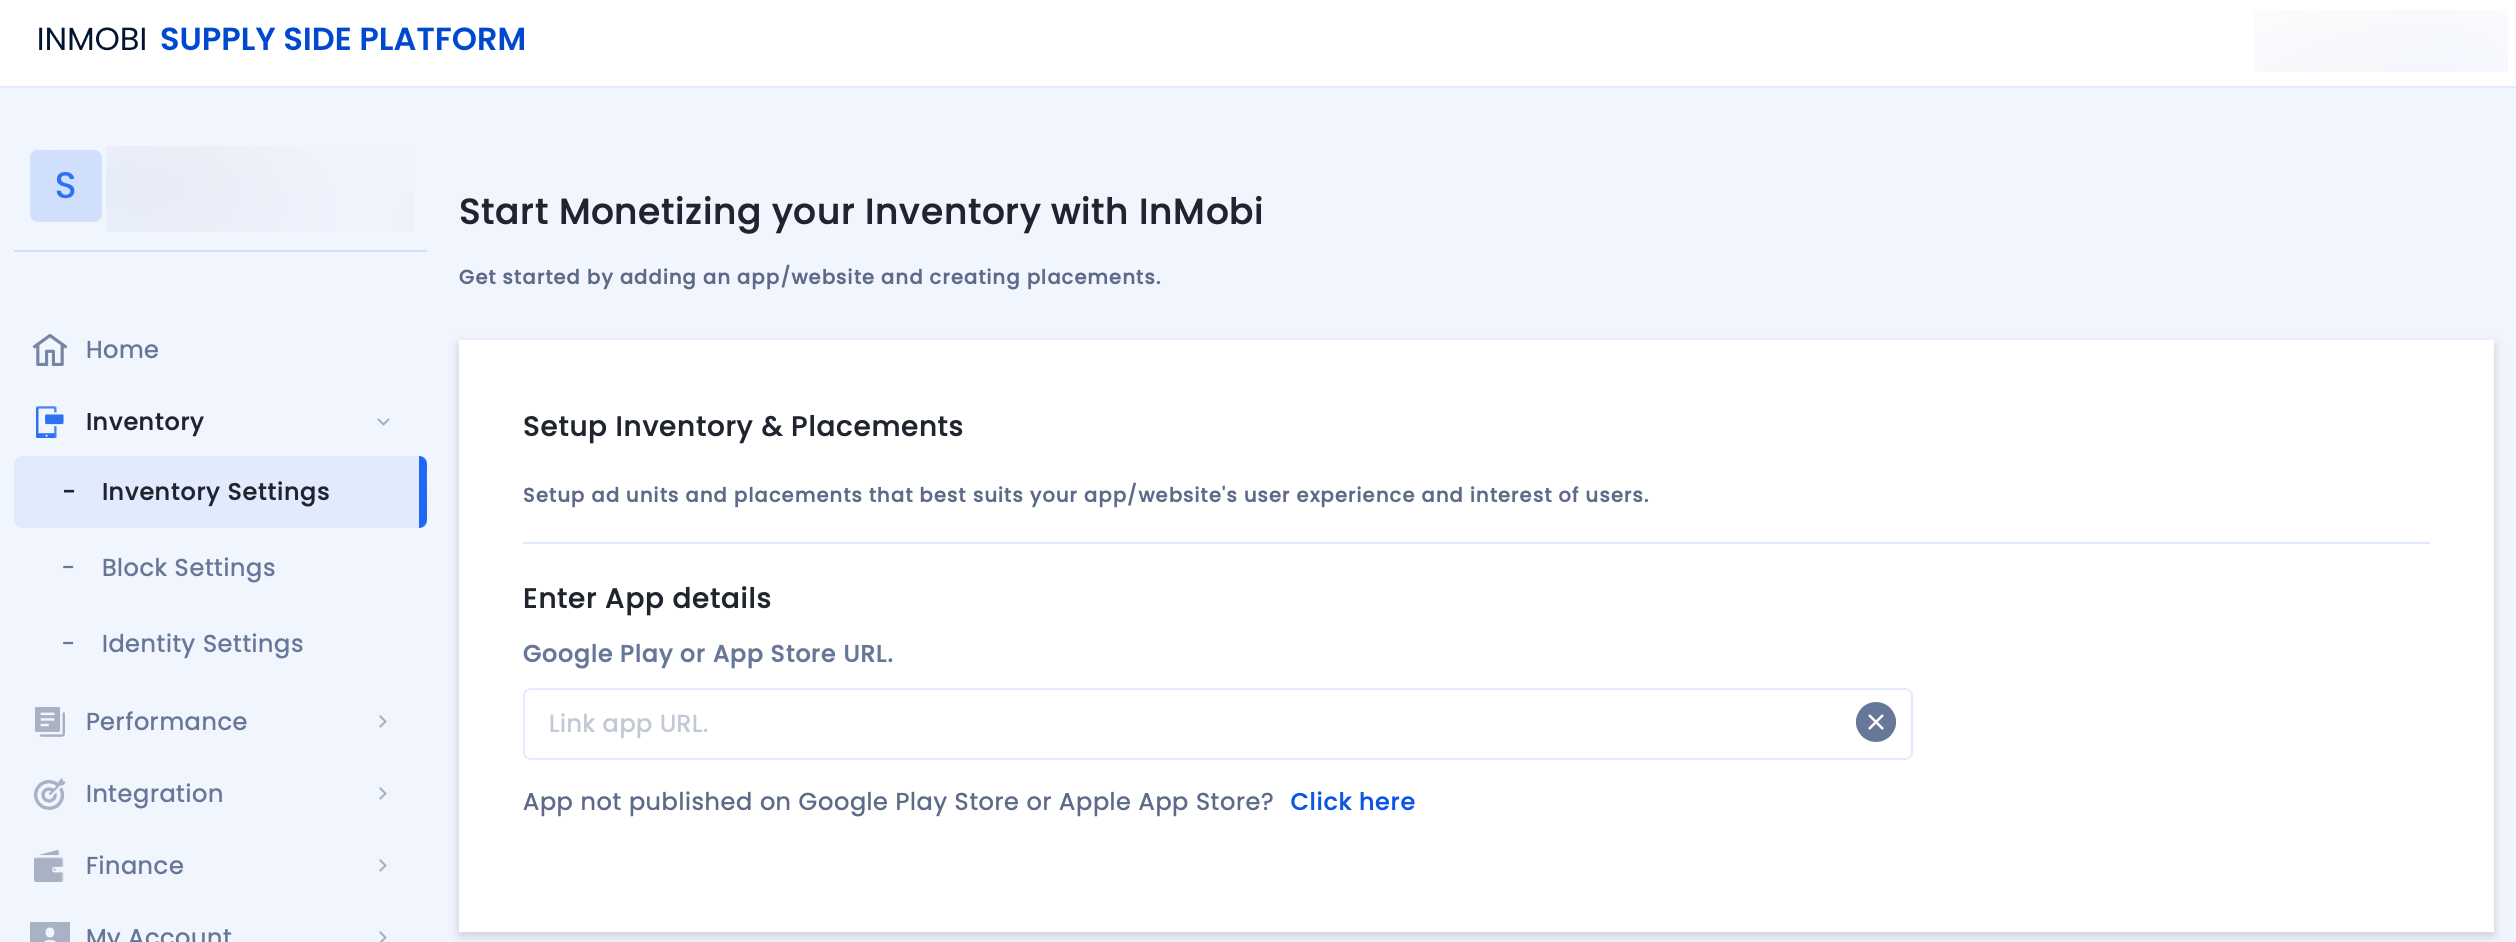
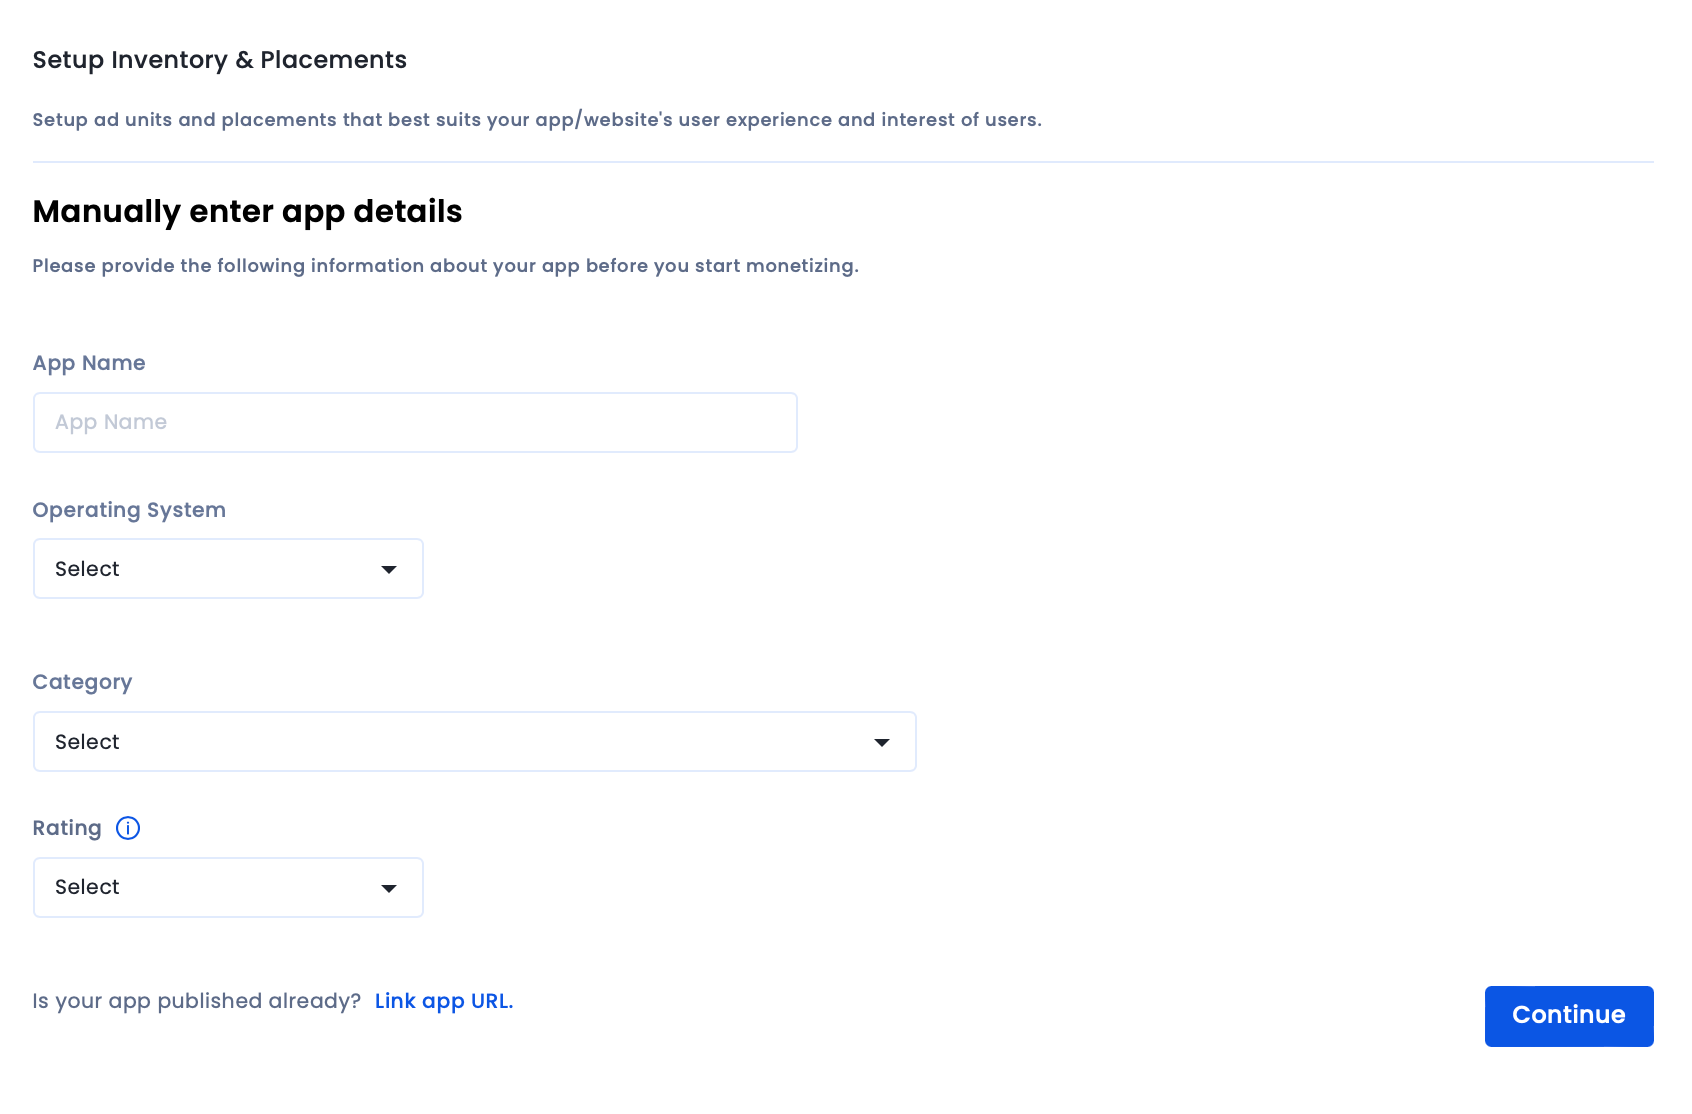
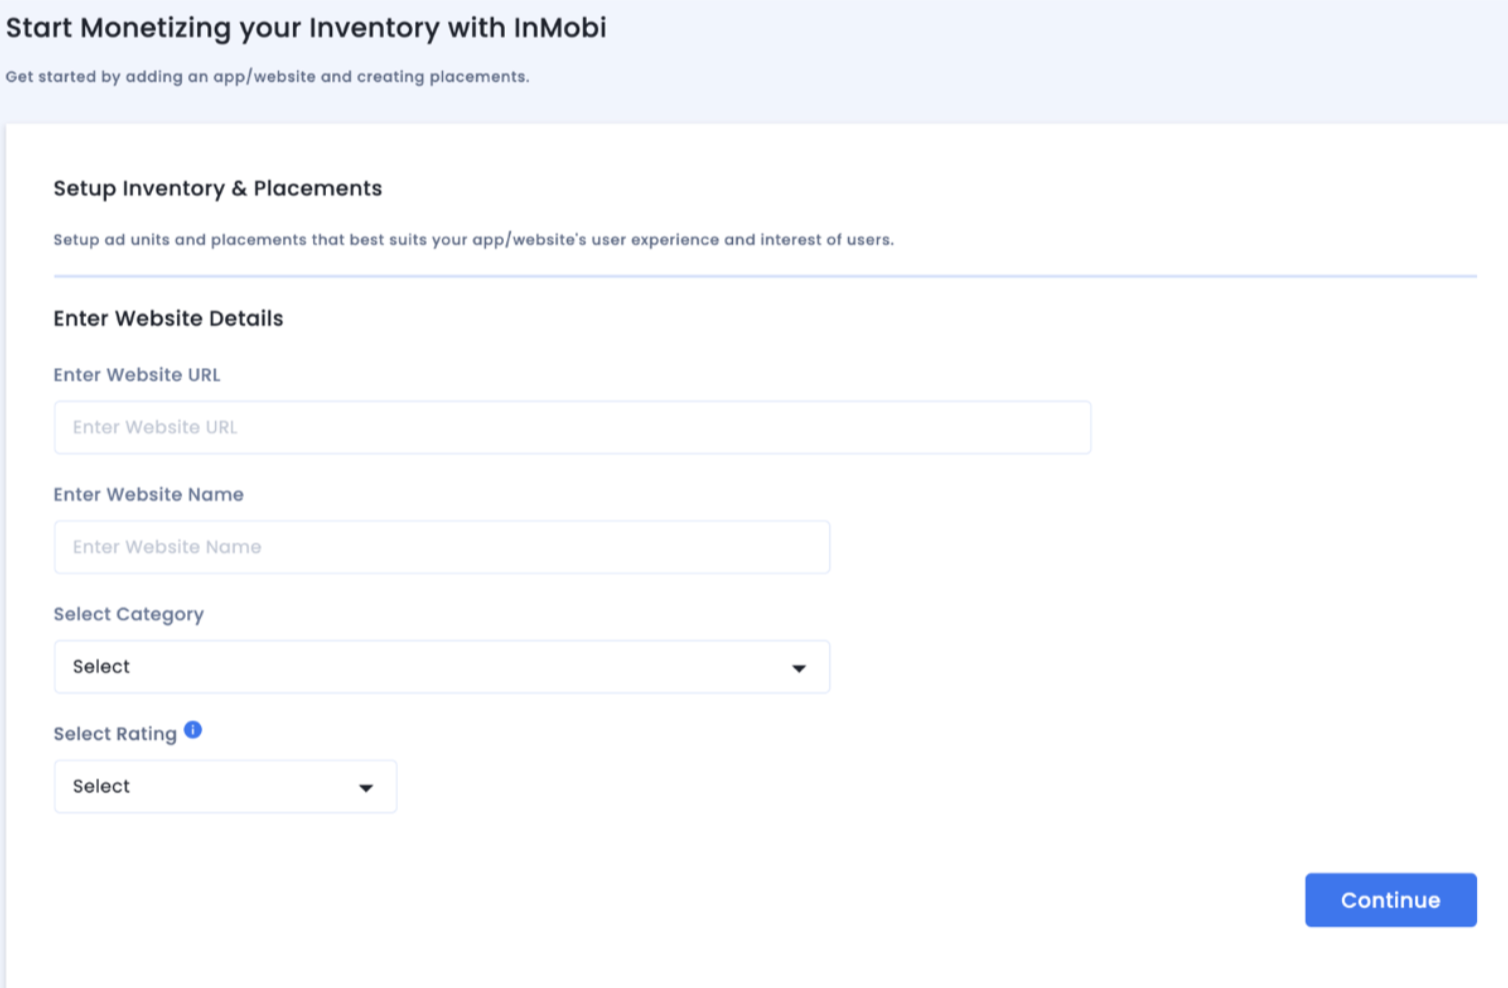
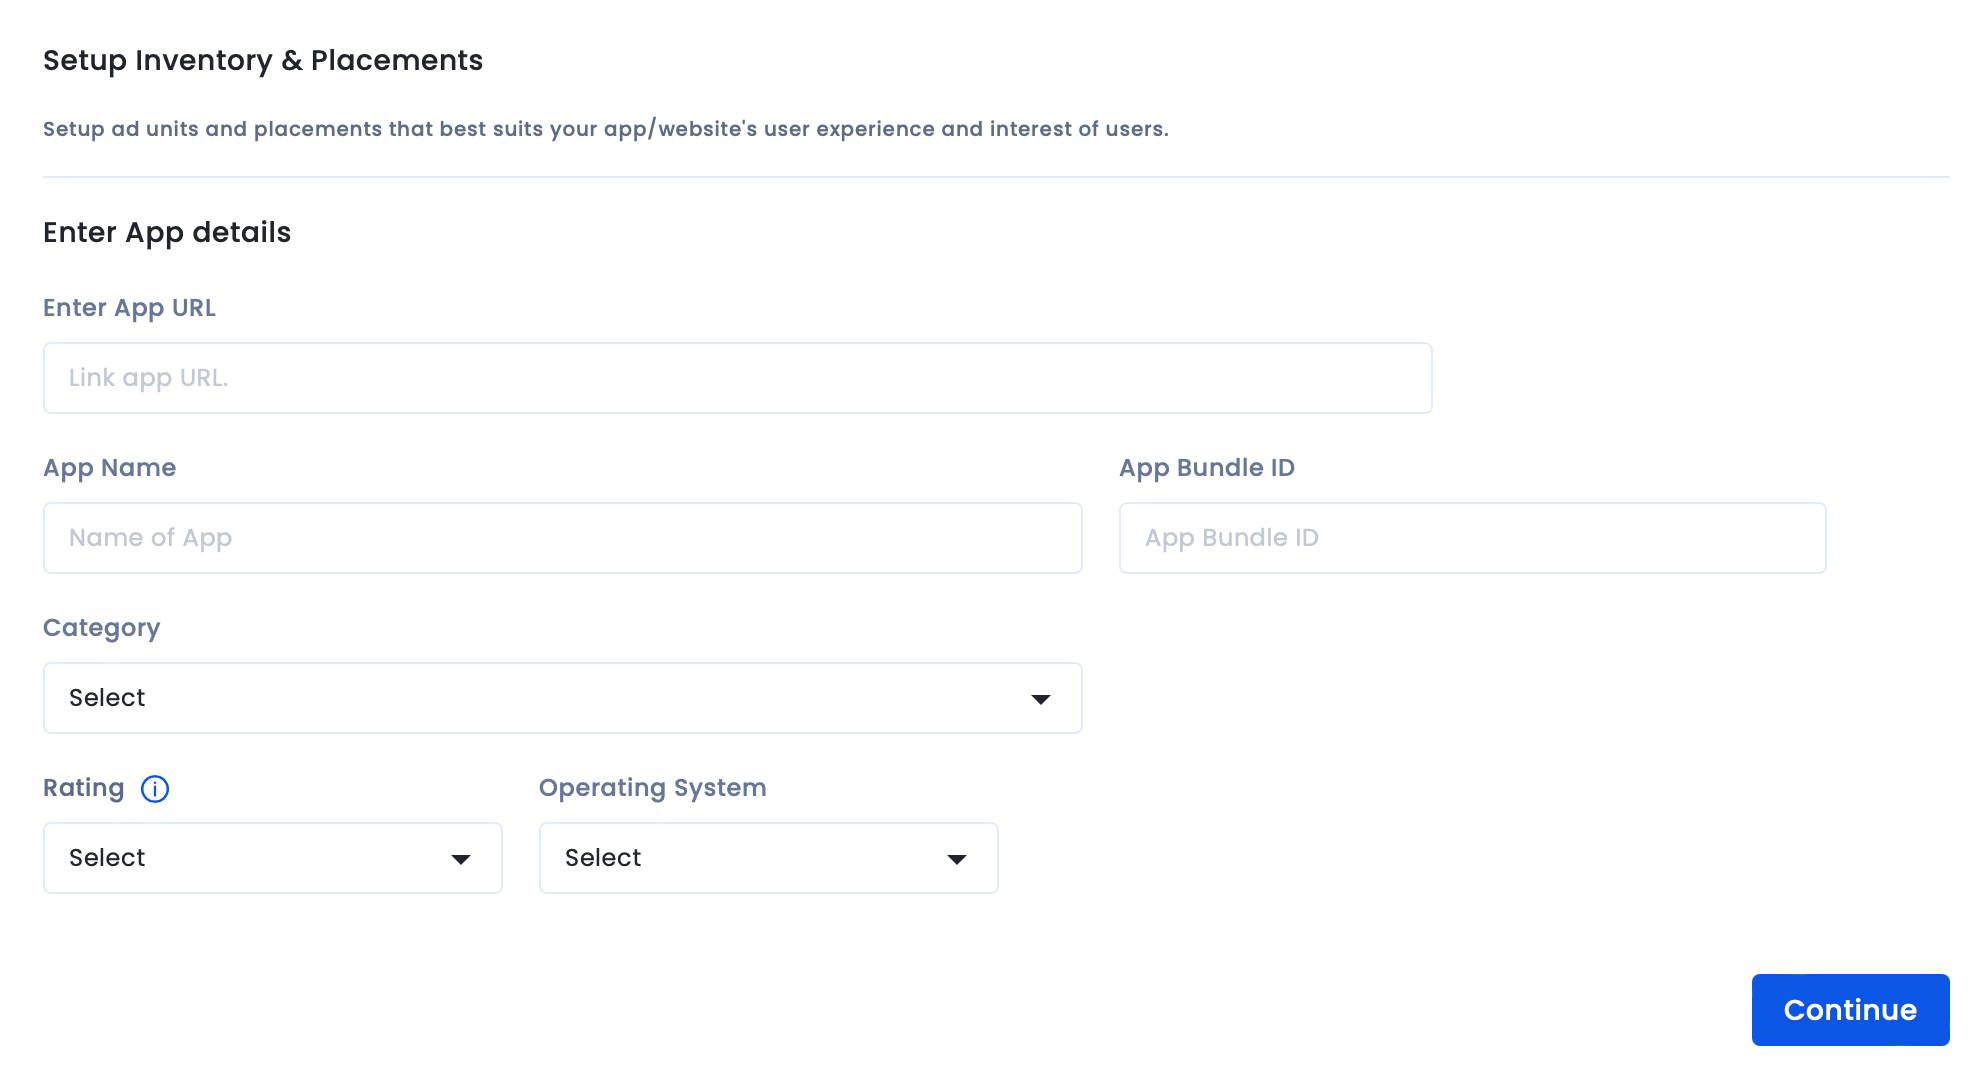
To register your published app, website, or unpublished app with InMobi, follow the instructions below.
Currently, mobile websites support only Banner, Video (VAST API), and Native ad unit types.

You have successfully added your app or website.
When an app is moved to a Pending or Flagged status, raise a ticket at https://support.inmobi.com/mytickets to facilitate a review and resolution.
There can be various reasons why an app may go into Pending status:
For Flagged status, common reasons include:
Ensure the aforementioned aspects are checked when raising a ticket to expedite resolution.
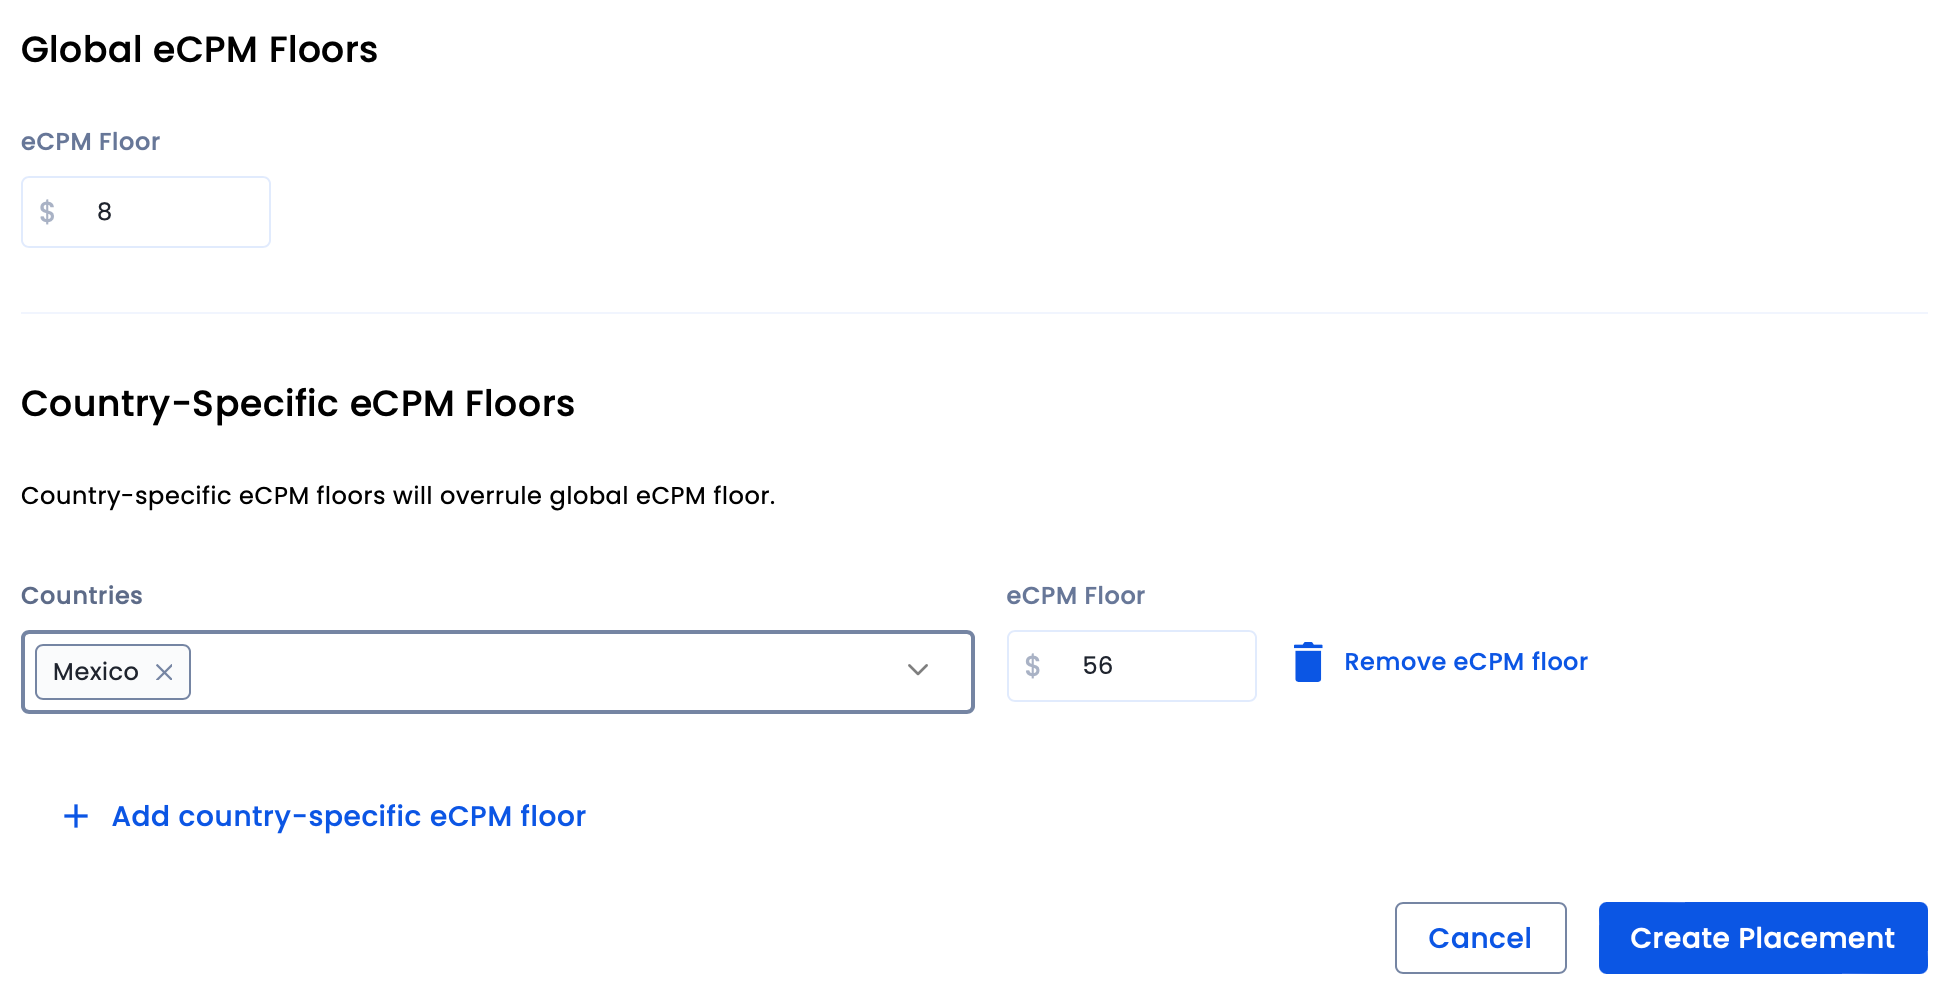
To create a new placement, follow the instructions below.
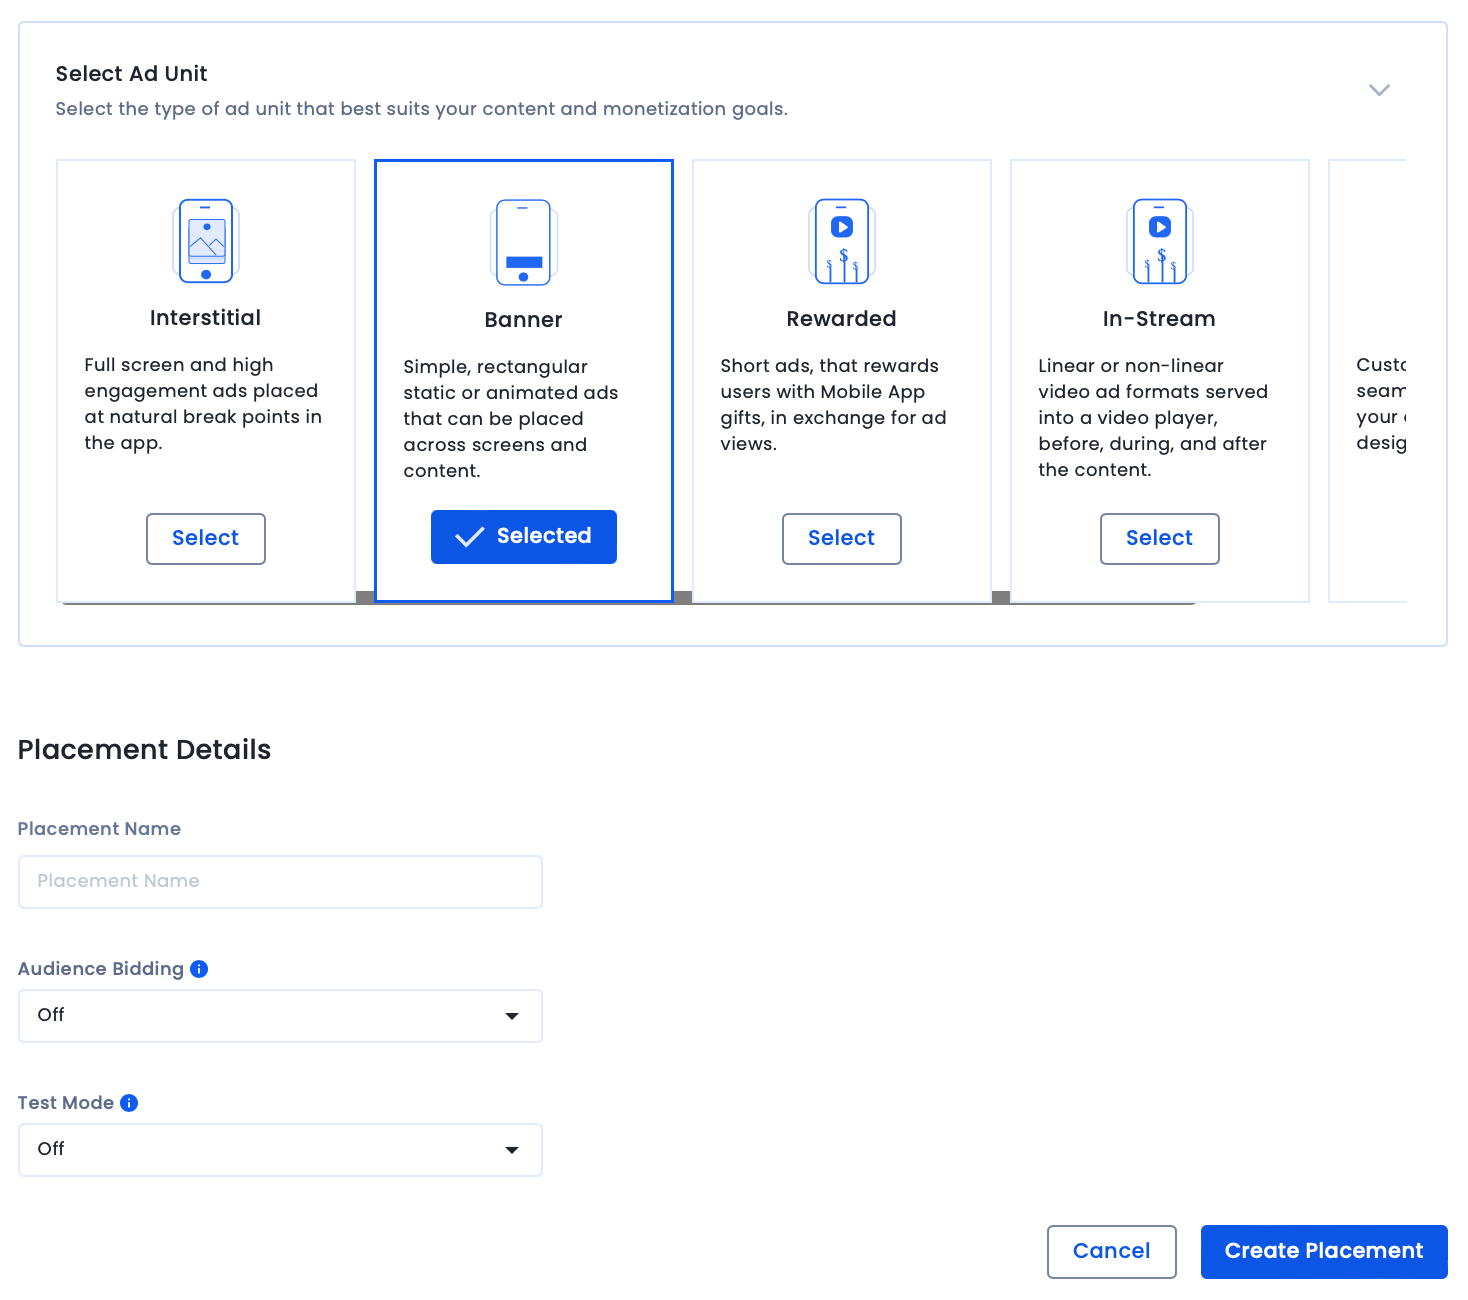
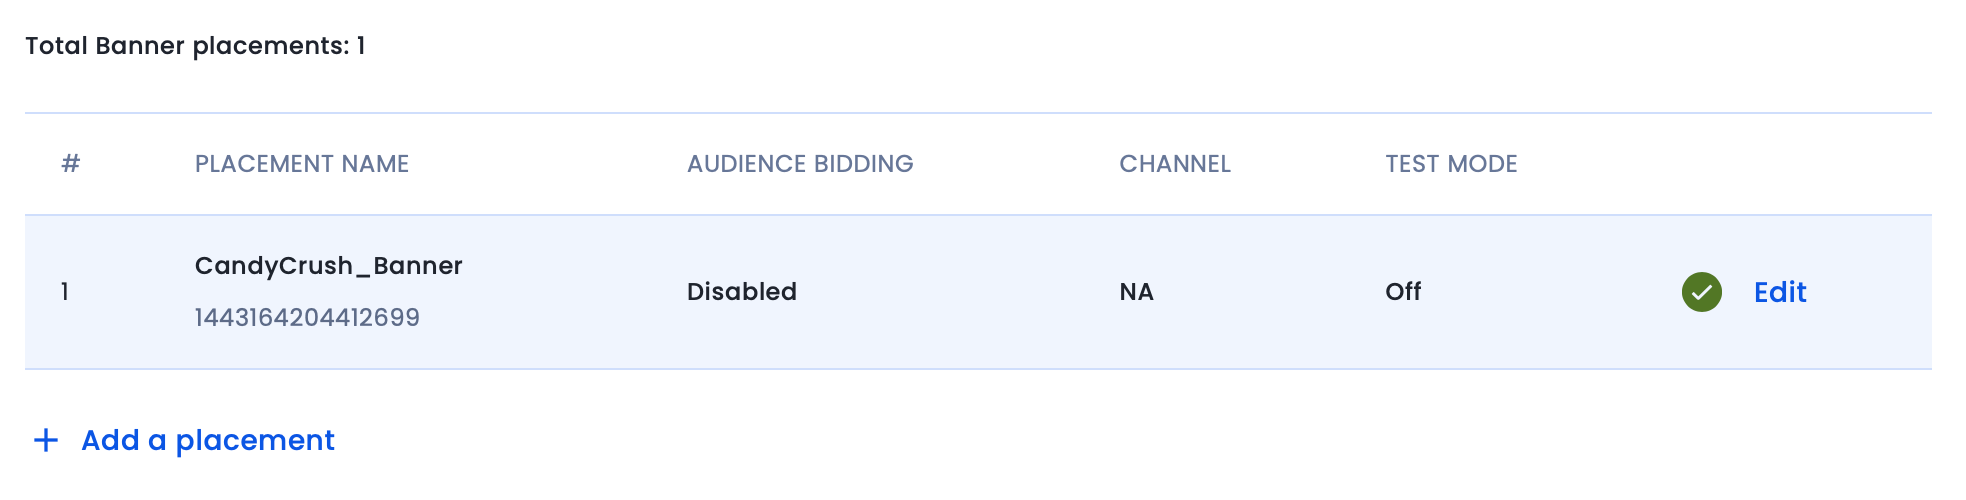
You have successfully created an ad unit and placement. Repeat the above steps to create multiple ad units.
After creating placements for your inventory, the next step is to set up ads.txt or app-ads.txt for your website or app respectively.
To know how to set up ads.txt for your website, see Set up An Ads.txt File for Your Website.
To know how to set up app-ads.txt for your website, see Set up An Ads.txt File for Your Website.
Since you have already set up your account, first placements, and ad units on the InMobi UI, your next step is integrating the InMobi SDK into your app. It gives you access to InMobi’s exchange and ad network technology to serve in-app ads.
It is recommended that you always update to the latest version of our SDK to take advantage of newly launched features or performance fixes we might introduce.
Click here to download the latest InMobi SDKs (iOS and Android). You can review our integration guidelines for iOS and Android.
Mediation is a monetization solution that allows app developers to manage and optimize multiple advertising partners with just one SDK integration. Mediation gives publishers access to demand through multiple ad networks, creating an arena where the networks compete to serve their ads.
To integrate InMobi as a demand source on third-party mediation platforms, you must integrate the InMobi SDK adapter. You can integrate InMobi with:
Header bidding goes by many names. At InMobi, we call it Audience Bidding. Essentially, Audience Bidding is in-app header bidding. It allows publishers to sell their inventory in a unified auction where ad sources bid for each impression in real time.
Publishers can enable Audience Bidding with InMobi as a demand source using all major header bidding solutions in the market, including:
For more information, see our Audience Bidding integrations.
For more information on the Open RTB integrations, see oRTB integrations.
Testing your integration is an important step for successful onboarding. We recommend testing your integration to ensure that placements and ad units are correctly displaying across your app without affecting the live traffic. To start testing using our Sandbox Testing tool, follow the instructions below.
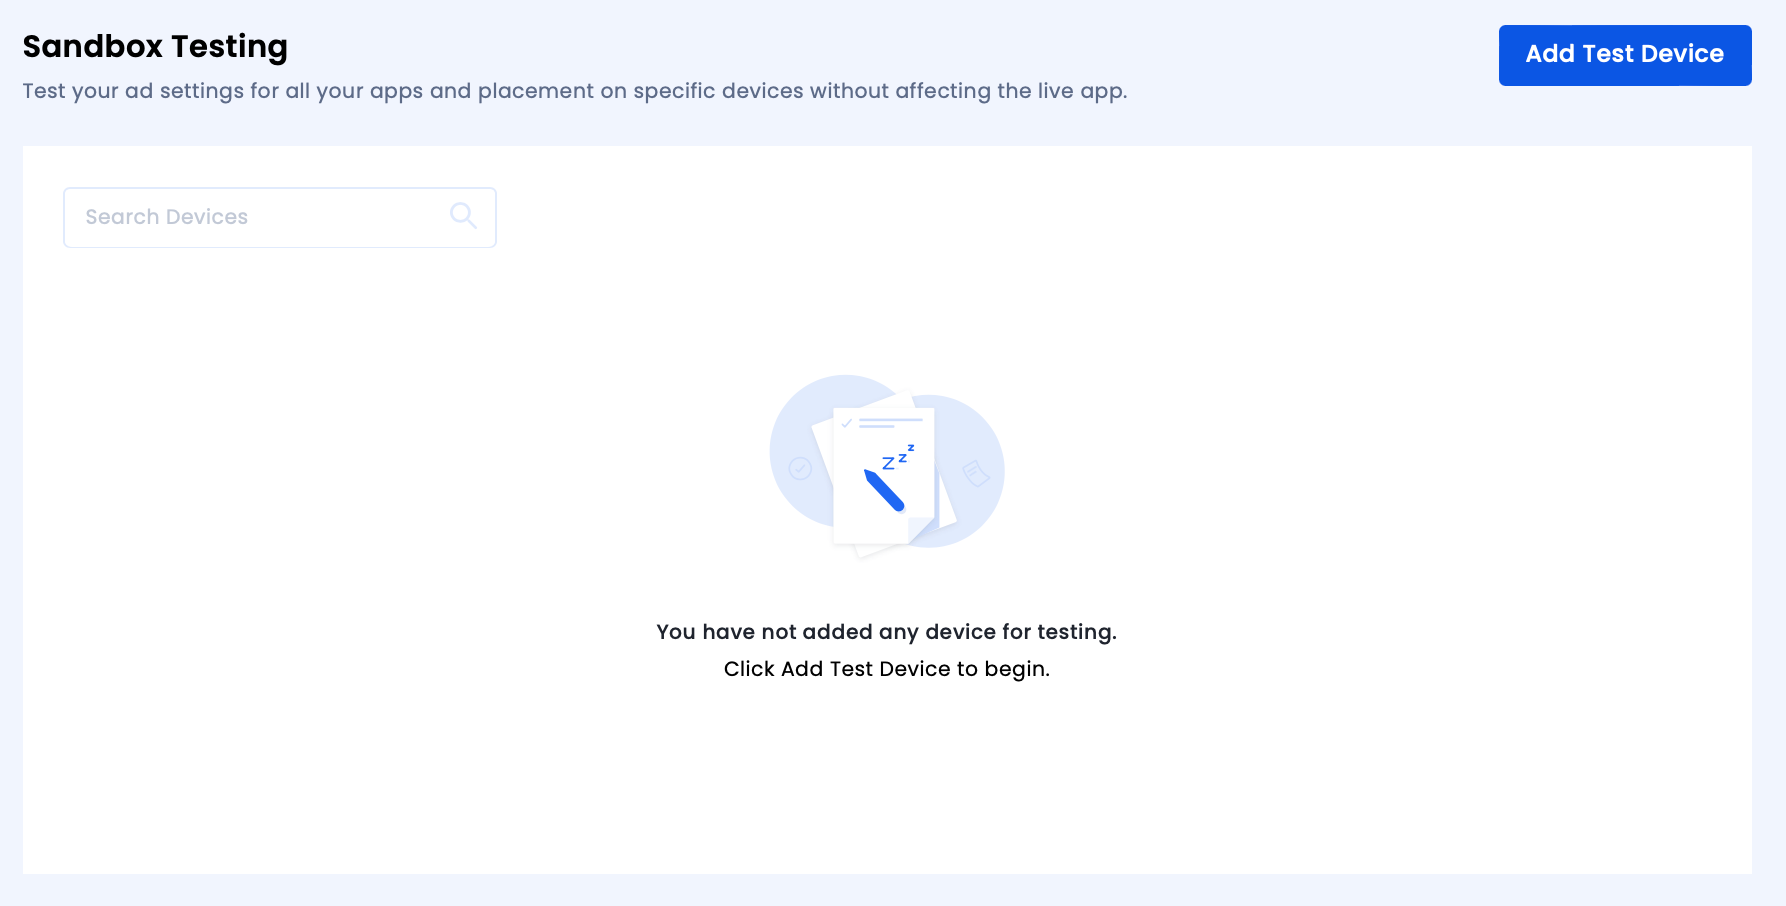
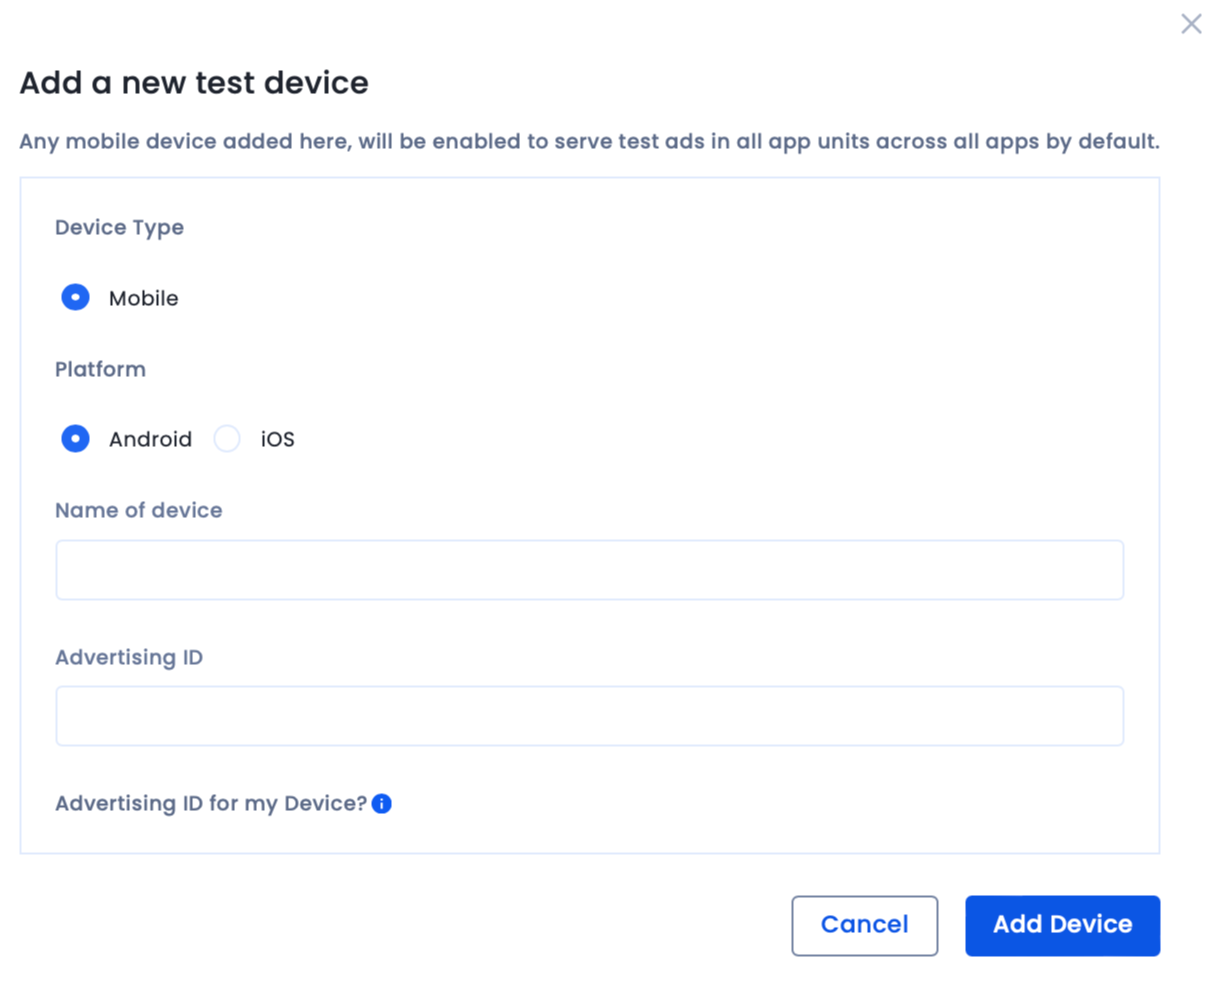
You have successfully added a device for testing your integration. If you come across any issues, contact our support team to start troubleshooting your integration.
To maximize your monetization with InMobi, it is strongly recommended that you implement our best practices listed below.
By installing this SDK update, you agree that your Children Privacy Compliance setting remains accurate or that you will update that setting, whenever there is a change in your app's audience. You may update the app's Children Privacy Compliance settings at https://publisher.inmobi.com/my-inventory/app-and-placements.
 Support Center


