For the InMobi CMP to work across one or more apps, you will be required to first configure those within the portal.
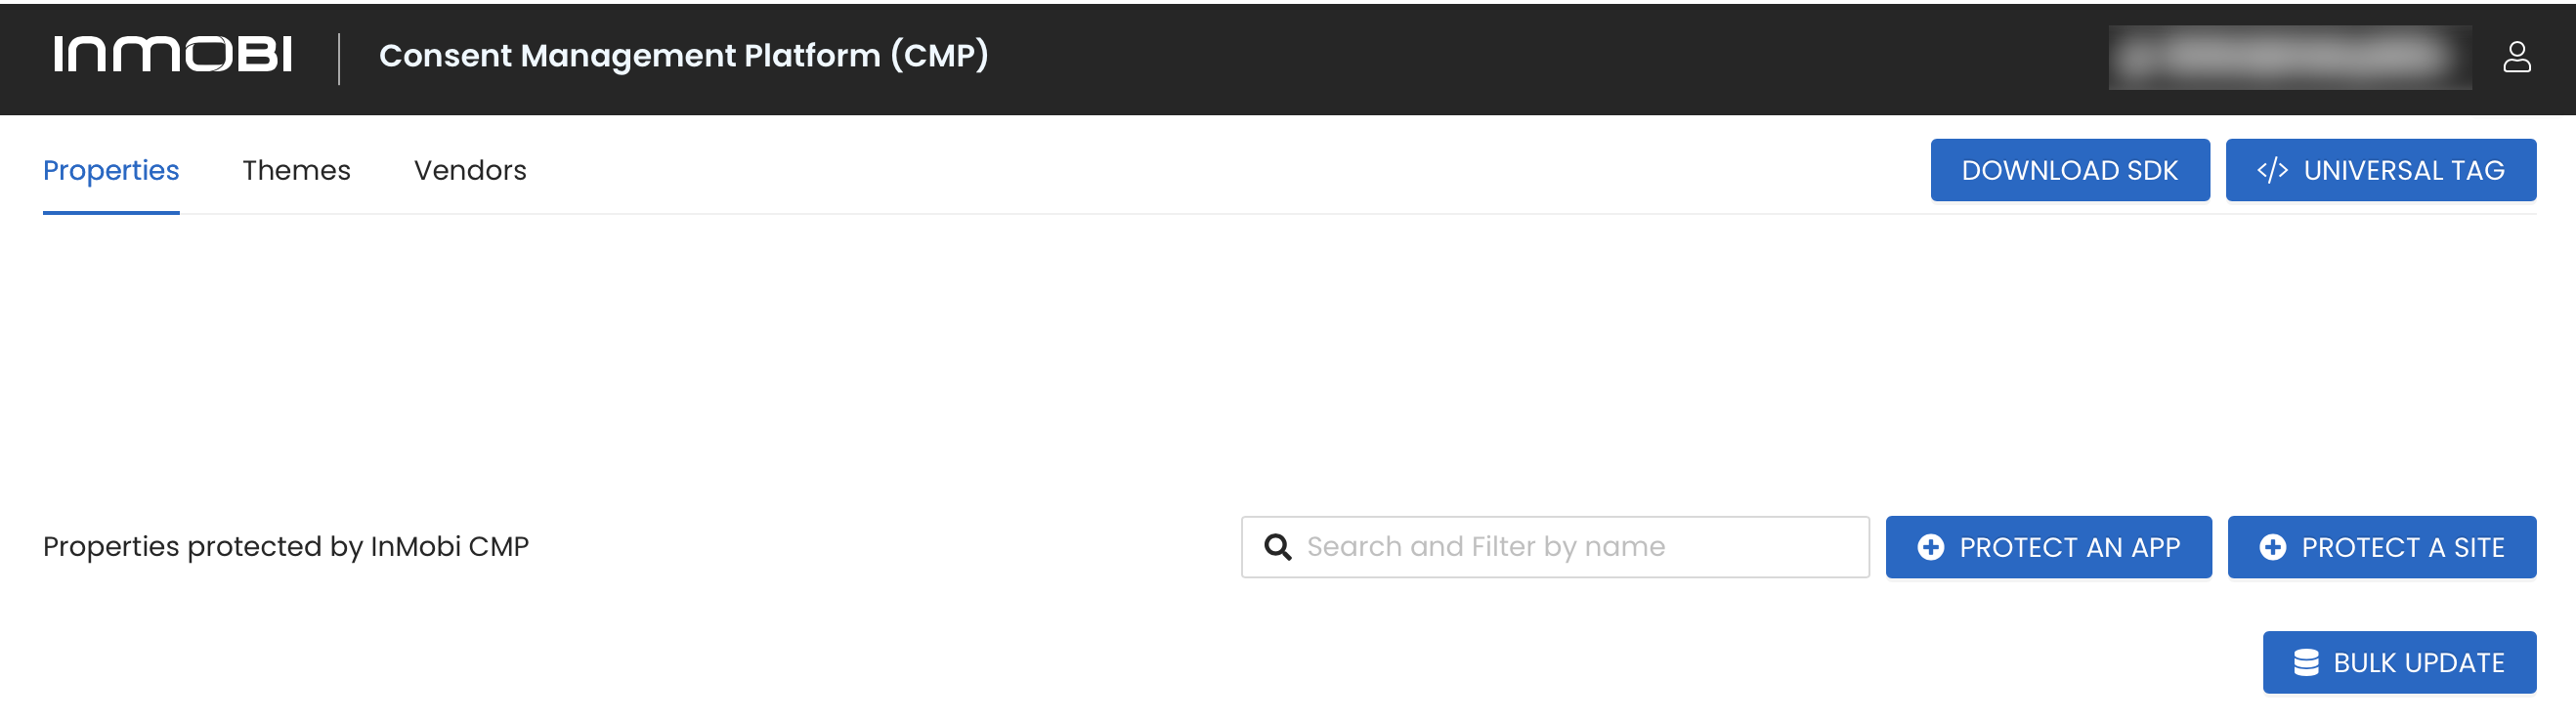
- Under the Properties tab of your InMobi CMP portal, click Protect an App.
- On the General Settings section, you will enter information about your app. All starred items are required.
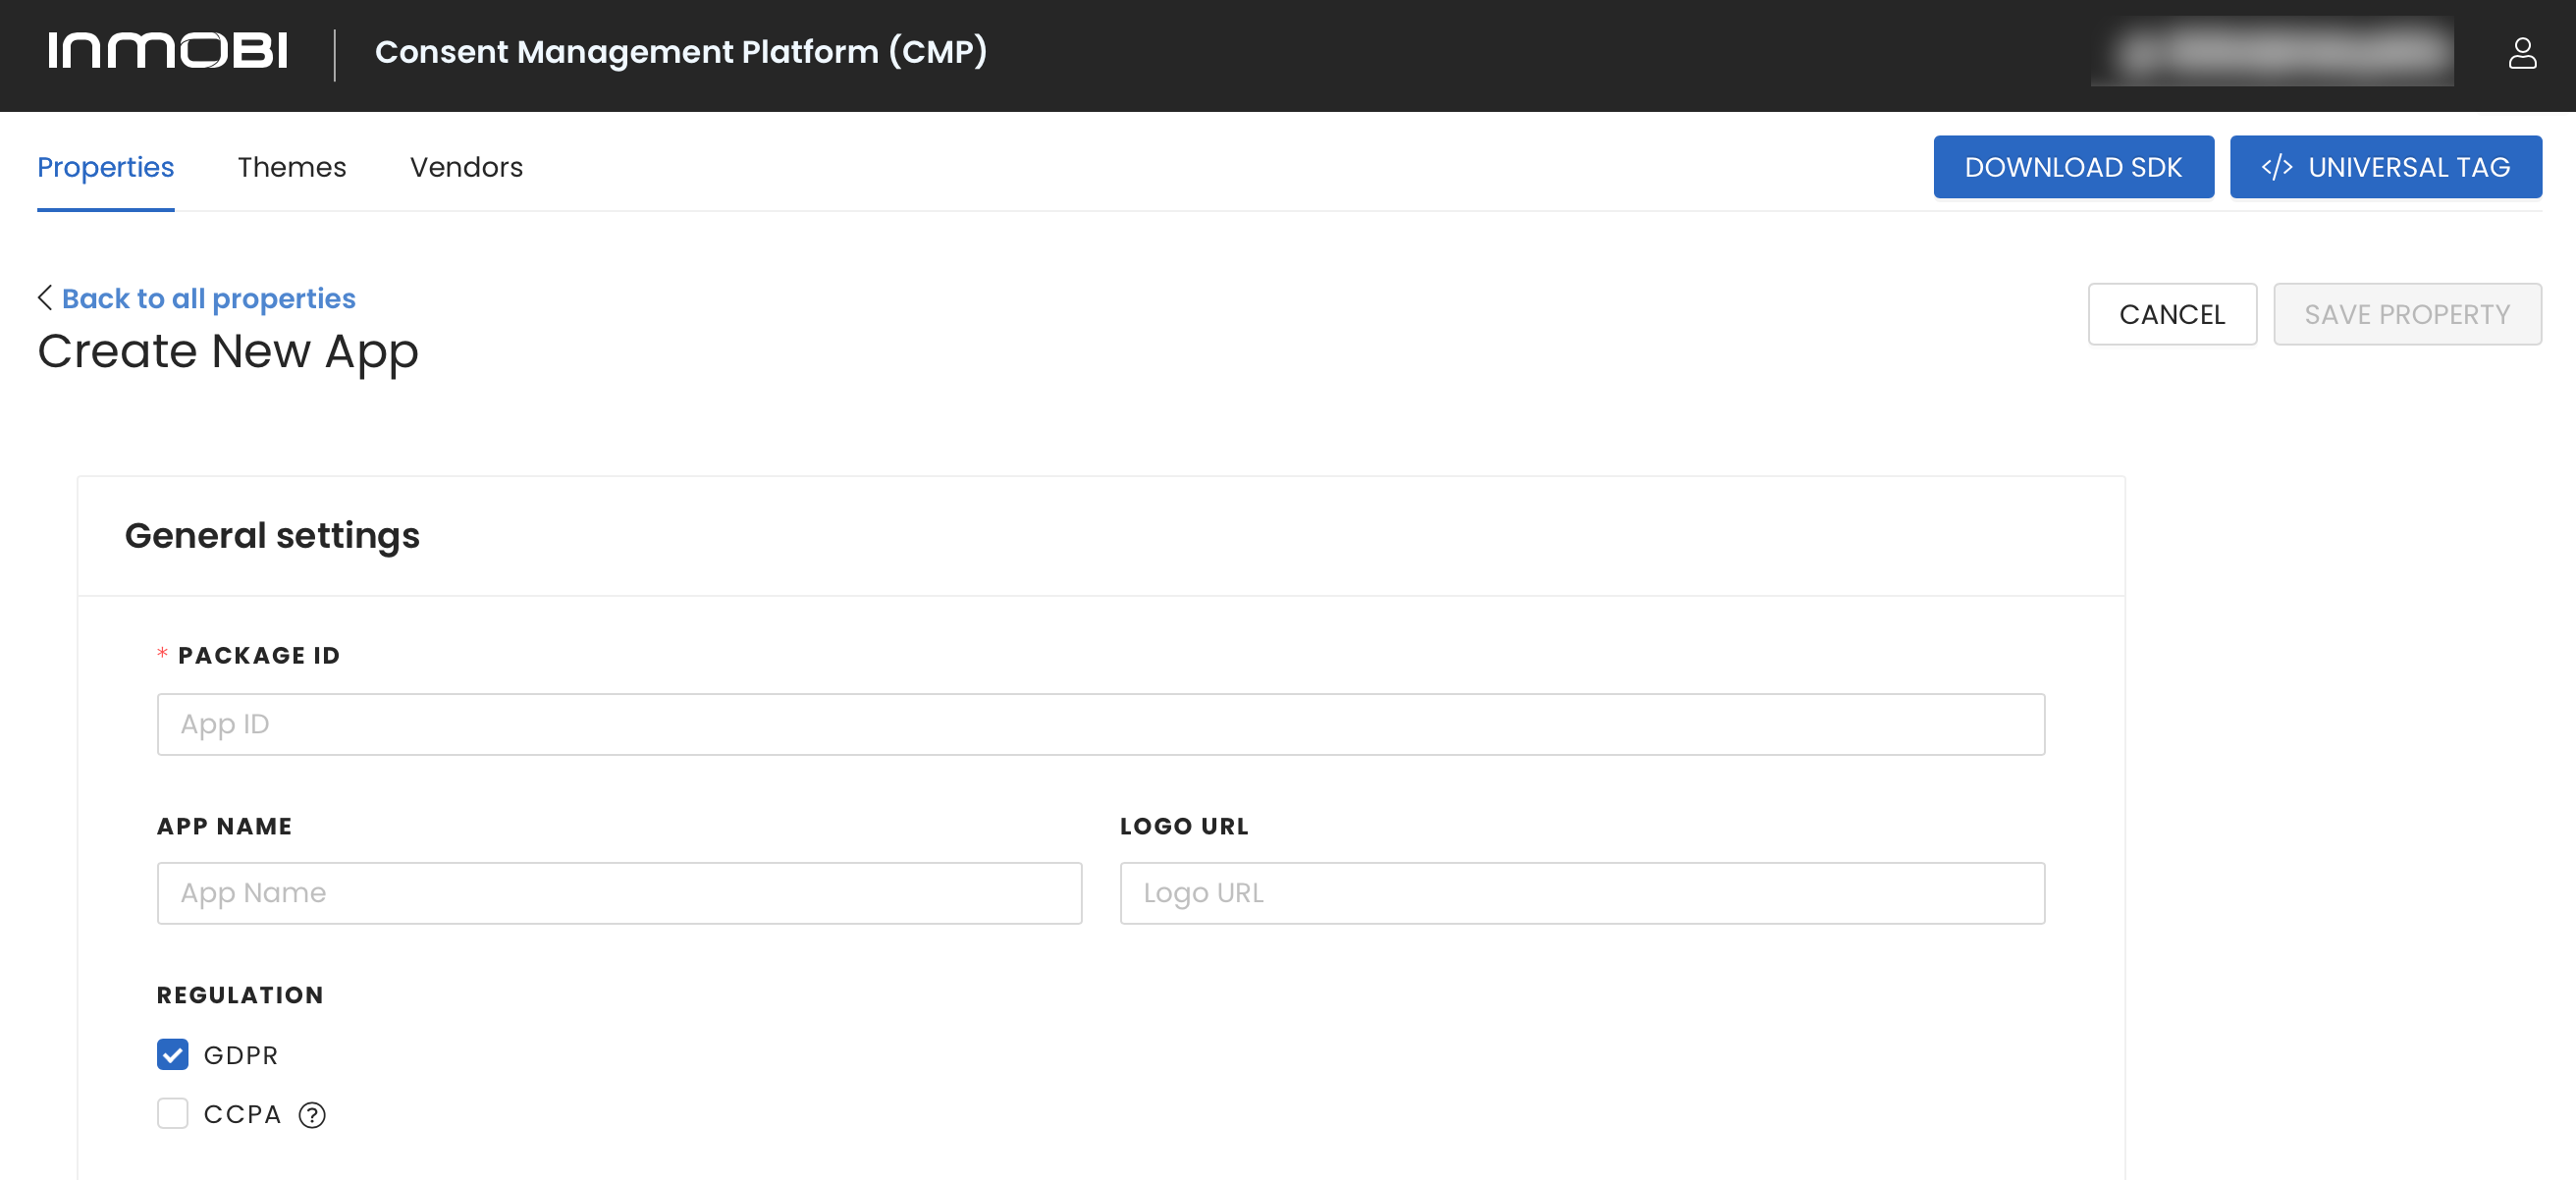
- Package ID: Enter the bundle id or the package ID of the application.
- App Name: Specify the name of the application you wish to protect.
- Logo URL: Provide the URL where the logo of the application can be accessed.
- Regulation:
- Regulation-GDPR: GDPR is the primary regulation in EU law on data protection and privacy.
- If selected, the Publisher Country Code drop-down menu field will appear below CMP Version. It determines legislation of reference. Commonly, this corresponds to the country in which the publisher’s business entity is established.
- Regulation-CCPA: CCPA is designed to regulate the ‘sale’ of personal information of California residents by a business and provide more privacy protections to California residents.
- If selected, the following CCPA options will appear:
Note
- If you are unsure, leave this field unchecked - this will not impact your usage of the CCPA opt-out signal.
- You can also customize the CCPA Do Not Sell My Data Screen like you can do for GDPR. You can change the Title string, Body text and the links to the Delete/Access data and Privacy Policy. More information here.
- Target entire U.S.? If selected, allows you to enable the CCPA functionality for all users within the U.S.
- IAB LSPA signed? Select this checkbox if you have signed the Limited Services Provider Agreement as part of the IAB CCPA Compliance Framework.
- CMP Version: The latest version is selected by default. No action is required.
- Customize Do Not Sell My Data Screen, if you’ve selected CCPA regulation coverage, you’ll need to configure the information that will be displayed to users when they click the Do Not Sell My Data link on your site. Complete the following information:
- Headline Text: Allows you to provide a short title for the modal. An example is provided in the field. If you do not edit this field, it will be used as the default.
- Body Text: Allows you to provide a body copy explaining this service and how/why data collection is used on the app. An example is provided in the field. If you do not edit this field, it will be used as the default.
- Suppress CCPA Links: Select this checkbox if you only want to support the IAB CCPA Framework. This will suppress the links to the Data Deletion, Data Access, and Data Privacy Policy.
- Data Deletion Link: Allows you to provide a link to your data deletion tool, if applicable.
- Data Access Link: Allows you to provide a link to your data access tool, if applicable.
- Privacy Policy Link: Allows you to provide a link to your site privacy policy.
- Preview: No action. This is a preview of what it might look like when it is live on your app.
- Under the Consent scope, you will find the following fields:
- Which Users Should be Asked for Consent?
- Choose the relevant option based on the GDPR regulation. For example, if publishers within the EEA and the UK are required to apply GDPR to any user, select "Everyone."
- Consent Scope: Ask User for Consent for
- Specify the scope for which user consent is required. Please note: Publishers established within the EEA and the UK are required to apply GDPR and ePrivacy Directive to any user (option "Everyone") regardless of the user's location.
- Show New Vendors Every
- Determines how frequently, in days, the CMP will check for additions or changes to the vendor list, and re-prompt users for consent if changes are found.
Note
- Vendors who are added to the list before a user is re-prompted will not receive a consent signal until this value is exceeded. If the Vendor is blocked manually in the Vendor list, the user will be re-prompted immediately.
- We recommend making changes to the Vendors' list in bulk. If you have made a manual change to your IAB or non-IAB vendor lists, this will cause the CMP to prompt the user to adapt their consent to the latest version of your vendor list. Read more on Vendors here.
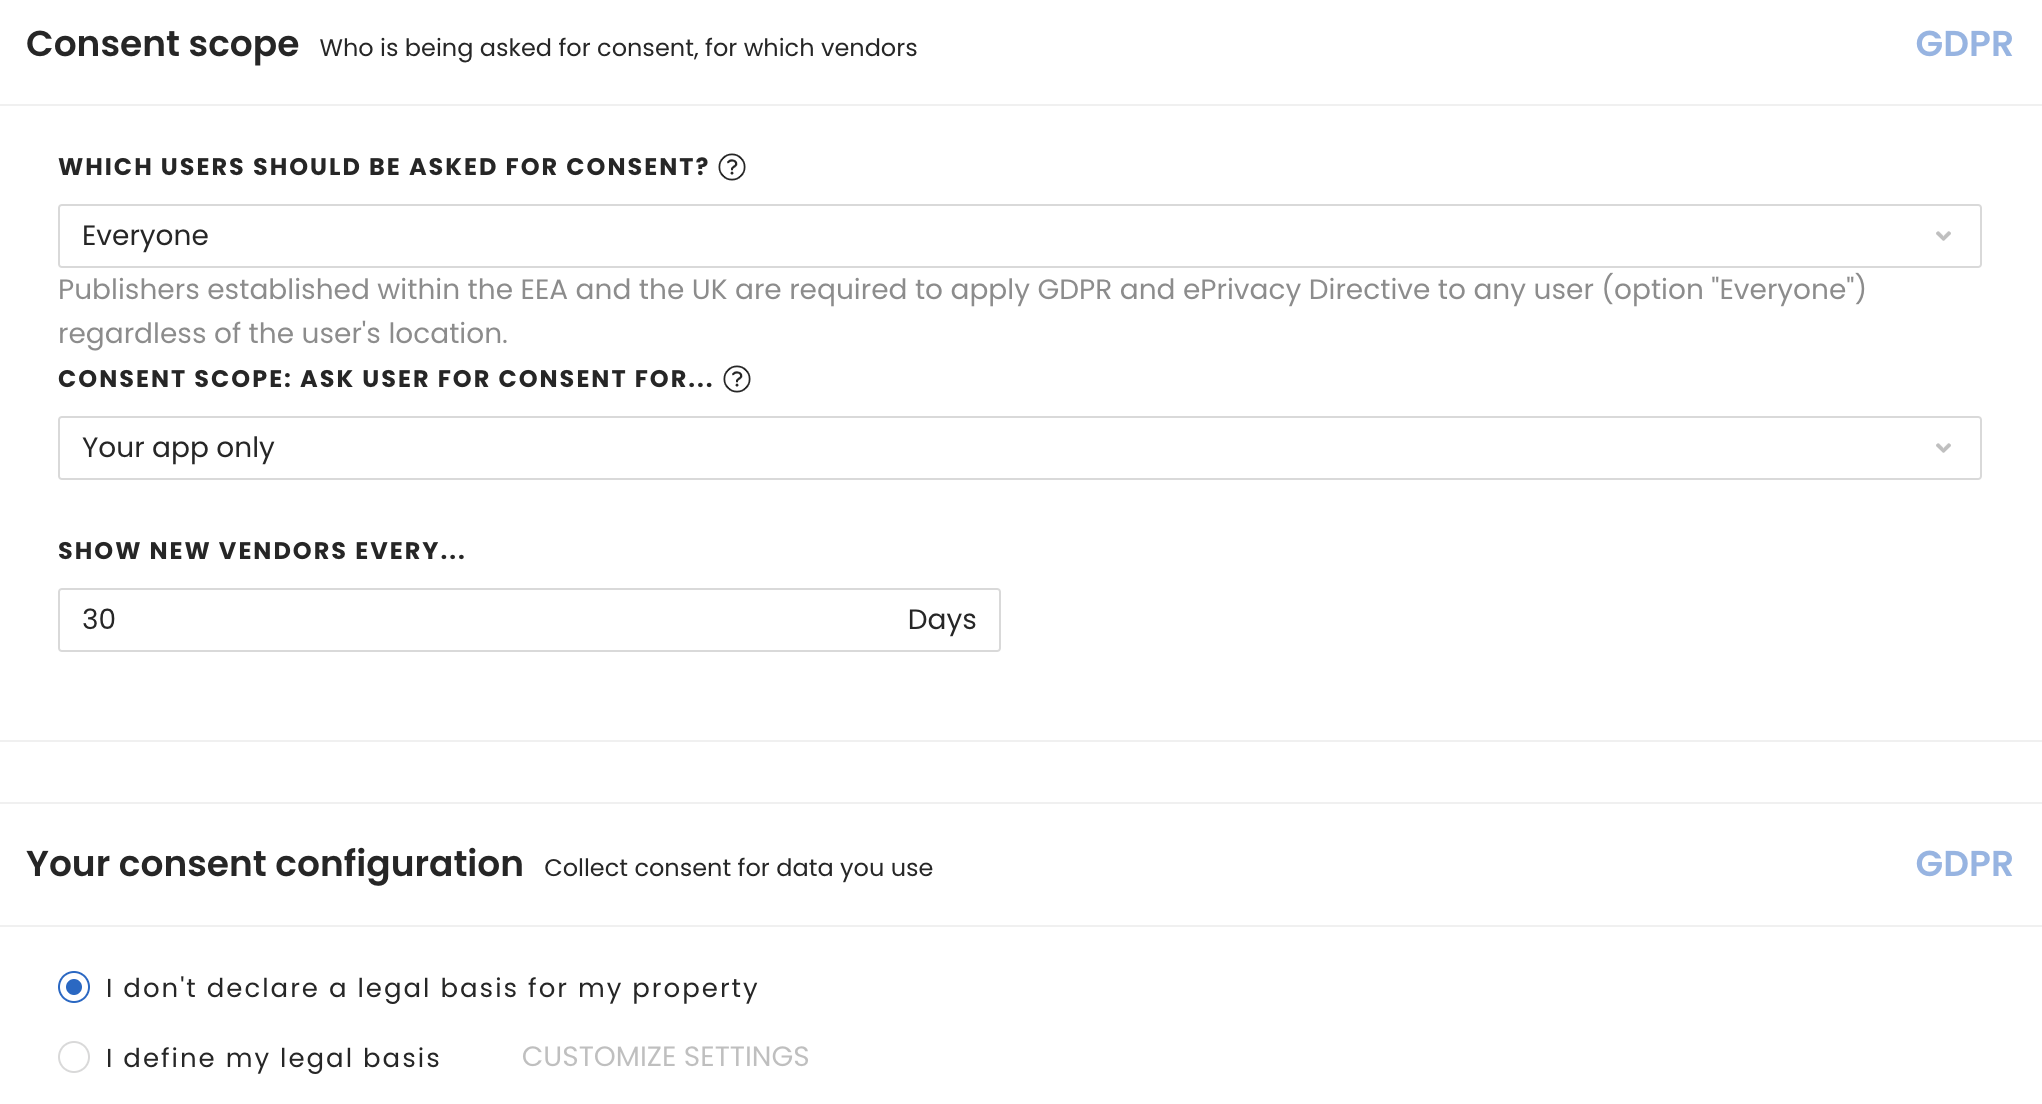
- Under Your consent configuration, you need to define your legal basis. Legal basis refers to the justification for processing personal data. When you declare a legal basis for your property, you are specifying the lawful reason for collecting and using personal information under the privacy regulations.
- By default, I don’t declare a legal basis for my property is selected, meaning the CMP is inactive
- To declare your legal basis, click on I define my legal basis
- If selected, Customize Purposes will appear. InMobi CMP provides one recommended stack out of the box that covers many use cases. Based on the purposes selected, the purposes will be displayed as either purposes or as the proposed stacks. More information about the purposes and stacks can be found in the IAB Framework Policies.
- Google Vendors: Select the checkbox if you wish to Enable Google Vendors.
- Under Customize Purpose Screen:
- Select your consent version. You should use the TCF 2.2 version.
- Customize how you would like to present the purposes within your CMP
- Google Vendors: Select the checkbox if you wish to Enable Google Vendors.
- UI settings
- CMP UI Language: This is the language for text in the CMP UI. There is an additional language setting in the drop down called Auto Detect Language. This option allows you to configure the CMP to pick up the language configured for your site or if that is not set the language of the browser. If the language doesn't match with any languages InMobi provides, it will default to English. Please see below for a list of supported languages:
| Bulgarian |
English |
Greek |
Maltese |
Italian |
| Swedish |
Croatian |
Lithuanian |
Finnish |
Polish |
| Russian |
Czech |
Romanian |
Irish |
French |
| Slovak |
Danish |
Estonian |
Norwegian |
Latvian |
| Slovenian |
Dutch |
Hungarian |
Flemish |
Portuguese |
| Spanish |
|
|
|
|
- Once you have finished, scroll back to the top and click Save Property.
Once you have added apps to your portal, you will see them listed here with information about the property that includes a status indicator, the name of the property, which regulation is in effect, theme in use, the consent rate, the CMP version, the analytics report and more. The status indicator turns 'Green' when the analytics reports are available for the site. It can take up to 24hrs for the site analytics to appear on the 'Reports' page. This dashboard also allows you to Edit or Bulk Update your Properties.
Learn how to Create or Edit a Theme (via the SDK) for apps.
 Support Center


