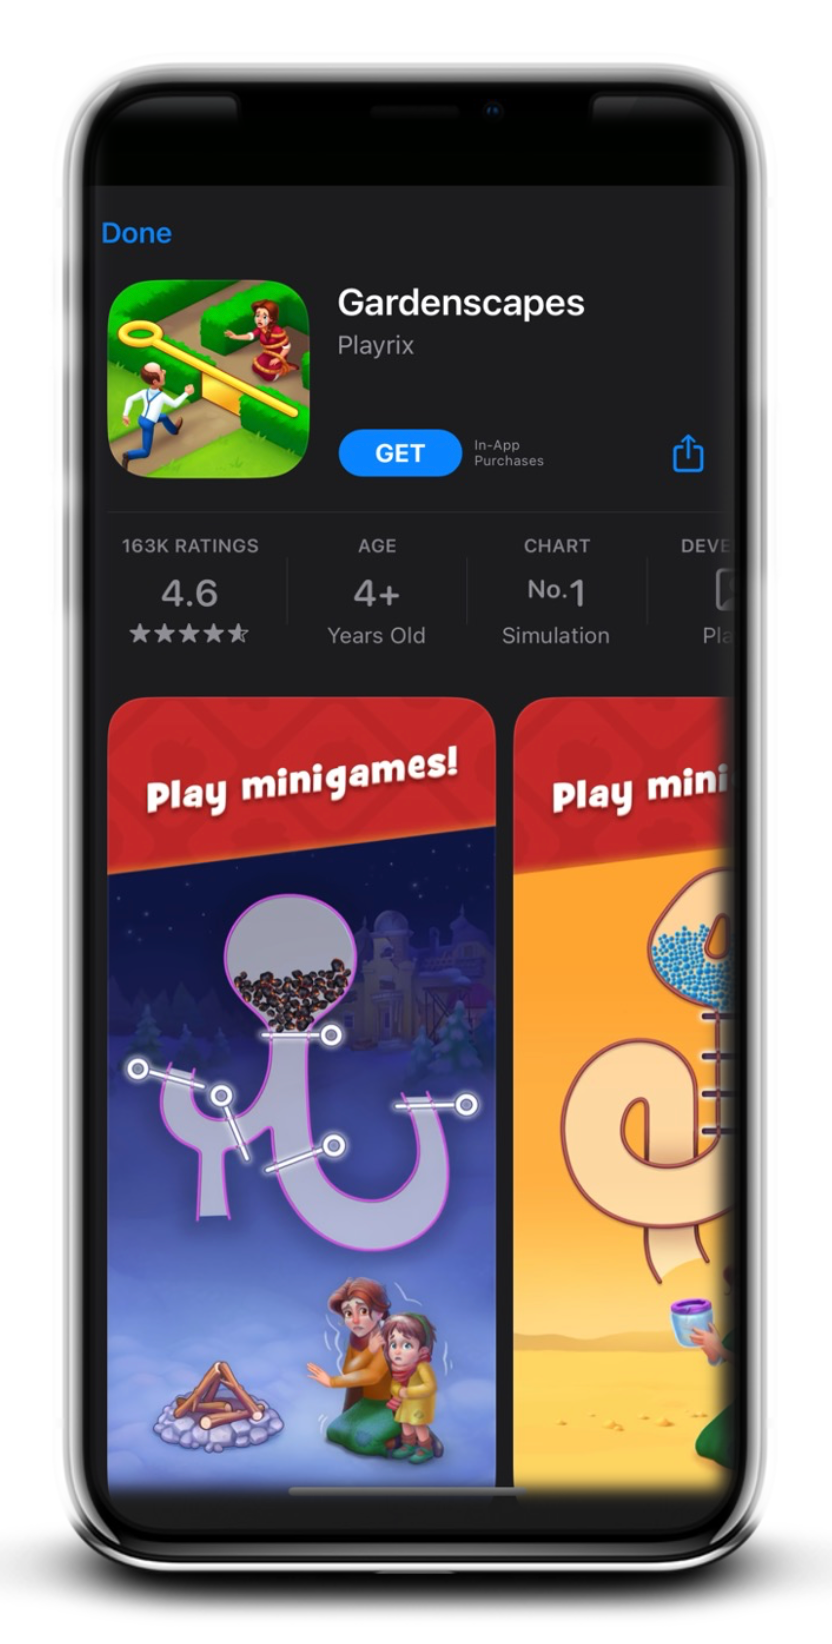
Auto Store allows DSPs to decide whether InMobi Exchange should display a store modal on top of a VAST video. This feature enhances the effectiveness of app-install campaigns, leading to increased conversion rates and reduced CPIs.
It is a store modal supported by iOS with the SKStoreProductViewController object.
DSPs determine if the InMobi Exchange iOS Store Kit is displayed automatically after a user:
When dismissed, users see the creative end card loaded below.
|
Attribute |
Description |
Type |
|
autostore |
Indicates whether the inventory is eligible for Auto Store.
|
Int; |
{
  "imp": [
     {
       "ext": {
         "autostore":1
        }
     }
  ]
|
Attribute |
Description |
Type |
autostore |
Indicates whether InMobi Exchange should enable automatically displaying the Store.
|
Int; default 1 |
{
  "seatbid":[
   {
     "bid":[
        {
          "ext": {
             "autostore":1
            }
         }
       ]
     }
   }
 }
|
Attribute |
Description |
Type |
autostoreclick |
Indicates whether InMobi Exchange should fire click trackers when automatically displaying the Store Kit.
|
Int; default 0 |
{
  "seatbid":[
    {
      "bid":[
        {
         "ext":{
            "autostore":1,
             "autostoreclick":1
            }
        }
     ]
   }
]
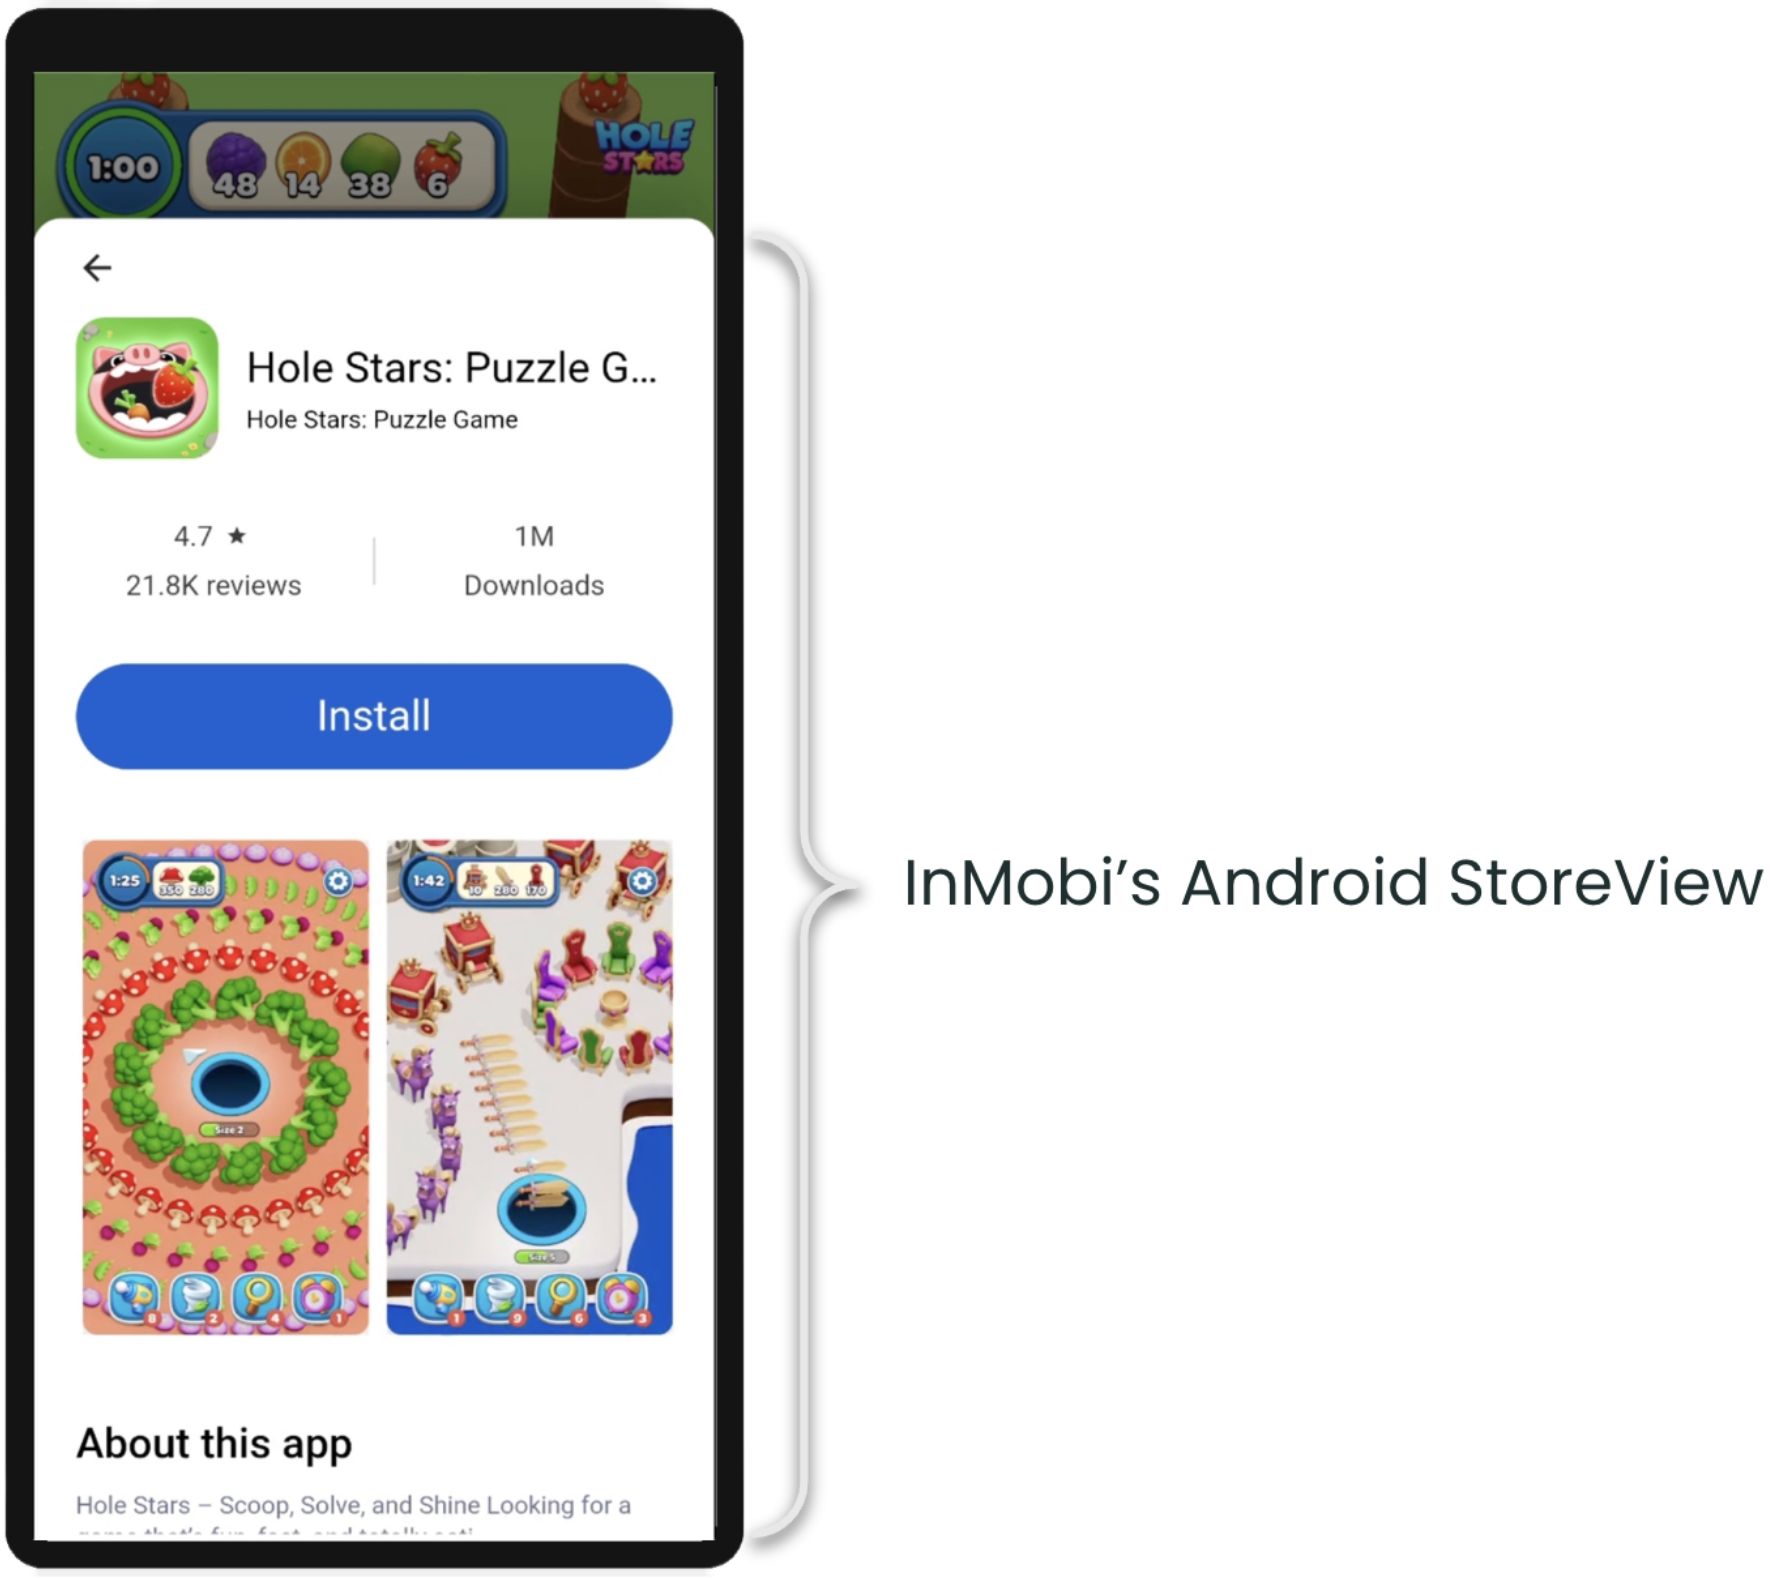
Android StoreView is part of InMobi’s suite of ad behavior enhancements. It is an InMobi SDK-powered ad experience that allows users to quickly preview key elements of an app’s Google Play Store page directly within the ad flow.
This experience presents a lightweight, store-like interface that mirrors the Google Play product page, featuring elements such as app description, scrollable screenshots, and relevant metadata. It provides users with immediate context about the advertised app without requiring them to leave the host app.
StoreView automatically appears at the end of a video ad, overlaying the end card in a format similar to iOS Auto StoreKit. Users can dismiss it or interact with it. On interaction, a clickthrough redirects them to the Google Play Store to continue the install flow.
By increasing user intent and engagement before redirection, StoreView improves key performance metrics such as conversion rate, IPM, and overall efficiency (CPA, CPI). It is enabled by default and can be controlled by DSPs via the bid response.
This feature is available for:
StoreView is supported for app install campaigns and is disabled by default for retargeting campaigns.
Android StoreView is enabled automatically for performance DSPs running app install campaigns. Reach out to your Demand Partner Manager to confirm activation.
DSPs can choose to enable StoreView on a per-impression basis, allowing full control over when the feature is applied. This enables optimization based on campaign goals, landing page behavior, and CTR performance, and supports straightforward A/B testing.
BidRequest.imp.ext| Attribute | Description | Type |
asv |
Indicates whether the impression opportunity is eligible for Android StoreView (1 = eligible, 0 = not eligible) |
Integer |
BidResponse.seatbid.bid.ext| Attribute | Description | Type |
asv |
Indicates whether Android StoreView is enabled for this impression (1 = enabled, 0 = disabled, default value = 0) |
Integer |
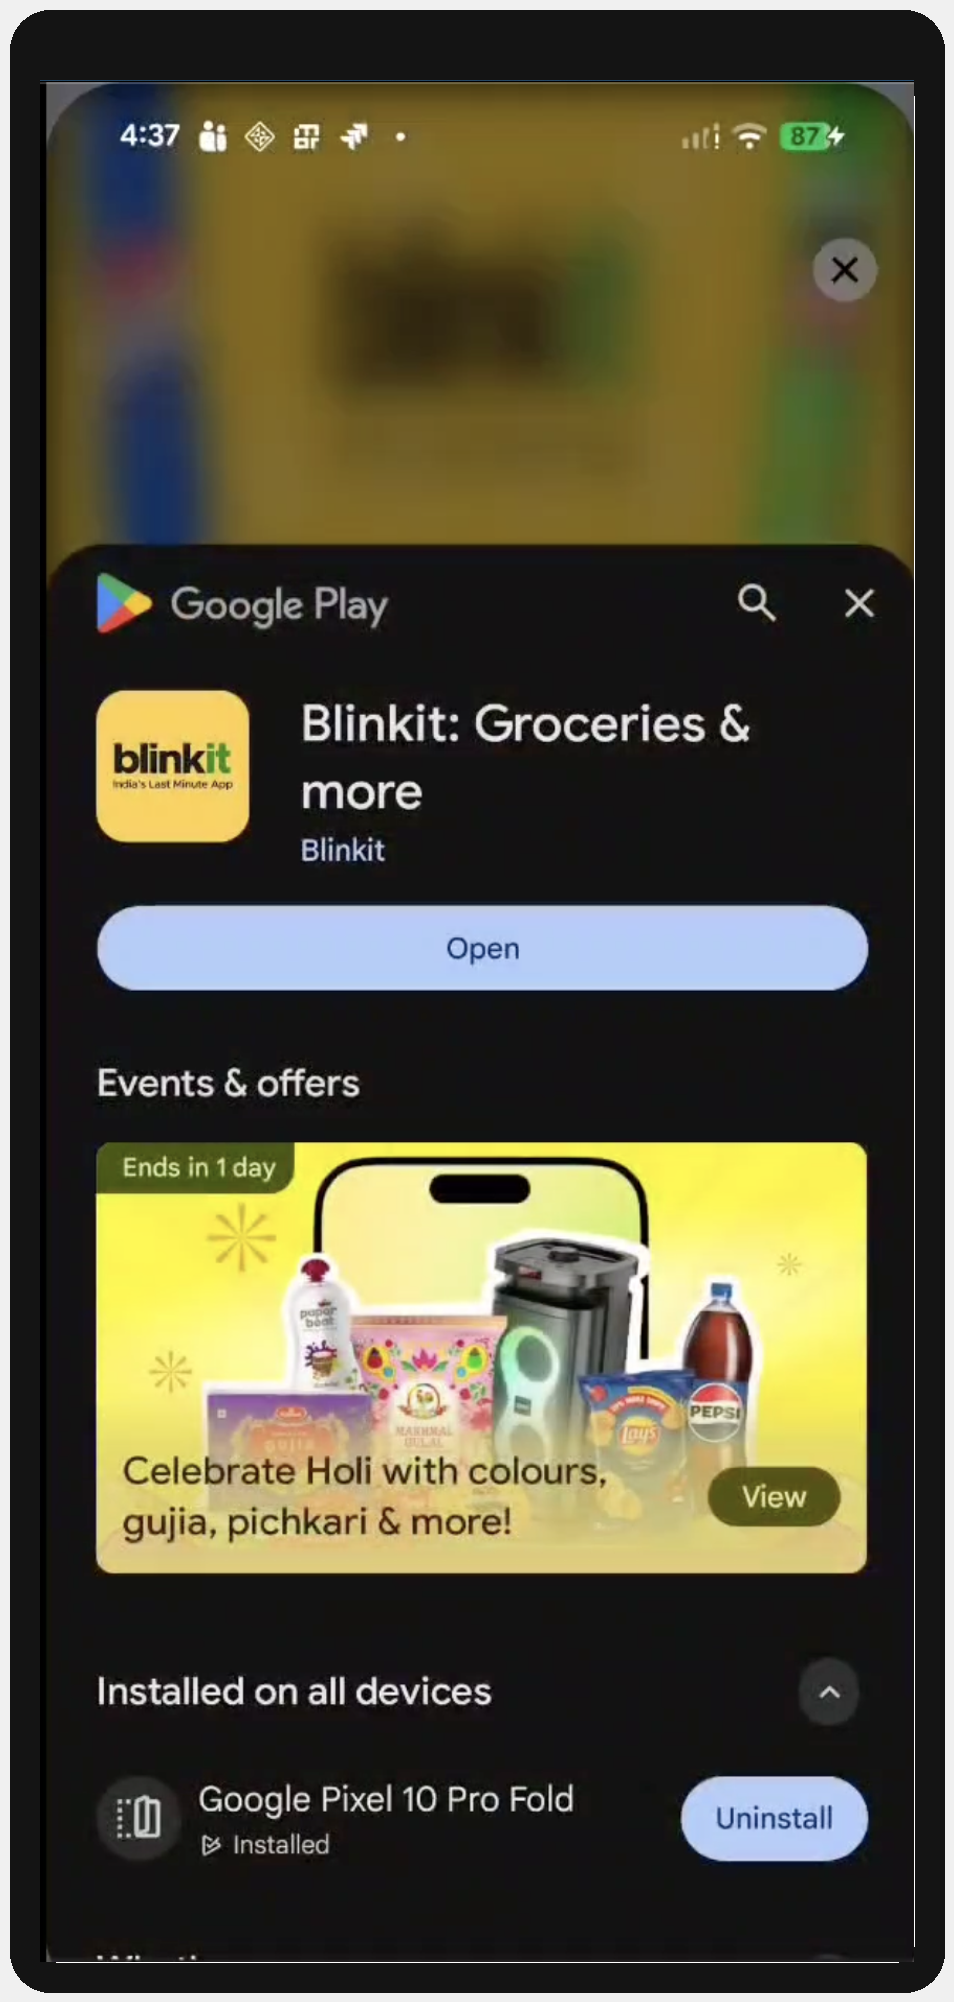
Android Inline Installs is a Google Play-powered capability enabled by the InMobi SDK that allows users to install an advertised app directly within the ad experience, without redirecting to the Google Play Store.
This experience leverages the Google Play Install API to present app product details in a native, in-context interface, allowing users to complete the install flow without leaving the host app.
For DSPs and advertisers, this results in a more seamless user journey, reducing friction in the clickthrough flow and improving key metrics such as conversion rate, and overall campaign efficiency (IPM, CPA, CPI).
The integration follows a two-sided OpenRTB handshake:
imp.ext.inlineinstallallowedseatbid.bid.ext.inlineinstallInMobi can also enable this feature on behalf of DSPs that do not support RTB based activation or install referrer based attribution. Please contact your Demand Partner Manager to discuss enablement.
InMobi sets inlineinstallallowed = 1 only when all of the following conditions are met:
Object: BidRequest.imp.ext
| Field | Type | Required | Description |
inlineinstallallowed |
integer | Yes | 1 = available, 0/ absent = not available |
"ext": {
  "inlineinstallallowed": 1
}
Object: BidResponse.seatbid[].bid[].ext.inlineinstall
| Field | Type | Required | Description |
|---|---|---|---|
enabled |
boolean | Yes | 'true' to activate, false to opt out (default value is 'true'). |
referrer |
string | No* | Referrer string passed by the SDK to the Play Install API for attribution. * Strongly recommended. |
"ext": {
  "inlineinstall": {
    "enabled": true,
    "referrer": "dsp1_760a59d6-1507-11f1-96c3-9565488fcc70"
  }
}
bid.bundle (the advertised app's package name) is required when enabled=true.
The InMobi SDK calls the Google Play Install API directly on the device. The flow bypasses the Play Store redirect entirely, which means:
You must pass the referrer explicitly in the bid response for attribution.
Without a referrer:
We recommend passing the install referrer explicitly in the bid response for attribution. If the DSP does not use Install Referrer for third-party attributions, then this recommendation may not be relevant for you.
InMobi passes the referrer to the Google Play Install API exactly as received. It does not validate or modify the value.
The referrer field is optional at the protocol level. However, it is strongly recommended for any campaign where you need install attribution. Since the InMobi SDK calls the Play Install API directly (rather than redirecting through a Play Store URL), there is no redirect chain for the MMP to read a referrer from. The only way to pass a referrer in this flow is explicitly through this field.Without it:
If inlineinstallallowed is absent or set to 0 in the bid request, the device is not eligible for Inline Install. Setting enabled=true in the bid response will have no effect — the InMobi SDK will fall back to standard store redirect behaviour. DSPs should treat inlineinstallallowed = 1 as a prerequisite before activating Inline Install.
InMobi may enable automatic Inline Install opt-in for DSPs who have agreed to it. When auto opt-in is active, eligible impressions will be treated as opted-in by default, even without an explicit enabled=true in the bid response.
To override this and explicitly opt out of Inline Install for a specific bid, set enabled=false in the bid response extension.
Yes. When enabled=true, DSP must include a valid bid.bundle in the bid object. This is the Android package name of the app to be installed (e.g. com.advertiser.game). The SDK uses this to identify the app on the Play Store. Bids with enabled=true and a missing or invalid bundle will not be processed for Inline Install.
Yes, click trackers will be invoked as usual when the user clicks on the ad.
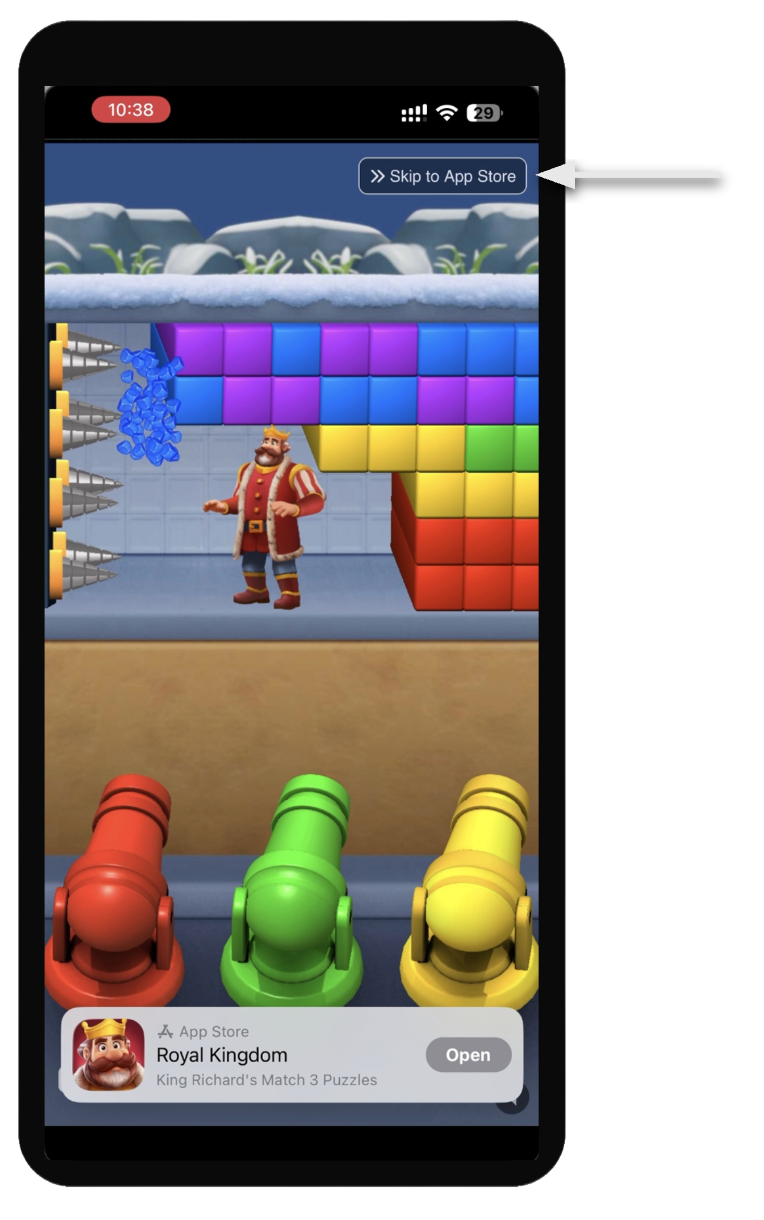
Skip to Store is an ad experience feature available on the InMobi Exchange for DSPs bidding on in-app inventory via the InMobi SDK. It enables a streamlined click-through flow that directs users to the advertiser’s destination as part of the ad experience.
This feature is designed for performance-focused campaigns such as app installs, retargeting, and commerce. It helps improve:
When enabled for an eligible impression, the InMobi SDK renders a full-screen ad experience with a single call-to-action (CTA) button.
The CTA button can direct users to:
href)Skip to Store is supported for the following ad formats:
For solutions focused on improving click-through rate (CTR) in static full-screen ads, contact your Demand Partner Manager for additional options.
You can enable Skip to Store using one of the following methods:
InMobi can enable Skip to Store across a defined percentage of traffic for selected formats and placements.
DSPs can control Skip to Store on a per-impression basis using OpenRTB extensions.
This approach allows you to:
| Attribution | Description | Type |
|---|---|---|
skiptostore |
Indicates whether the impression is eligible for Skip to Store ( 1= eligible, 0 = not eligible). |
Integer |
| Attribution | Description | Type |
|---|---|---|
skiptostore |
Indicates whether to enable Skip to Store for the impression (1= enabled, 0 = disabled) |
Integer |
When the user clicks the Skip to Store CTA button:
What click trackers are triggered when the user clicks the CTA button?
Standard click trackers are triggered, consistent with a normal ad click. The configured click-through URL is then opened.
Which click-through URL is used?
What happens if the user clicks on the main ad asset instead of the CTA button?
If the user clicks the main ad asset (for example, the video player), the Skip to Store flow is disabled for that interaction. The default click behavior is applied.
The InMobi WebX enables publishers to monetize their websites by rendering ads through a lightweight JavaScript integration.
Ensure you have the following before integrating:
Before you begin with InMobi WebX integration, you need to create default website placements first.
Follow the steps in Default Website Placements to start creating website placements.
Contact your Customer Success Manager to activate WebX on your inventory.
The SDK supports multiple integration approaches based on your use case:
| Method | Description |
| Script-Only Integration (Recommended) | Automatically loads and renders ads on page load |
| Manual Initialization | Provides control over when ads are loaded |
| Dynamic Ad Slot Integration | Loads ads based on user engagement signals |
Use this method for a quick and easy integration. It uses script attributes to configure the SDK. The SDK automatically loads and renders an ad when the page loads.
<div id="inmobi-ad-container"> </div>
"https://app.inmobi.com/web-sdk?publisherId=<inmobi_accountID>".
<script defer src="https://app.inmobi.com/web-sdk?publisherId=<inmobi_accountID>" data-mode="auto" data-container="inmobi-ad-container"></script>
|
Attribute |
Description |
data-mode="auto" |
Enables automatic ad loading |
data-container |
Specifies the container ID where the ad will render |
Multiple Ad Slots Support: In addition to a single ad container, publishers can now render multiple ads on the same page. To enable this, define multiple containers using the prefix ad-slot- (e.g., ad-slot-1, ad-slot-2, etc.) in the DOM. The SDK will automatically detect all such containers and render ads in each slot.
Only one "script" tag with the main container is needed; additional ad-slot-* containers can be added in the DOM and are detected automatically by the SDK.
<!DOCTYPE html>
<html>
<head>
  <title>InMobi Ad Example</title>
</head>
<body>

<h1>My Website</h1>

<div id="inmobi-ad-container"></div>

<script
  defer
  src="https://app.inmobi.com/web-sdk?publisherId=<inmobi_accountID>"
  data-mode="auto"
  data-container="inmobi-ad-container">
</script>

</body>
</html>
This method allows you to control when and where ads are loaded. In this mode, the SDK only runs when init() is called. It is useful for:
<div id="ad-slot"></div>
<script defer src="https://app.inmobi.com/web-sdk?publisherId=<inmobi_accountID>"></script>
InMobiWebSDK.init() after the page loads. The SDK will load an ad inside the specified container when init() is called.
<script>
window.addEventListener("DOMContentLoaded", function () {

  InMobiWebSDK.init({
    containerId: "ad-slot"
  });

});
</script>
You can provide the following signals to help the SDK optimize ad delivery.
|
Signal |
Type |
Optional |
Description |
Example Values |
|
|
string |
No |
container (html div) where the ad will appear |
|
|
|
string or array |
Yes |
Dimensions of the ad slot. Used by the SDK to request compatible creatives. |
|
|
|
string |
Yes |
Ad format supported by the slot. Helps select compatible ad creatives. |
|
|
|
string |
Yes |
Describes where the ad appears on the page. Helps optimize layout and auction demand. |
|
|
|
string |
Yes |
Contextual category of the page used for contextual targeting. |
|
|
|
string |
Yes |
Type of AI-generated summary used for contextual targeting. |
|
|
|
string |
Yes |
Page keywords provided by the publisher to improve contextual targeting. |
|
|
|
string |
Yes |
Indicates whether the user has consented to personalized ads. Required for privacy compliance. |
|
|
|
string |
Yes |
Indicates whether GDPR applies to the user session. |
|
|
|
string |
Yes |
CCPA / US privacy string for compliance. |
|
<!DOCTYPE html>
<html>
<head>
<title>InMobi Web SDK Example</title>

<script defer src="https://app.inmobi.com/web-sdk?publisherId=<inmobi_accountID>"></script>

</head>
<body>

<h1>My Website</h1>

<div id="ad-slot"></div>

<script>
window.addEventListener("DOMContentLoaded", function () {

  InMobiWebSDK.init({
    containerId: "ad-slot",
    slotSize: ["300x250"]
  });

});
</script>

</body>
</html>
This method allows ads to be loaded dynamically based on user engagement, such as time spent on the page or scroll depth. It is useful for:
The SDK loads ads based on user engagement instead of on page load.
|
Parameter |
Type |
Required |
Description |
Example |
|
|
number |
No |
Minimum time (in seconds) the user must spend before the ad can be inserted |
|
|
|
number |
No |
The percentage of page scroll after which the ad will be inserted |
|
<!DOCTYPE html>
<html>
<head>
<title>InMobi Web SDK Example</title>

<script defer src="https://app.inmobi.com/web-sdk?publisherId=<inmobi_accountID>"></script>

</head>
<body>

<h1>My Website</h1>

<div id="ad-slot"></div>

<script>
window.addEventListener("DOMContentLoaded", function () {

  InMobiWebSDK.init({
    minSeconds: 3,
    minViewabilityPercentage: 50,
  });

});
</script>

</body>
</html>
When no ad is available for a given slot, the SDK dispatches a NO_FILL custom event on the window object. You can listen for this event to take fallback actions.
window.addEventListener('NO_FILL', function(event) {

 const slotId = event.detail.slotId;

 console.log('No fill for slot:', slotId);

});
defer attribute.Check the following if ads are not rendering:
For further assistance, Contact Us.
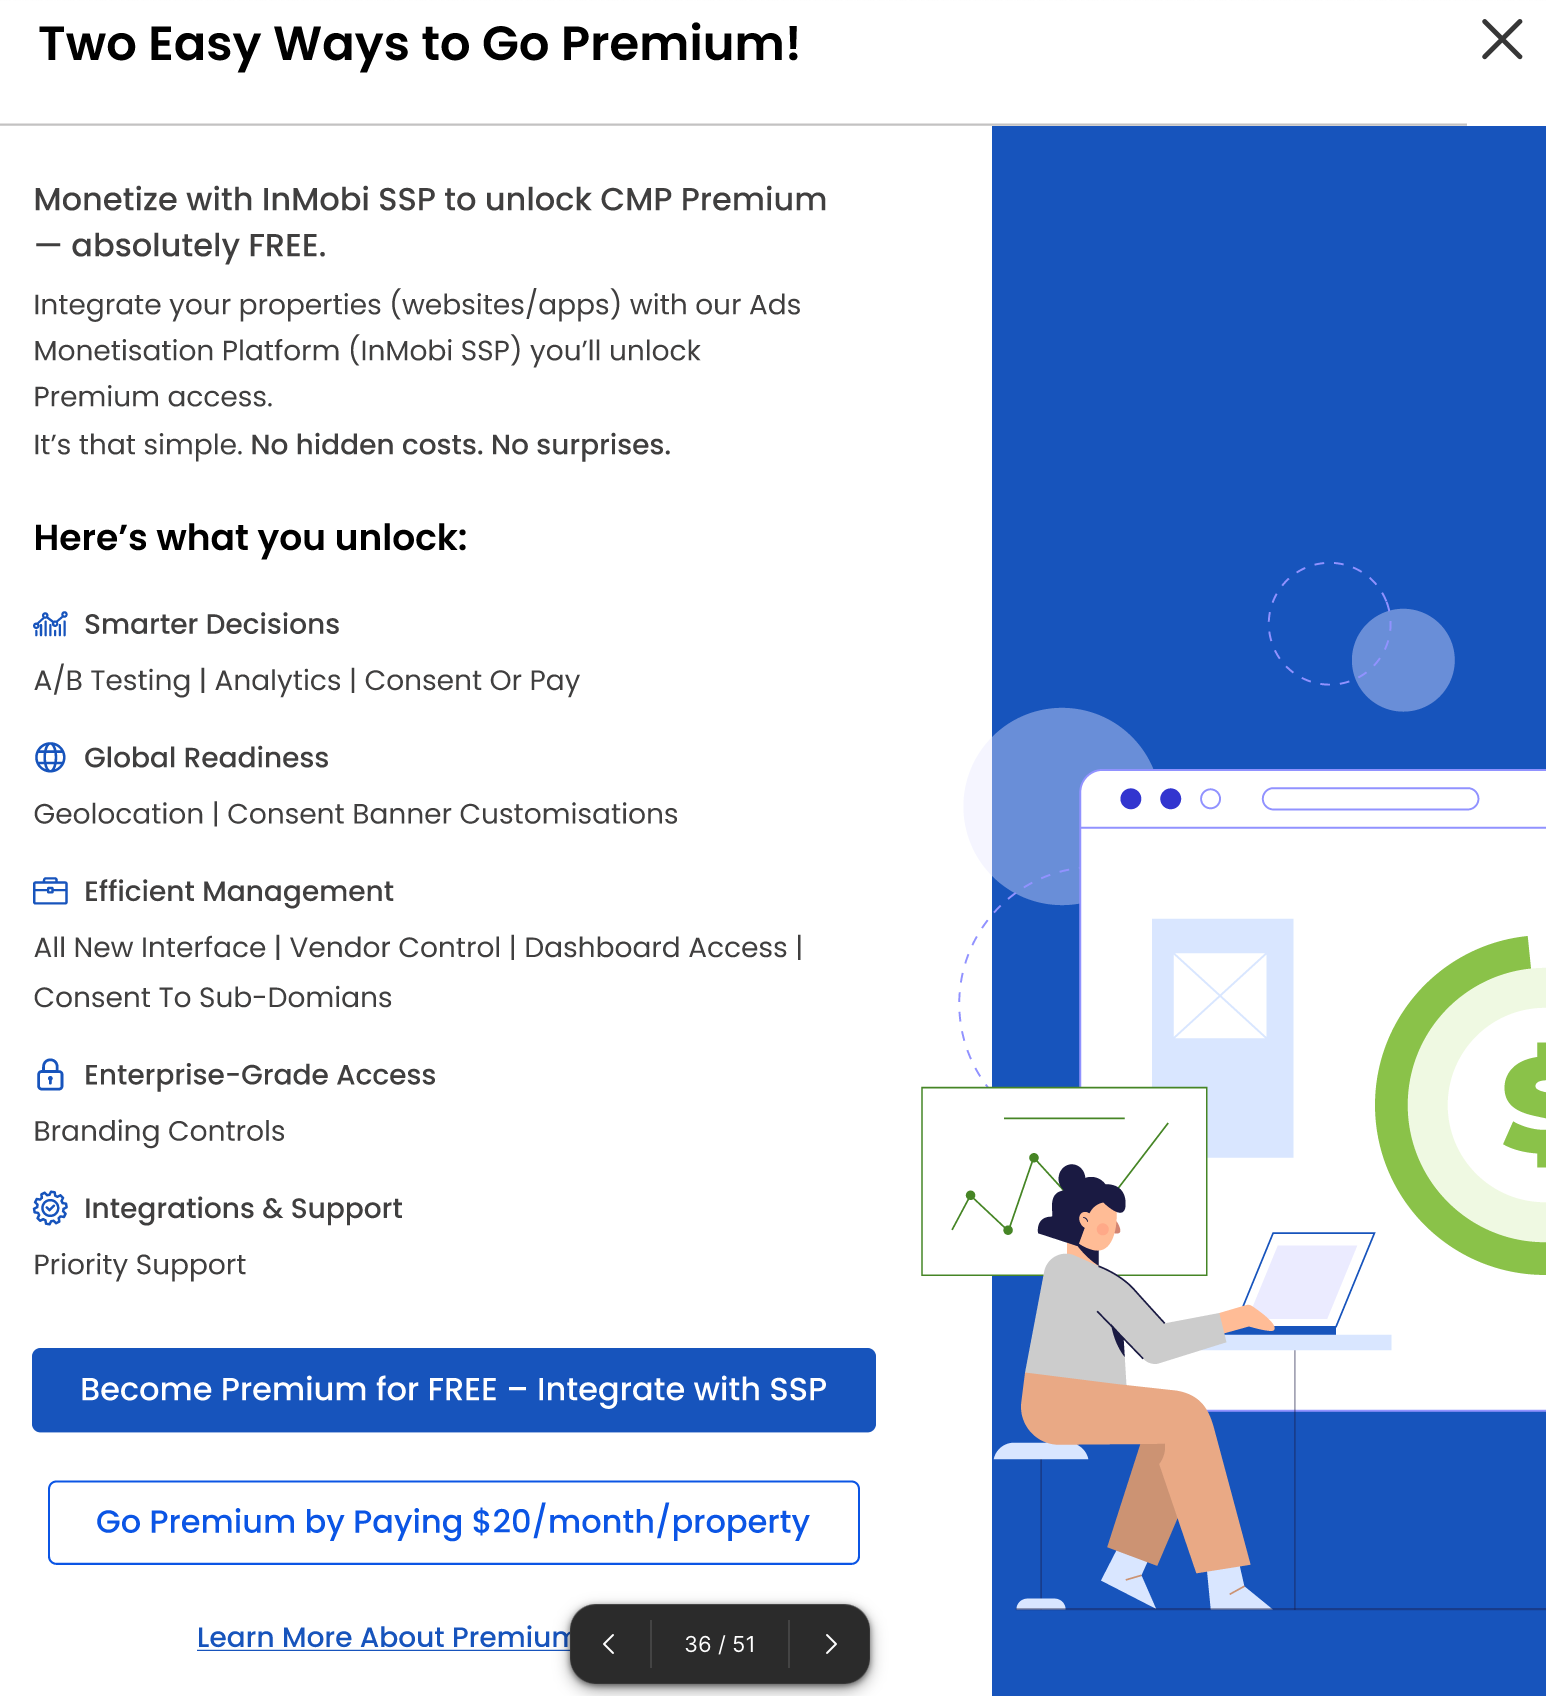
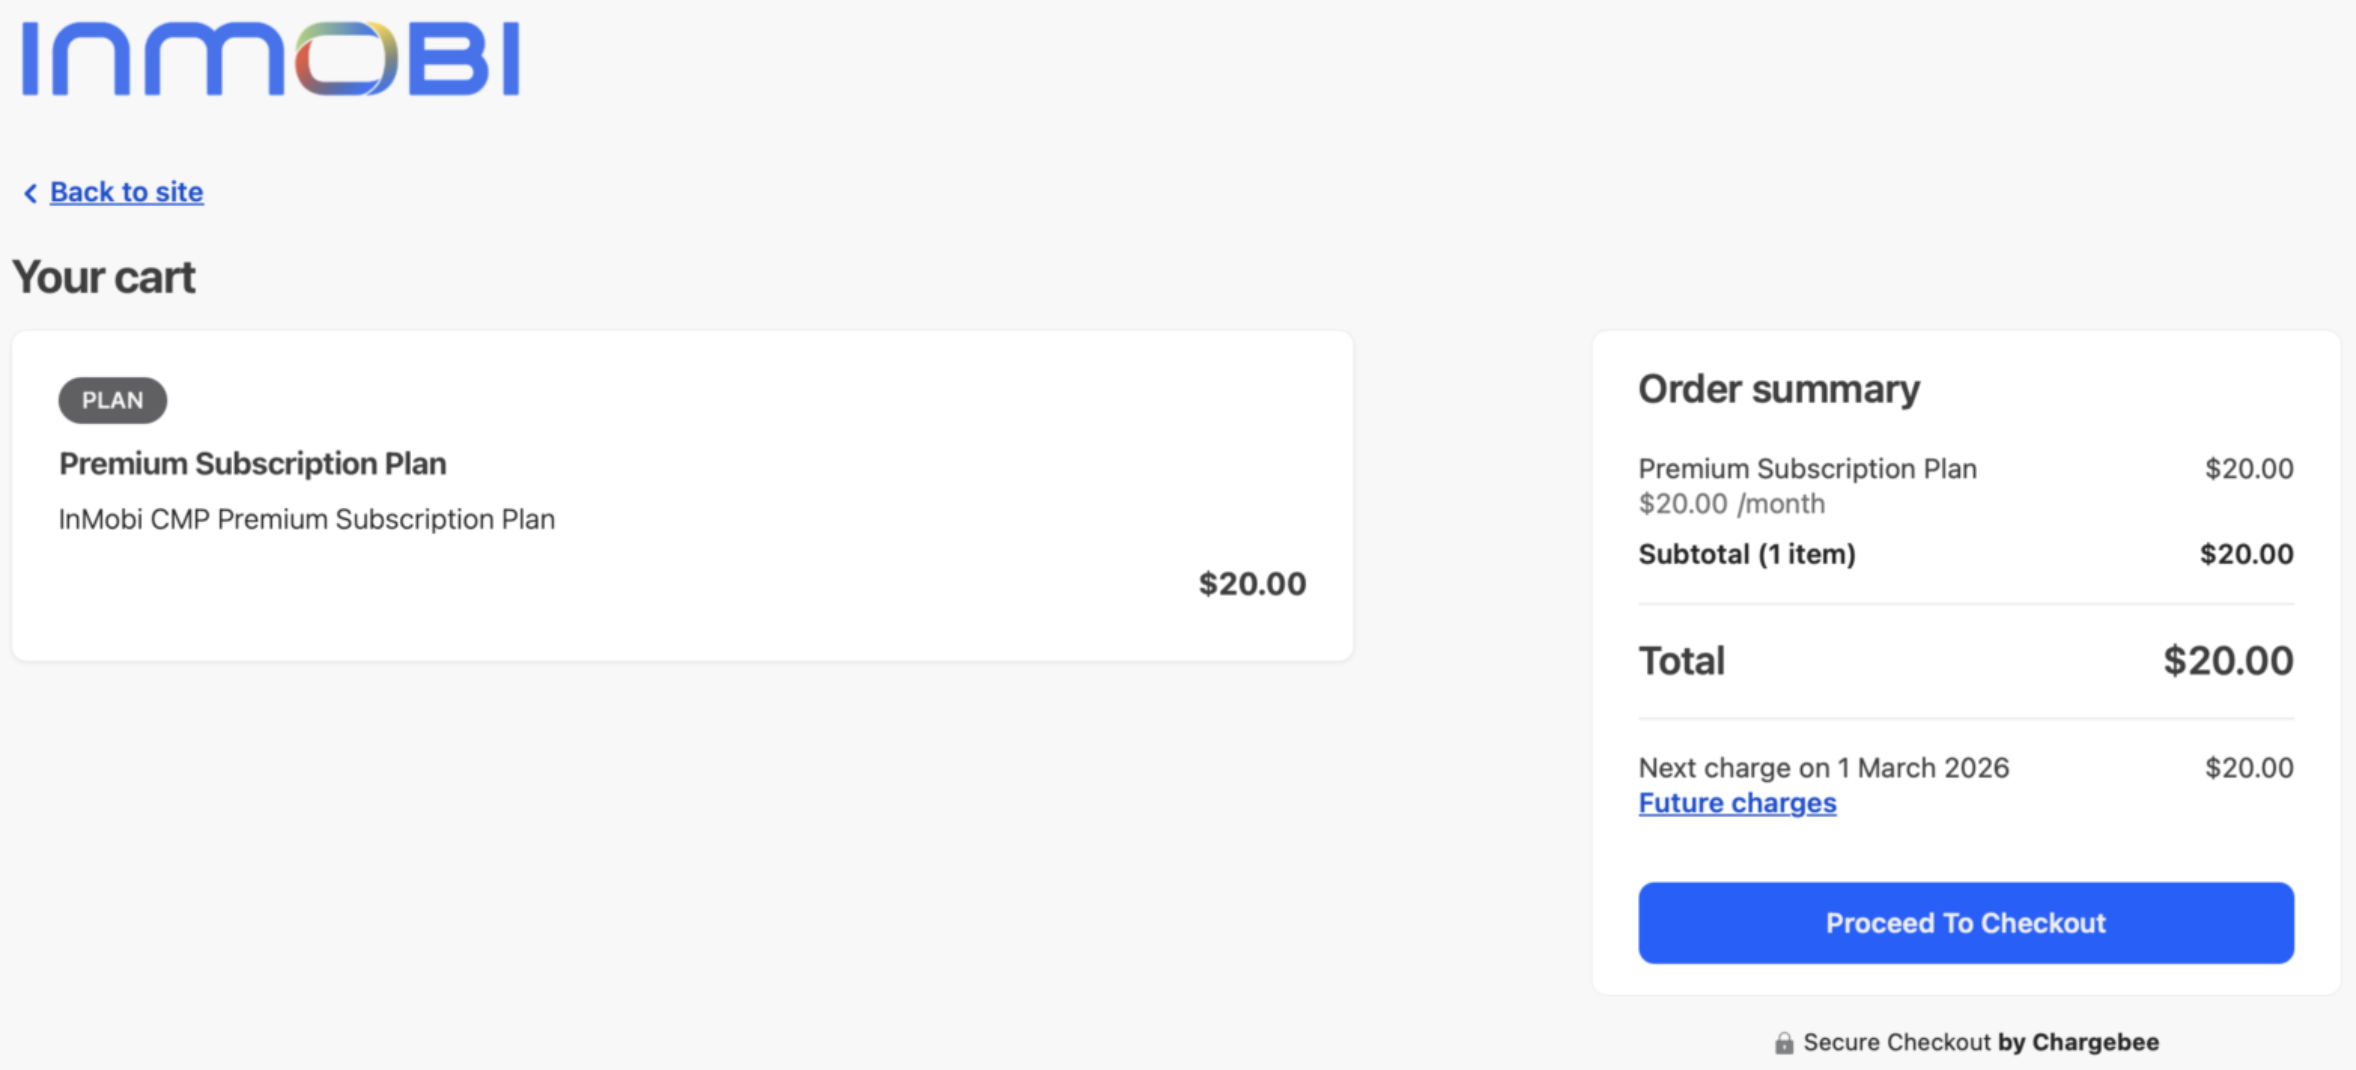
InMobi CMP Premium is an enhanced version of the Consent Management Platform that provides advanced customization, analytics, and monetization options.
Premium access can be unlocked in two ways:
Premium is assigned per property (each app or domain). Each has its own trial, subscription, and integration status.
You retain all compliance-critical features through the Essentials plan, but advanced tools such as custom branding, granular analytics, and Consent-or-Pay will be disabled.
Premium includes the following key features:
Essential features include:
Compliance-critical features will remain in Essentials. However, advanced customization (logo, geolocation targeting, custom vendors, reporting, and branding control) will now fall under Premium.
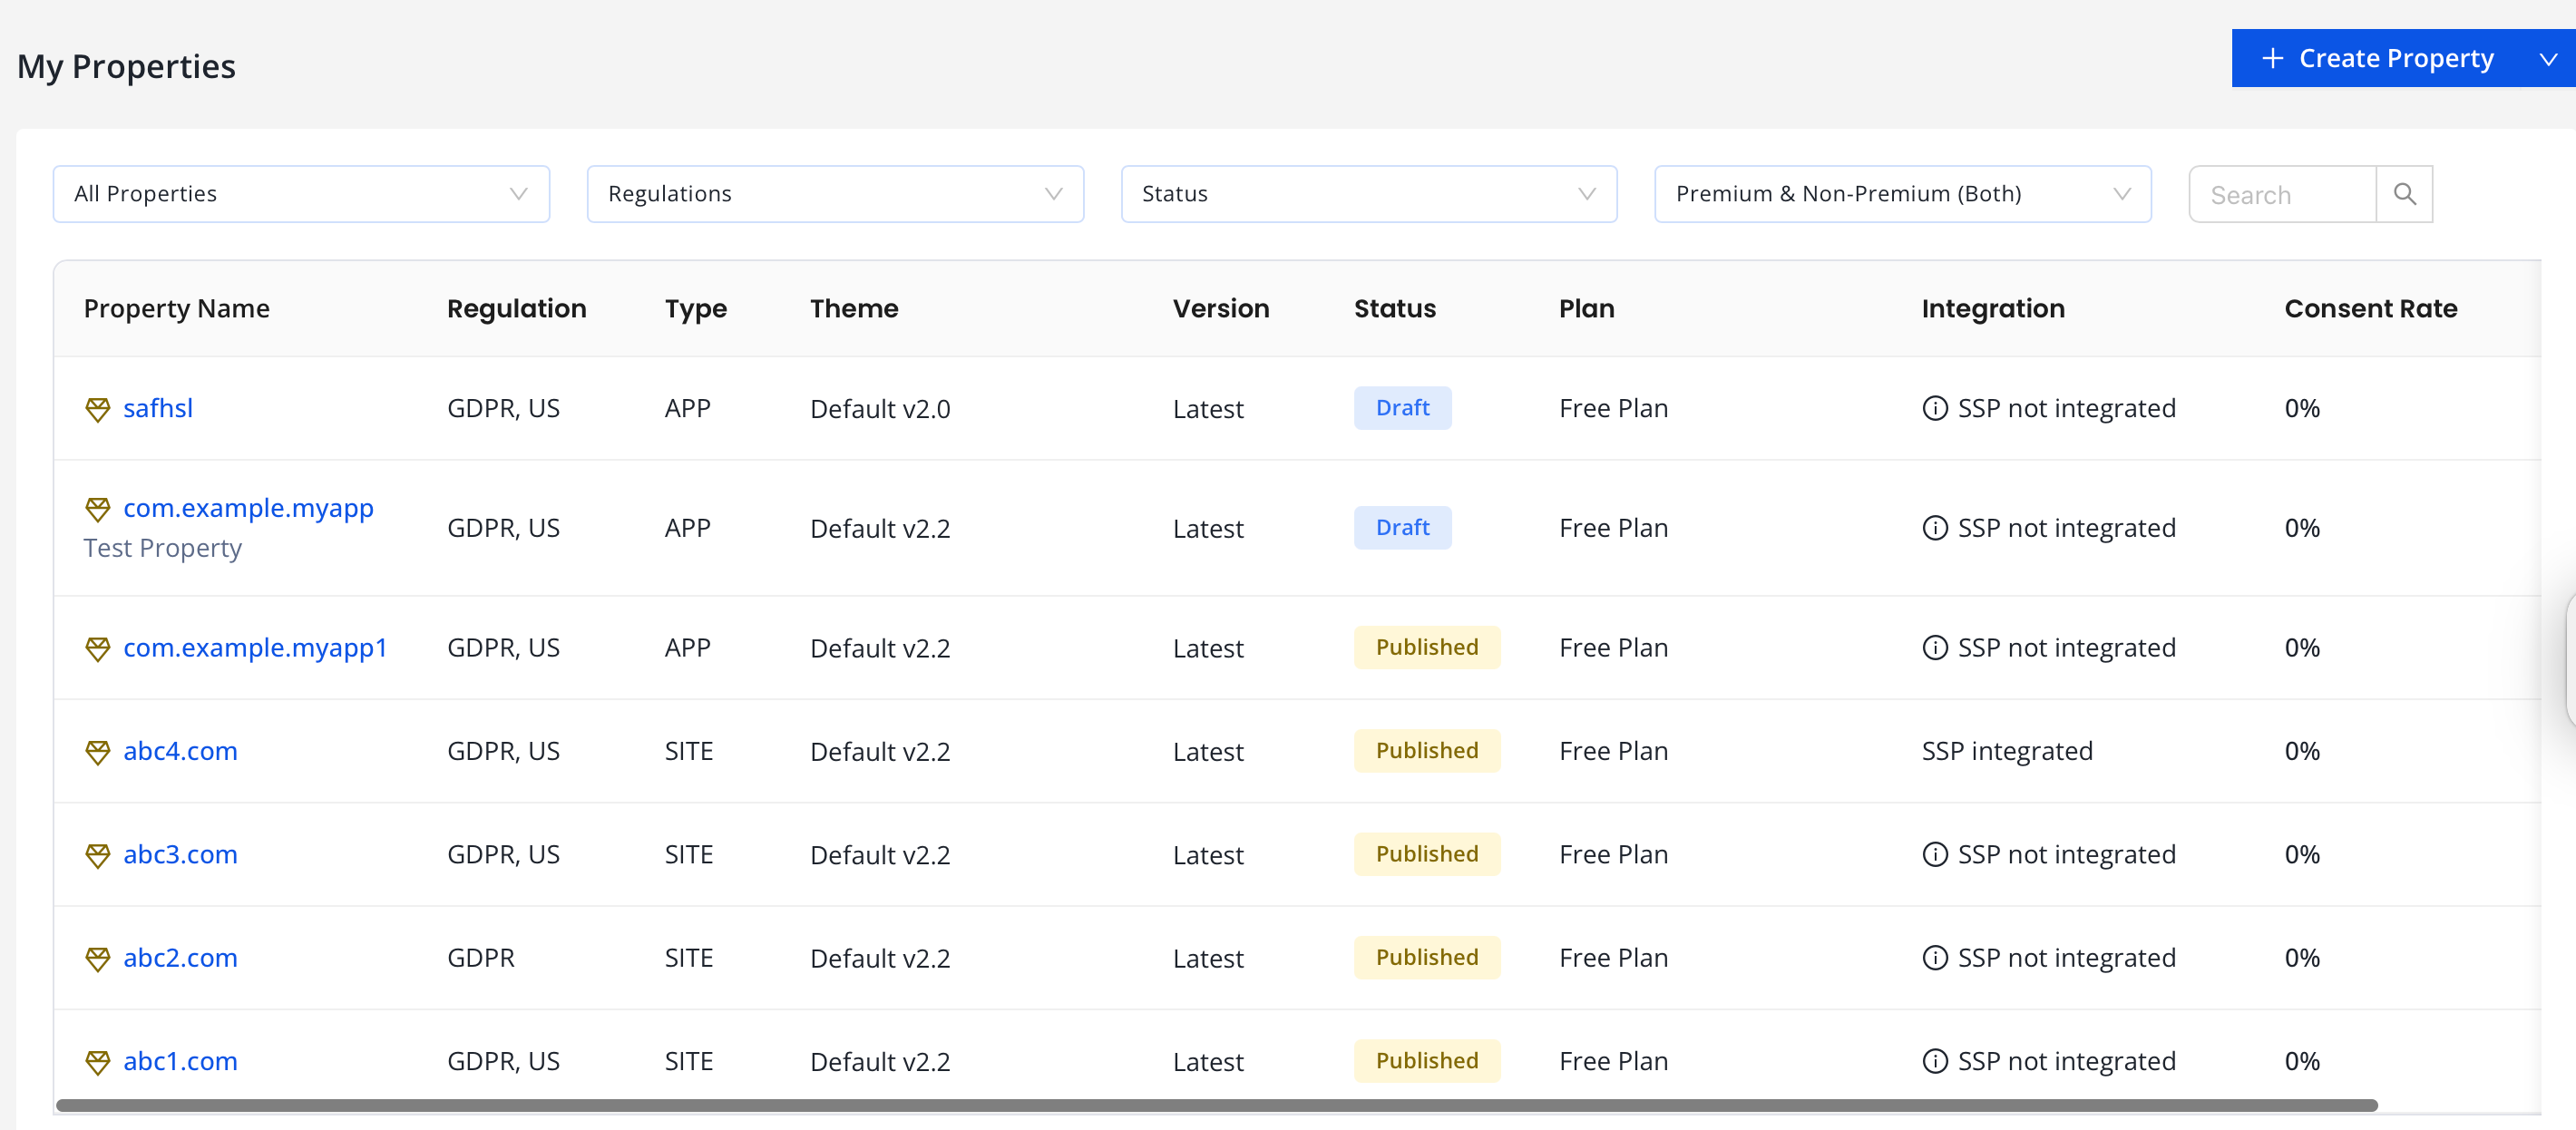
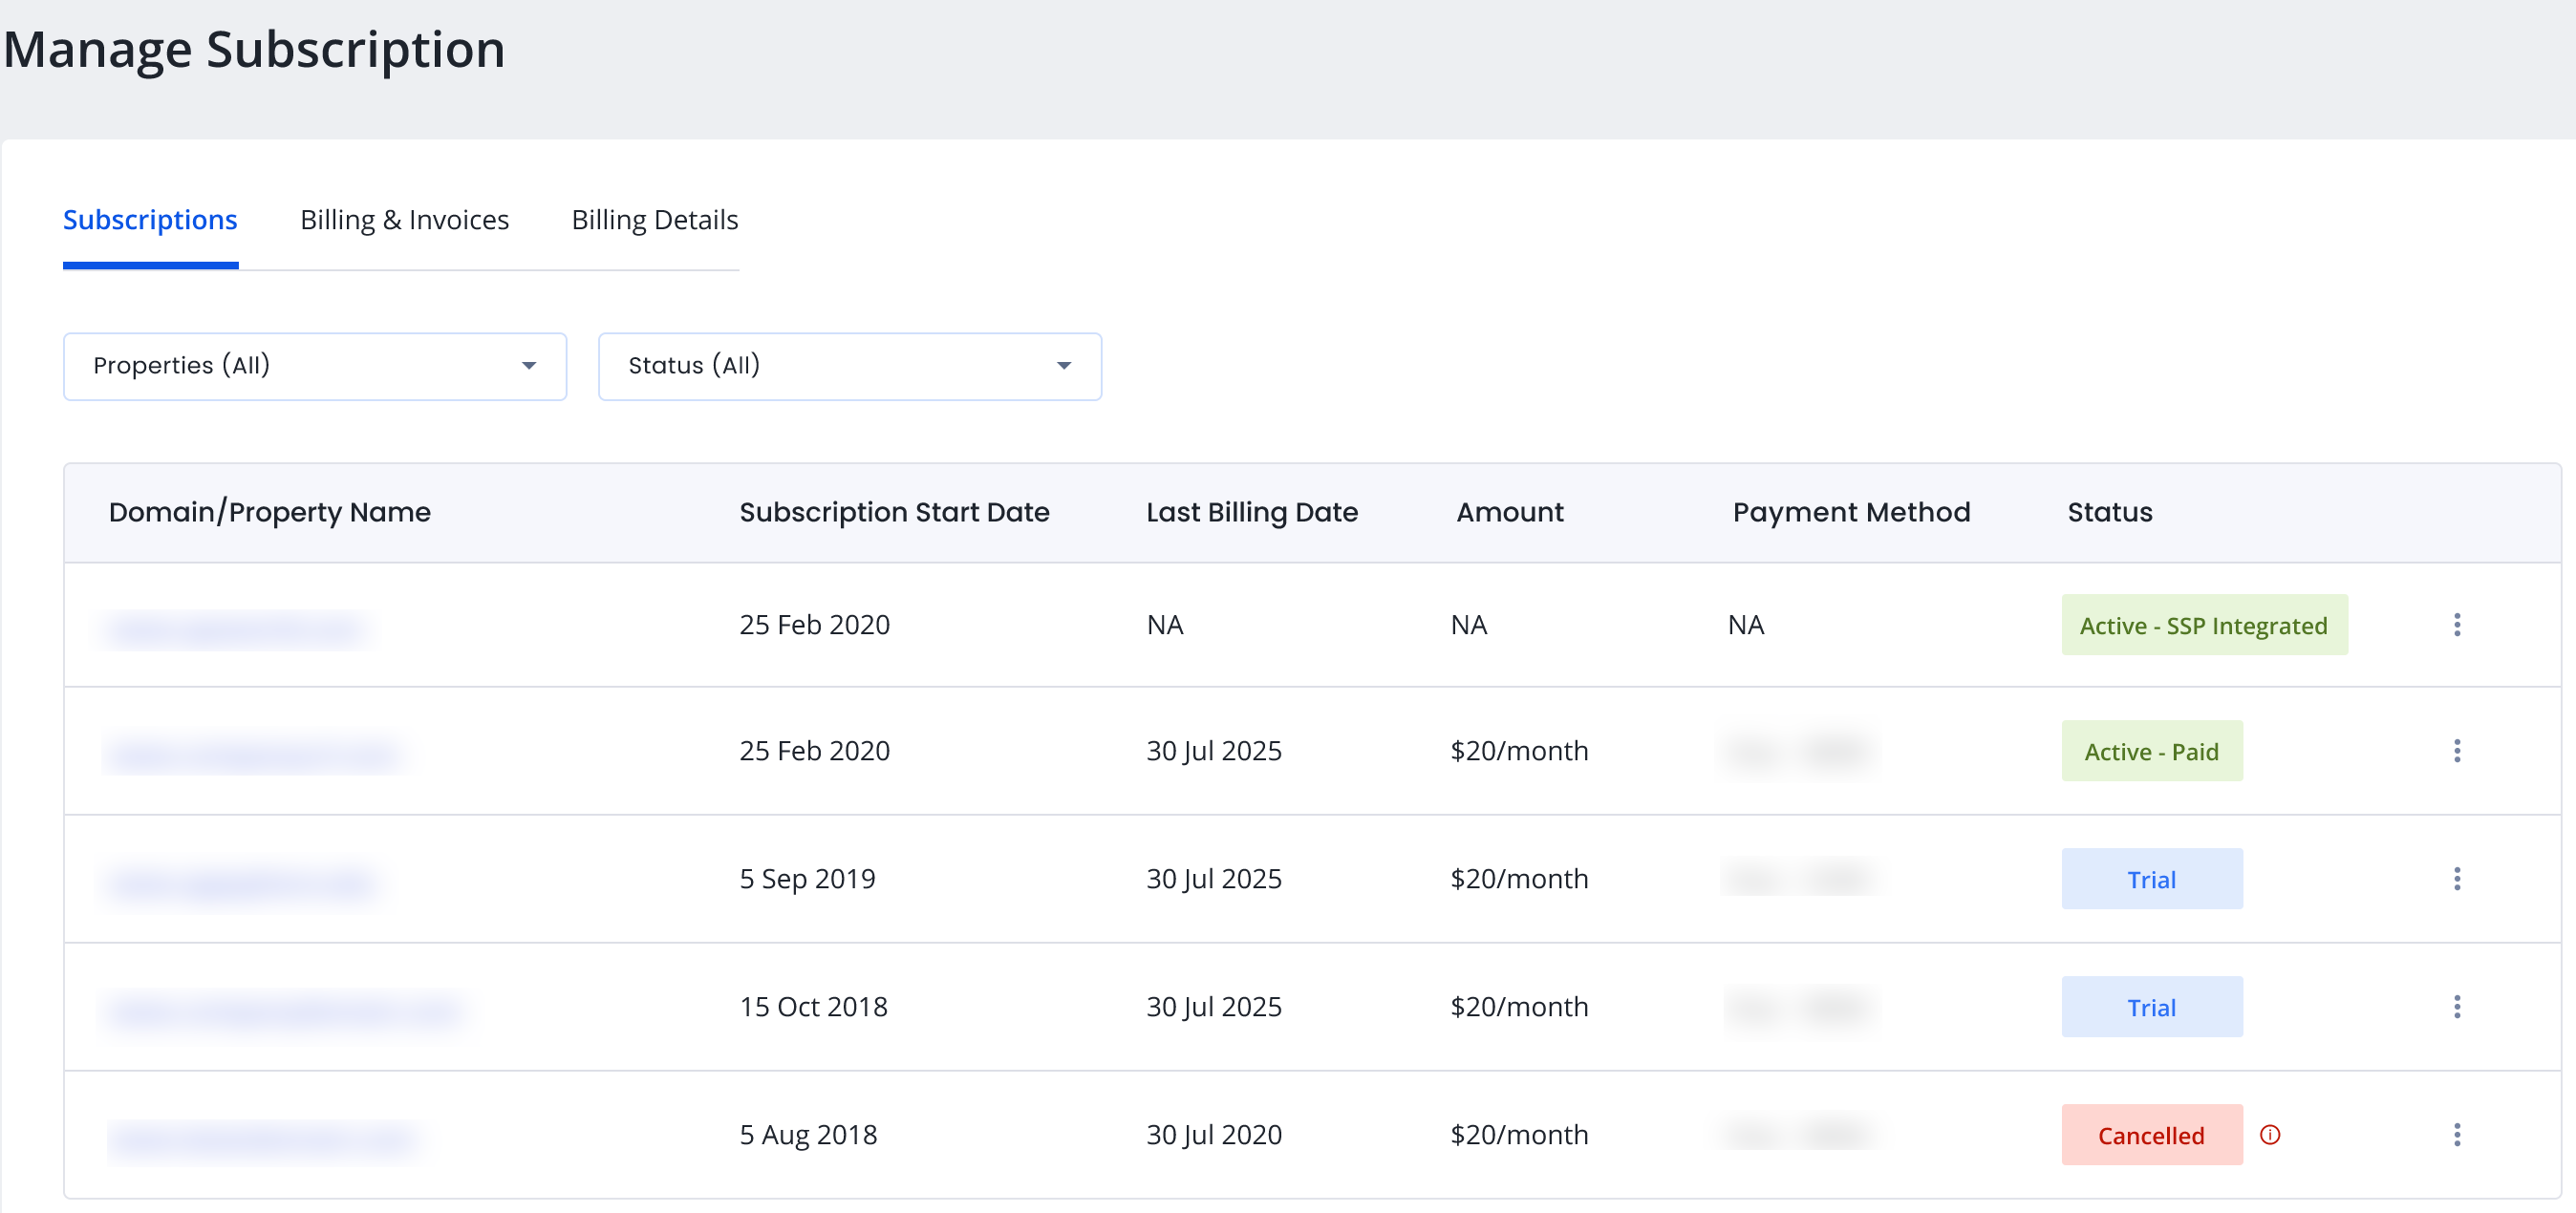
A property is considered integrated when it has rendered at least 500 ad impressions in the past 7 days via InMobi SSP. If eligible, the property status will show “SSP Integrated” in the CMP portal.
If integration fails, CMP provides a 7-day grace period with active Premium features and sends alerts for correction.
Every new property receives a 30-day free trial to explore Premium capabilities.
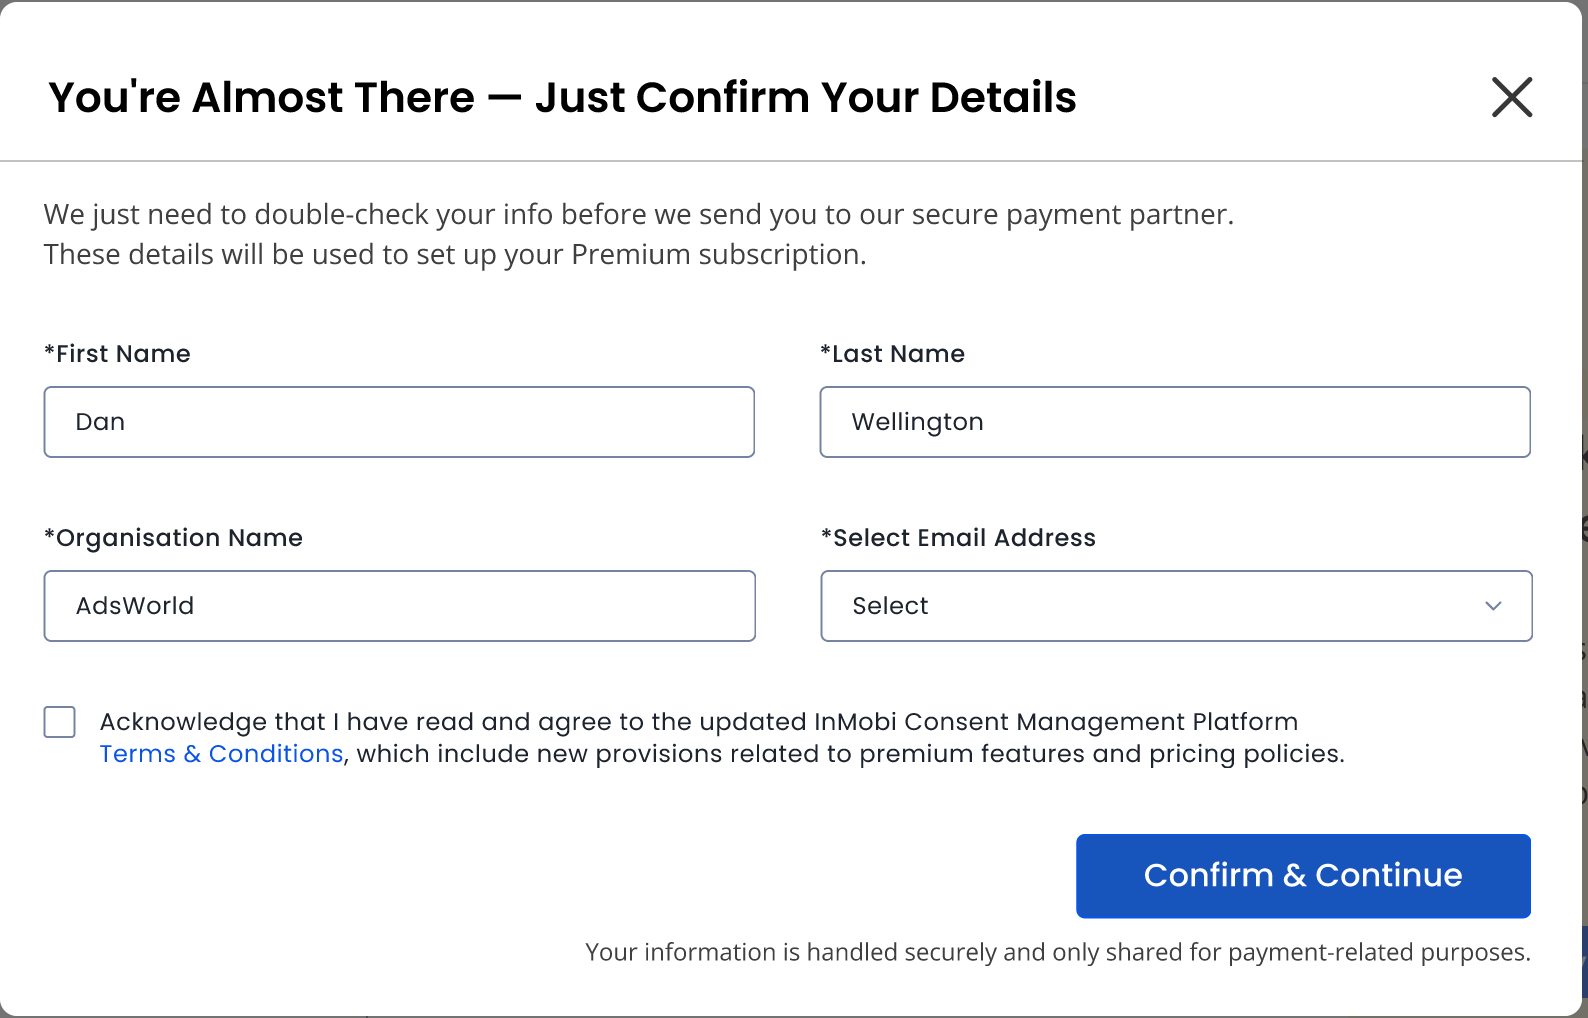
After 30 days, Premium access continues only if:
Yes, if your property maintains 500 impressions per week through InMobi SSP.
Yes, at any time. Compliance remains active, but advanced tools are disabled.
Premium continues as long as the property remains monetized through InMobi SSP. You won’t be double-billed.
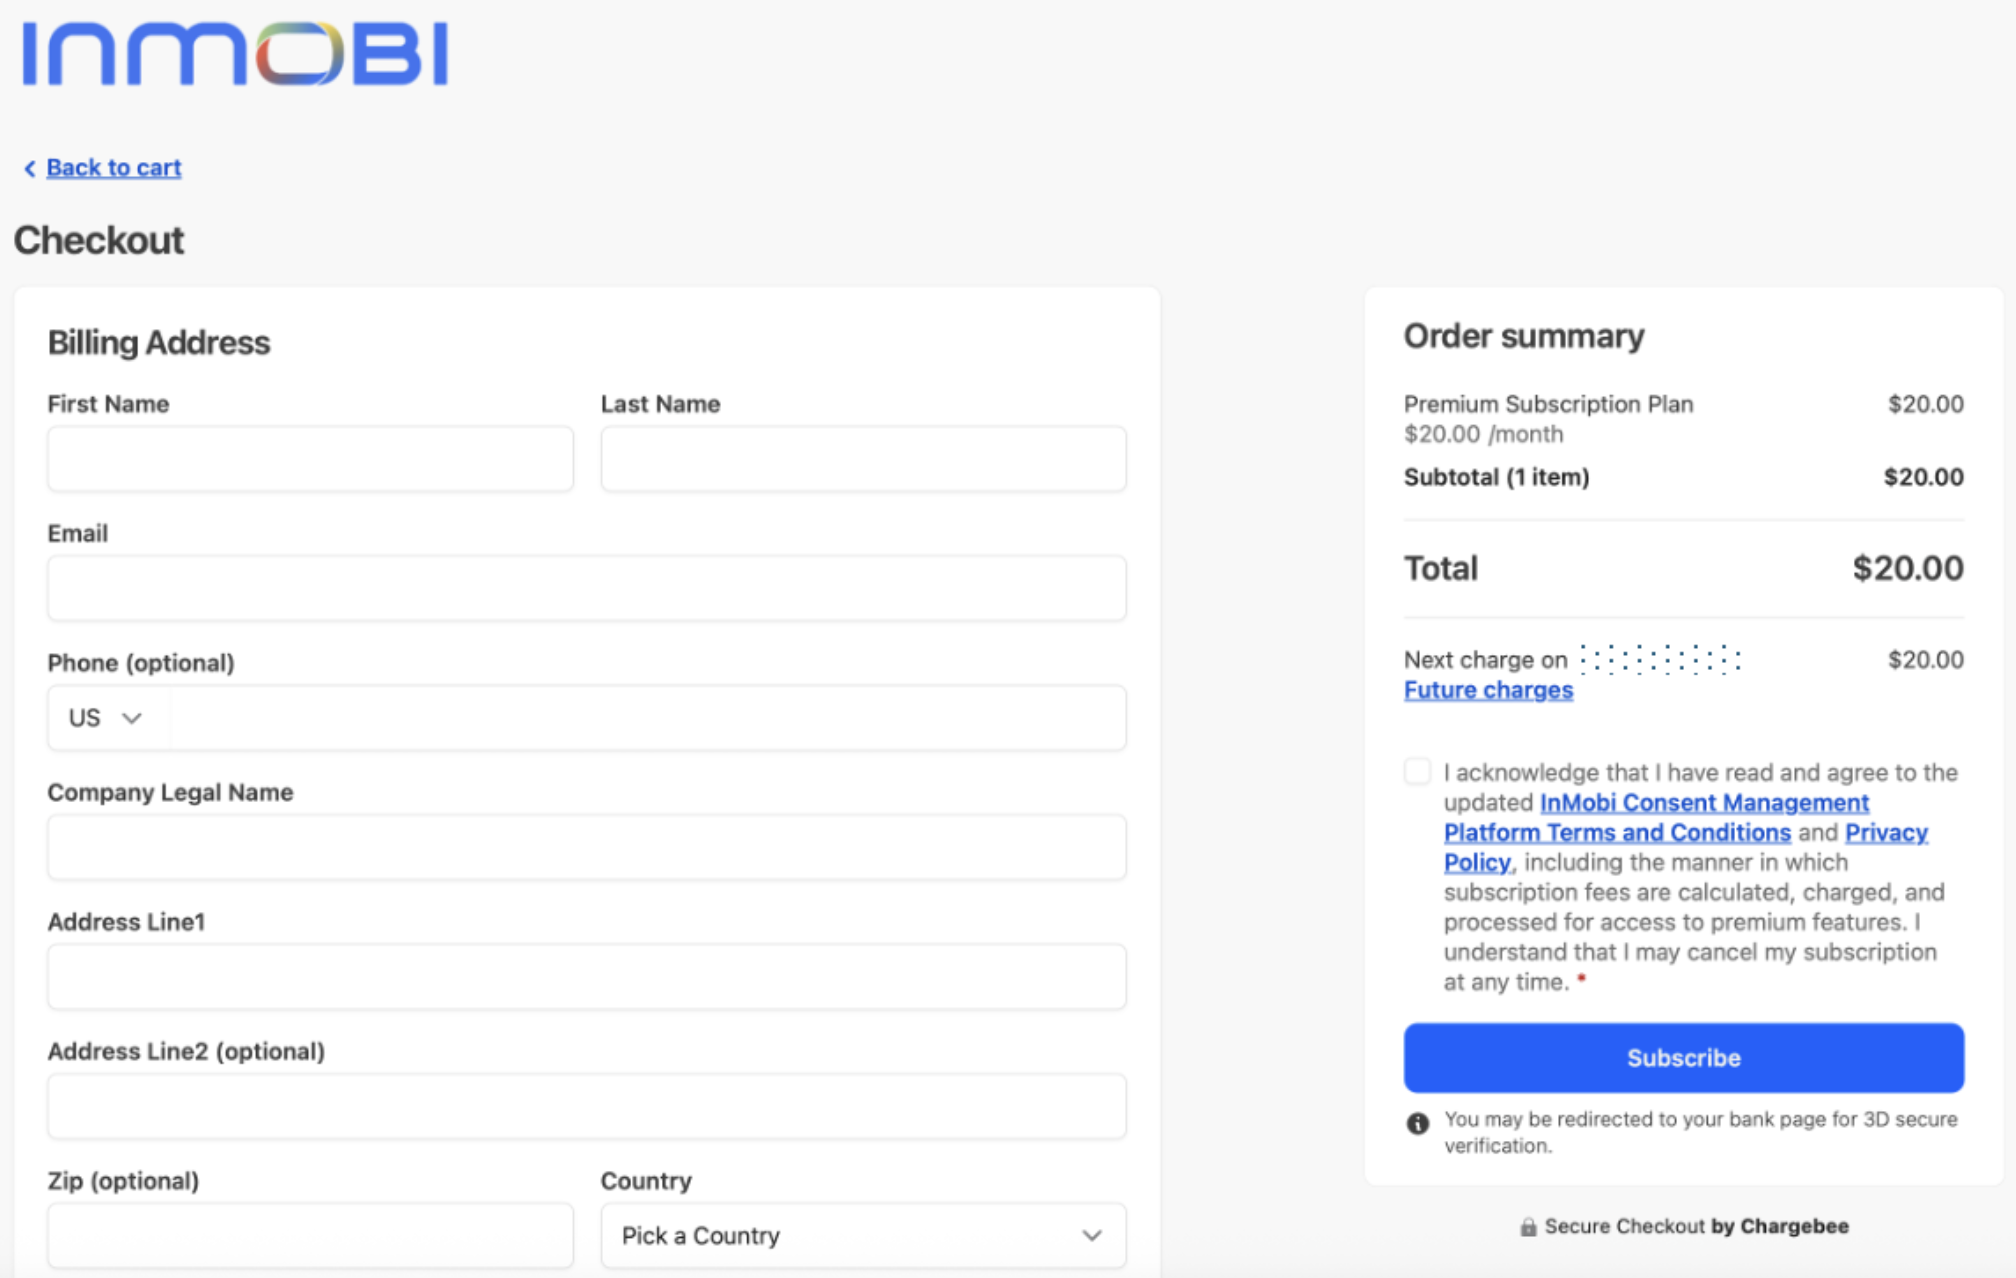
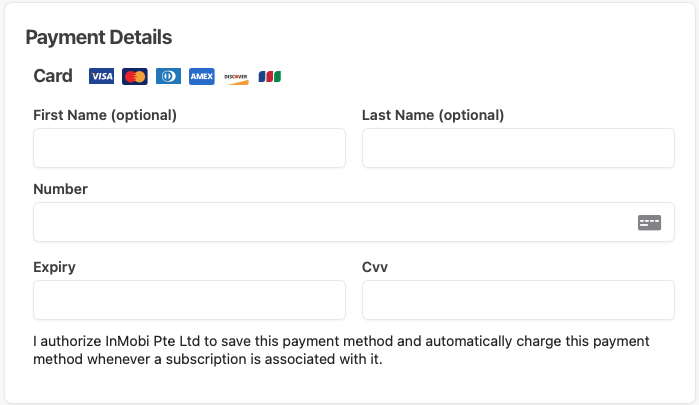
Currently supports credit card payments. Invoices are accessible via the CMP portal under Manage Subscriptions (coming soon).
Payments are retried on Days 1, 3, 5, and 7. During retries, Premium remains active. After failed retries, the property reverts to Essentials. You can cancel anytime, and Premium will stay active until the billing cycle ends.
It allows Premium users to manage custom vendors outside of IAB lists, providing more flexibility in consent collection.
A Premium feature allowing users to either provide consent or pay for ad-free access. For more details, see Overview.
No. Settings are stored and reinstated once Premium access resumes.
SDK reintegration is not required. All plan transitions occur automatically through the CMP dashboard.
CMP runs an automated integration check weekly to verify the impression threshold and monetization linkage.
Yes. Each newly added property, whether by a new or existing publisher, gets a 30-day free trial.
Yes. CMP sends email and in-app notifications for trial expiry, payment retries, integration failures, and access changes.
CMP Premium is priced at USD20 per domain per month. Pricing is handled via a monthly subscription model and billed automatically at the start of each cycle.
You can check the SSP integration status of your properties on the My Properties page. The CMP dashboard will provide the following information:
A property is marked as Premium with a 'diamond' icon in the CMP dashboard when Premium features are enabled. The status clearly indicates whether access is via subscription, SSP integration, or special access.
A grace period provides temporary Premium access after:
This allows time to resolve issues before access is revoked.
No. Subscriptions can only be created for active properties.
No. Each property can have only one active subscription at a time.
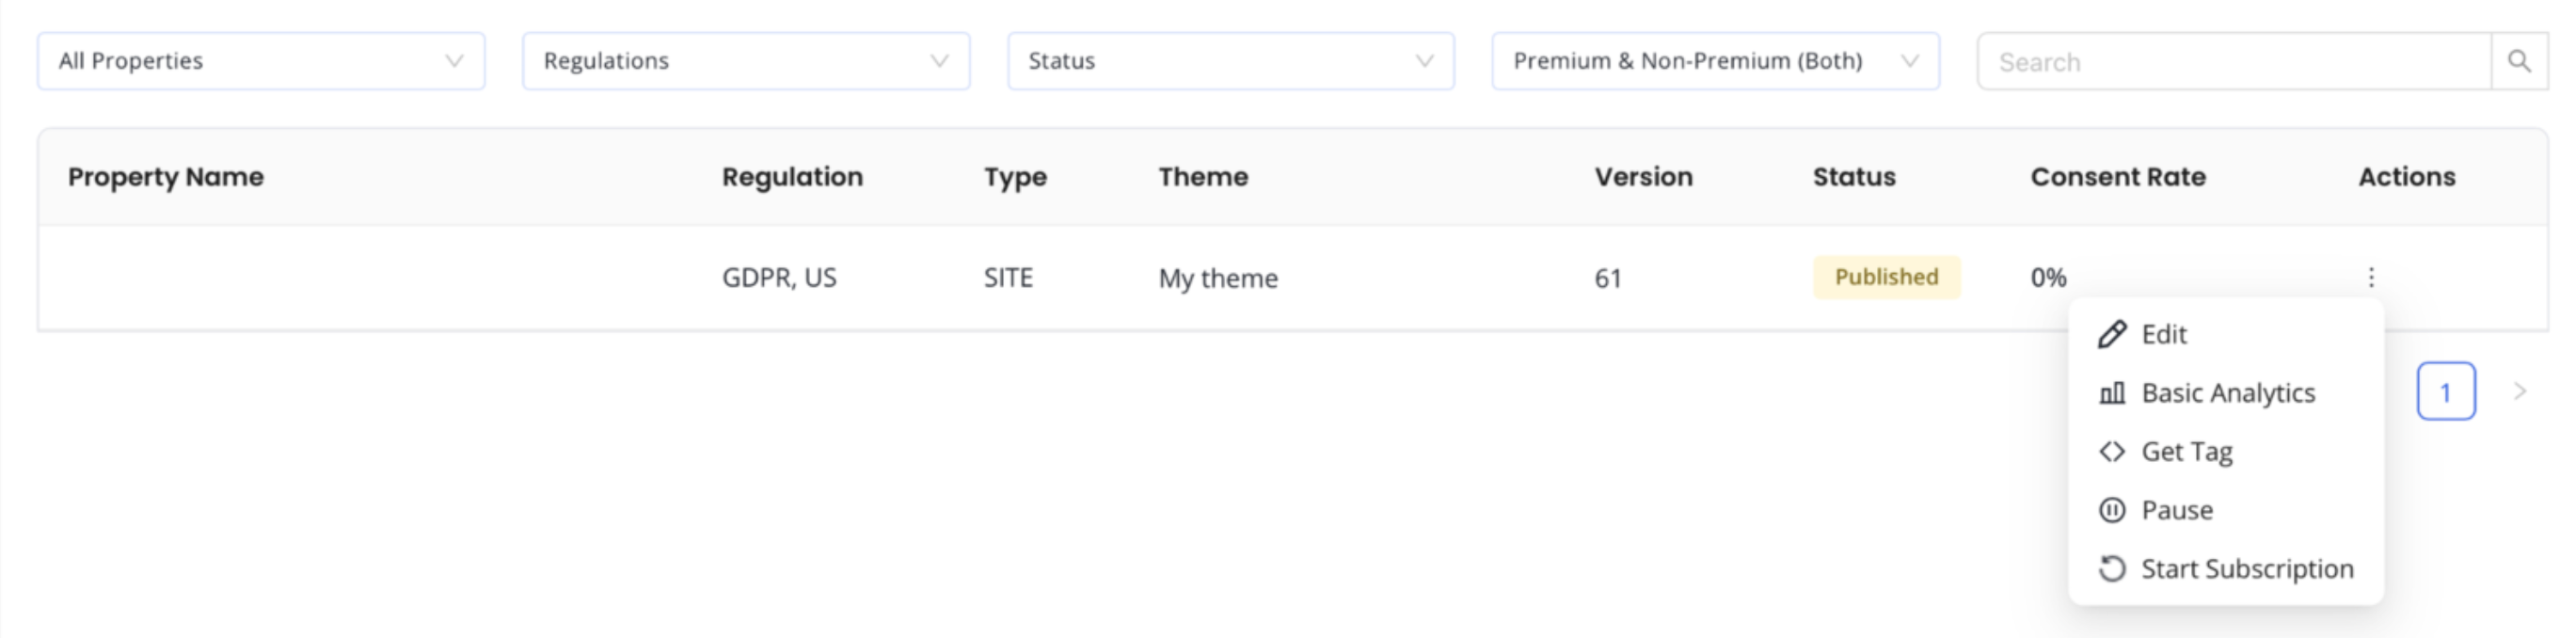
Subscriptions can be:
Subscription status as "Future' usually means:
A subscription may be cancelled due to:
No. Card details are securely handled by our PCI-compliant payment partner and are not stored by InMobi.
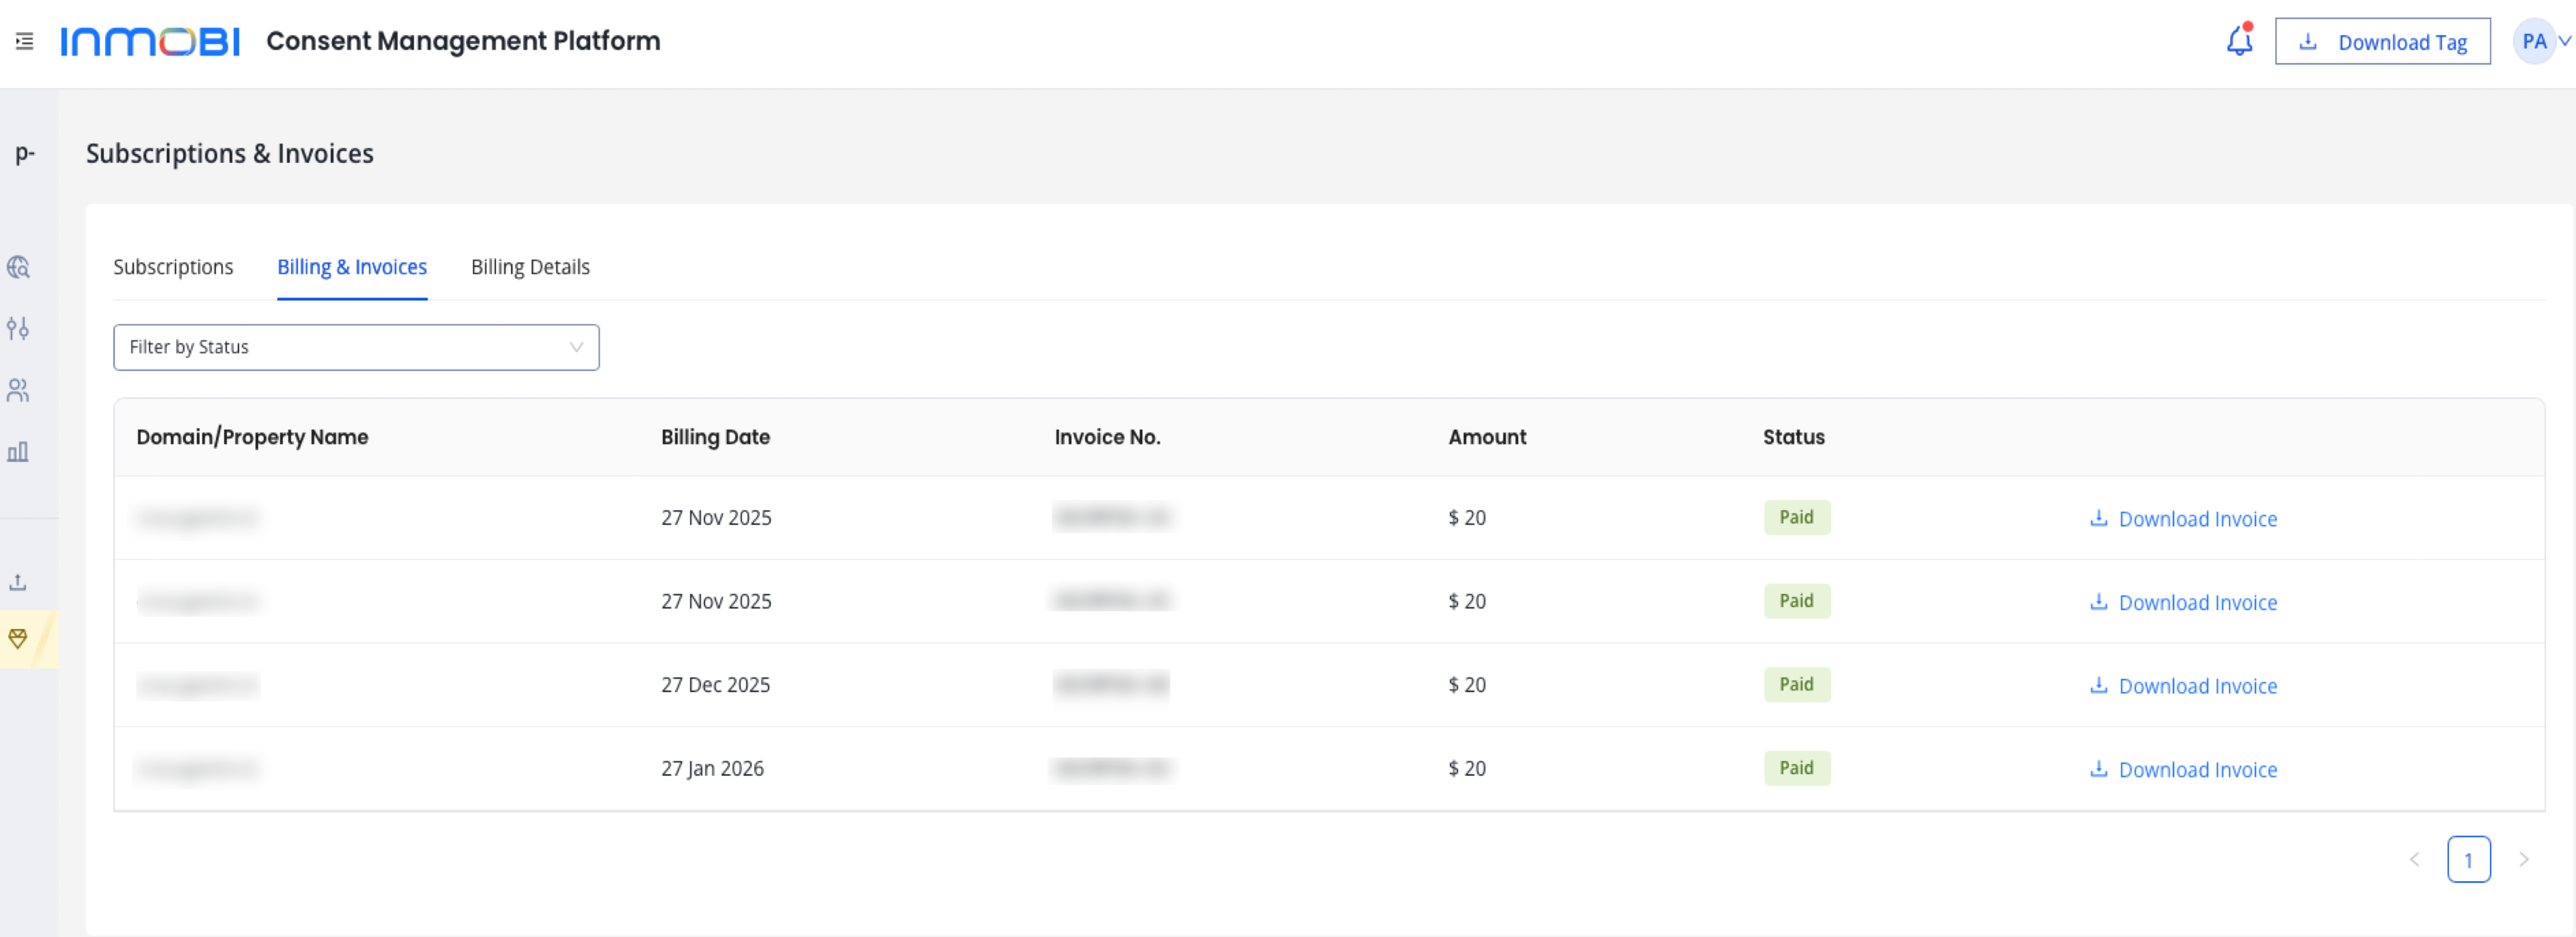
Invoices are available under Billing & Invoices in the CMP portal for all completed billing cycles.
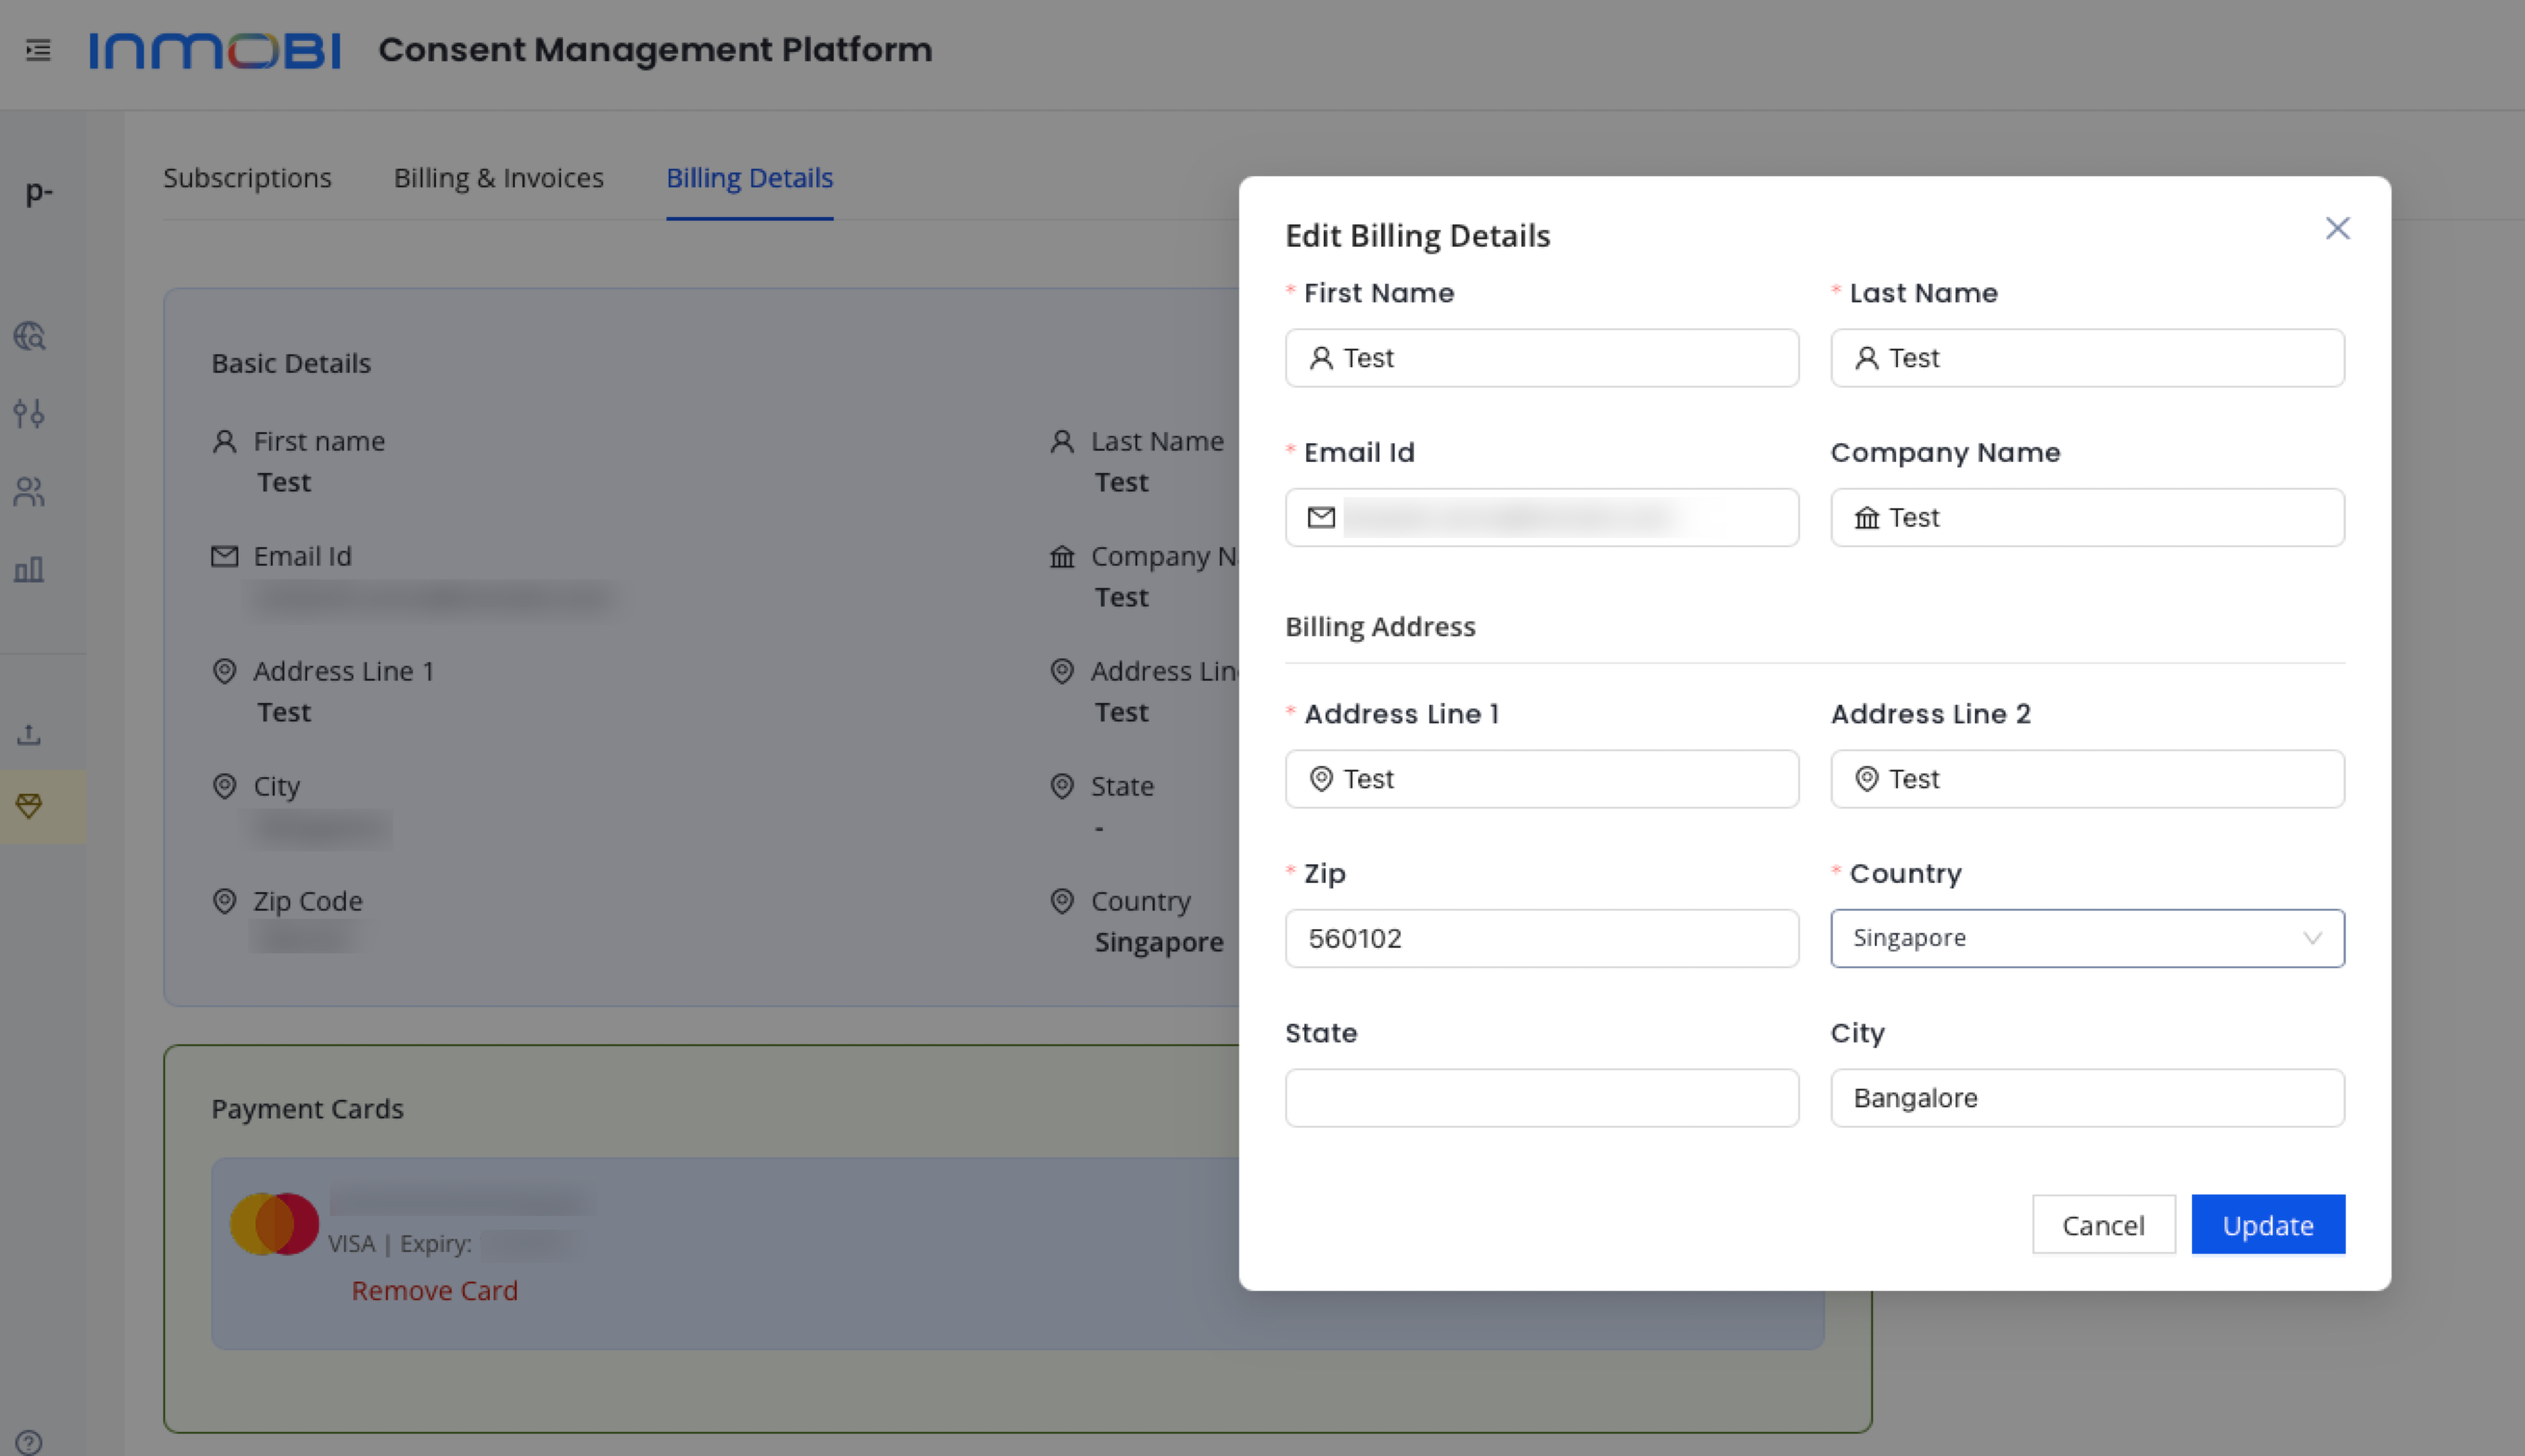
Billing details can be updated from the CMP portal. Changes apply to future invoices only.
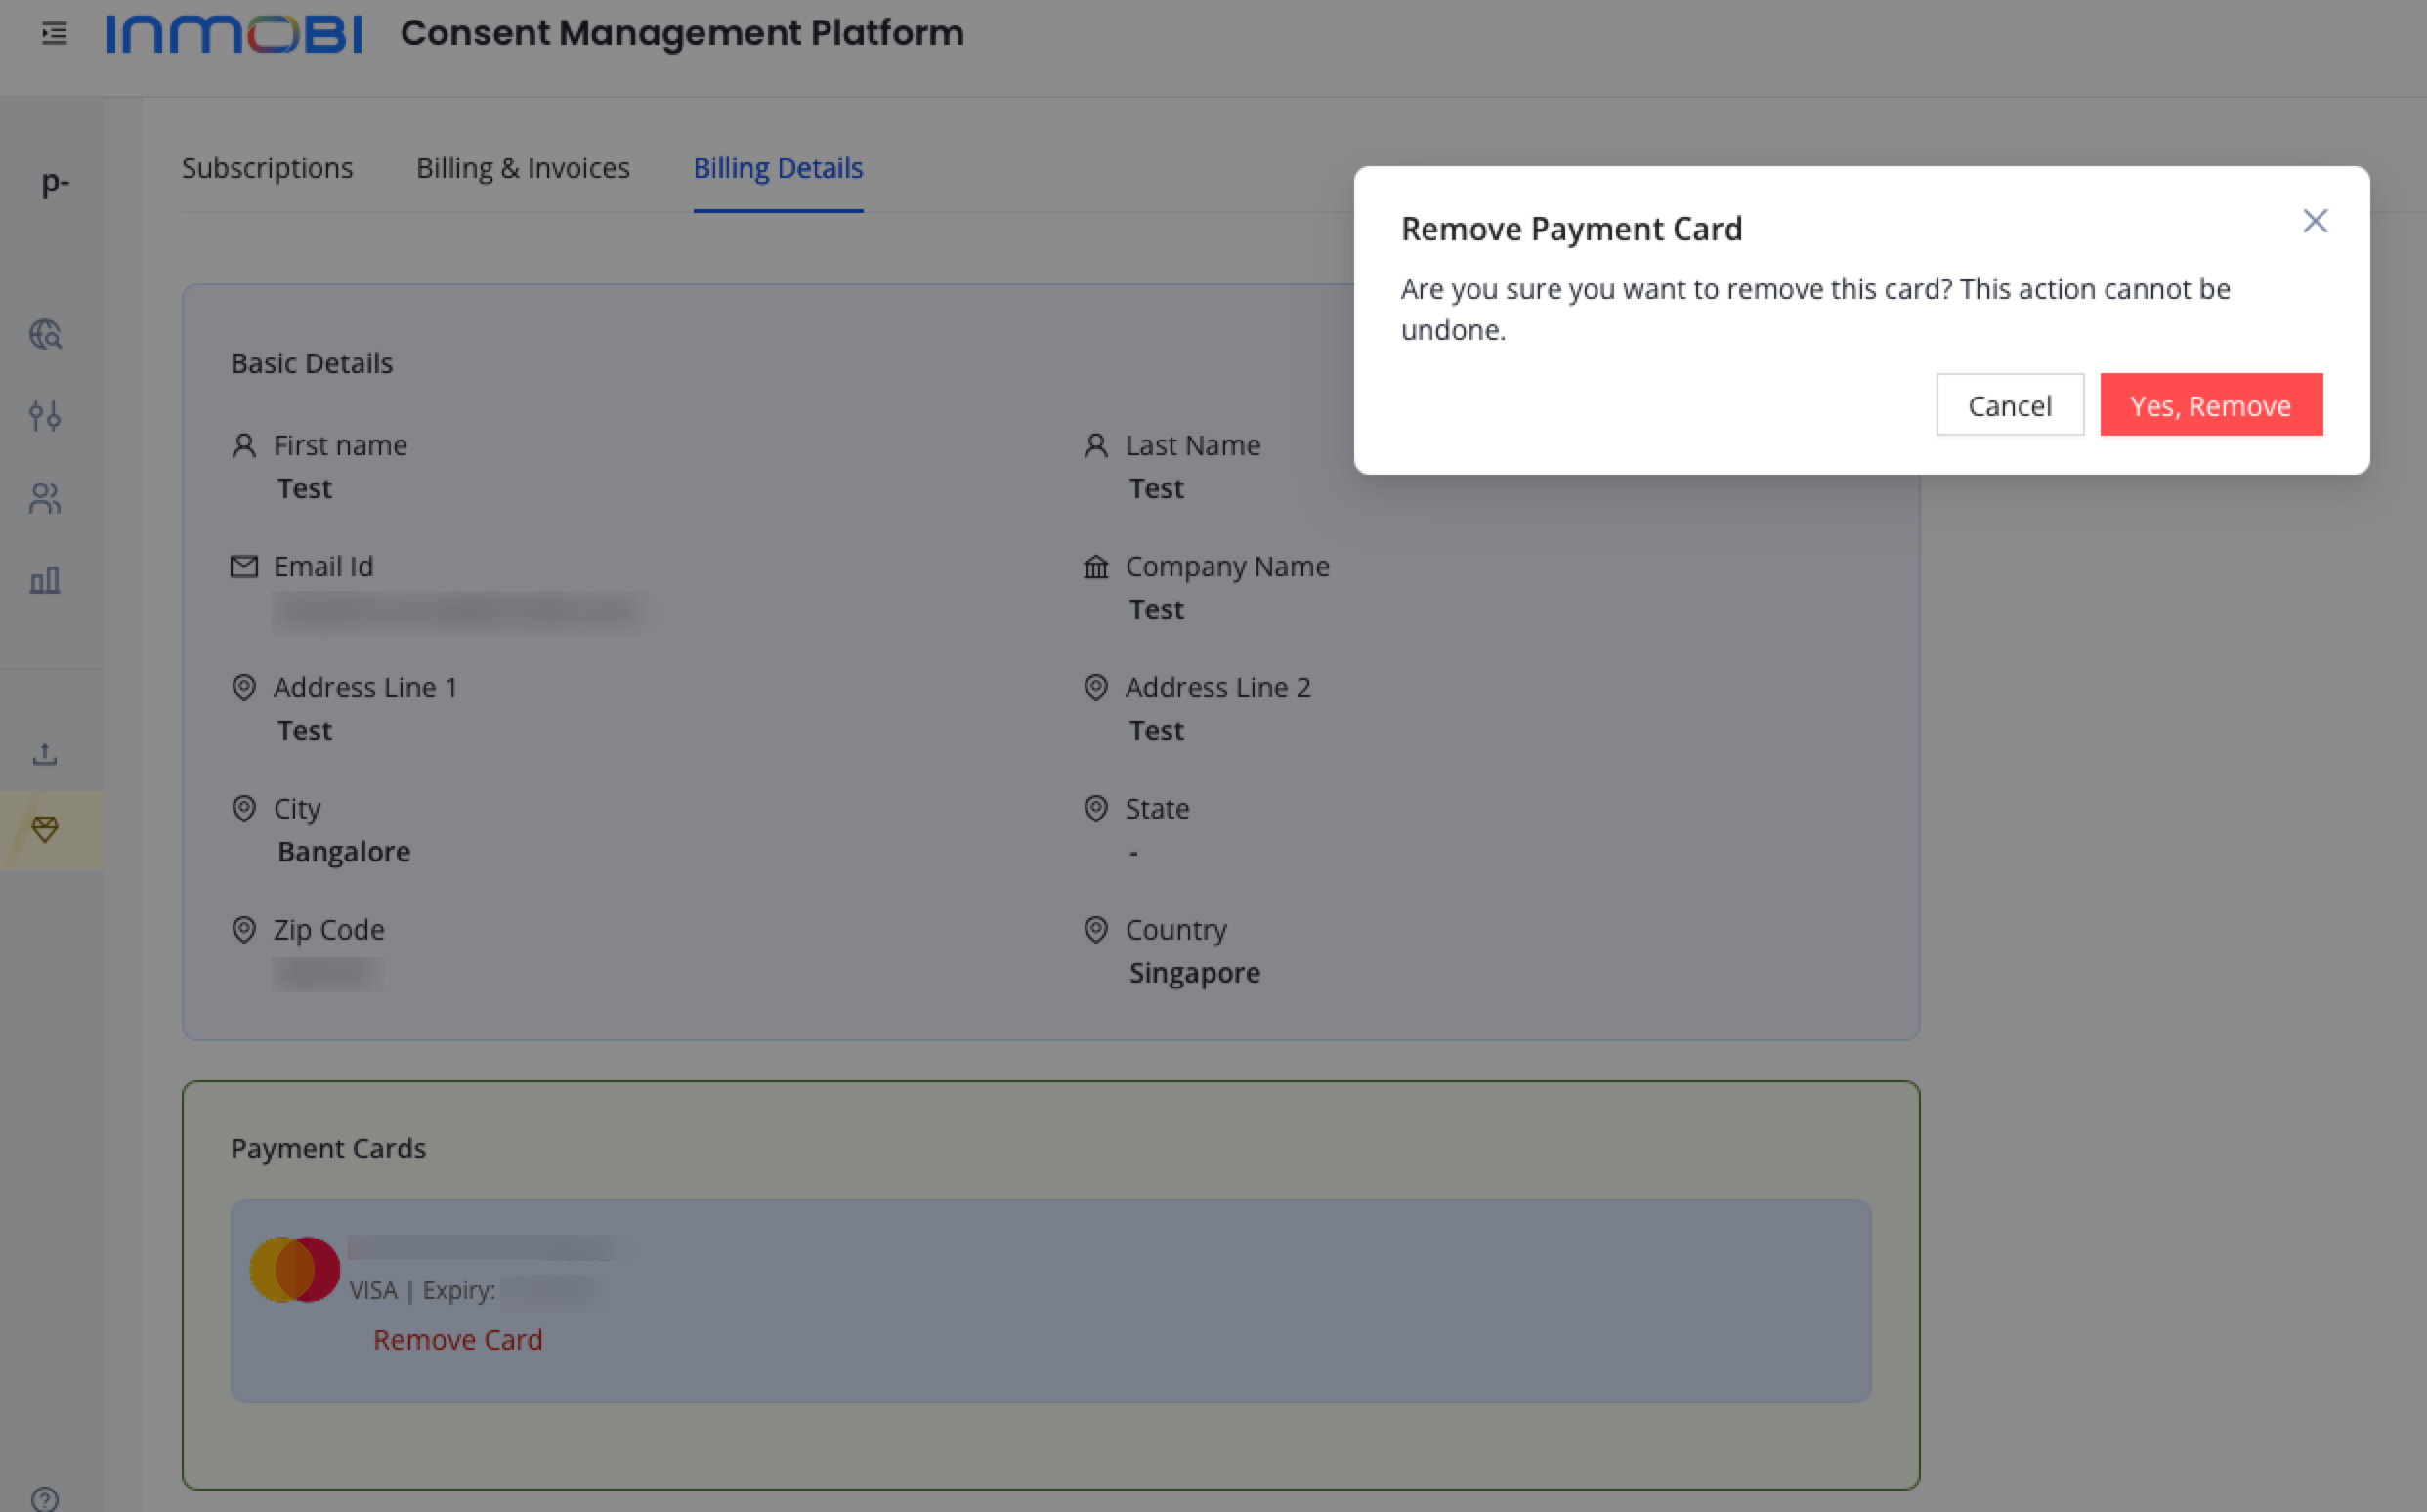
You can remove a card from Payment Cards under Billing Details. Your Primary card will be used for future billing. We suggest canceling the subscription before removing a card if you don't wish to be billed for a subscription.
GST is applicable only if your billing address is in Singapore. It will be charged at 9%.
For further assistance, Contact Us.
This topic provides a comprehensive overview of InMobi CMP Premium vs Essentials for publishers and partners to understand benefits, eligibility, billing, and advanced features.
InMobi CMP offers two tiers — Essentials (free) and Premium (paid or free with SSP integration). Essentials ensures compliance with privacy regulations like GDPR and CCPA, while Premium provides deeper customization, analytics, and revenue optimization.
| Feature | Essentials (Free) | Premium |
| Pricing | Free for all apps/sites | $20 per domain/month or free via SSP integration |
|
Branding & Look & Feel |
Basic customization (text, color, CSS theme) | Full branding control (logo, fonts, light/dark themes) |
| Analytics | Basic analytics & audit logs | Granular analytics by region, device, and regulation |
| Targeting | Standard consent templates and global privacy control | Geolocation & sub-domain targeting |
|
Vendor Management |
IAB vendor support only | Custom vendor management (non-IAB vendors supported) |
|
InMobi Branding |
Displayed on consent banner | Option to remove InMobi branding (coming soon) |
|
Consent Models |
Standard consent |
Consent-or-Pay (coming soon) |
Premium access enhances brand trust, compliance management efficiency, and revenue optimization while giving publishers full creative and analytical control over their consent workflows.
Premium users can upload logos, apply custom fonts, and align consent banners with their brand theme. Essentials users are limited to basic text and color customization.
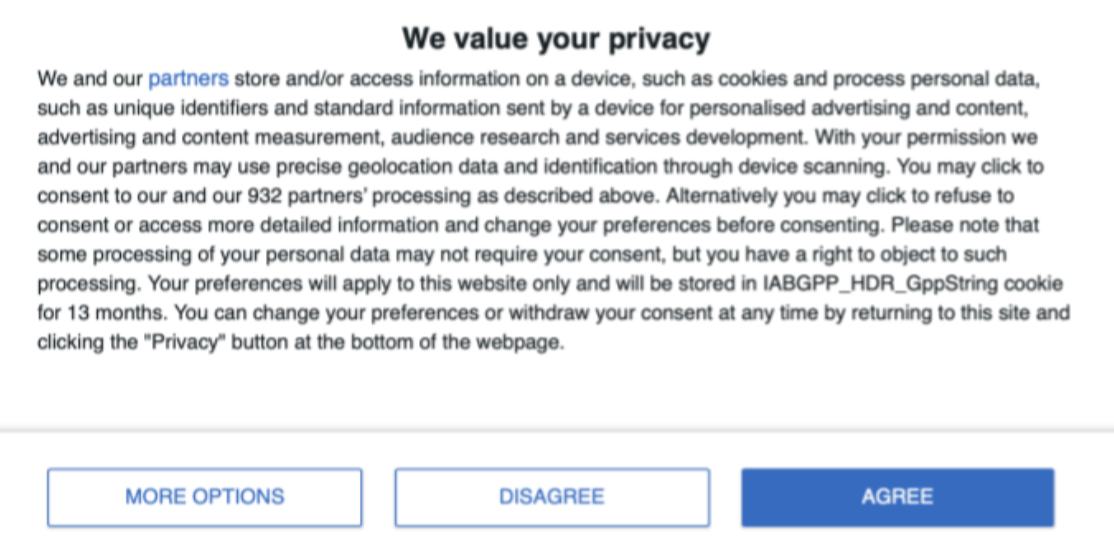
Consent modal without your brand logo.
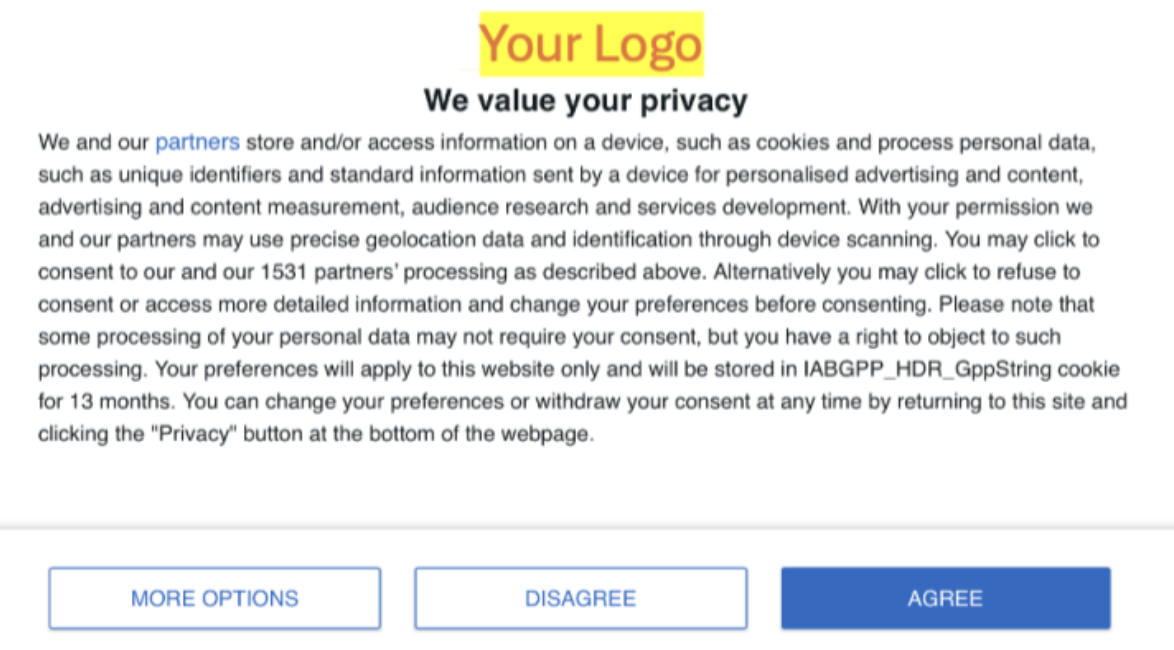
Consent modal with your brand logo.
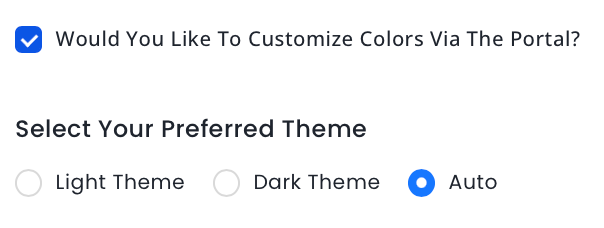
Available exclusively to Premium users, enabling adaptive themes for mobile apps to ensure better user experience across platforms.
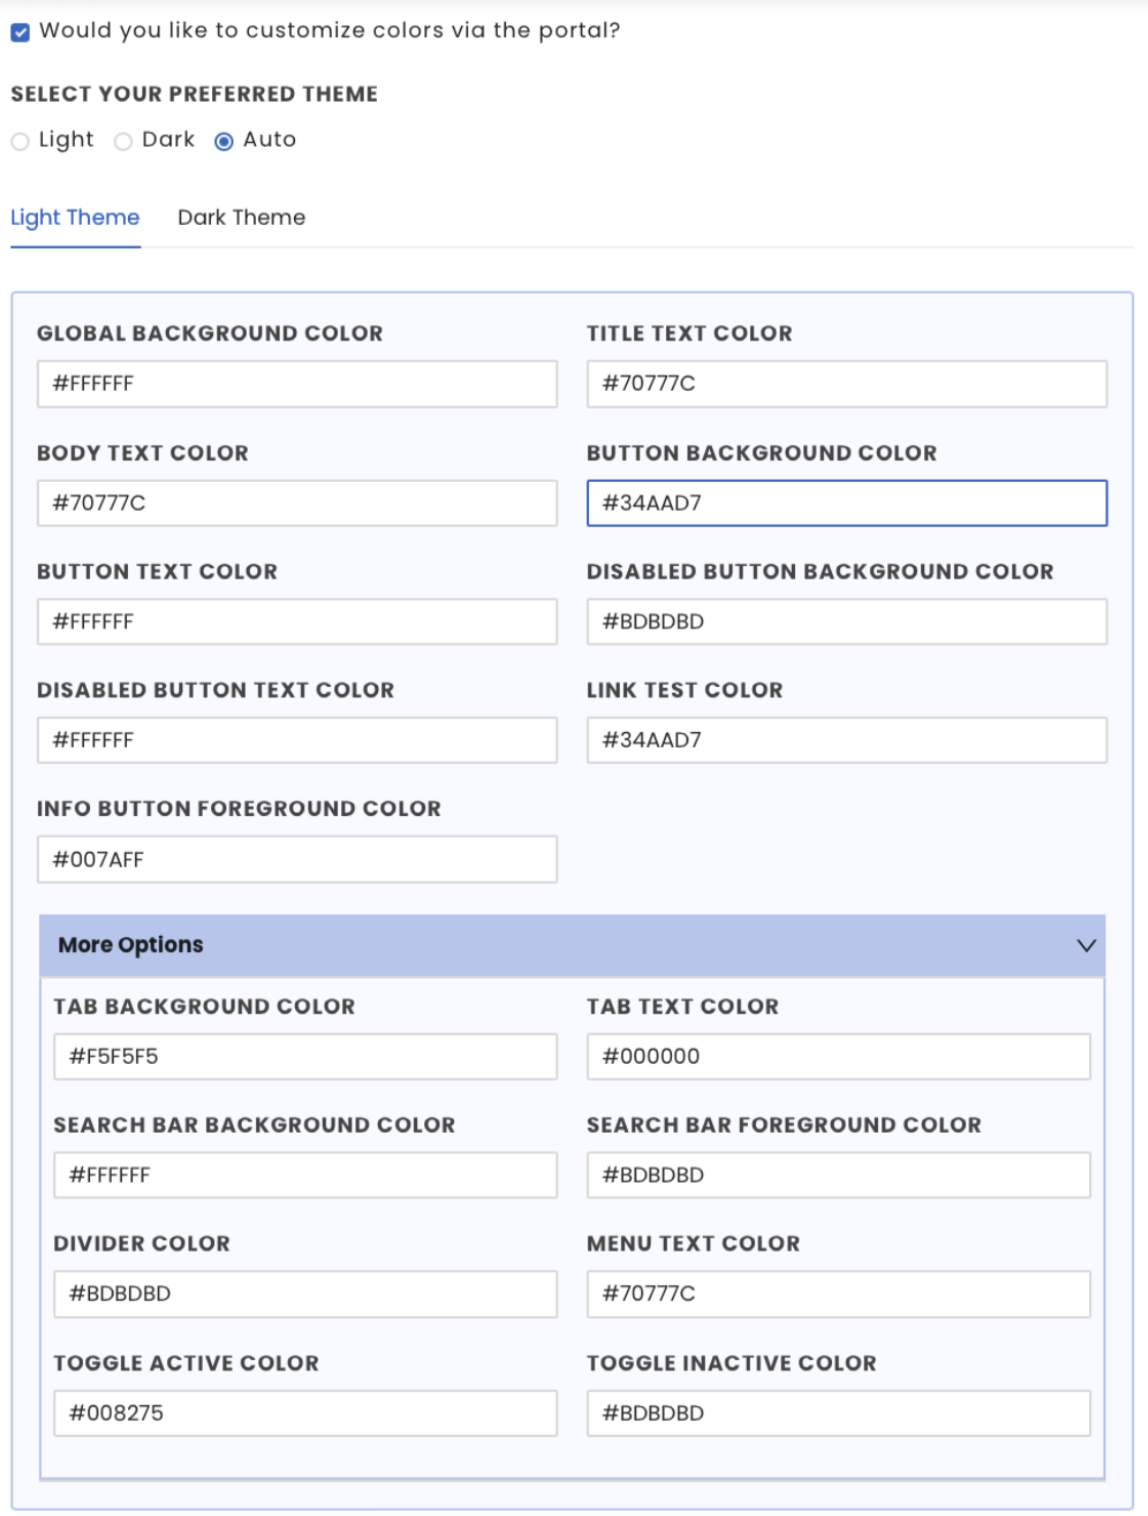
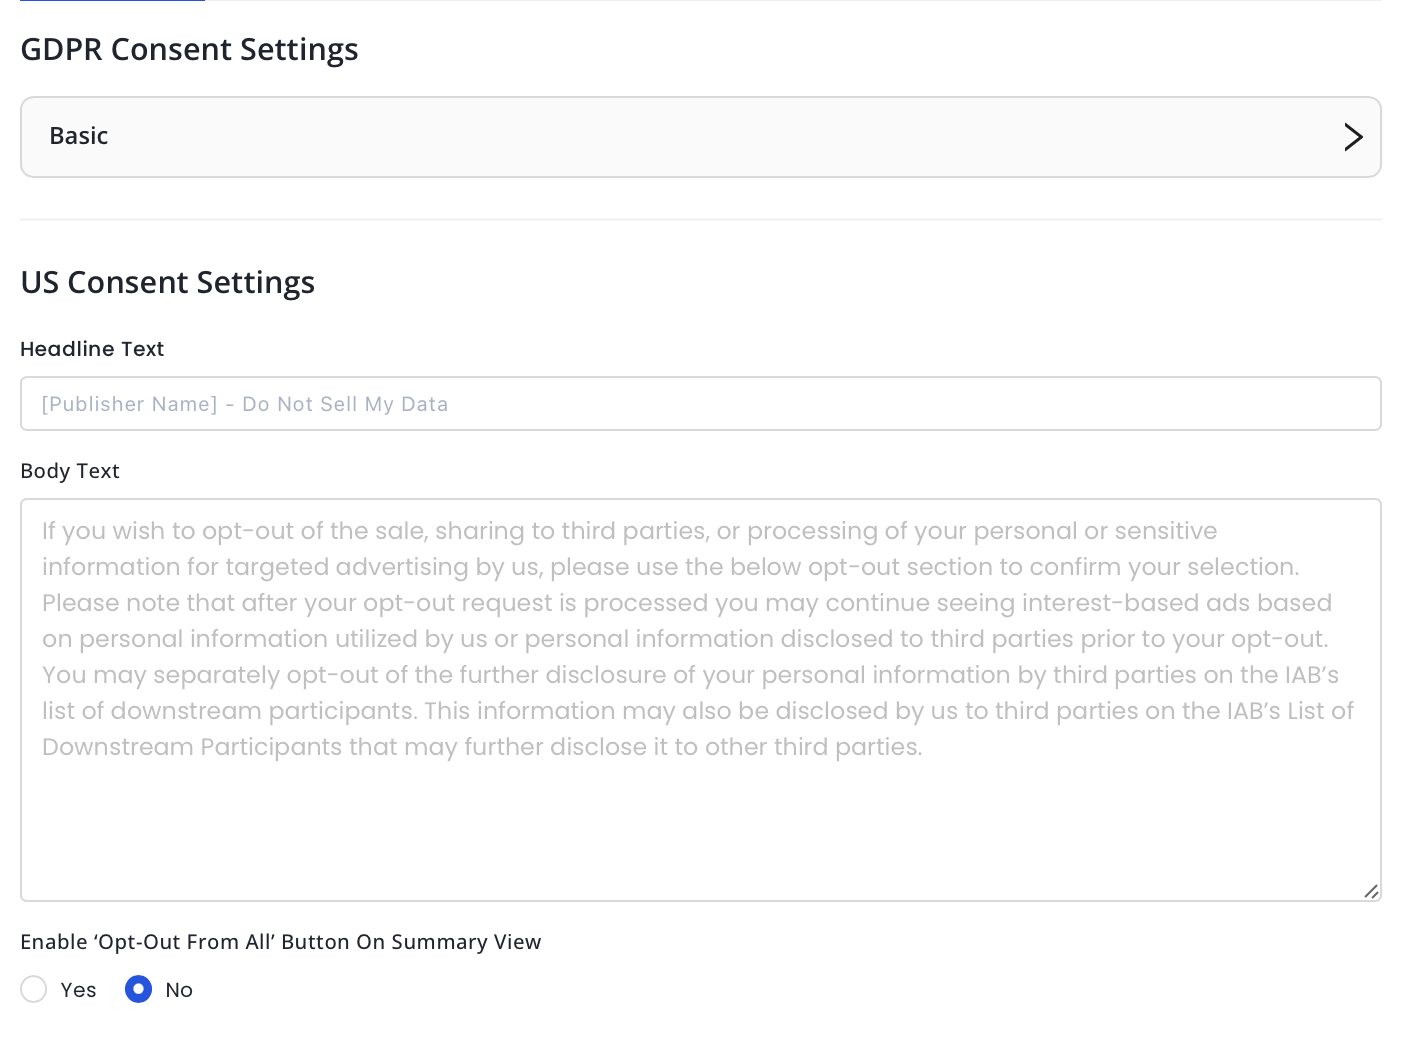
The option to configure theme colors for apps through the portal will be supported only for premium properties. Properties under the Essentials plan will have default theme colour.
Premium enables region-specific consent flows (e.g., EEA, USA, or APAC). Essentials only supports a global configuration.

Non-premium properties can only select Worldwide; consent can’t be collected from limited regions.
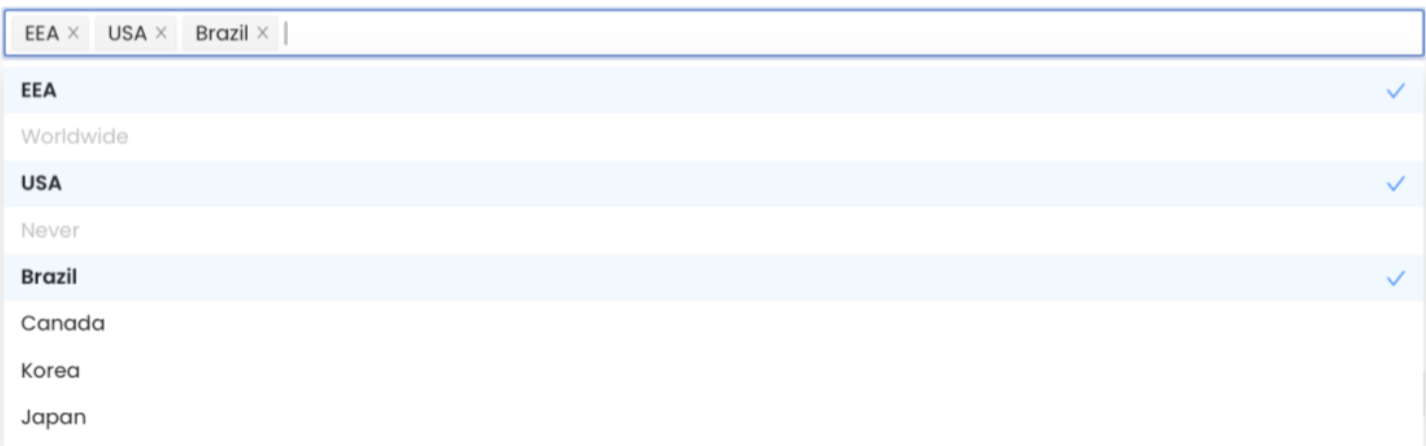
Premium properties can pick and choose regions, i.e., apply to one or more regions/countries (EEA, USA, etc.) supported on the portal.
Premium supports consent sharing across sub-domains, ensuring a seamless user experience for publishers managing multiple properties.

Non-premium properties can’t enable consent collection across sub-domains. Consent collection will be limited to the parent URL
Premium users can manage both IAB and custom (non-IAB) vendors. Essentials only supports IAB vendors.
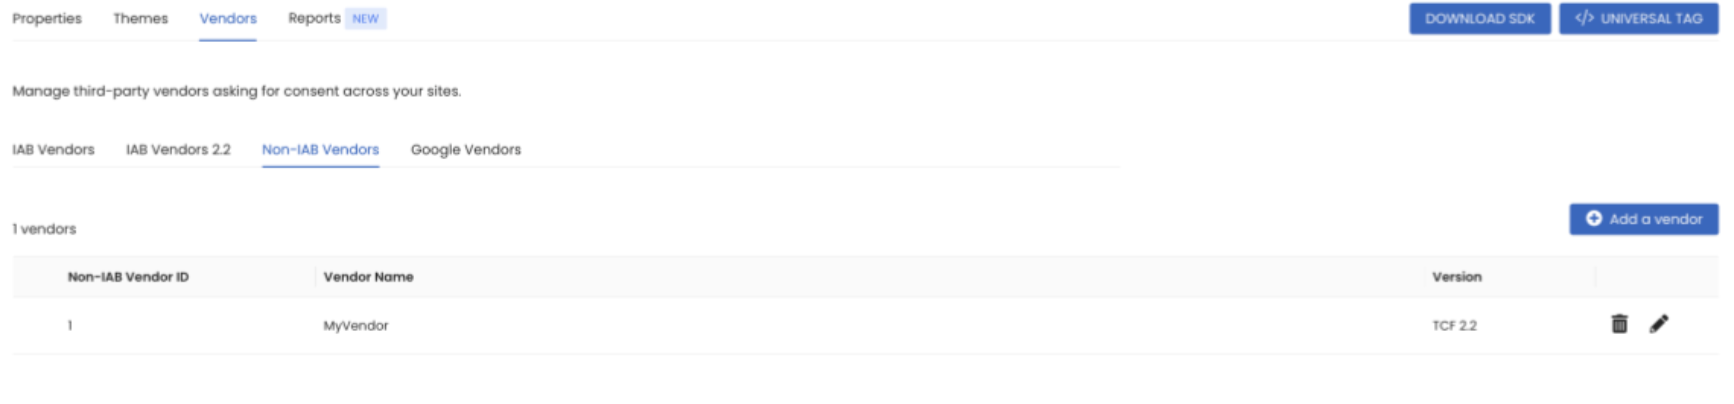
Non-IAB vendors added to the account will be supported only for premium properties. Consent collected will not be shared with non-IAB/custom-added vendors if the property is not a premium property.
Premium provides detailed analytics by country, regulation type, and device to help optimize consent rates. Essentials includes only basic metrics.

Dashboard and detailed analytics under the Reports tab will be supported only for premium properties.
Premium properties can remove InMobi’s logo or text from consent banners to maintain a fully white-labeled experience.
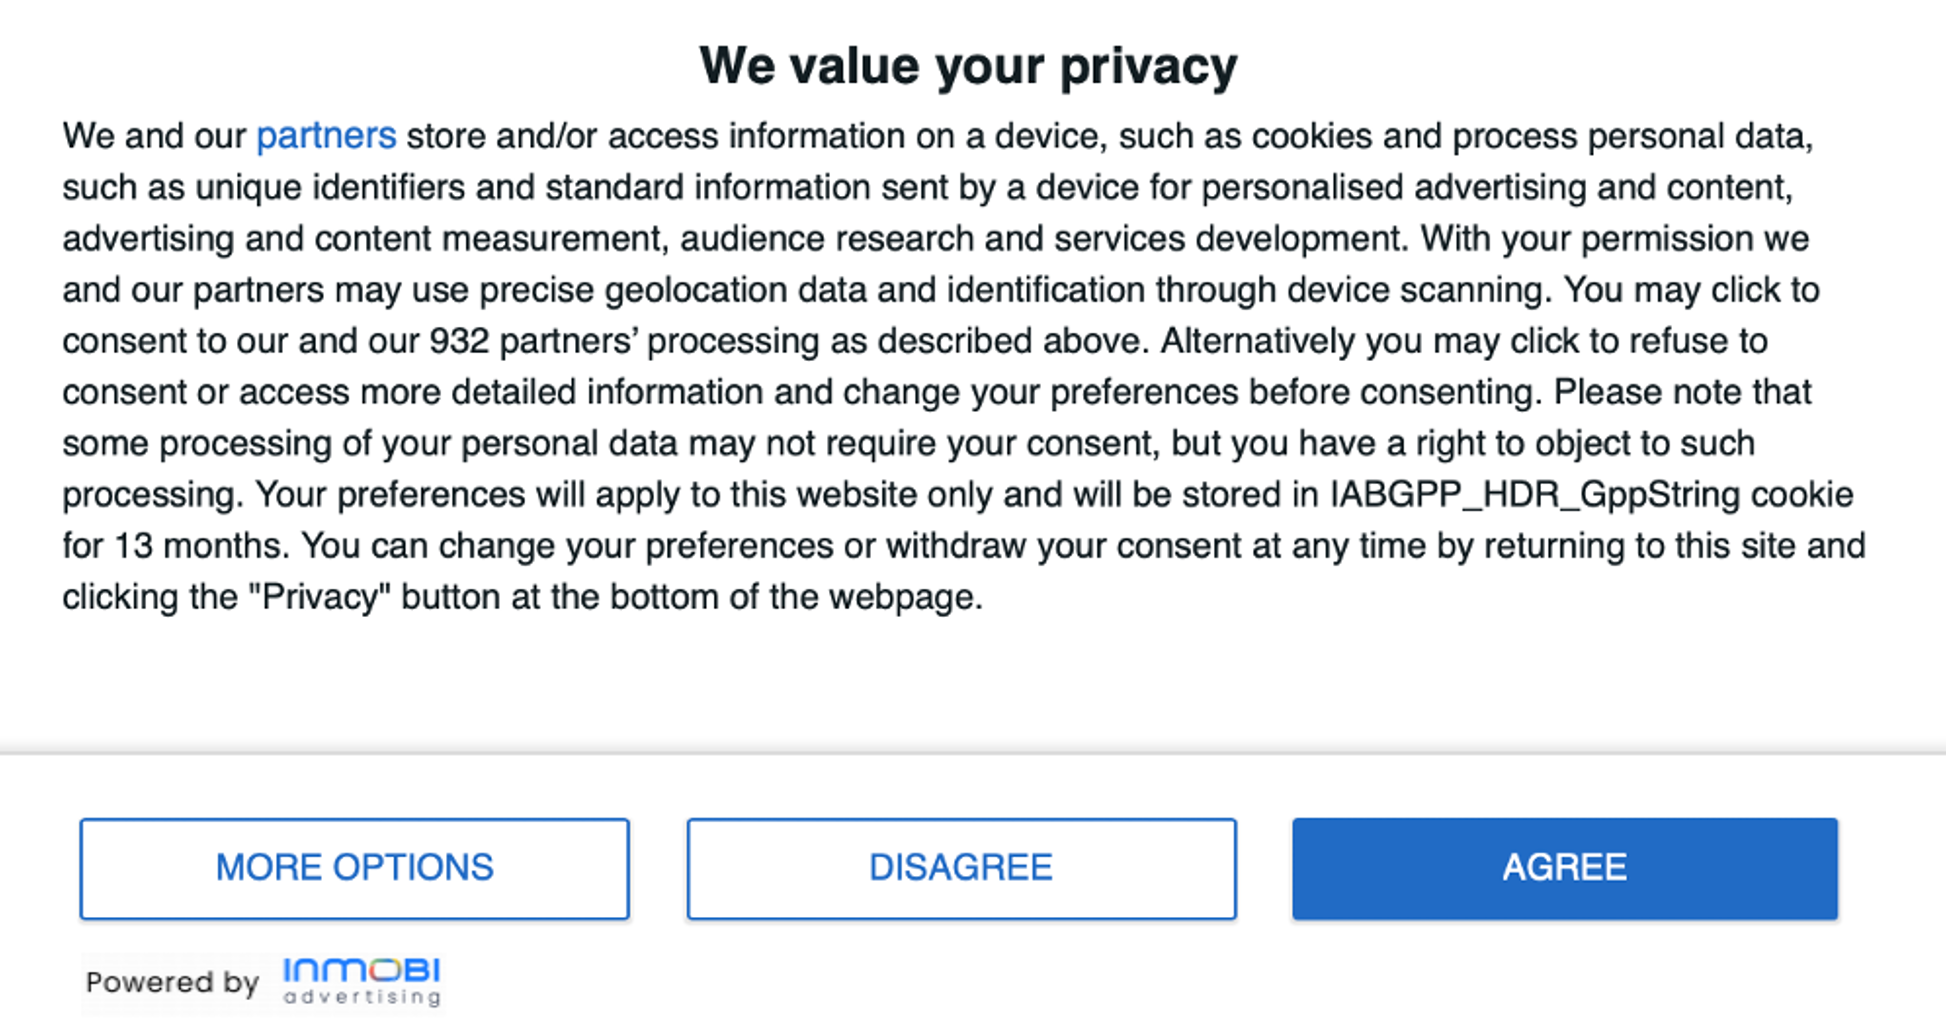
Non-Premium property with InMobi branding.
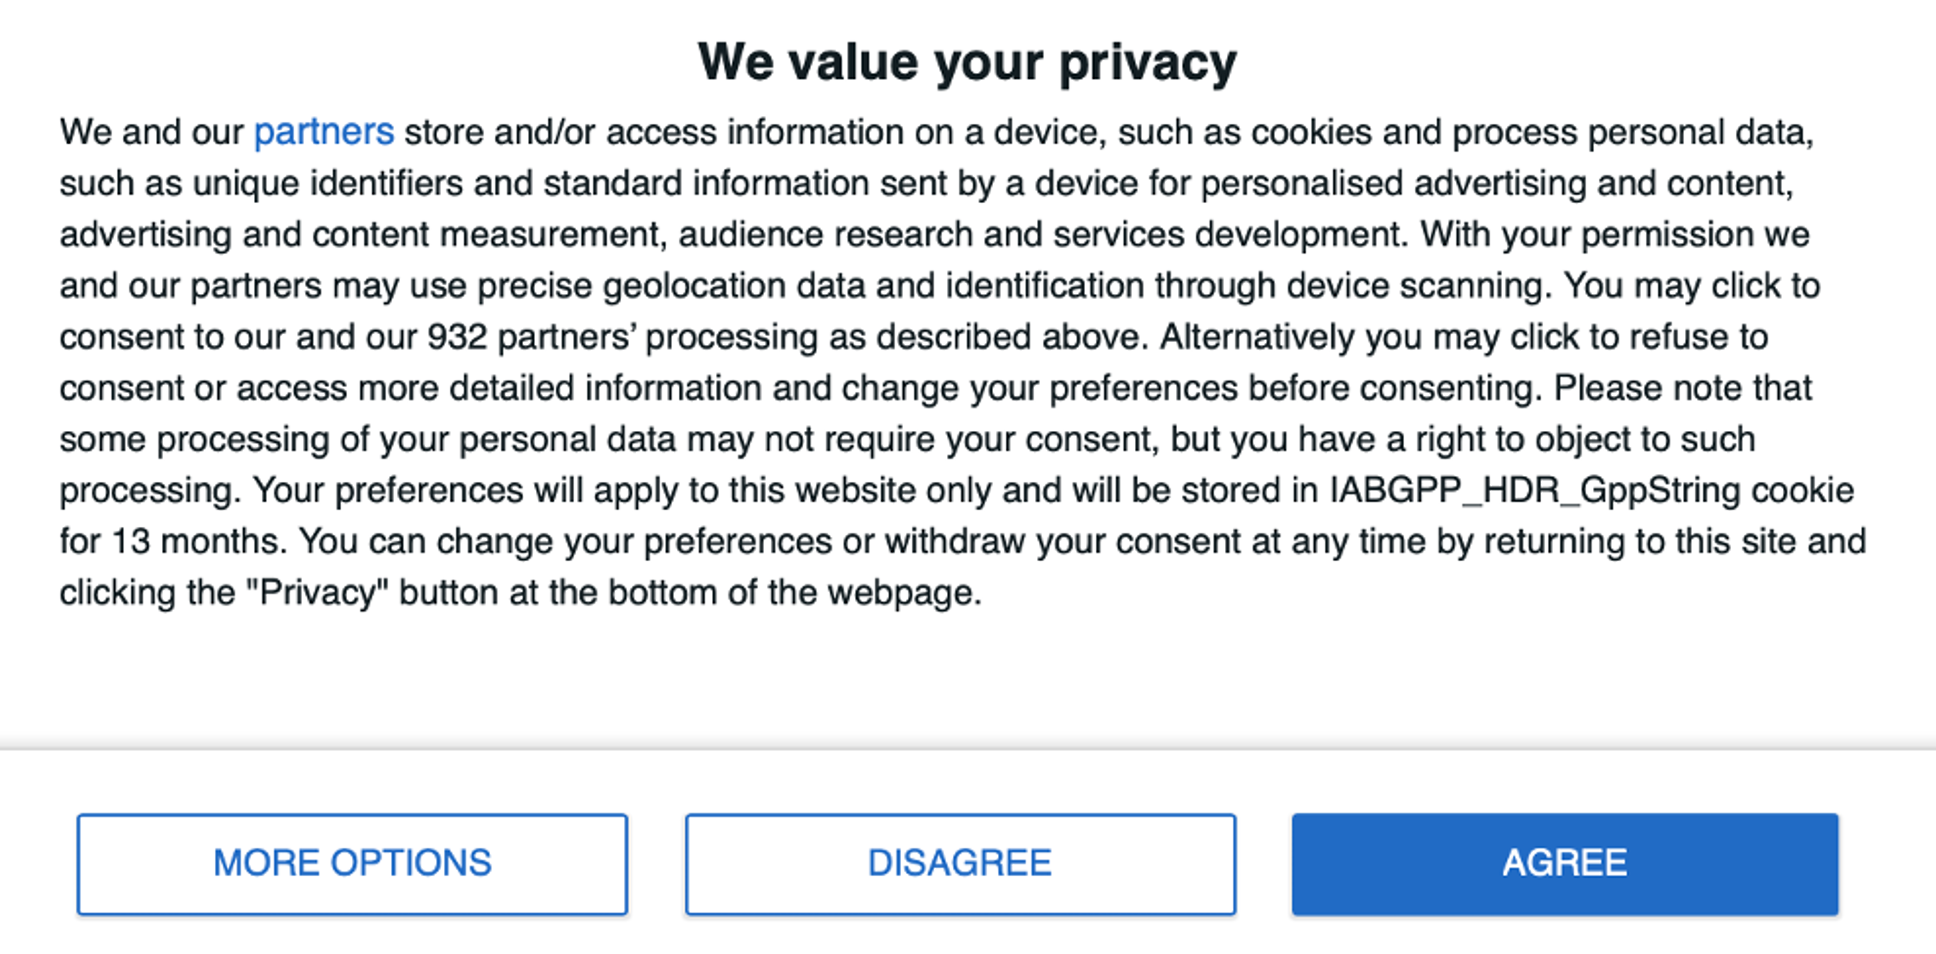
Premium property without InMobi branding.
Premium users will be able to modify the consent modal text in compliance with IAB standards to match brand tone and language.

This feature allows you to have a custom consent modal text as per your requirement(subject to IAB guidelines). This feature will be available only for premium properties.
Premium will support a hybrid model where users can choose to consent or access content through an alternative payment option, allowing publishers to minimize revenue loss.
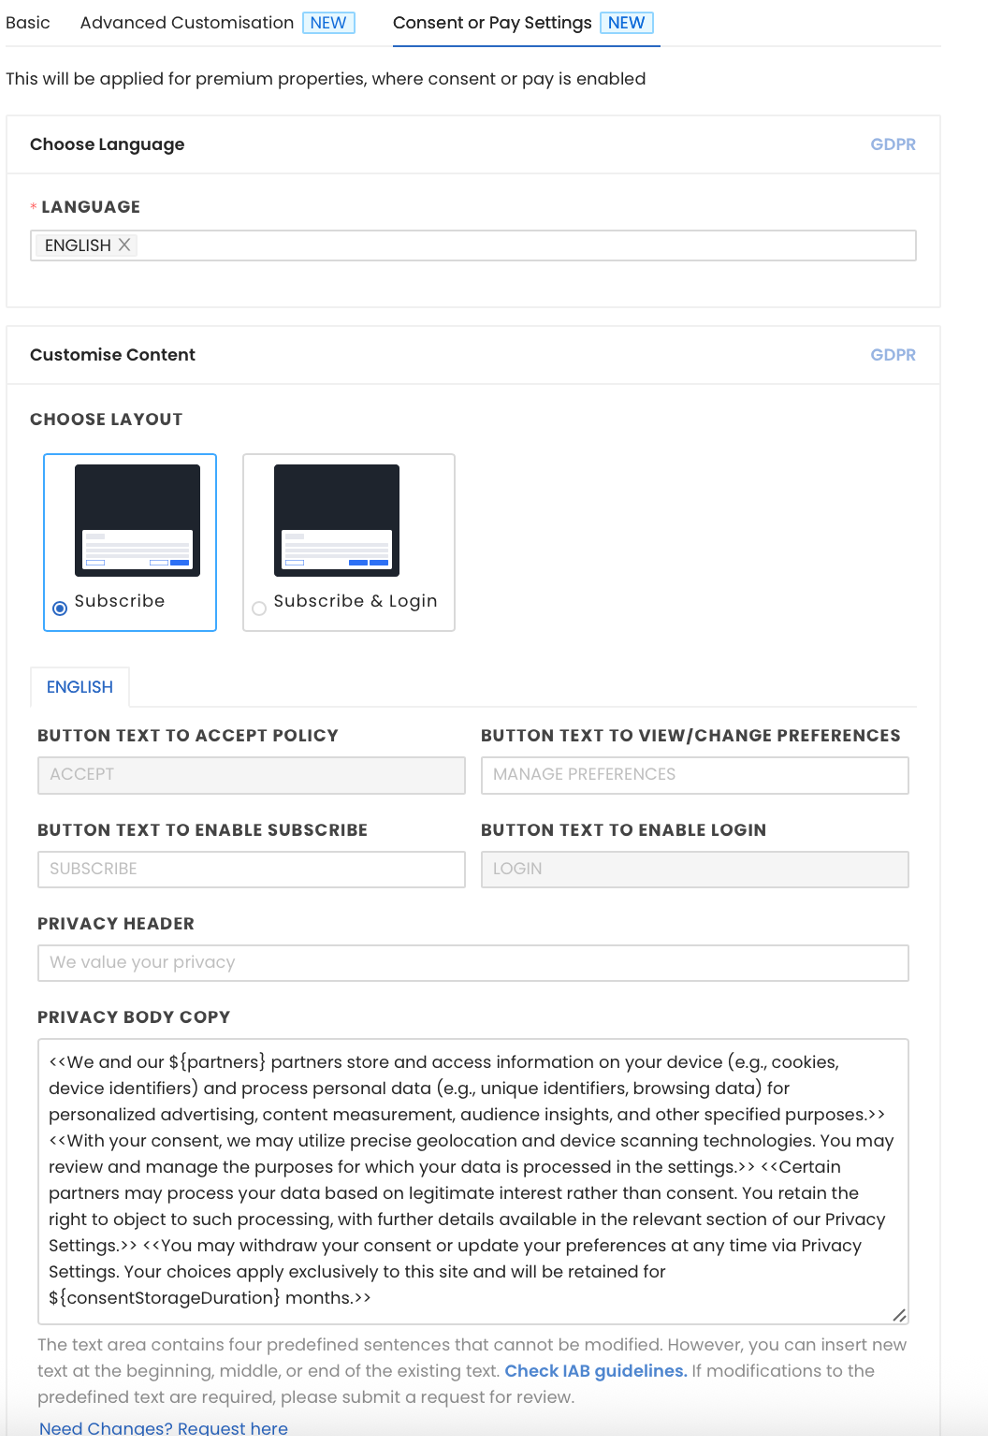
Consent or pay model allows you to configure the modal pop-up to enable your property with an option to either collect consent or pay in case of withdrawal. To learn more, see Overview. This feature will be available only for premium properties.
For more information on billing, setup, and SSP integration, see CMP Premium FAQs.
For further assistance, Contact Us.
InMobi CMP offers a subscription for its premium features, or you can get those premium features for free by integrating with InMobi SSP. For more information, see InMobi CMP Premium.
We’ve extended the free trial by an additional 2 months due to requests from publishers. During this period, Premium features will remain free, so you don't need to immediately complete billing setup or subscription activation. We understand this may affect how you manage property access and ownership, and we appreciate your patience while we improve these features.

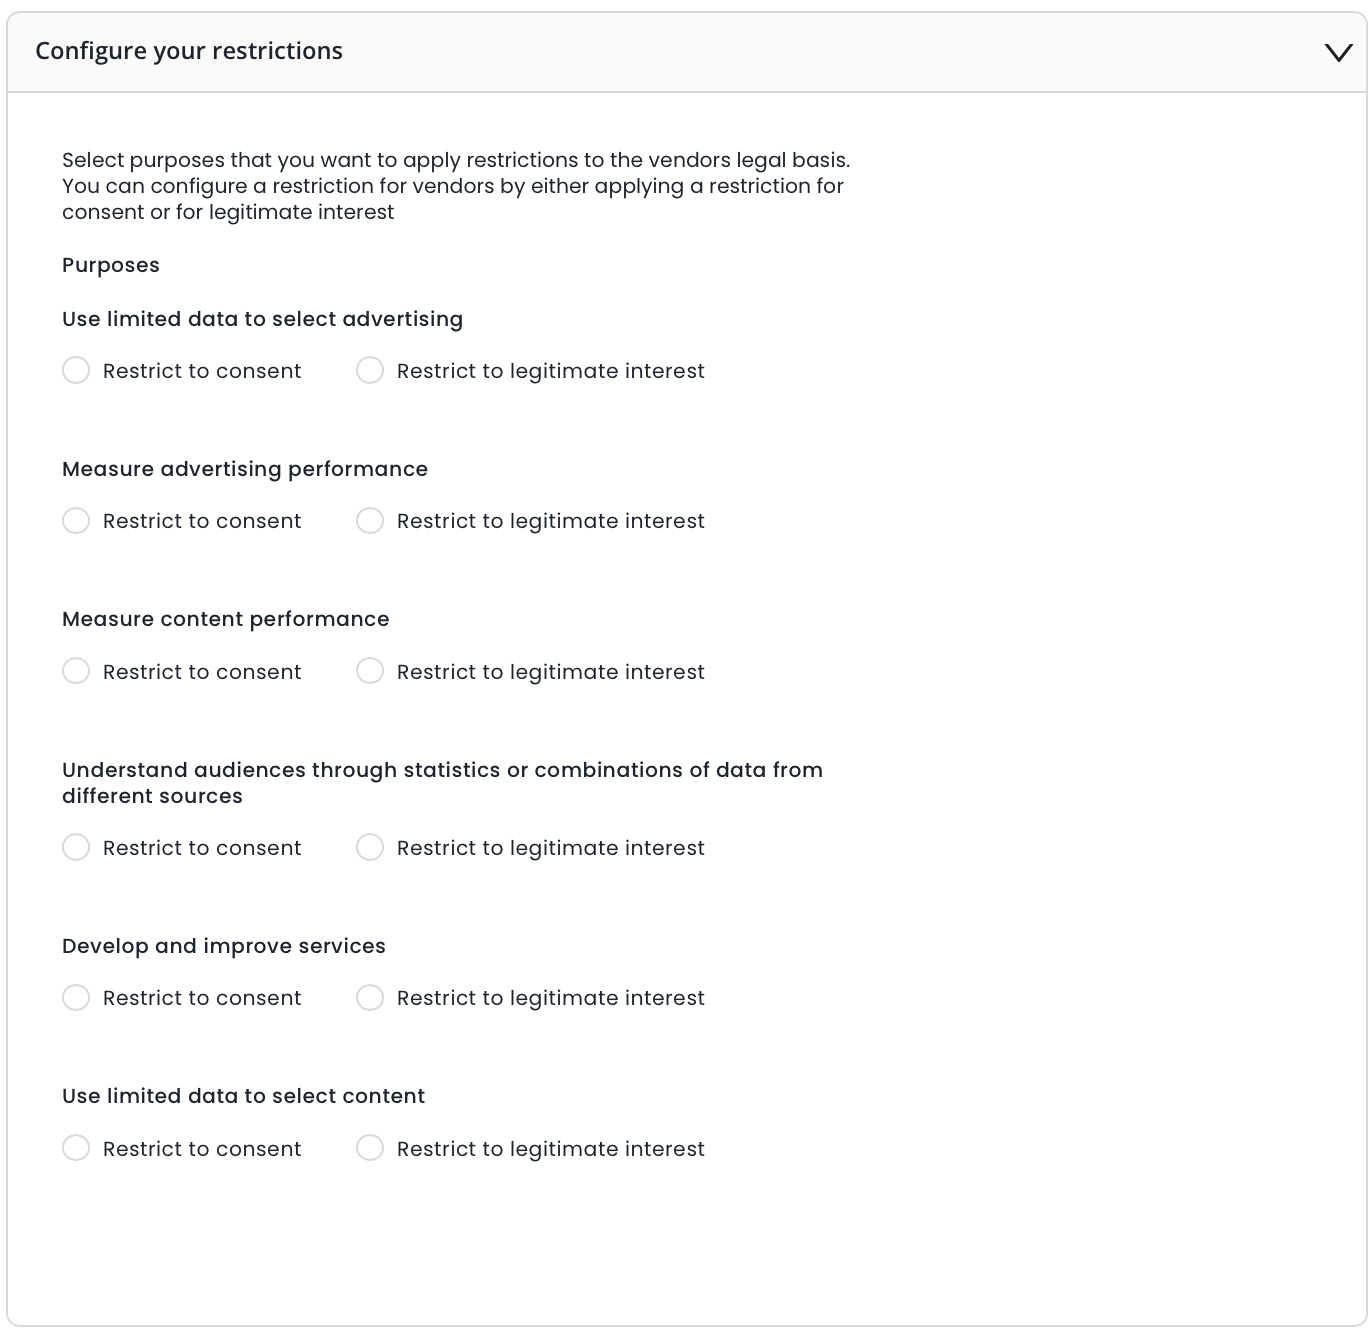
This guide covers the steps and best practices for configuring and managing vendors for your properties within the InMobi CMP portal. When you use InMobi CMP on your property, you must specify the vendors (third parties) that may process user data, set their purposes, and manage consent preferences.
IAB vendors are those registered in the IAB Global Vendor List (GVL) and recognized by the IAB Transparency & Consent Framework (TCF). Using them allows you to use standardized consent strings (TCF/GPP) and simplifies compliance.

We consider consent, legitimate interest, and flexible purposes to classify vendors' legal basis types. Special purposes, features, and special features are not considered to classify vendors based on legal basis.
Non-IAB vendors are vendors who have not registered with IAB Europe and are not part of the IAB Vendor List TCF 2.2. Since they are not listed in the IAB Global Vendor List, it is not possible to create a signal to transmit to non-IAB vendors. They only enable publishers to show the vendor to the consumer and obtain a consumer's privacy preferences for that vendor, not the ability to transmit them in a standard way.

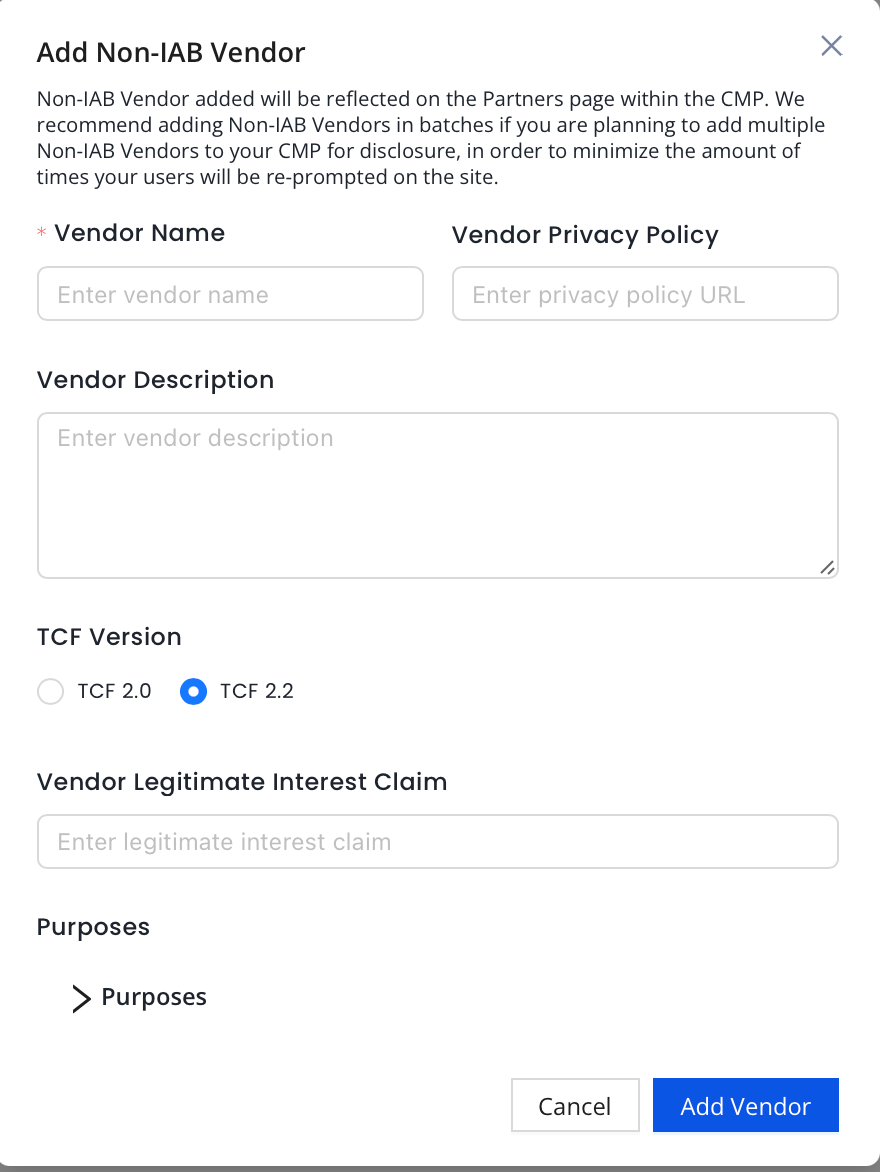
Your newly created vendor will be added to your non-IAB vendors list in the portal and will appear in the CMP in the partner screen.
On the InMobi CMP portal, the vendor will be given a non-IAB vendor ID, which will correlate to their position in the non-IAB vendor cookie and the non-IAB vendor API. You will now need to manage these vendor technologies using the non-IAB APIs and/or cookie instructions.
You have completed all the configuration options for the InMobi CMP and can apply the Universal tag to the site.
You need to use the nonIABVendorConsent API to gather user consent. Each vendor you specified is assigned an id and stored in the consent.nonIabVendorConsents object. Check each entry as needed for consent (true/false). Here is an example using a fictitious vendor "Non-IAB Company" with id 1, which requires consent for purposes 1 and 3 to operate.
__tcfapi('getNonIABVendorConsents', 2, function(consent, success) {
    // check consent for non-IAB vendor with id 1. Always check
    // whether the callback returned success and GDPR applies
    if (   success
        && consent.gdprApplies
        && consent.nonIabVendorConsents[1]
       ) {
        // Use getTCData to validate consent is given for the
        // purposes declared in the configuration step
        __tcfapi('getTCData', 2, function(tcdata, success) {
          if (   success
              && consent.gdprApplies) {
              if (   tcdata.purpose.consents[1]
                  && tcdata.purpose.consents[3]) {
                  nonIabCompanyTag(); // replace this with your own code
                  console.log("Debug: ", tcdata.purpose.consents[1],
                    tcdata.purpose.consents[3]);
              }
          }
        });
    }
});
You can make that call anywhere in your code where you need to check for consent for the non-IAB vendor you use on your page. You also need to manually configure your Google tag(s) on your site to behave based on the consent preference made and on the product the user is using.
For Non-IAB vendor API and all other APIs, see CMP2 & CCPA API Index.
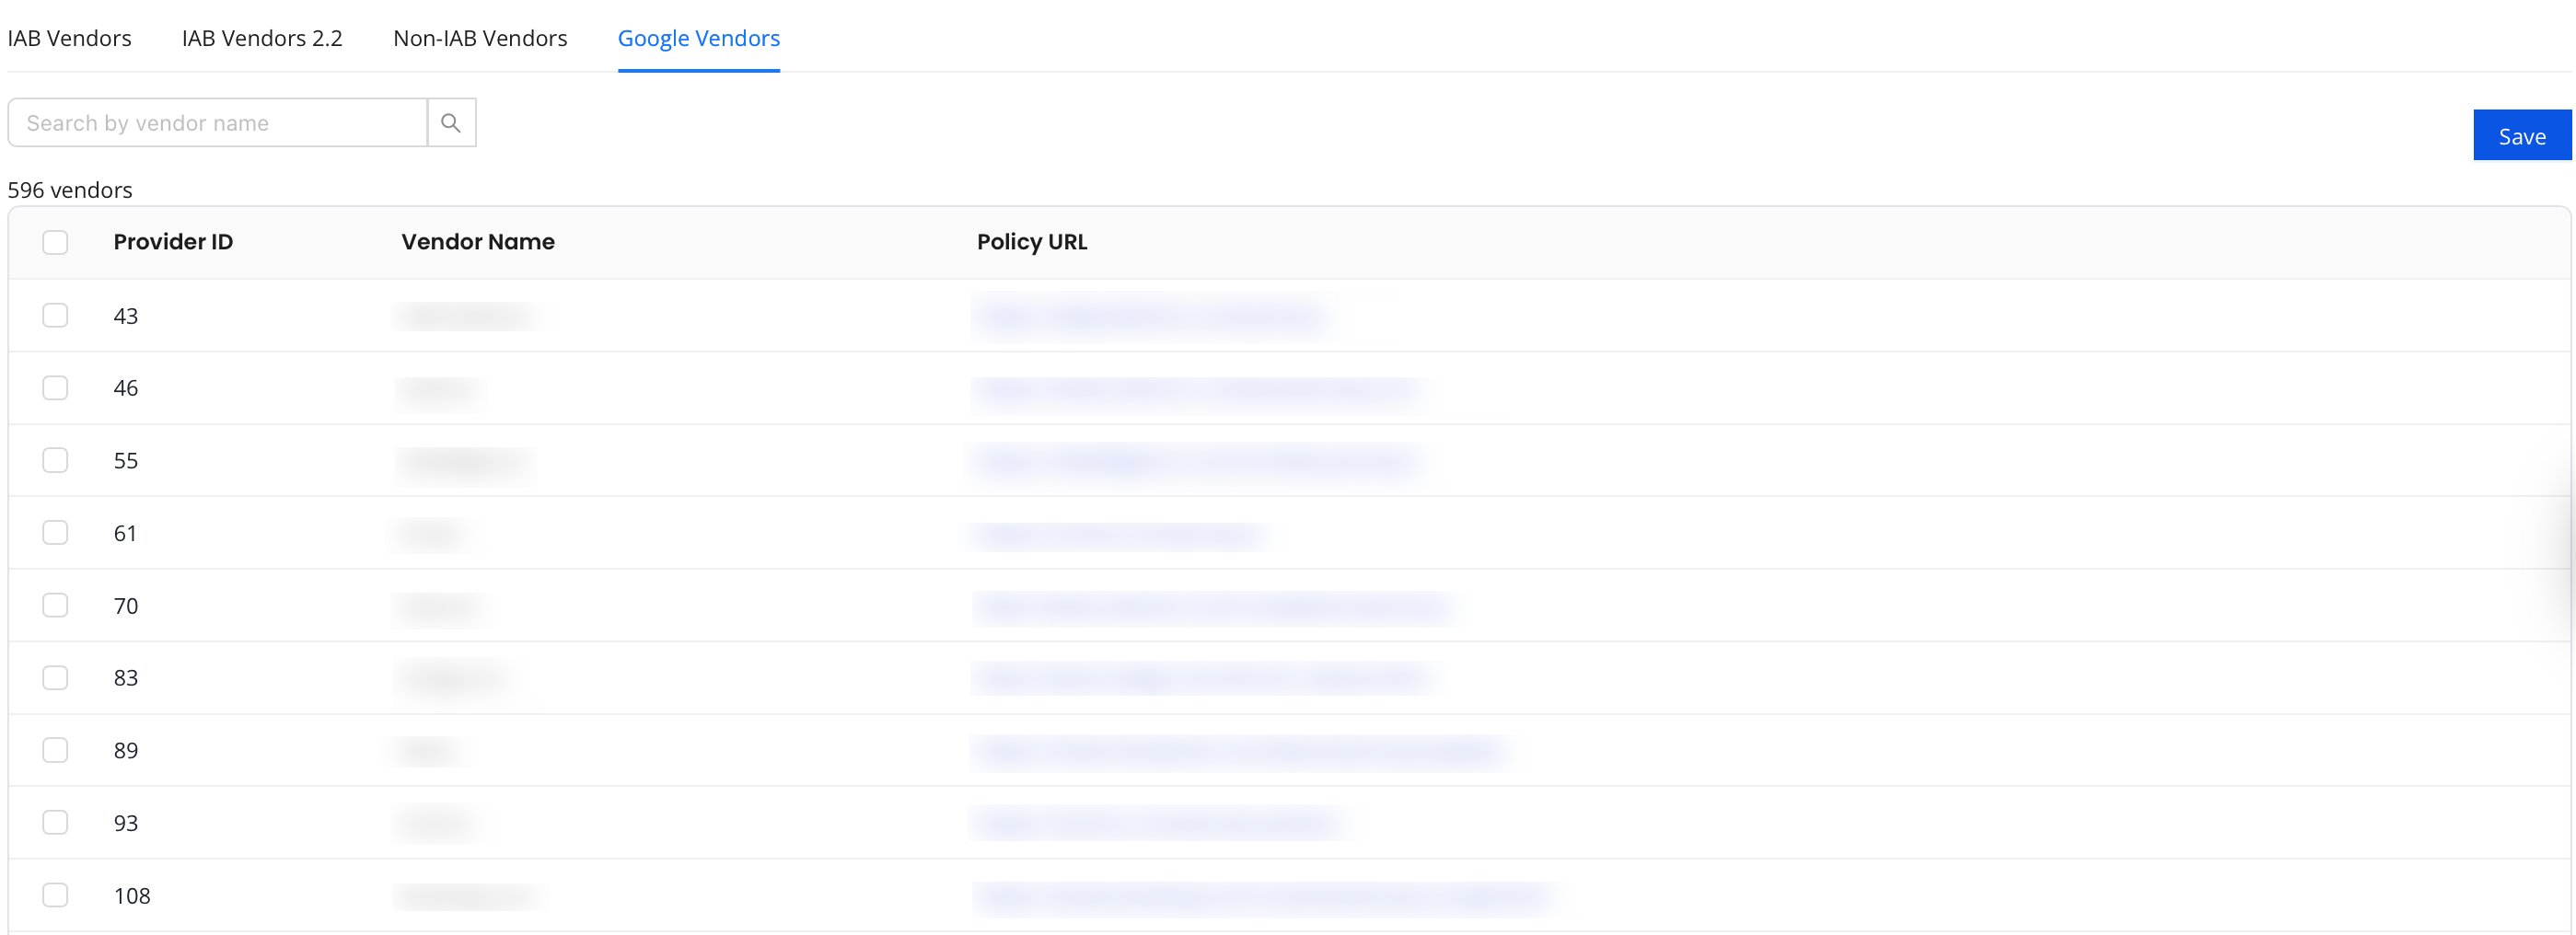
These are vendors that work with Google and are not listed under the TCF vendor list. If you work with Google Ad Manager, you may want to review this list and enable the vendors that you are working with through Google Ad Manager, AdMob, and AdSense. By default, all vendors are selected. For more information, see Ad Technology Providers.
The UK Information Commissioner’s Office (ICO) outlines how organizations must approach cookie consent within the scope of the Privacy and Electronic Communications Regulations (PECR). These requirements go beyond legal compliance, they are designed to ensure that users are given clear, fair, and transparent choices about how their data is used.
In this topic, we highlight the essential principles of an ICO-aligned consent framework and show how Inmobi CMP can be applied to put these principles into practice.
In alignment with GDPR principles, the ICO requires that consent is more than a simple acknowledgment. It must reflect a user’s clear and deliberate choice. For a consent banner to be considered compliant, it needs to embody four core qualities: freely given, specific, informed, and unambiguous.
| Standard | Explanation |
| Freely given | Consent should be offered without pressure. Users must be able to decline cookies without losing access to the main content or service. |
| Unambiguous | Consent must come from a deliberate action. Assumptions such as “continuing to browse means you agree” do not qualify as valid under ICO rules. |
| Specific and informed | Users need clear, plain-language details on what data is collected, why it is used, and how cookies support those purposes, so they can make an informed decision. |
The Inmobi CMP platform provides the functionality to implement these standards effectively and helps ensure your consent messaging is consistent with ICO requirements.
| Standard | Explanation |
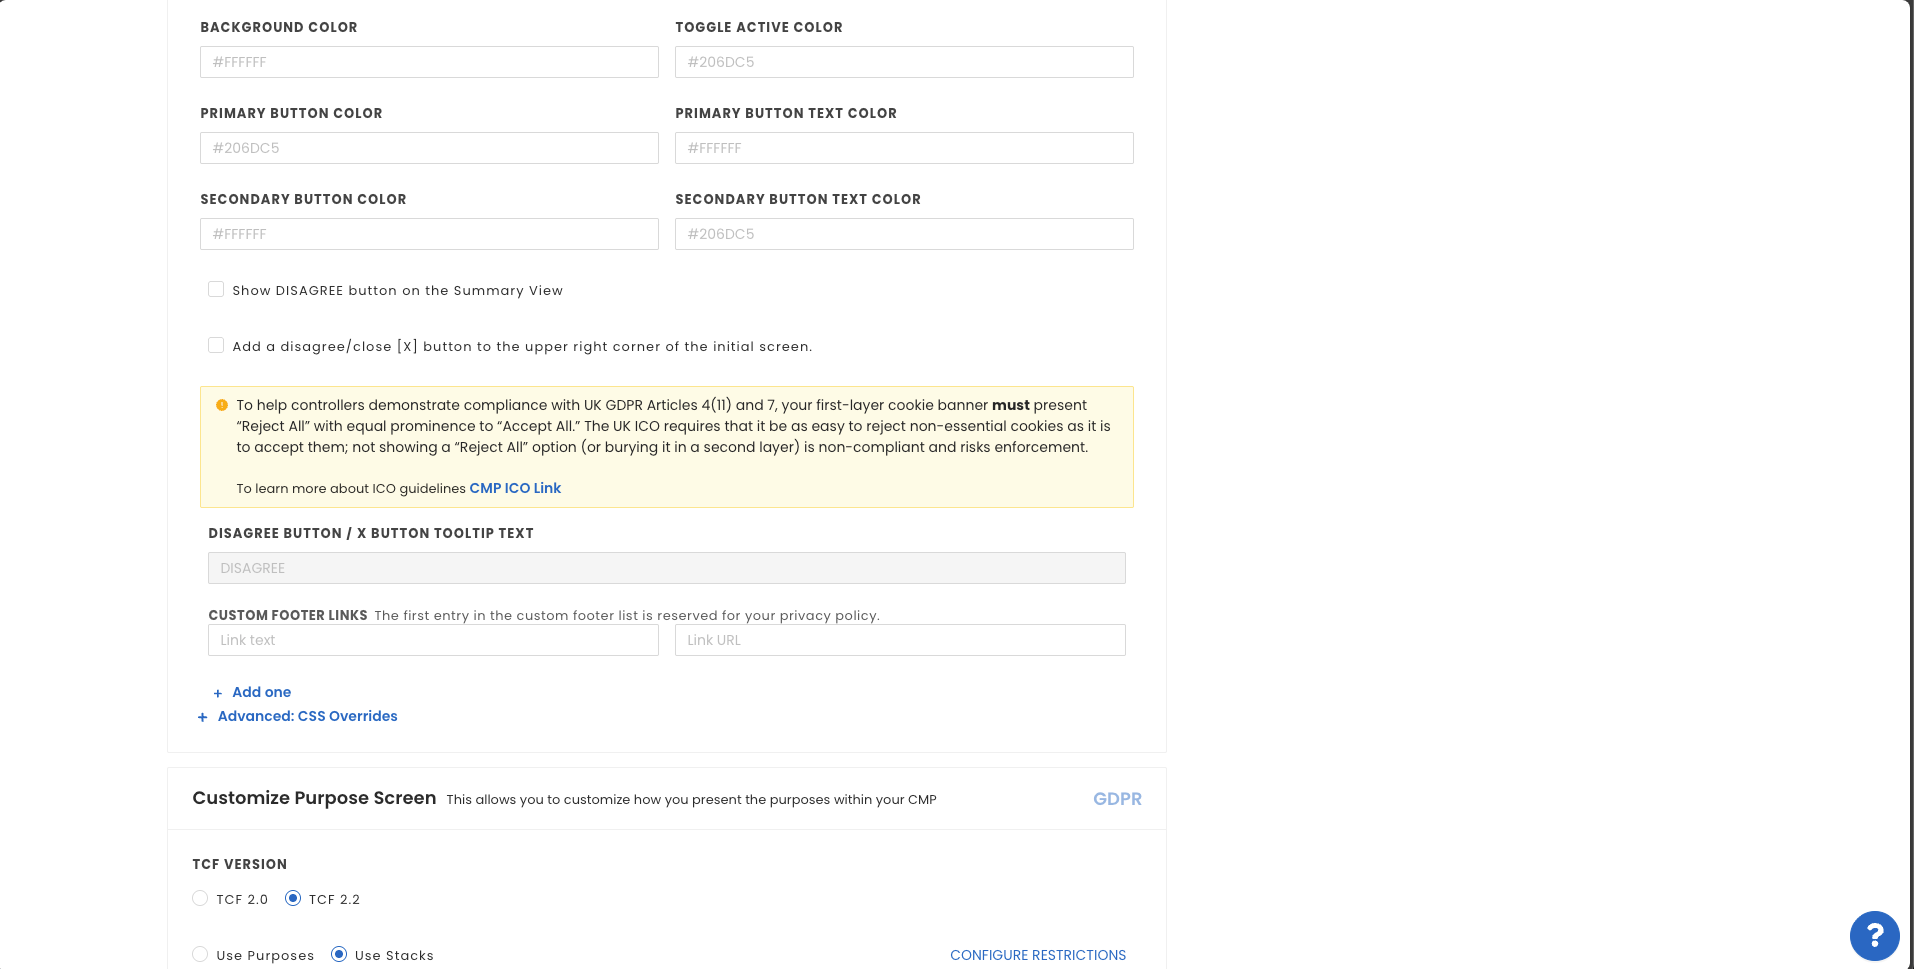
| Balanced acceptance and rejection | The consent interface should not favor acceptance over refusal. If a single-click “Accept All” option is offered, an equivalent “Reject All” or “Continue without accepting” option should appear with equal prominence on the first layer. |
| Simple withdrawal | Users must have ongoing access to review and change their preferences. This is typically achieved through a persistent element, such as a footer link or a privacy icon, that reopens the consent banner at any time. |
InMobi CMP supports these requirements through an option in the Themes settings, which provides the necessary setup required to be compliant with the UK ICO.
Accountability is a central principle of the ICO’s guidance. Organizations must be able to show that consent was collected properly and that reliable records are maintained over time. A Consent Management Platform (CMP) plays a key role in enabling this transparency.
| Standard | Explanation |
| Documented proof of consent | Every user decision should be logged securely, with details such as the date, time, and specific preferences selected. Within the Inmobi CMP platform, these records are generated automatically to ensure accuracy and consistency. |
| Comprehensive audit trail | Maintaining this information creates a verifiable trail of evidence. Such records can be critical if the ICO requests confirmation of your consent practices during an investigation or complaint process. |
For official examples and deeper advice, see the ICO’s resource: How do we manage consent in practice.
By following these practices, you ensure your consent experience is both compliant and user-centric—protecting your business while respecting user rights.
After creating your property, it's time to create a theme for it. InMobi CMP allows you the freedom to tailor your message, branding, and display to your audience.
A theme is a customizable bundle of design and configuration settings, like layout, text, colors, and legal link behavior, that defines the look and feel of your CMP. Once created, you can save and assign themes to multiple sites.
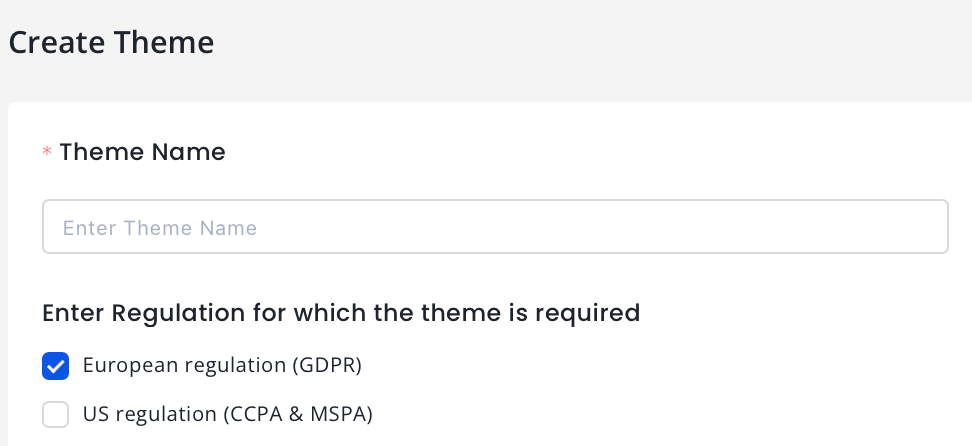
The theme creation process is divided into five sections for each regulation.


If you would like to make any additional CSS changes to your CMP outside the customization options presented on the Theme’s page, you can include the CSS code in the CSS Overrides section of the Theme’s page.
If you are using InMobi CMP Version2, we use a CSS reset within the CMP to have a consistent experience on all websites. Therefore, please prepend all your rules with the id #qc-cmp2-ui. This will also eliminate the need to specify !important to all the rules.
#qc-cmp2-ui {
   background: yellow;
}
#qc-cmp2-ui button[mode="primary"] {
   background: red;
   color: white;
}
#qc-cmp2-ui h2 {
   color: red;
   font-size: 21px;
}
To change the font-family and sizing of all our texts, see below:
#qc-cmp2-ui p {
   font-family: Arial, sans-serif;
   font-size: 15px;
}
To avoid unexpected style behavior, it’s not recommended to change the color using this rule because it would change the text color for ALL text as well. Please specify the color per text block.
To change the text styling of the main message of the summary page, see below:
#qc-cmp2-ui .qc-cmp2-summary-info p {
   color: red;
}
To change the text styling of the main message of the purposes, vendors, and legitimate pages, see below:
#qc-cmp2-ui .qc-cmp2-consent-info p {
   color: pink;
}
To change the text styling of the list elements, see below:
#qc-cmp2-ui .qc-cmp2-list-item-title { color: red; }#qc-cmp2-ui .qc-cmp2-list-item-status { color: blue; }
To change the text styling of the text INSIDE a list element you can do it like this:
#qc-cmp2-ui .qc-cmp2-expandable-list p {
   color: green;
}
#qc-cmp2-ui .qc-cmp2-expandable-list li {
   color: darkblue;
}
.qc-cmp2-container .qc-cmp2-persistent-link {
   background-color: red;
   color: white;
   padding: 10px;
}
This is the only component that isn’t going to be prepended with the #qc-cmp2-ui id since it’s outside of the CMP UI itself. Instead, we prepend it with the .qc-cmp2-container class. If you intend to modify the padding without an increase in height, ensure to adjust the max-height rule as well (default is 30px).
After creating your property, it's time to create a theme for it. InMobi CMP allows you the freedom to tailor your message, branding, and display to your audience.
A Theme is a customizable bundle of design and configuration settings, like layout, text, colors, and legal link behavior, that defines the look and feel of your CMP. Once created, you can save and assign themes to multiple sites.
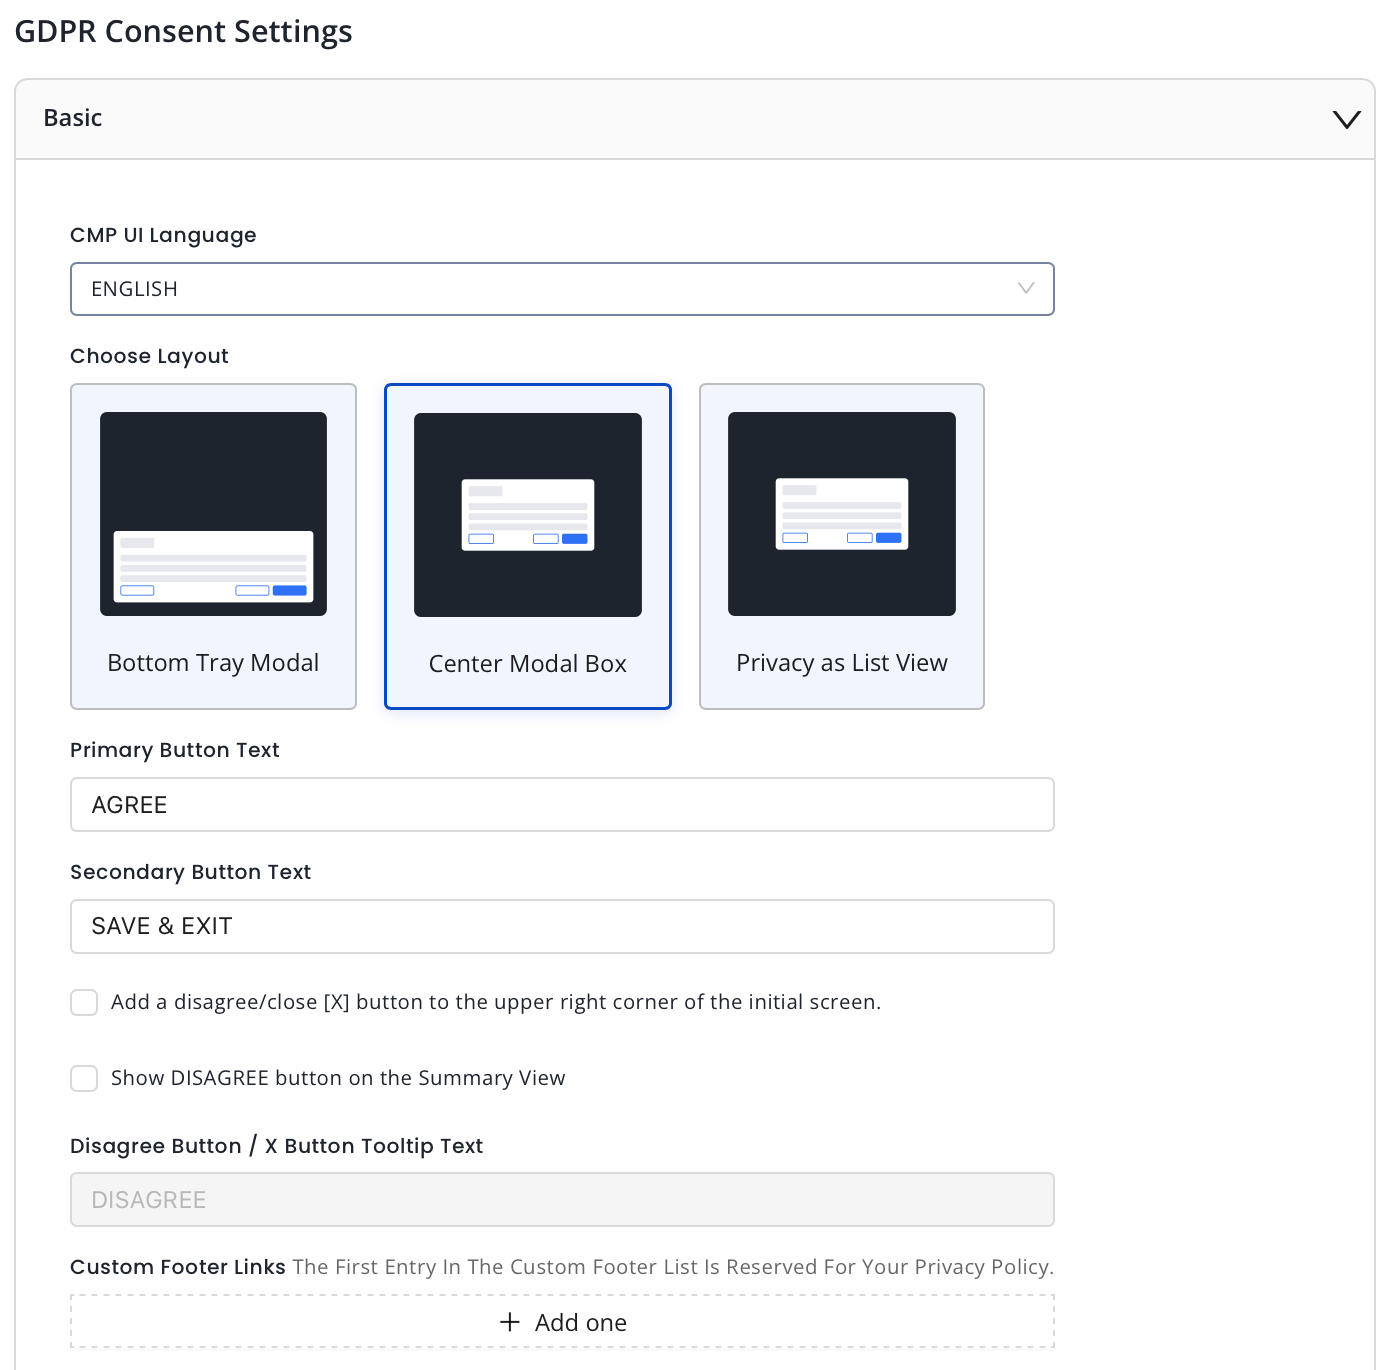
The theme creation process is divided into three sections for each regulation.
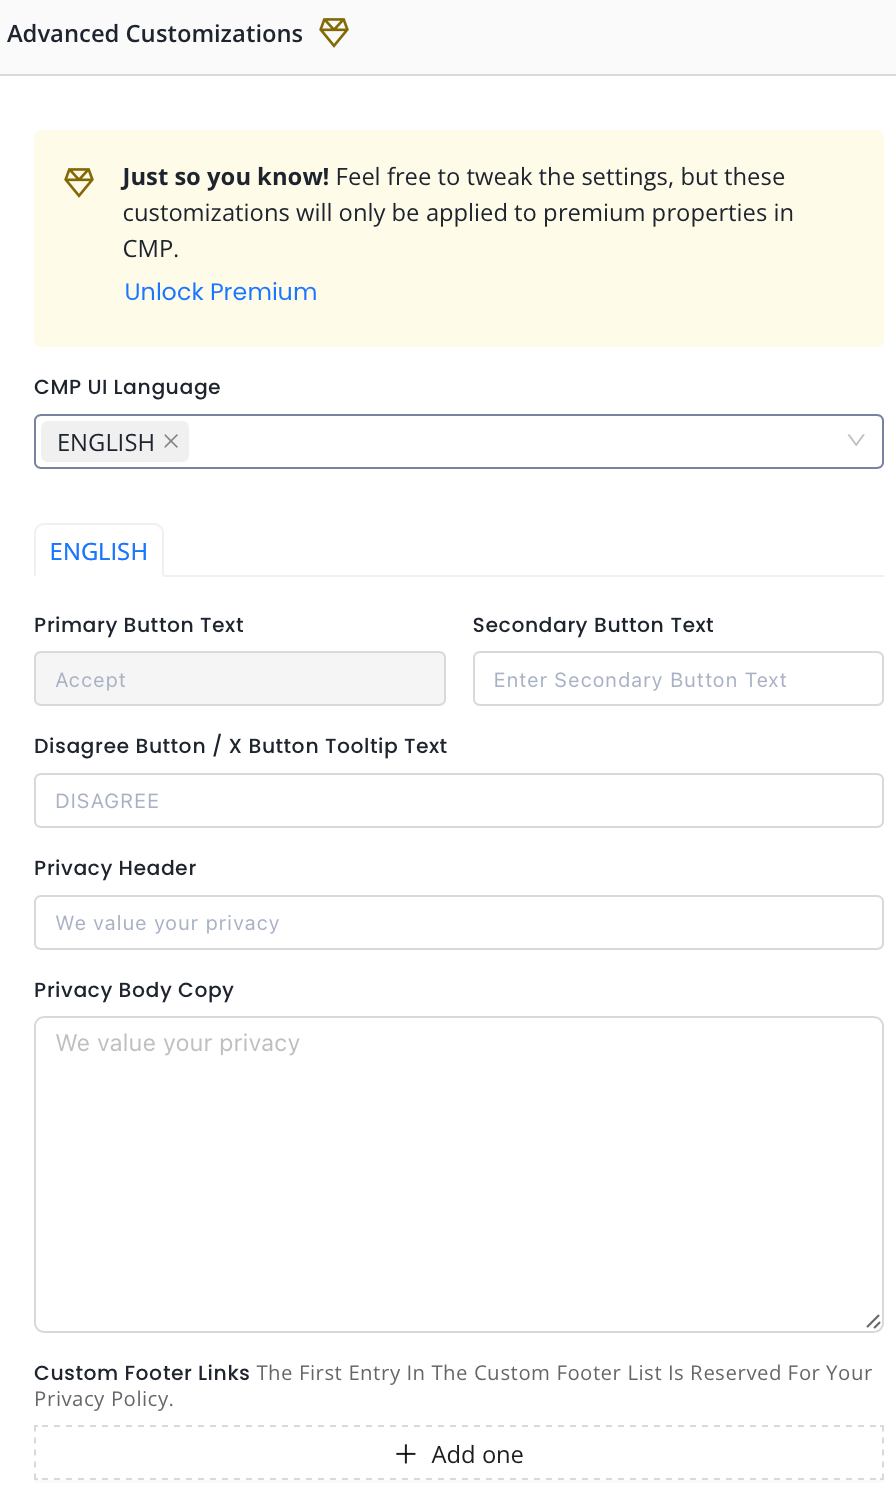
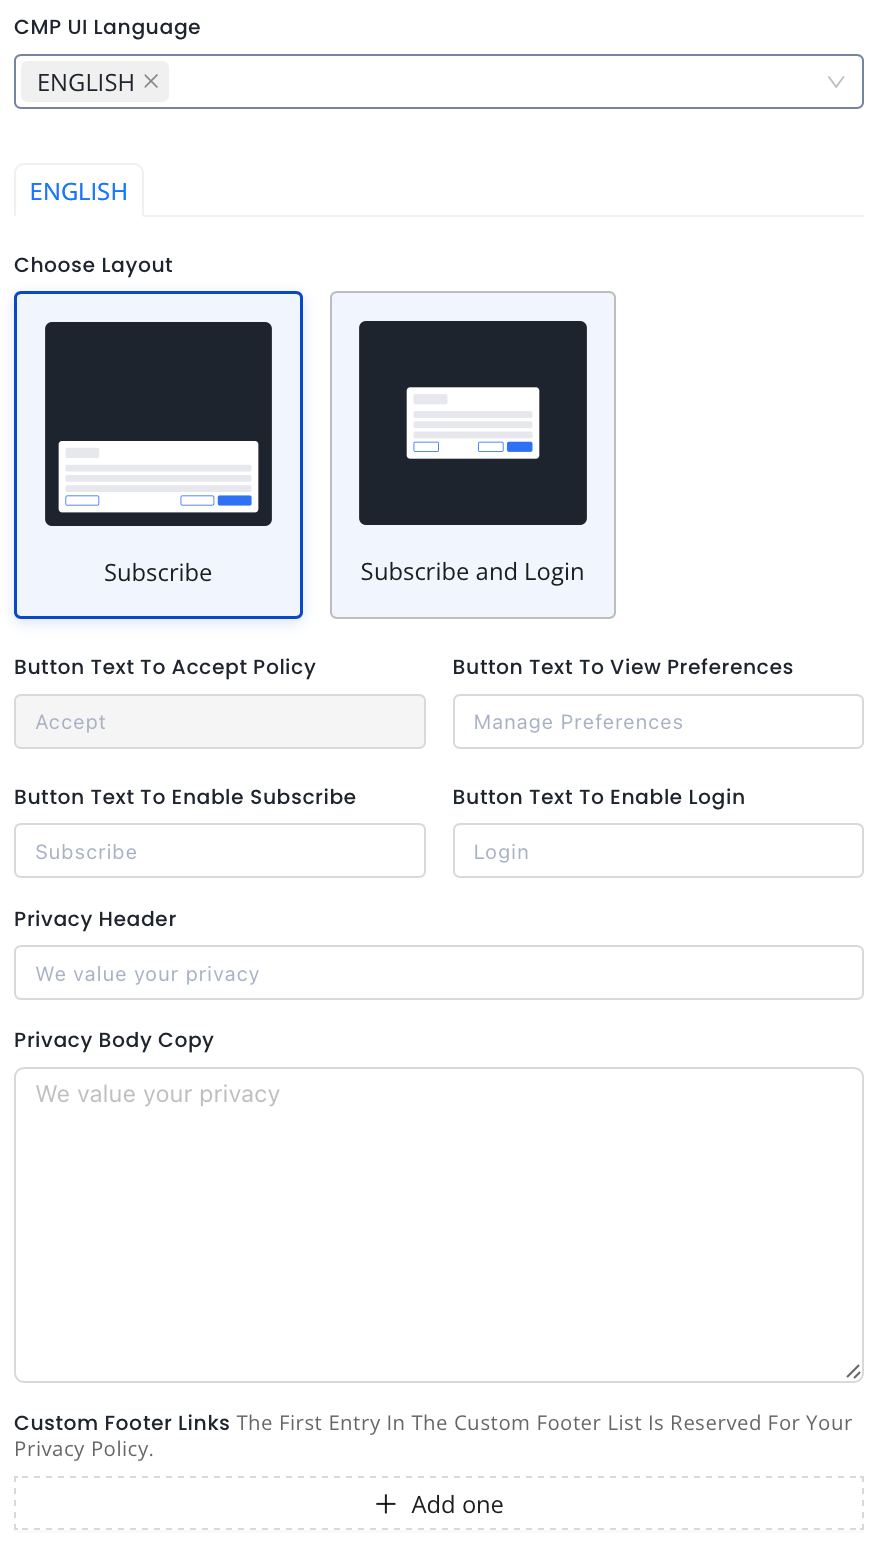
Advanced customization lets you modify the text for your GDPR consent screen and buttons in different languages. Currently, this feature is available only for Premium properties. For details, see Advanced Customization.
InMobi CMP enables publishers to provide a free option to opt out of data tracking and receiving personalized ads with the Partial Accept option. Currently, theme setting under Consent or Pay is available only for Premium properties.. For details, see Consent or Pay.
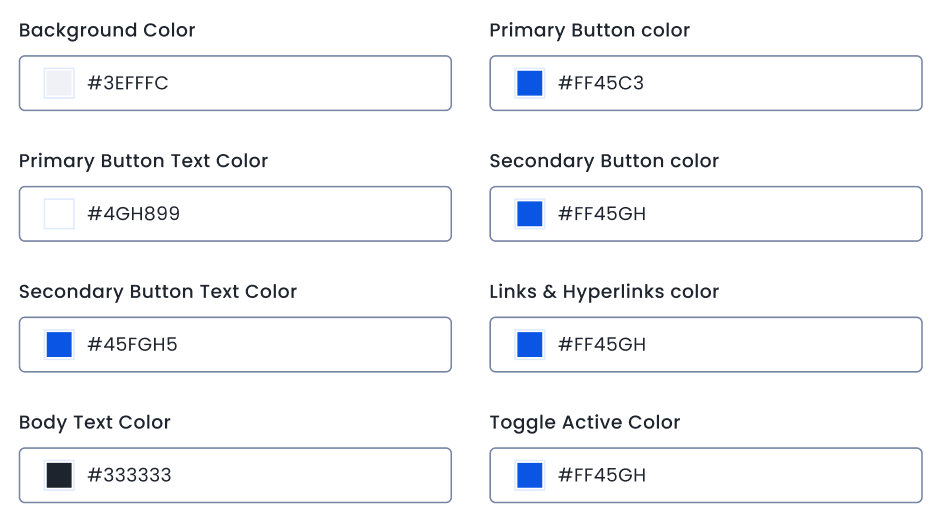
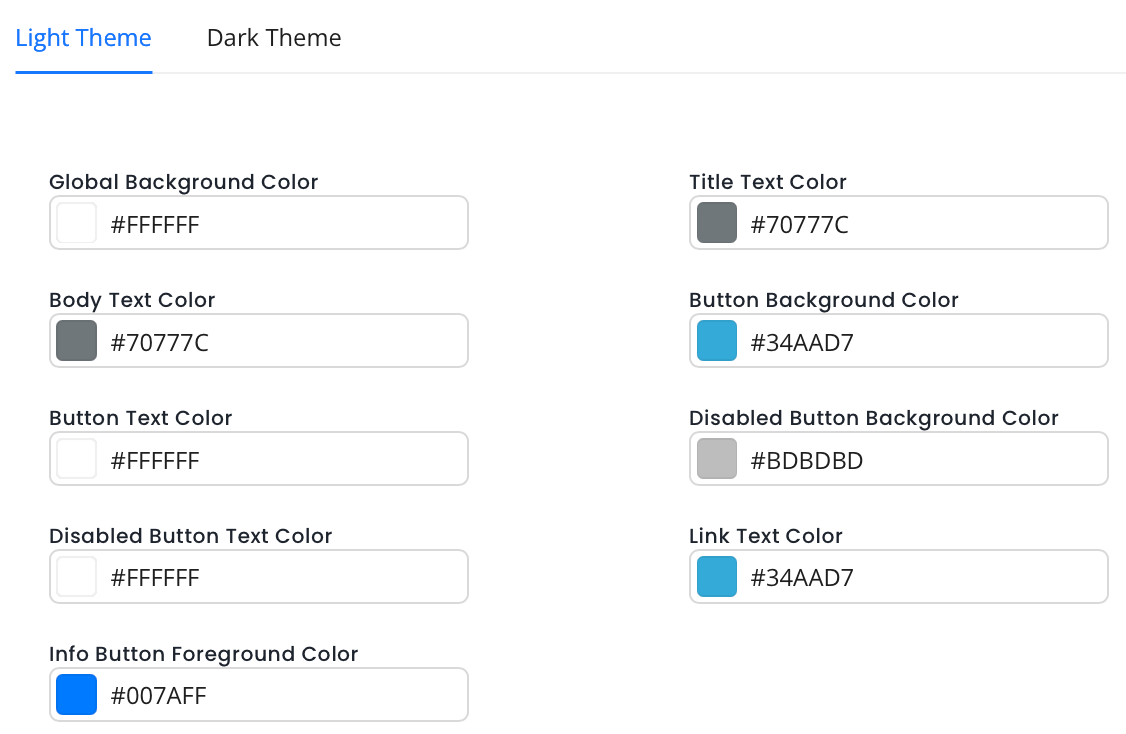
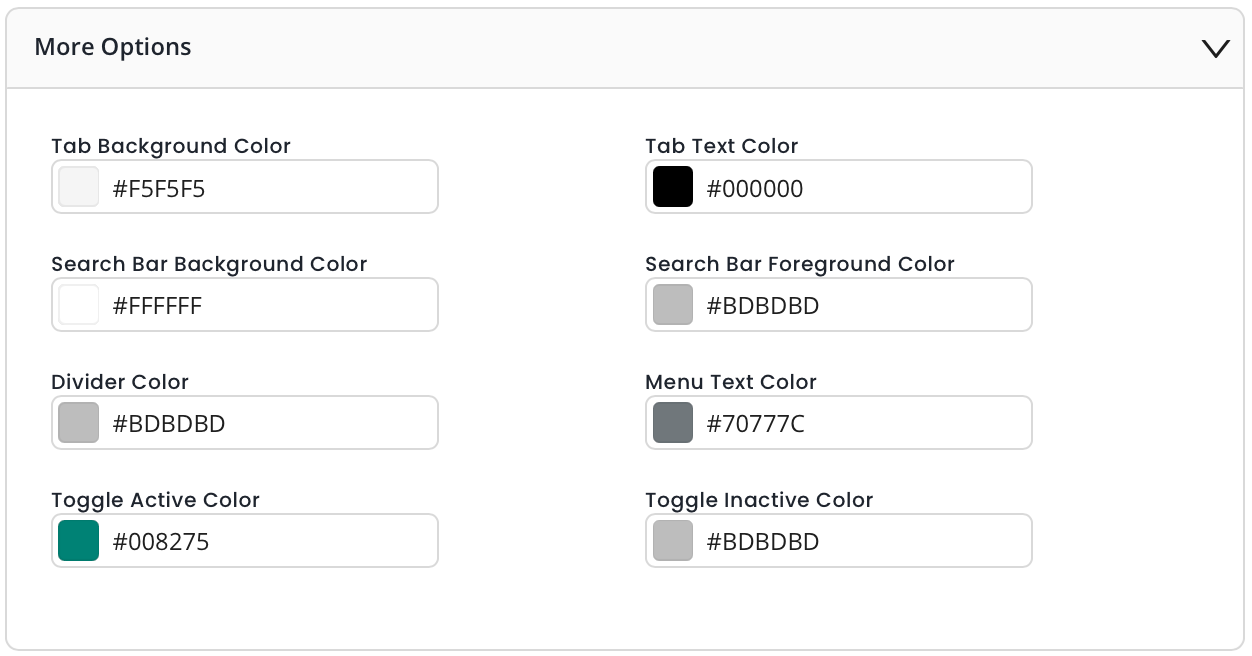
Color Customization is a premium feature and any changes made will be applied to only premium properties in the CMP.
While color customization can be done through code, InMobi CMP gives priority to color customization enabled through the portal. First, we will consider the customisations from the portal; if there are none, we will consider the customisations made through code. In case there are no changes made through code, we will apply the default colours.
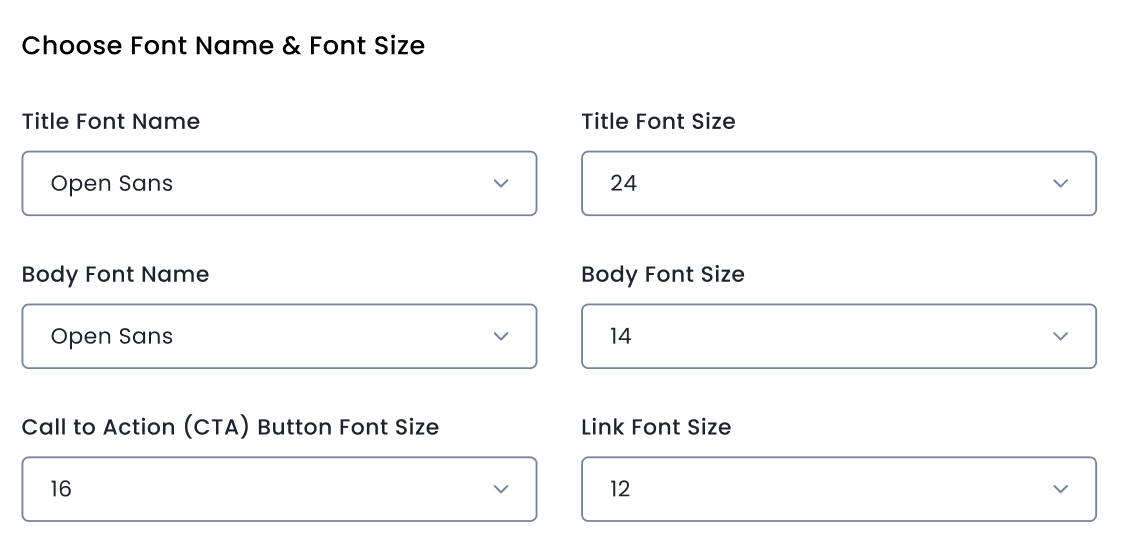
Typography is a premium feature and any changes made will be applied to only premium properties in the CMP.
While font customization can be done through code, InMobi CMP gives priority to font customization enabled through the portal. First, we will consider the customisations from the portal; if there are none, we will consider the customisations made through code. In case there are no changes made through code, we will apply the default fonts.
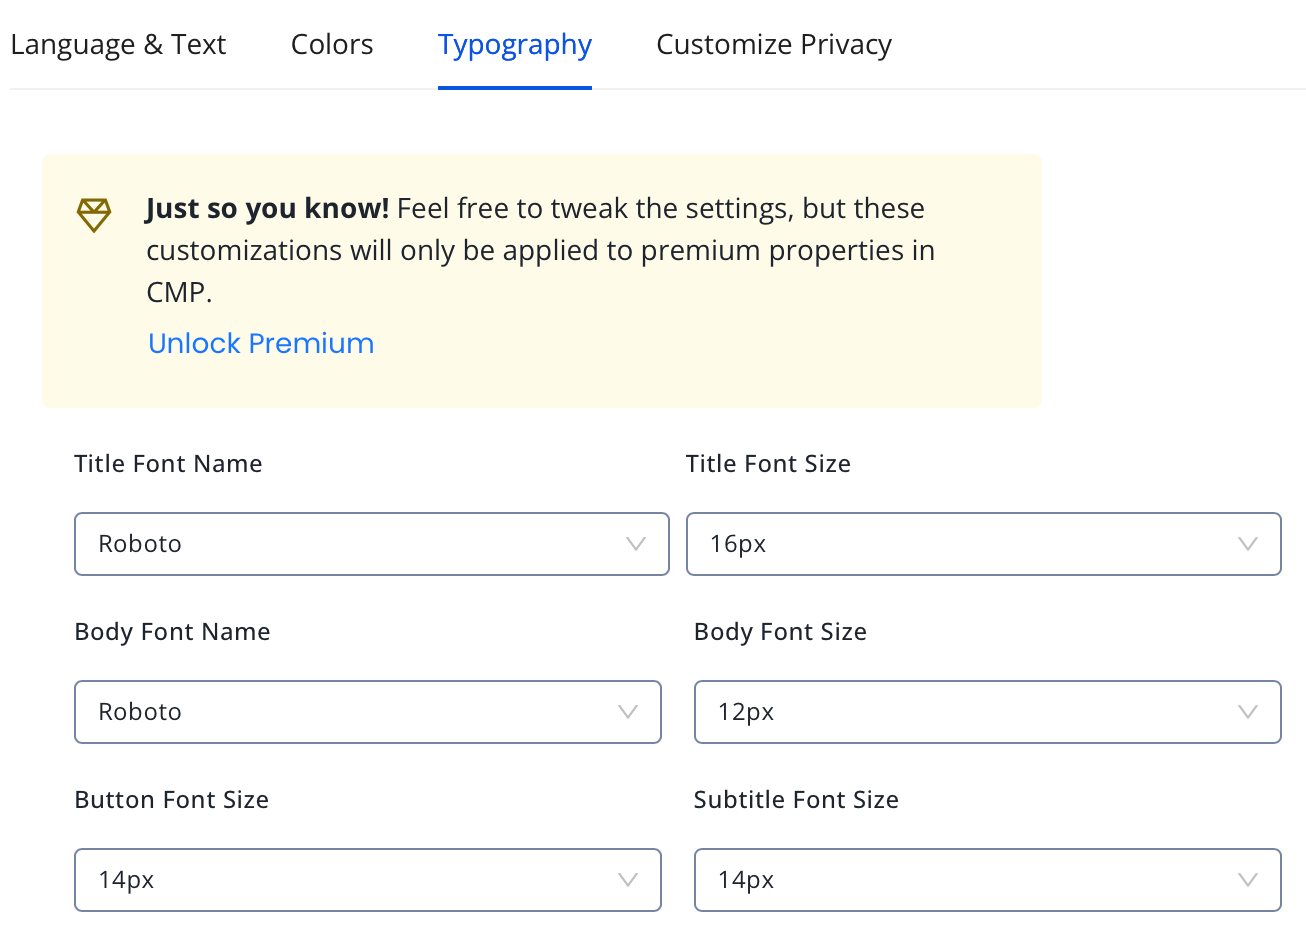
Choose Font Name & Font Size
Once you've set the language and text of your consent screen, you can further customize it by choosing the font and font size you prefer.
Choose Font Name & Font Size
Once you've set the language and text of your consent screen, you can further customize it by choosing the font and font size you prefer.
Color Customization is a premium feature and any changes made will be applied to only premium properties in the CMP.
While color customization can be done through code, InMobi CMP gives priority to color customization enabled through the portal. First, we will consider the customisations from the portal; if there are none, we will consider the customisations made through code. In case there are no changes made through code, we will apply the default colours.
Typography is a premium feature and any changes made will be applied to only premium properties in the CMP.
While font customization can be done through code, InMobi CMP gives priority to font customization enabled through the portal. First, we will consider the customisations from the portal; if there are none, we will consider the customisations made through code. In case there are no changes made through code, we will apply the default fonts.
These support the dropdown/search functionality in the UI:
| API | Method | Endpoint | Purpose |
|---|---|---|---|
| Get DSP Partners | GET | /meta/dsps |
Search DSPs |
| Get Countries | GET | /meta/countries |
Get a list of countries |
| Get States | GET | /meta/states |
Get a list of states |
| Get Cities | GET | /meta/cities |
Get a list of cities |
| Get Zip Code | GET | /meta/zip-code |
Get a list of zip codes |
| Get Ad Type | GET | /meta/ad-type |
Get a list of Ad types |
| Get Ad Slot | GET | /meta/ad-slot |
Get a list of Ad slots |
| Get OS Type | GET | /meta/operating-system |
Get a list of OS types |
| Get Audiences | GET | /meta/audiences |
Get a list of audiences |
| Get Deal Sync | GET | /meta/deals/sync |
Sync deals to DSPs (TTD, DV360) |
Use this API to retrieve the list of all DSP accounts integrated with the InMobi Exchange. This metadata API is useful when setting up or editing deals, as it provides valid DSP ID and name pairs required for deal creation.
GET https://apis.demand.ssp.inmobi.com/v1/meta/dsps
| Field Name | Type | Is mandatory (Y/N)? | Description |
|---|---|---|---|
| Authorization | String | Y | Bearer token for authentication (Bearer <token>) |
| X-USER-ID | String | Y | The ID of the user making the request |
| X-INMOBI-ORG-ID | String | Y | The organization ID associated with the user |
| Content-Type | String | Y | Specifies the media type of the request body. Use: application/json |
 curl -X GET "https://apis.demand.ssp.inmobi.com/v1/meta/accounts" \
-H "Authorization: Bearer <your bearer token>" \
-H "X-USER-ID: <test app>" \
-H "X-INMOBI-ORG-ID: <your org id>" \
-H "Content-Type: application/json"
{
  "data": [
    {
      "name": "Aarki RTB",
      "id": "cbab4104e7f14e2fbd2e21e96a8bf787"
    },
    {
      "name": "Adcolony_FirstRTBD",
      "id": "50f3f94bf37047ff982aca2536d781d1"
    },
    {
      "name": "Adcolony RTBD",
      "id": "b77bf7ba928f412eb02714cb5983f8d2"
    },
    {
      "name": "AdElement RTBD",
      "id": "bb9c931396d44a45b7e11b9b259e2d42"
    }
    // ...more DSPs
  ]
}
This metadata API returns the list of all supported countries that can be used for country-level geo-targeting in deals. The API supports pagination to retrieve results in batches.
GET https://apis.demand.ssp.inmobi.com/v1/meta/countries
| Field Name | Type | Is mandatory (Y/N)? | Description |
|---|---|---|---|
| Authorization | String | Y | Bearer token for authentication (Bearer <token>) |
| X-USER-ID | String | Y | The ID of the user making the request |
| X-INMOBI-ORG-ID | String | Y | The organization ID associated with the user |
| Content-Type | String | Y | Specifies the media type of the request body. Use: application/json |
| Field Name | Type | Is mandatory (Y/N)? | Description |
|---|---|---|---|
| num_items | Integer | N | Number of results per page (default: 20) |
| page_num | Integer | N | The page number to retrieve (default: 1) |
curl -X GET "https://apis.demand.ssp.inmobi.com/v1/meta/countries?num_items=30&page_num=2" \
-H "Authorization: Bearer <your bearer token>" \
-H "X-USER-ID: <test app>" \
-H "X-INMOBI-ORG-ID: <your org id>" \
-H "Content-Type: application/json" \
{
  "data": {
    "countries": [
      { "id": 150, "name": "India" },
      { "id": 108, "name": "Brazil" },
      { "id": 151, "name": "Canada" },
      { "id": 152, "name": "Netherlands" },
      { "id": 153, "name": "Bulgaria" },
      { "id": 154, "name": "Japan" },
      { "id": 155, "name": "China" }
      // ...more countries
    ],
    "pageNum": 2,
    "numItems": 30,
    "nextPage": true,
    "totalItems": 254,
    "totalPages": 9
  }
}
This metadata API returns the list of states or regions available under a specific country. It is typically used when setting up state-level geo-targeting during deal creation or update.
GET https://apis.demand.ssp.inmobi.com/v1/meta/states
| Field Name | Type | Is mandatory (Y/N)? | Description |
|---|---|---|---|
| Authorization | String | Y | Bearer token for authentication (Bearer <token>) |
| X-USER-ID | String | Y | The ID of the user making the request |
| X-INMOBI-ORG-ID | String | Y | The organization ID associated with the user |
| Content-Type | String | Y | Specifies the media type of the request body. Use: application/json |
| Field Name | Type | Is mandatory (Y/N)? | Description |
|---|---|---|---|
| country_id | Integer | Y | The ID of the country to filter cities by |
curl -X GET "https://apis.demand.ssp.inmobi.com/v1/meta/states?country_id=108" \
-H "Authorization: Bearer <your bearer token>" \
-H "X-USER-ID: <test app>" \
-H "X-INMOBI-ORG-ID: <your org id>" \
-H "Content-Type: application/json" \
{
  "data": {
    "states": [
      {
        "id": 31328,
        "name": "ACRE",
        "countryName": "Brazil",
        "countryId": 108
      },
      {
        "id": 31300,
        "name": "ALAGOAS",
        "countryName": "Brazil",
        "countryId": 108
      },
      {
        "id": 31301,
        "name": "AMAPA",
        "countryName": "Brazil",
        "countryId": 108
      }
      // ...more states
    ],
    "pageNum": 1,
    "numItems": 20,
    "nextPage": true,
    "totalItems": 39,
    "totalPages": 2
  }
}
This metadata API returns a list of cities within a specified country and (optionally) a specific state. It is used to configure precise city-level targeting while creating or updating deals.
GET https://apis.demand.ssp.inmobi.com/v1/meta/cities
| Field Name | Type | Is mandatory (Y/N)? | Description |
|---|---|---|---|
| Authorization | String | Y | Bearer token for authentication (Bearer <token>) |
| X-USER-ID | String | Y | The ID of the user making the request |
| X-INMOBI-ORG-ID | String | Y | The organization ID associated with the user |
| Content-Type | String | Y | Specifies the media type of the request body. Use: application/json |
| Field Name | Type | Is mandatory (Y/N)? | Description |
|---|---|---|---|
| country_id | Integer | Y | The ID of the country to filter cities by |
| state_id | Integer | N | The ID of the state to further filter cities |
curl -X GET "https://apis.demand.ssp.inmobi.com/v1/meta/cities?country_id=108&state_id=31301" \
-H "Authorization: Bearer <your bearer token>" \
-H "X-USER-ID: <test app>" \
-H "X-INMOBI-ORG-ID: <your org id>" \
-H "Content-Type: application/json" \
{
  "data": {
    "cities": [
      {
        "id": 1174474,
        "name": "CARIPI",
        "stateName": "AMAPA",
        "stateId": 31301,
        "countryName": "Brazil",
        "countryId": 108
      },
      {
        "id": 73777,
        "name": "MACAPA",
        "stateName": "AMAPA",
        "stateId": 31301,
        "countryName": "Brazil",
        "countryId": 108
      }
      // ... more cities
    ],
    "pageNum": 1,
    "numItems": 5,
    "nextPage": false,
    "totalItems": 5,
    "totalPages": 1
  }
}
This metadata API is used to retrieve ZIP or postal code information for supported countries. It helps in configuring zipcode-level geo-targeting in deal setup.
Note: This API is designed to filter zip codes by a numeric string using the search parameter.
GET https://apis.demand.ssp.inmobi.com/v1/meta/zip-code
| Field Name | Type | Is mandatory (Y/N)? | Description |
|---|---|---|---|
| Authorization | String | Y | Bearer token for authentication (Bearer <token>) |
| X-USER-ID | String | Y | The ID of the user making the request |
| X-INMOBI-ORG-ID | String | Y | The organization ID associated with the user |
| Content-Type | String | Y | Specifies the media type of the request body. Use: application/json |
| Field Name | Type | Is mandatory (Y/N)? | Description |
|---|---|---|---|
| search | String | Y | Zip code or part of it to filter the results |
curl -X GET "https://apis.demand.ssp.inmobi.com/v1/meta/zip-code?search=302012" \
-H "Authorization: Bearer <your bearer token>" \
-H "X-USER-ID: <test app>" \
-H "X-INMOBI-ORG-ID: <your org id>" \
-H "Content-Type: application/json"
{
  "data": {
    "countries": [
      {
        "id": 11,
        "name": "India",
        "zipcodes": [
          {
            "id": 5558498,
            "code": "302012"
          }
        ]
      }
    ],
    "pageNum": 1,
    "numItems": 1,
    "nextPage": false,
    "totalItems": 1,
    "totalPages": 1
  }
}
This metadata API returns the list of ad types supported by InMobi, along with their internal id, name, and broad externalName classification. These IDs are required for configuring ad type targeting in deals.
GET https://apis.demand.ssp.inmobi.com/v1/meta/ad-type
| Field Name | Type | Is mandatory (Y/N)? | Description |
|---|---|---|---|
| Authorization | String | Y | Bearer token for authentication (Bearer <token>) |
| X-USER-ID | String | Y | The ID of the user making the request |
| X-INMOBI-ORG-ID | String | Y | The organization ID associated with the user |
| Content-Type | String | Y | Specifies the media type of the request body. Use: application/json |
curl -X GET "https://apis.demand.ssp.inmobi.com/v1/meta/ad-type" \
-H "Authorization: Bearer <your bearer token>" \
-H "X-USER-ID: <test app>" \
-H "X-INMOBI-ORG-ID: <your org id>" \
-H "Content-Type: application/json"
{
  "data": [
    {
      "id": 0,
      "name": "Banner/Interstitial",
      "externalName": "Display"
    },
    {
      "id": 1,
      "name": "Interstitial Video",
      "externalName": "Video"
    },
    {
      "id": 6,
      "name": "Native",
      "externalName": "Native"
    },
    {
      "id": 10,
      "name": "Audio Banner",
      "externalName": "Audio"
    }
    // ...more ad types
  ]
}
This metadata API returns the list of supported ad slot sizes (width x height) available for inventory targeting. Each ad slot is identified by a unique id and its standard dimension name.
GET https://apis.demand.ssp.inmobi.com/v1/meta/ad-slot
| Field Name | Type | Is mandatory (Y/N)? | Description |
|---|---|---|---|
| Authorization | String | Y | Bearer token for authentication (Bearer <token>) |
| X-USER-ID | String | Y | The ID of the user making the request |
| X-INMOBI-ORG-ID | String | Y | The organization ID associated with the user |
| Content-Type | String | Y | Specifies the media type of the request body. Use: application/json |
curl -X GET "https://apis.demand.ssp.inmobi.com/v1/meta/ad-slot" \
-H "Authorization: Bearer <your bearer token>" \
-H "X-USER-ID: <test app>" \
-H "X-INMOBI-ORG-ID: <your org id>" \
-H "Content-Type: application/json"
{
  "data": [
    { "id": 14, "name": "320x480" },
    { "id": 11, "name": "728x90" },
    { "id": 15, "name": "320x50" },
    { "id": 18, "name": "160x600" },
    { "id": 0,  "name": "0x0" },
    { "id": 37, "name": "320x100" },
    { "id": 16, "name": "768x1024" },
    { "id": 32, "name": "480x320" },
    { "id": 33, "name": "1024x768" },
    { "id": 10, "name": "300x250" }
  ]
}
This metadata API returns a list of supported Operating Systems (OS) that can be used for device-level targeting during deal configuration. Each OS is identified by a unique ID and a human-readable name.
GET https://apis.demand.ssp.inmobi.com/v1/meta/operating-system
| Field Name | Type | Is mandatory (Y/N)? | Description |
|---|---|---|---|
| Authorization | String | Y | Bearer token for authentication (Bearer <token>) |
| X-USER-ID | String | Y | The ID of the user making the request |
| X-INMOBI-ORG-ID | String | Y | The organization ID associated with the user |
| Content-Type | String | Y | Specifies the media type of the request body. Use: application/json |
curl -X GET "https://apis.demand.ssp.inmobi.com/v1/meta/operating-system" \
-H "Authorization: Bearer <your bearer token>" \
-H "X-USER-ID: <test app>" \
-H "X-INMOBI-ORG-ID: <your org id>" \
-H "Content-Type: application/json"
{
  "data": [
    { "id": 3, "name": "Android" },
    { "id": 42, "name": "Android Automotive" },
    { "id": 11, "name": "Bada OS" },
    { "id": 35, "name": "BlackBerry OS" },
    { "id": 18, "name": "Desktop" },
    { "id": 21, "name": "FireFox OS" },
    { "id": 32, "name": "Fire OS" },
    { "id": 43, "name": "Fuchsia" },
    { "id": 44, "name": "HarmonyOS" },
    { "id": 15, "name": "Hiptop OS" },
    { "id": 5, "name": "iOS" },
    { "id": 38, "name": "iPadOS" }
  ]
}
This metadata API returns a list of audience segments available for targeting. These segments can be used to define behavioral, contextual, or 3rd-party targeting in a deal. The API supports search, pagination, and country filtering.
GET https://apis.demand.ssp.inmobi.com/v1/meta/audiences
| Field Name | Type | Is mandatory (Y/N)? | Description |
|---|---|---|---|
| Authorization | String | Y | Bearer token for authentication (Bearer <token>) |
| X-USER-ID | String | Y | The ID of the user making the request |
| X-INMOBI-ORG-ID | String | Y | The organization ID associated with the user |
Content-Type |
String | Y | Specifies the media type of the request body. Use: application/json |
| Field Name | Type | Is mandatory (Y/N)? | Description |
|---|---|---|---|
| limit | Integer | N | Number of segments to return per page |
| offset | Integer | N | Offset from the first result (used for pagination) |
| searchValue | String | N | Filter segments by keyword (e.g., Weather) |
| country | String | N | Filter segments by country name (e.g., USA) |
curl -X GET "https://apis.demand.ssp.inmobi.com/v1/meta/audiences?limit=2&offset=0&searchValue=Weather&country=USA" \
-H "Authorization: Bearer <your bearer token>" \
-H "X-USER-ID: <test app>" \
-H "X-INMOBI-ORG-ID: <your org id>" \
-H "Content-Type: application/json"
{
  "data": {
    "records": [
      {
        "type": "segment_detailed",
        "id": "374c4f34-5ad5-437c-aa20-8f153d04970d",
        "segmentCore": {
          "type": "segment_third_party",
          "startDateTime": "2024-12-31T00:00:00.000Z",
          "endDateTime": "2099-12-31T00:00:00.000Z",
          "brands": [],
          "categories": [],
          "tags": [],
          "widgets": [],
          "taxonomyType": "custom",
          "datasets": [],
          "name": "TWC > Weather Targeting > Relative > Current > Unseasonably Warm and Sunny",
          "description": "TWC > Weather Targeting > Relative > Current > Unseasonably Warm and Sunny",
          "providerId": "0f6e5ac5-cf01-494e-895e-840c416c4f4b",
          "pricing": {
            "value": 0,
            "pricingModel": "CPM"
          },
          "membershipTTLInHours": 8760,
          "segmentType": "PUBLIC",
          "primaryCountry": 94,
          "clientType": "IDI",
          "externalId": "de97d203-aa46-488d-b5de-3c9399e05d03",
          "externalSegmentId": "AU_RTD_9crq",
          "snapshotEpoch": 0
        },
        "createdOn": 1737023889992,
        "updatedOn": 1737023889992,
        "createdBy": "NA",
        "updatedBy": "NA",
        "isDeprecated": false,
        "segmentLifeCycleStage": "CREATED",
        "stats": {
          "reach": 0
        },
        "consumerAccountIdList": []
      },
      {
        "type": "segment_detailed",
        "id": "e246b77b-b71a-4537-8789-1ea07c5e2219",
        "segmentCore": {
          "type": "segment_third_party",
          "startDateTime": "2024-12-31T00:00:00.000Z",
          "endDateTime": "2099-12-31T00:00:00.000Z",
          "brands": [],
          "categories": [],
          "tags": [],
          "widgets": [],
          "taxonomyType": "custom",
          "datasets": [],
          "name": "TWC > Weather Targeting > Relative > Current > Unseasonably Cool",
          "description": "TWC > Weather Targeting > Relative > Current > Unseasonably Cool",
          "providerId": "0f6e5ac5-cf01-494e-895e-840c416c4f4b",
          "pricing": {
            "value": 0,
            "pricingModel": "CPM"
          },
          "membershipTTLInHours": 8760,
          "segmentType": "PUBLIC",
          "primaryCountry": 94,
          "clientType": "IDI",
          "externalId": "de97d203-aa46-488d-b5de-3c9399e05d03",
          "externalSegmentId": "AU_RTD_9crp",
          "snapshotEpoch": 0
        },
        "createdOn": 1737023889626,
        "updatedOn": 1737023889626,
        "createdBy": "NA",
        "updatedBy": "NA",
        "isDeprecated": false,
        "segmentLifeCycleStage": "CREATED",
        "stats": {
          "reach": 0
        },
        "consumerAccountIdList": []
      }
    ],
    "pagination": {
      "pageNum": 0,
      "pageSize": 2,
      "totalPages": 264,
      "totalRecords": 528
    }
  }
}
This API allows you to retrieve the synchronization status of a deal between the InMobi platform and a connected DSP. It provides details like the proposal ID, name, revision number, and last sync timestamp.
This API is applicable only for deals created for The Trade Desk (TTD) and DV360 DSPs.
POST https://apis.demand.ssp.inmobi.com/v1/deals/sync
| Field Name | Type | Is mandatory (Y/N)? | Description |
|---|---|---|---|
| Authorization | String | Y | Bearer token for authentication (Bearer <token>) |
| X-USER-ID | String | Y | The ID of the user making the request |
| X-INMOBI-ORG-ID | String | Y | The organization ID associated with the user |
Content-Type |
String | Y | Specifies the media type of the request body. Use: application/json |
| Field Name | Type | Is mandatory (Y/N)? | Description |
|---|---|---|---|
| rpDealId | String | Y | The ID of the deal for which sync status is being fetched |
curl -X POST "https://apis.demand.ssp.inmobi.com/v1/deals/sync" \
-H "Authorization: Bearer <your bearer token>" \
-H "X-USER-ID: <test app>" \
-H "X-INMOBI-ORG-ID: <your org id>" \
-H "Content-Type: application/json" \
-d '{ "rpDealId": "4263509454" }'
{
  "data": {
    "data": {
      "Sync Timestamp": "2025-06-26 08:58",
      "Proposal Id": 3491448,
      "Proposal Name": "TTD_SYNC_TEST_DEAL - Package",
      "Revision Number": 1
    }
  }
}
The Deal Management APIs allow InMobi partners—such as DSPs, agencies, curators, and advertisers—to programmatically create, retrieve, update, and manage their deals at scale. These APIs are designed to eliminate manual workflows, support faster deal creation, and provide fine-grained control over deal configuration and targeting.
Use these endpoints to integrate directly with InMobi’s exchange and manage deals aligned with your business goals.API Topics
These APIs require authentication via a bearer token, along with a mandatory client ID and Client Secret, for tracking and access control.
To access the Deals API, every request must include the following three mandatory headers:
| Field Name | Type | Is mandatory (Y/N)? | Description |
|---|---|---|---|
clientid |
String | Y | Partner-issued client identifier used to generate the auth token. |
clientSecret |
String | Y | Partner-issued secret key used alongside clientID to generate the token |
curl --location 'https://iam.inmobi.com/iam/v3/app/token' \
--header 'Content-Type: application/json' \
--data '{
  "clientId": "<client id value>",
  "clientSecret": "<client secret value>"

}'
{
  "httpCode": 200,
  "data": {
    "token": "eyJhbGciOiJSUzI1NiIsInR5cCI6IkpXVCIsImtpZCI6InZSY0Flb29fcFFMTnFiREo4ekZ2ciJ9.eyJpc3MiOiJodHRwczovL3N0YWdpbmcuaWFtLmF1dGguaW5tb2JpLmNvbS8iLCJzdWIiOiJoelVlaEh5alNDcGdwN0IxSU9mT0s0Z1ozZUtRekxsdUBjbGllbnRzIiwiYXVkIjoiaHR0cHM6Ly9pbm1vYmlpYW0udXMuYXV0aDAuY29tL2FwaS92Mi8iLCJpYXQiOjE3NTA3ODAzNjEsImV4cCI6MTc1MDg2Njc2MSwic2NvcGUiOiJjbGllbnRfY3JlZGVudGlhbHMiLCJndHkiOiJjbGllbnQtY3JlZGVudGlhbHMiLCJhenAiOiJoelVlaEh5alNDcGdwN0IxSU9mT0s0Z1ozZUtRekxsdSJ9.c3xwBQfXq5oVY04ReS8uFrgEsbnW_aGUkS6D3UEYMAosbcc66_tMFoQUIDuhk0tj-4ol9YNpMviy5ot4JyadErhRGa3gzyUQnwz6lFSNWK95g_k1weVKq3gyhp5-ImBNyW0xNvUG4u7QIG0KmC1jTAfjM5kJsL4SL1XWzmEVNc_o50tvBjGoBCc88ChDkel3NuZYBxCN-idQ3Y0N_okA68RYIgzlhIfpiv4LccOEib3I_jK17myZVlkno7JlG2p8HTvkYVPS3p15OhDAKt9sLMAN5xeCP9Fme9AtnnJNAa-E7mjxWner52I4Q75DxsBk47oEzE443FdImgz-8AJi_w",
    "validTill": "2025-06-25T15:52:41.21"
  }
}
API requests without these headers will result in a 401 or 400. For more information, see Error Codes.
Use the following API to create a new deal on the partner platform.
POST https://apis.demand.ssp.inmobi.com/v1/deals
| FIeld Name | Type | Is mandatory (Y/N)? | Description |
|---|---|---|---|
| Authorization | String | Y |
Bearer token used to authenticate the API request. (Format: |
| X-USER-ID | String | Y | Identifier for the user making the request (e.g., email or username) |
| X-INMOBI-ORG-ID | Array of objects | Y | Unique ID representing the requesting organization |
| Content-Type | String (Date) | Y | Specifies the media type of the request body. Use: application/json |
| FIeld Name | Type | Is mandatory (Y/N)? | Description |
|---|---|---|---|
name |
String | Y |
Name of the deal. |
dealCategory |
String | Y | Supported values: AUCTION_PACKAGE, STANDARD_DEAL
|
dspId |
String | Y | DSP identifier. For more information, see Get DSP Partners. |
seats |
Array of objects | N | List of buyer seats |
startDate |
String (Date) | Y | Start date in DD/MM/YYYY HH:mm:ss format |
endDate |
String (Date) | Y | End date in DD/MM/YYYY HH:mm:ss format |
dealType |
String | Y | Type of deal pricing (Supported value: PREFERRED_DEAL) |
dealFloorType |
String | Y | Supported value: STATIC, and VARIABLE.
|
dealFloor |
Float | Y | Floor price in whole numbers (up to 2 decimals accepted). |
dealFloorTolerance |
String | N | Allowed pricing flexibility (Supported value in the range 0 - 200) |
margin |
Integer | N | Partner margin percentage (if applicable) |
isActive |
Boolean | N | Whether the deal is active (ACTIVE) or paused (PAUSE). |
targeting |
Array of objects | N | Targeting segments (see Targeting object) |
targetKpis |
Array of objects | N | Performance KPIs (see KPI object) |
tracking |
Object | N | Tracking config (see Tracking object) |
| FIeld Name | Type | Is mandatory (Y/N)? | Description |
|---|---|---|---|
id |
String | N | Unique seat ID |
| FIeld Name | Type | Is mandatory (Y/N)? | Description |
|---|---|---|---|
| geography | Object | N | Geographic targeting rules |
| inventory | Object | N | Inventory filtering |
| audiences | Object | N | Audience targeting |
| devices | Object | N | Device targeting |
| FIeld Name | Type | Is mandatory (Y/N)? | Description |
|---|---|---|---|
| countryTargeting | Object | N | Country-level filtering. For more information, see Get Countries List. |
| stateTargeting | Object | N | State-level filtering. For more information, see Get States List. |
| cityTargeting | Object | N | City-level filtering. For more information, see Get Cities List. |
| FIeld Name | Type | Is mandatory (Y/N)? | Description |
|---|---|---|---|
| countries | Integer[] | N | List of country IDs |
| isIncl | Boolean | N | Include/exclude toggle (true/false) |
| FIeld Name | Type | Is mandatory (Y/N)? | Description |
|---|---|---|---|
| states[] | Object | N | Nested list of state IDs |
| isIncl | Boolean | N | Include/exclude toggle (true/false) |
| FIeld Name | Type | Is mandatory (Y/N)? | Description |
|---|---|---|---|
| stateIds | Integer[] | Y | State identifiers |
| FIeld Name | Type | Is mandatory (Y/N)? | Description |
|---|---|---|---|
| cities[] | Object | N | Grouped by country |
| isIncl | Boolean | N | Include/exclude toggle (true/false) |
| FIeld Name | Type | Is mandatory (Y/N)? | Description |
|---|---|---|---|
| countryId | Integer | Y | Country associated |
| cityIds | Integer[] | Y | City identifiers |
| FIeld Name | Type | Is mandatory (Y/N)? | Description |
|---|---|---|---|
| inventoryTypeTargeting | Object | N | Filters by inventory type |
| adTypeTargeting | Object | N | Filters by ad creative type. For more information, see Get Ad Type. |
| adSlotTargeting | Object | N | Filters by ad size/slot ID. For more information, see Get Ad Slot. |
| bundleTargeting | Object | N | Filters by app bundles/domains |
| publisherTargeting | Object | N | Filters by publisher whitelist |
| placementContextTargeting | Object | N | Filters by placement context type |
| videoAdDurationTargeting | Object | N | Filters by video ad duration (For eg: {"min": 1, "max": 30} |
| FIeld Name | Type | Is mandatory (Y/N)? | Description |
|---|---|---|---|
| types | String[] | N | E.g., BROWSER, APP |
| isIncl | Boolean | N | Include/exclude toggle (true/false) |
| FIeld Name | Type | Is mandatory (Y/N)? | Description |
|---|---|---|---|
| types | String[] | N | eg: In-stream, Out-stream, In-banner, Livestream |
| isIncl | Boolean | N | Include/exclude toggle (true/false) |
| FIeld Name | Type | Is mandatory (Y/N)? | Description |
|---|---|---|---|
| csidFilterExpression | String | N | Audience logic in CSID expression format |
| FIeld Name | Type | Is mandatory (Y/N)? | Description |
|---|---|---|---|
| osVersions | Integer[] | N | OS version IDs. For more information, see Get OS Type. |
| deviceIdPresent | Integer | N | 1 = Required, 0 = Optional |
| FIeld Name | Type | Is mandatory (Y/N)? | Description |
|---|---|---|---|
| kpi | String | Y | KPI type (Supported values: vcr, ctr, viewability) |
| optimisationRule | String | Y | Optimization logic (Supported values: auto) |
| target | Integer | Y | Target value (Supported value in the range: 0-100) |
| isPrimary | Boolean | N | Indicates if KPI is primary (true/false) |
| FIeld Name | Type | Is mandatory (Y/N)? | Description |
|---|---|---|---|
| viewabilityPartners | Object | N | IAS or other partner setup |
| FIeld Name | Type | Is mandatory (Y/N)? | Description |
|---|---|---|---|
| enableIas | Boolean | Y | Enable IAS tracking (true/false) |
| useInmobiIasTag | Boolean | Y | Use IAS tags served via InMobi (true/false) |
| usePartnerAdvertiserIdIas | Boolean | Y | Use the partner advertiser’s IAS tag (true/false) |
| iasExternalTags[] | Array | N | Custom IAS tag entries |
curl -X POST "https://apis.demand.ssp.inmobi.com/v1/deals" \
-H "accept: application/json" \
-H "Authorization: Bearer <your bearer id>" \
-H "X-USER-ID: testapp" \
-H "X-INMOBI-ORG-ID: <your org id>" \
-H "Content-Type: application/json" \
-d '{
  "deal": {
    "name": "testdeal1",
    "dspId": "cbab4104e7f14e2fbd2e21e96a8bf787",
    "seats": [
      {
        "id": "seat1"
      }
    ],
    "startDate": "17/07/2025 00:00:00",
    "endDate": "18/07/2025 23:59:59",
    "dealType": "PREFERRED_DEAL",
    "dealFloor": 10,
    "dealFloorType": "STATIC",
    "margin": 20,
    "targeting": [
      {
        "geography": {
          "stateTargeting": {
            "states": [
              {
                "stateIds": [
                  31207
                ]
              }
            ],
            "isIncl": true
          },
          "cityTargeting": {
            "cities": [
              {
                "countryId": 53,
                "cityIds": [
                  900611
                ]
              },
              {
                "countryId": 111,
                "cityIds": [
                  49229,
                  49222
                ]
              }
            ],
            "isIncl": true
          },
          "countryTargeting": {
            "countries": [
              125
            ],
            "isIncl": true
          }
        },
        "inventory": {
          "bundleTargeting": {
            "bundleIds": [
              "app/domain"
            ],
            "isIncl": true
          },
          "publisherTargeting": {
            "publishers": [
              "publisherwhitelist"
            ],
            "isIncl": true
          },
          "inventoryTypeTargeting": {
            "types": [
              "BROWSER"
            ],
            "isIncl": true
          },
          "adTypeTargeting": {
            "types": [
              1
            ],
            "isIncl": true
          },
          "adSlotTargeting": {
            "slots": [
              14
            ],
            "isIncl": true
          }
        },
        "audiences": {
          "csidFilterExpression": "[[5ace5190-db24-4392-8c88-4042491bca2e,7740e4bb-1963-4ed5-b4e2-c4a69a716e2f]]"
        },
        "devices": {
          "osVersions": [
            3
          ],
          "deviceIdPresent": 1
        }
      }
    ],
    "dealFloorTolerance": "",
    "isActive": false,
    "targetKpis": [
      {
        "kpi": "vcr",
        "optimisationRule": "auto",
        "target": 70,
        "isPrimary": false
      }
    ],
    "tracking": {
      "viewabilityPartners": {
        "ias": {
          "enableIas": true,
          "useInmobiIasTag": true,
          "usePartnerAdvertiserIdIas": false,
          "iasExternalTags": []
        }
      }
    }
  }
}'
{
  "data": {
    "id": "4263509453",
    "message": "Created successfully"
  }
}
This response confirms that the deal was created successfully and provides the unique deal ID generated by the system.
For more information, see Error Codes.
Use the API to retrieve a paginated list of all deals associated with your organization. Supports optional filters by status, partner, or keyword search.
GET https://apis.demand.ssp.inmobi.com/v1/deals
| Field Name | Type | Is mandatory (Y/N)? | Description |
|---|---|---|---|
| Authorization | String | Y | Bearer token for authentication (Bearer <token>) |
| X-USER-ID | String | Y | The ID of the user making the request |
| X-INMOBI-ORG-ID | String | Y | The organization ID associated with the user |
| Content-Type | String | Y | Specifies the media type of the request body. Use: application/json |
| Field Name | Type | Is mandatory (Y/N)? | Description |
|---|---|---|---|
search |
String | Optional | Search by dealId, dealName, or seatId |
status |
String | Optional | Filter by deal status: ACTIVE, PAUSED, EXPIRED, UPCOMING |
partner |
String | Optional | Filter deals by partner name |
pageNum |
Integer | Optional (default = 1) | Page number for pagination |
numItems |
Integer | Optional (default = 20) | Number of items per page |
You must include the standard headers: Authorization, X-USER-ID, and X-INMOBI-ORG-ID.
curl -X GET "https://apis.demand.ssp.inmobi.com/v1/deals" \
-H "Authorization: Bearer <your bearer token>" \
-H "X-USER-ID: <test app>" \
-H "X-INMOBI-ORG-ID: <your org id>" \
-H "Content-Type: application/json"
{
  "data": {
    "deals": [
      {
        "name": "testdeal1",
        "id": "4263509453",
        "seats": [
          {
            "id": "seat1"
          }
        ],
        "endDate": "2025-07-18T23:59:59",
        "status": "UPCOMING"
      },
      {
        "name": "testdeal2",
        "id": "4263509452",
        "seats": [
          {
            "id": "seat1"
          }
        ],
        "endDate": "2025-07-18T23:59:59",
        "status": "UPCOMING"
      }
    ]
  }
}
For more information, see Error Codes.
Use the API to fetch the complete configuration of a specific deal using its unique ID.
GET https://apis.demand.ssp.inmobi.com/v1/deals?deal_id=<deal_id>
| Field Name | Type | Is mandatory (Y/N)? | Description |
|---|---|---|---|
| Authorization | String | Y | Bearer token for authentication (Bearer <token>) |
| X-USER-ID | String | Y | The ID of the user making the request |
| X-INMOBI-ORG-ID | String | Y | The organization ID associated with the user |
| Content-Type | String | Y | Specifies the media type of the request body. Use: application/json |
| Field Name | Type | Is mandatory (Y/N)? | Description |
|---|---|---|---|
deal_id |
String | Y | Unique identifier for the deal to fetch |
All requests must include the headers: Authorization, X-USER-ID, and X-INMOBI-ORG-ID.
curl -X GET "https://apis.demand.ssp.inmobi.com/v1/deals?deal_id=4263509468" \
-H "Authorization: Bearer <your bearer token>" \
-H "X-USER-ID: <test app>" \
-H "X-INMOBI-ORG-ID: <your org id>" \
-H "Content-Type: application/json"
{
  "data": {
    "id": "4263509468",
    "name": "testdeal1",
    "seats": [
      {
        "id": "seat1"
      }
    ],
    "dspId": "cbab4104e7f14e2fbd2e21e96a8bf787",
    "dspName": "Aarki RTB",
    "startDate": "17/07/2025",
    "endDate": "18/07/2025",
    "dealType": "PREFERRED_DEAL",
    "dealFloor": 10,
    "dealFloorType": "STATIC",
    "dealFloorTolerance": "",
    "status": "UPCOMING",
    "isActive": false,
    "isDealSynced": false,
    "targeting": [
      {
        "targetingSegmentId": 30890,
        "geography": {
          "stateTargeting": {
            "states": [
              {
                "countryId": 128,
                "countryName": "Algeria",
                "stateIds": [
                  {
                    "id": 31207,
                    "name": "ADRAR"
                  }
                ]
              }
            ],
            "isIncl": true
          },
          "cityTargeting": {
            "cities": [
              {
                "countryId": 53,
                "countryName": "Germany",
                "cityIds": [
                  {
                    "id": 900611,
                    "name": "RHEINLAND-PFALZ - AACH"
                  }
                ]
              },
              {
                "countryId": 111,
                "countryName": "Belgium",
                "cityIds": [
                  {
                    "id": 49229,
                    "name": "OOST-VLAANDEREN - AALST"
                  },
                  {
                    "id": 49222,
                    "name": "VLAAMS-BRABANT - AARSCHOT"
                  }
                ]
              }
            ],
            "isIncl": true
          },
          "countryTargeting": {
            "countries": [
              {
                "id": 125,
                "name": "Afghanistan"
              }
            ],
            "isIncl": true
          }
        },
        "inventory": {
          "inventoryTypeTargeting": {
            "types": [
              {
                "id": "BROWSER",
                "name": "Browser"
              }
            ],
            "isIncl": true
          },
          "adTypeTargeting": {
            "types": [
              {
                "id": 1,
                "name": "Interstitial Video",
                "externalName": "Video"
              }
            ],
            "isIncl": true
          },
          "adSlotTargeting": {
            "slots": [
              {
                "id": 14,
                "name": "320x480"
              }
            ],
            "isIncl": true
          },
          "bundleTargeting": {
            "bundleIds": [
              "app/domain"
            ],
            "isIncl": true
          },
          "publisherTargeting": {
            "publishers": [
              "publisherwhitelist"
            ],
            "isIncl": true
          }
        },
        "audiences": {
          "csidFilterExpression": "[[5ace5190-db24-4392-8c88-4042491bca2e,7740e4bb-1963-4ed5-b4e2-c4a69a716e2f]]"
        },
        "devices": {
          "osVersions": [
            {
              "id": 3,
              "name": "Android"
            }
          ],
          "deviceIdPresent": 1
        }
      }
    ],
    "tracking": {
      "viewabilityPartners": {
        "ias": {
          "enableIas": true,
          "useInmobiIasTag": true,
          "usePartnerAdvertiserIdIas": false,
          "iasExternalTags": []
        }
      }
    },
    "margin": 20
  }
}
For more information, see Error Codes.
Use the API to update the details of an existing deal using its unique deal ID. You can modify attributes like end date, targeting, margins, floor price, and more.
PUT https://apis.demand.ssp.inmobi.com/v1/deals
| Field Name | Type | Is mandatory (Y/N)? | Description |
|---|---|---|---|
| Authorization | String | Y | Bearer token for authentication (Bearer <token>) |
| X-USER-ID | String | Y | The ID of the user making the request |
| X-INMOBI-ORG-ID | String | Y | The organization ID associated with the user |
| Content-Type | String | Y | Specifies the media type of the request body. Use: application/json |
| Field Name | Type | Is mandatory (Y/N)? | Description |
|---|---|---|---|
deal.id |
String | Y | Unique ID of the deal to update |
deal.name |
String | Y | Name of the deal |
deal.dspID |
String | Y | DSP ID |
deal.startDate |
String (DateTime) | Y | Start date in DD/MM/YYYY HH:mm:ss format |
deal.endDate |
String (DateTime) | Y | Start date in DD/MM/YYYY HH:mm:ss format |
deal.dealType |
String | Y | Deal type, e.g., PREFERRED_DEAL |
deal.dealFloor |
Number | Y | Floor price |
deal.dealFloorType |
String | Y | STATIC or VARIABLE |
deal.margin |
Number | N | Partner margin % |
deal.dealFloorTolerance |
String | N | Allowed floor tolerance (if applicable) |
| deal.isActive | Boolean | N | Deal status flag |
deal.targeting[].targetingSegmentId |
Integer | N | ID of the targeting segment |
| Field Name | Type | Is mandatory (Y/N)? | Description |
|---|---|---|---|
geography.countryTargeting.countries[] |
Integer[] | N | Country IDs |
geography.stateTargeting.states[].stateIds[] |
Integer[] | N | State IDs |
geography.cityTargeting.cities[].cityIds[] |
Integer[] | N | City IDs |
inventory.inventoryTypeTargeting.types[] |
String[] | N | E.g., APP, BROWSER |
inventory.adTypeTargeting.types[] |
Integer[] | N | E.g., 1 = Video |
inventory.adSlotTargeting.slots[] |
Integer[] | N | Ad slot IDs |
audiences.csidFilterExpression |
String | N | CSID expression |
devices.osVersions[] |
Integer[] | N | OS version IDs |
devices.deviceIdPresent |
Integer | N | 1 if device ID is required |
| Field Name | Type | Is mandatory (Y/N)? | Description |
|---|---|---|---|
targetKpis[].kpi |
String | N | KPI type, e.g., vcr |
targetKpis[].optimisationRule |
String | N | Rule: auto, manual |
targetKpis[].target |
Integer | N | Target value for KPI |
tracking.viewabilityPartners.ias.* |
Various | N | IAS tracking configuration flags |
tracking.billOnViewability |
Boolean | N | Billing logic based on viewability |
tracking.additionalParameters.* |
Various | N | Misc flags like trueViewEnabled, verticalVideoOnly |
curl -X PUT "https://apis.demand.ssp.inmobi.com/v1/deals" \
-H "Authorization: Bearer <your bearer token>" \
-H "X-USER-ID: <test app>" \
-H "X-INMOBI-ORG-ID: <your org id>" \
-H "Content-Type: application/json" \
-d '{
  "deal": {
    "id": "4263509468",
    "name": "testdeal1",
    "dspId": "cbab4104e7f14e2fbd2e21e96a8bf787",
    "seats": [
      {
        "id": "seat1"
      }
    ],
    "startDate": "17/07/2025 00:00:00",
    "endDate": "18/07/2025 23:59:59",
    "dealType": "PREFERRED_DEAL",
    "dealFloor": 10,
    "dealFloorType": "STATIC",
    "margin": 20,
    "targeting": [
      {
        "targetingSegmentId": 30890,
        "geography": {
          "stateTargeting": {
            "states": [
              {
                "stateIds": [
                  31207
                ]
              }
            ],
            "isIncl": true
          },
          "cityTargeting": {
            "cities": [
              {
                "countryId": 53,
                "cityIds": [
                  900611
                ]
              },
              {
                "countryId": 111,
                "cityIds": [
                  49229,
                  49222
                ]
              }
            ],
            "isIncl": true
          },
          "countryTargeting": {
            "countries": [
              125
            ],
            "isIncl": true
          }
        },
        "inventory": {
          "bundleTargeting": {
            "bundleIds": [
              "app/domain"
            ],
            "isIncl": true
          },
          "publisherTargeting": {
            "publishers": [
              "publisherwhitelist"
            ],
            "isIncl": true
          },
          "inventoryTypeTargeting": {
            "types": [
              "BROWSER"
            ],
            "isIncl": true
          },
          "adTypeTargeting": {
            "types": [
              1
            ],
            "isIncl": true
          },
          "adSlotTargeting": {
            "slots": [
              14
            ],
            "isIncl": true
          }
        },
        "audiences": {
          "csidFilterExpression": "[[5ace5190-db24-4392-8c88-4042491bca2e,7740e4bb-1963-4ed5-b4e2-c4a69a716e2f]]"
        },
        "devices": {
          "osVersions": [
            3
          ],
          "deviceIdPresent": 1
        }
      }
    ],
    "dealFloorTolerance": "",
    "isActive": false,
    "targetKpis": [
      {
        "kpi": "vcr",
        "optimisationRule": "auto",
        "target": 70,
        "isPrimary": false
      }
    ],
    "tracking": {
      "viewabilityPartners": {
        "ias": {
          "enableIas": true,
          "useInmobiIasTag": true,
          "usePartnerAdvertiserIdIas": false,
          "iasExternalTags": []
        }
      }
    }
  }
}'
{
  "data": {
    "id": "4263509468",
    "message": "Updated successfully"
  }
}
For more information, see Error Codes.
Welcome to the Monetization and Integration Guides, your central resource for setting up and scaling monetization with InMobi across environments. Whether you’re using InMobi as a demand source on a mediation platform or integrating it directly as a mediation layer, these guides are designed to help you go live with confidence.
These guides cover integrations across:
They also walk you through key steps for real-time bidding setup, SDK integration, and yield partner configuration — ensuring a seamless monetization experience on the platform of your choice.
Depending on the platform and inventory type, InMobi supports two modes of integration:
Depending on the platform and environment, InMobi supports:
InMobi is now integrated with all the leading header bidding and mediation platforms, including:
| Partner | Integration type | Inventory Supported | Ad Formats Supported |
| Amazon Publisher Services (APS) | OpenRTB | In-App, Web |
Mobile (In-App): Banner, Interstitial, Video (all formats), and Native. Web: Banner, In-stream Video, and Native. |
| AppLovin MAX | SDK | In-App | Banner, Interstitial, Rewarded Video, and Native. |
| DT FairBid | SDK | In-App | Banner, Interstitial, and Rewarded Video |
| Google Ad Manager | SDK | In-App | Banner, Interstitial, Native, and Rewarded Video |
| Google AdMob | SDK | In-App | Banner, Interstitial, Rewarded Video, and Native |
| Google Open Bidding | OpenRTB | In-App, Web, CTV |
Mobile App: Banner, Interstitial, Video (any format), and Native Web: Banner, Instream and Outstream Video, and Native |
| Nimbus | SDK | In-App | Banner, Interstitial, and Video (any format). |
| Prebid Plugin Renderer | SDK | In-App | Banner, Native, and Video |
| Prebid Server | OpenRTB | In-App, Web |
Banner, Native, Video (all formats) |
| Prebid.js | OpenRTB | In-App, Web | Banner, Instream and Outstream Video, and Native |
| Publica | OpenRTB | CTV | Video (VAST) |
| SpringServe | OpenRTB | CTV | Video (VAST) |
| Unity | SDK | In-App | Banner, Interstitial, and Rewarded Video |
| Unity LevelPlay | SDK | In-App | Banner, Interstitial, and Rewarded Video |
InMobi is available as a bidder on Amazon Publisher Services (APS) through Transparent Ad Marketplace (TAM) and Unified Ad Marketplace (UAM). This server-side integration uses the OpenRTB protocol and does not require SDK implementation. This setup enables seamless access to InMobi’s demand, offering an efficient, API-based monetization path for both mobile web and in-app inventory.
To successfully integrate InMobi with APS, ensure you meet the following prerequisites:
Use the toggle below to view the differences in dashboard configuration across platforms.
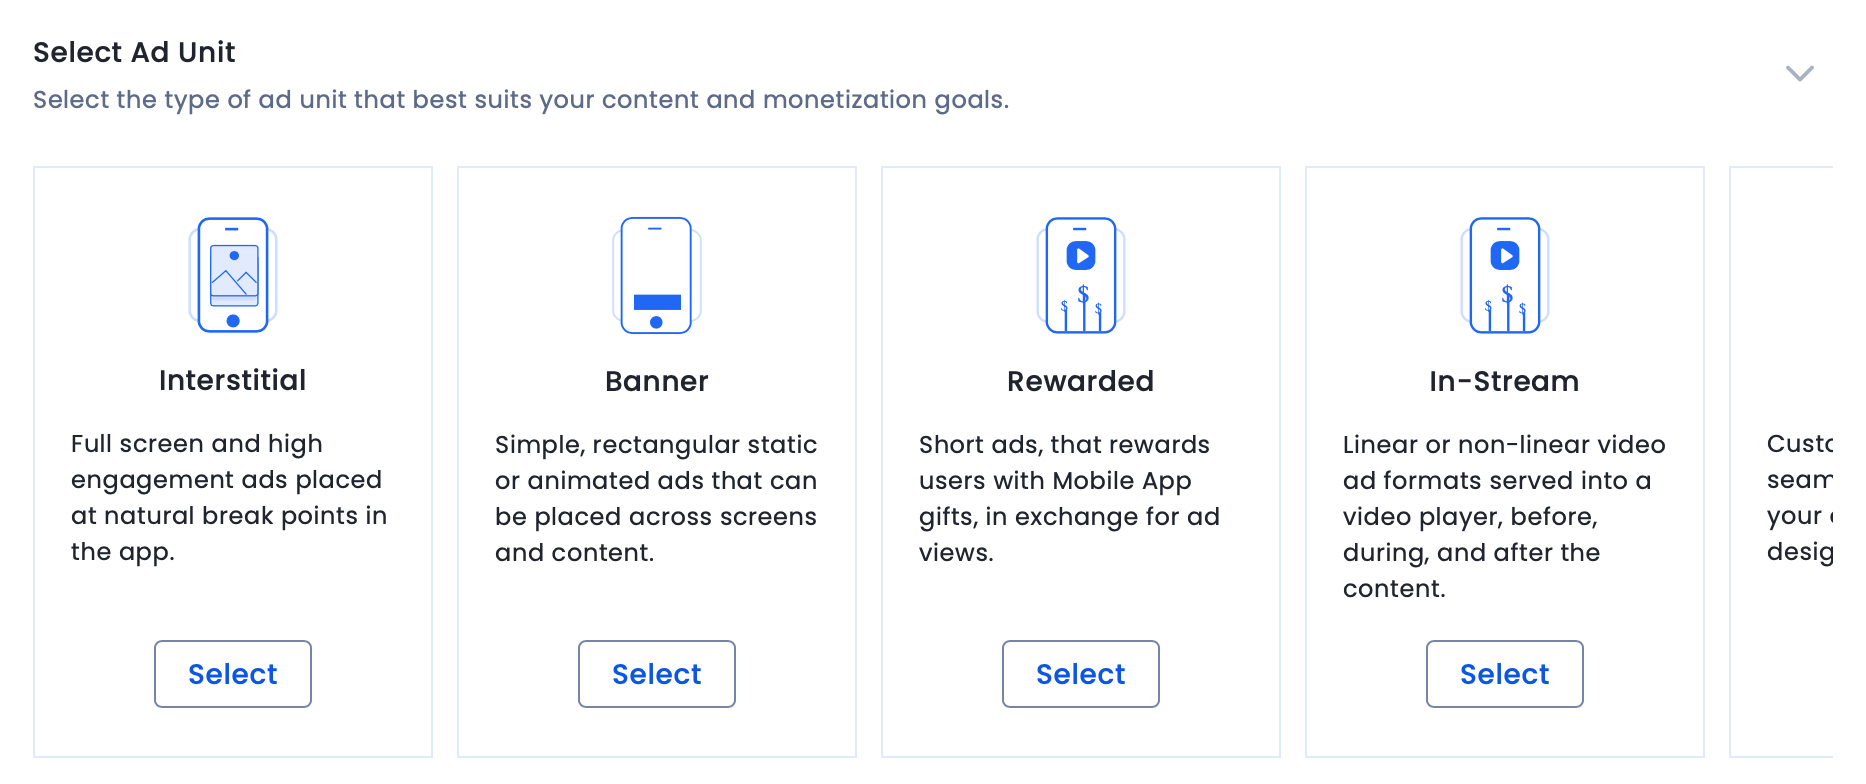
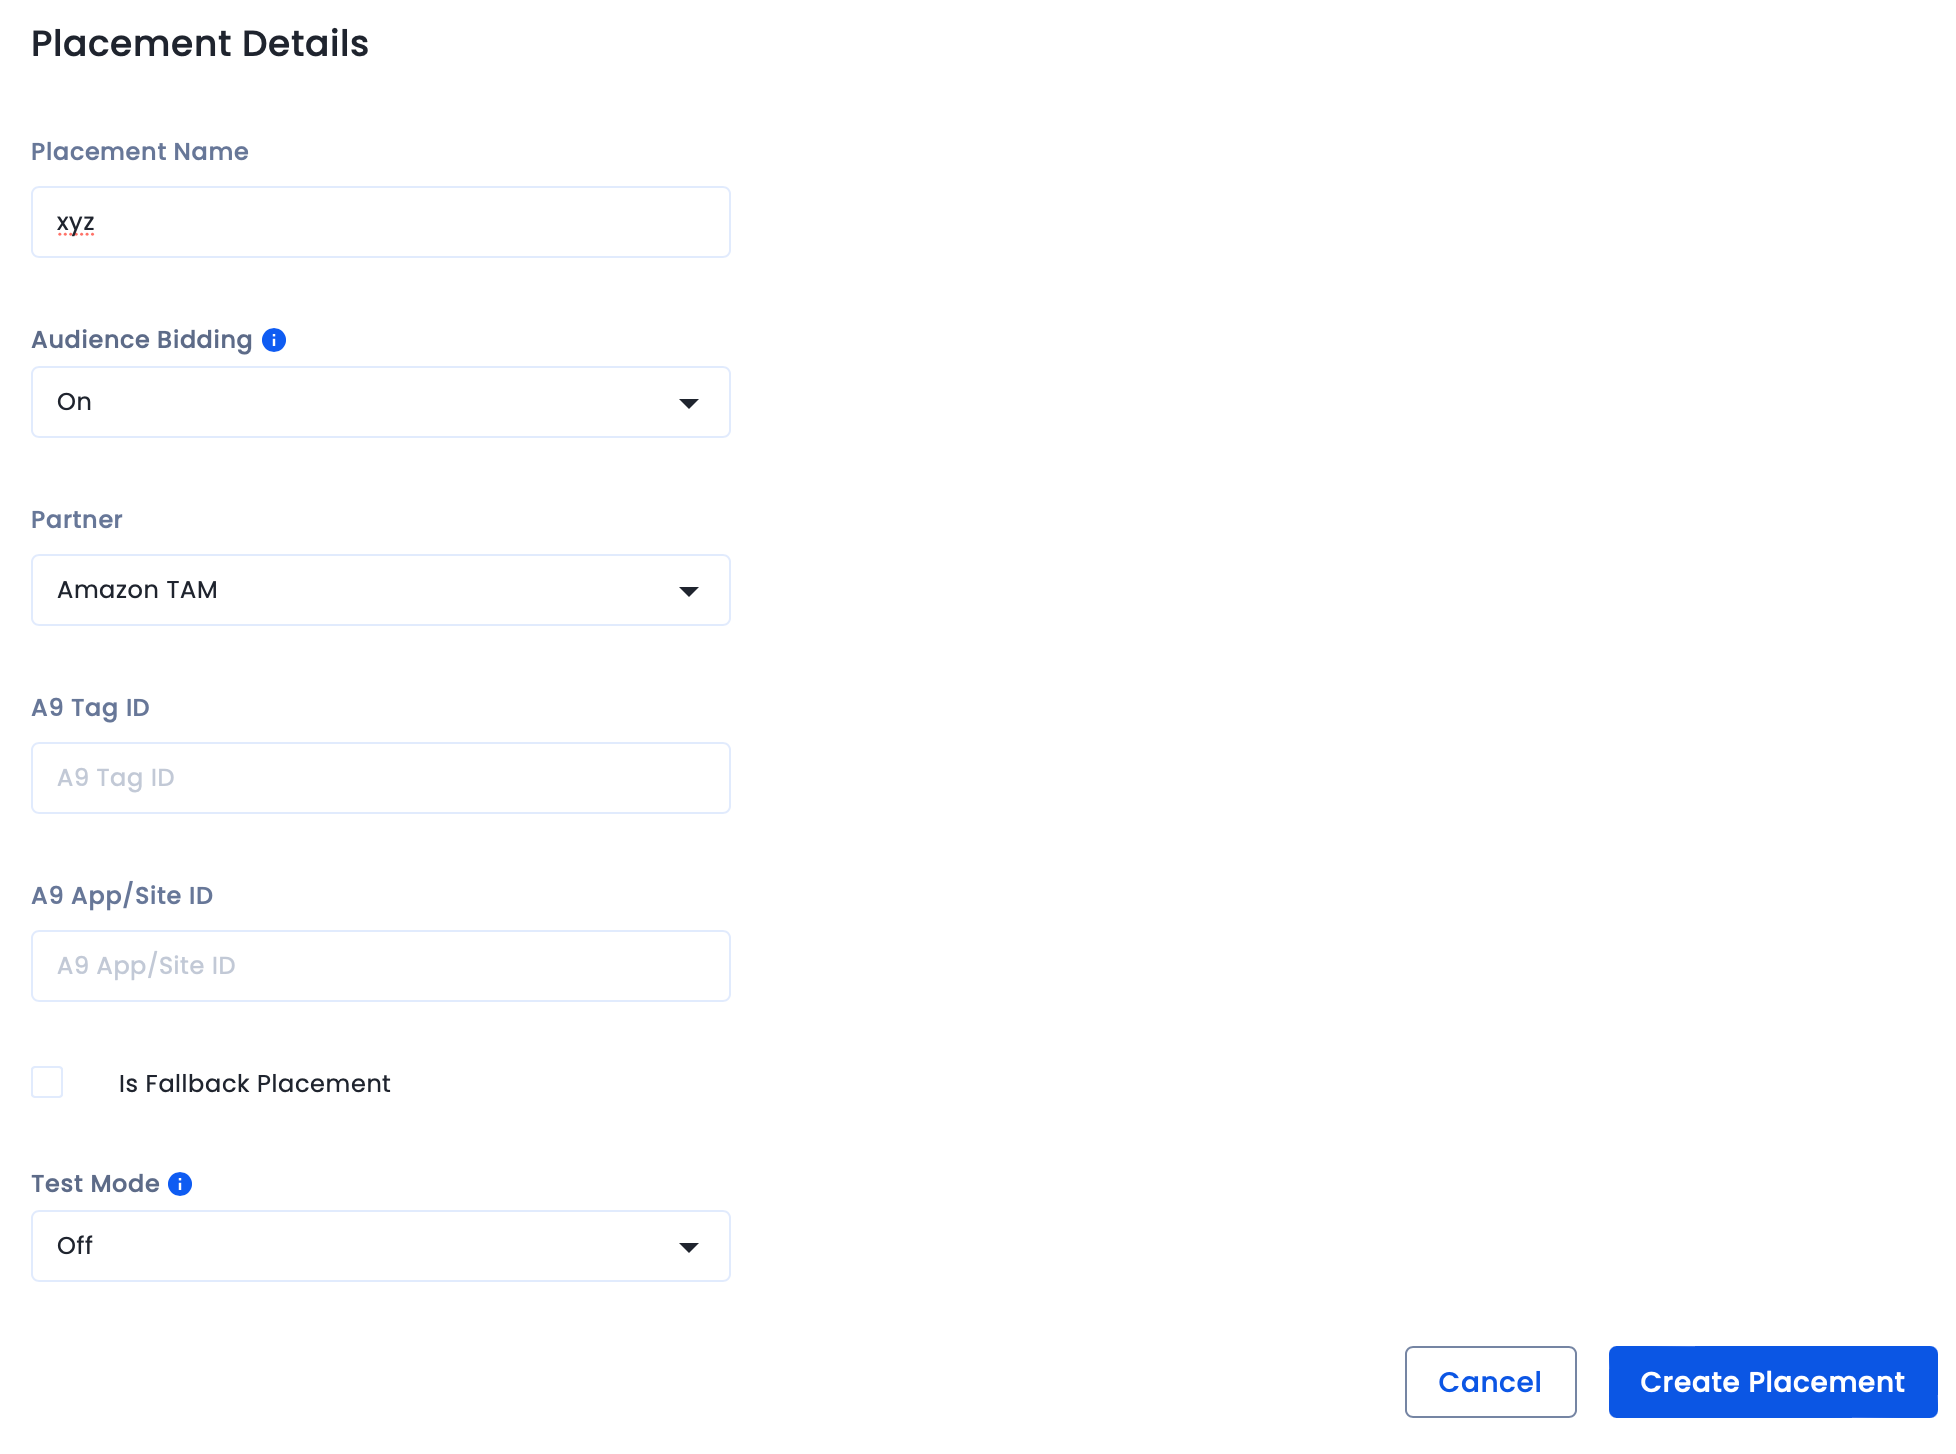
Use the toggles below to view platform-specific integration instructions.
For Mobile only:
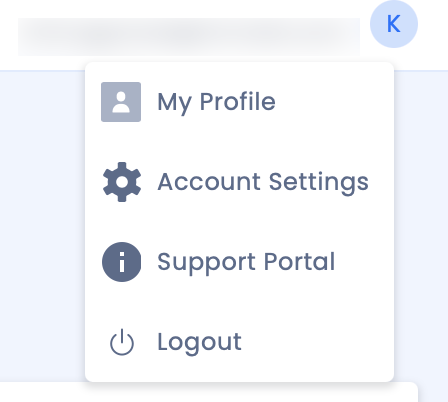
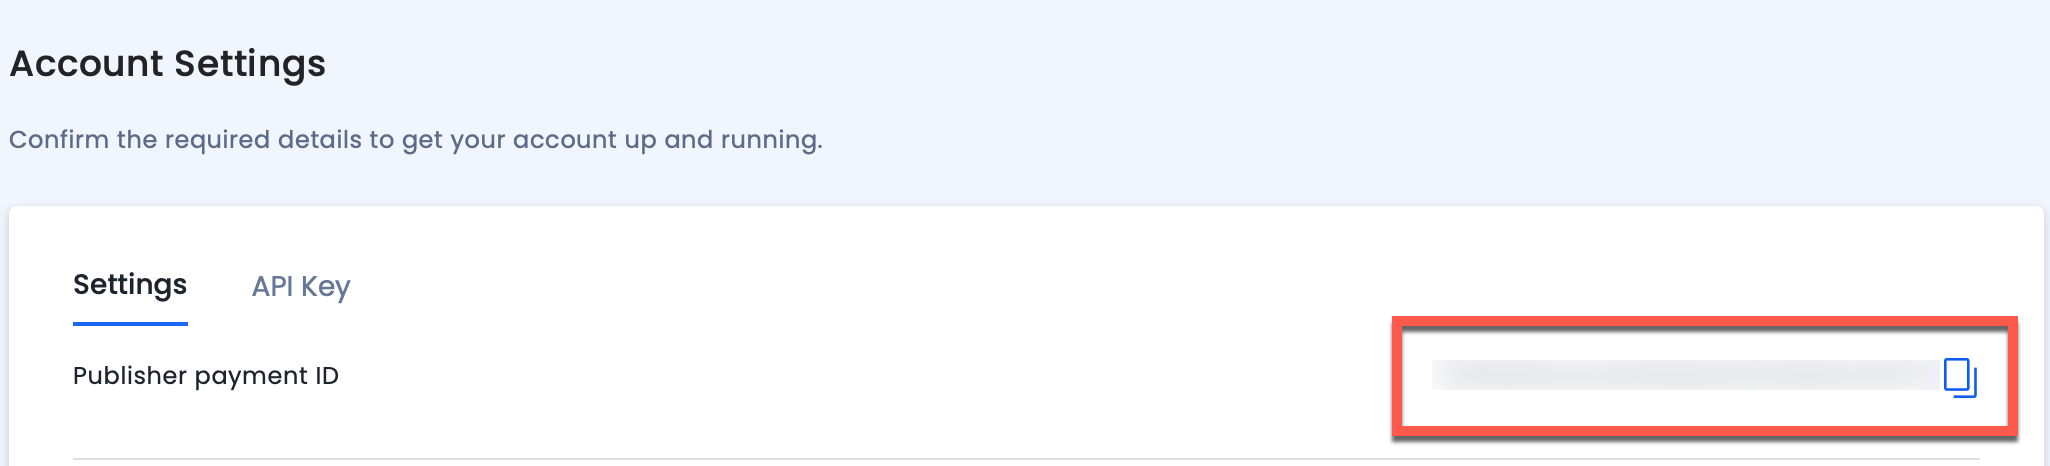
Use fallback placements only for apps that have multiple placements.
For further assistance, Contact Us.
Use the API to delete (expire) a deal from the InMobi platform using its unique ID. This action marks the deal as inactive and prevents it from being served.
DELETE https://apis.demand.ssp.inmobi.com/v1/deals?deal_id=<deal_id>
| Field Name | Type | Is mandatory (Y/N)? | Description |
|---|---|---|---|
| Authorization | String | Y | Bearer token for authentication (Bearer <token>) |
| X-USER-ID | String | Y | The ID of the user making the request |
| X-INMOBI-ORG-ID | String | Y | The organization ID associated with the user |
| Content-Type | String | Y | Specifies the media type of the request body. Use: application/json |
| Field Name | Type | Is mandatory (Y/N)? | Description |
|---|---|---|---|
deal.id |
String | Y | The unique ID of the deal to be deleted. |
curl -X DELETE "https://apis.demand.ssp.inmobi.com/v1/deals?deal_id=4263509453" \
-H "Authorization: Bearer <your bearer token>" \
-H "X-USER-ID: <test app>" \
-H "X-INMOBI-ORG-ID: <your org id>" \
-H "Content-Type: application/json"
{
  "data": {
    "id": "4263509453",
    "message": "Deleted successfully"
  }
}
This confirms the deal was successfully marked as inactive and removed from active use.
For more information, see Error Codes.
This guide covers integrating InMobi as a real-time bidder on MAX, AppLovin’s in-app header bidding platform. InMobi uses the oRTB protocol and renders ads via its SDK for Banner, Interstitial, Video, and Native formats. Ideal for gaming publishers, this SDK-based integration supports in-app environments only.
Ensure the following before you get started with this integration:
To get your account and inventory up and running on the InMobi Publisher Platform, follow the instructions below:
To create placements for MAX:

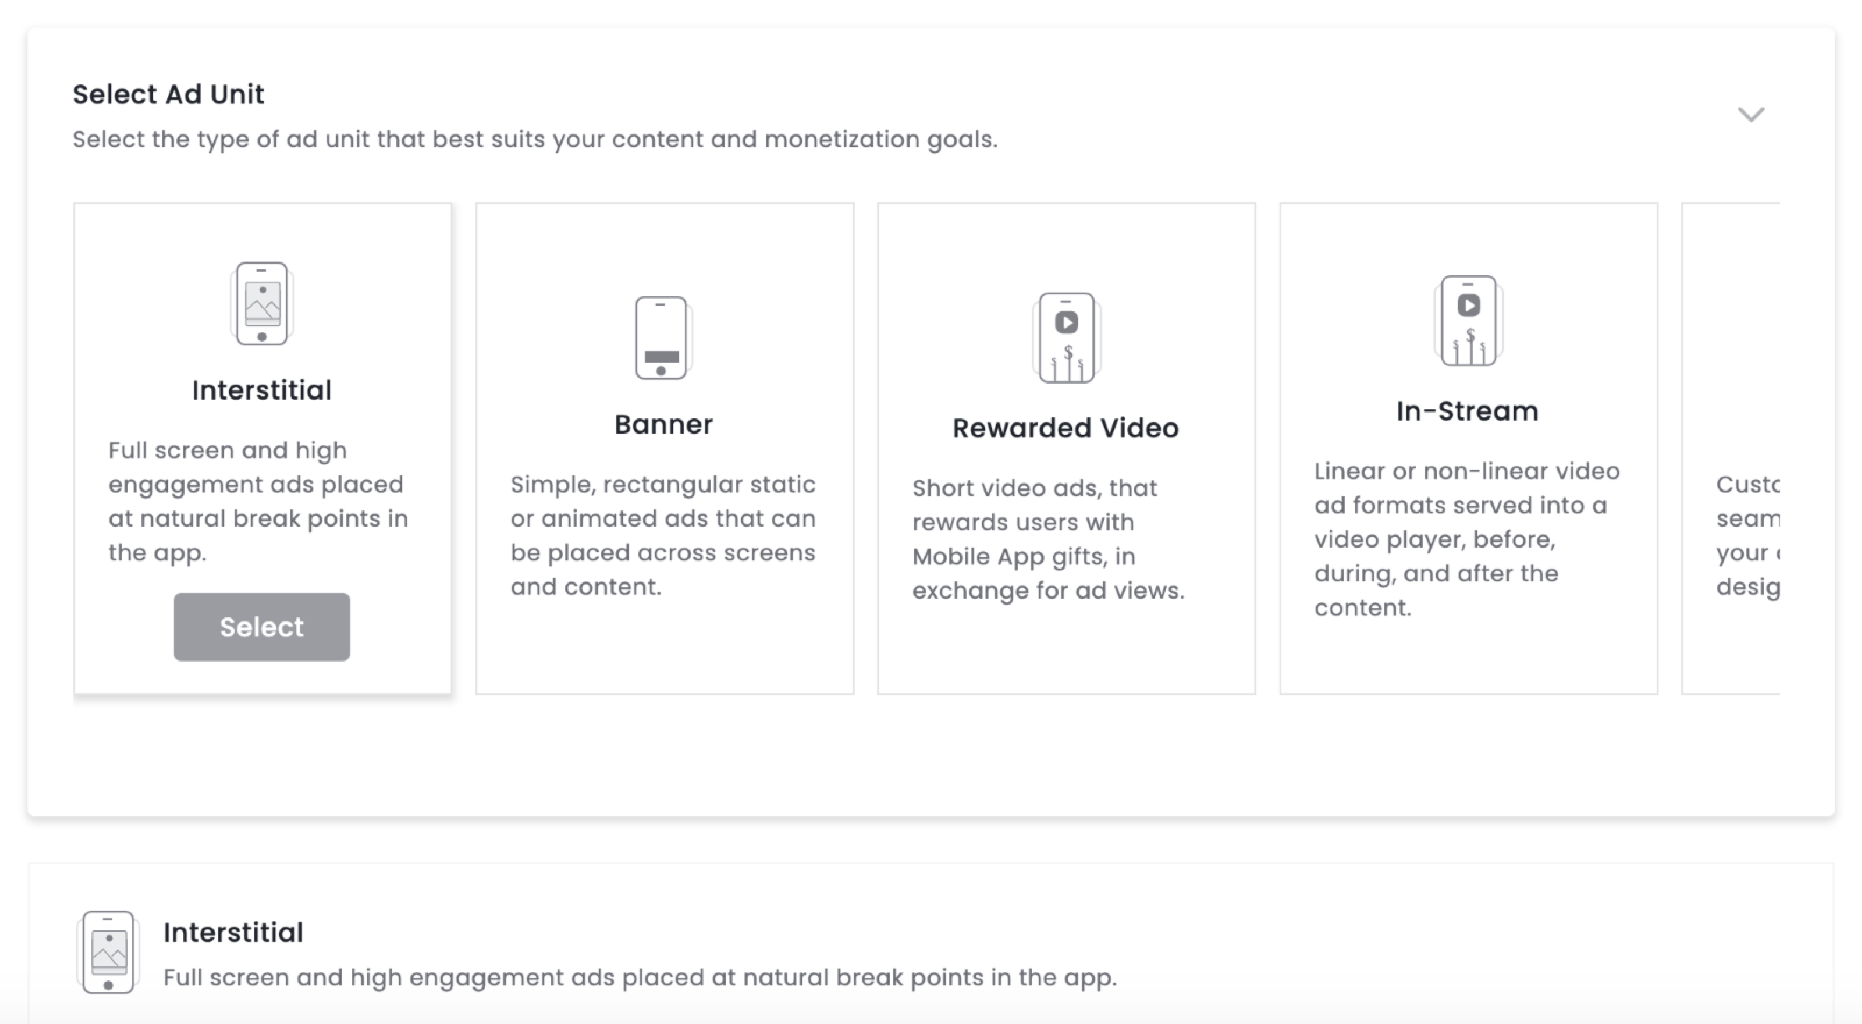
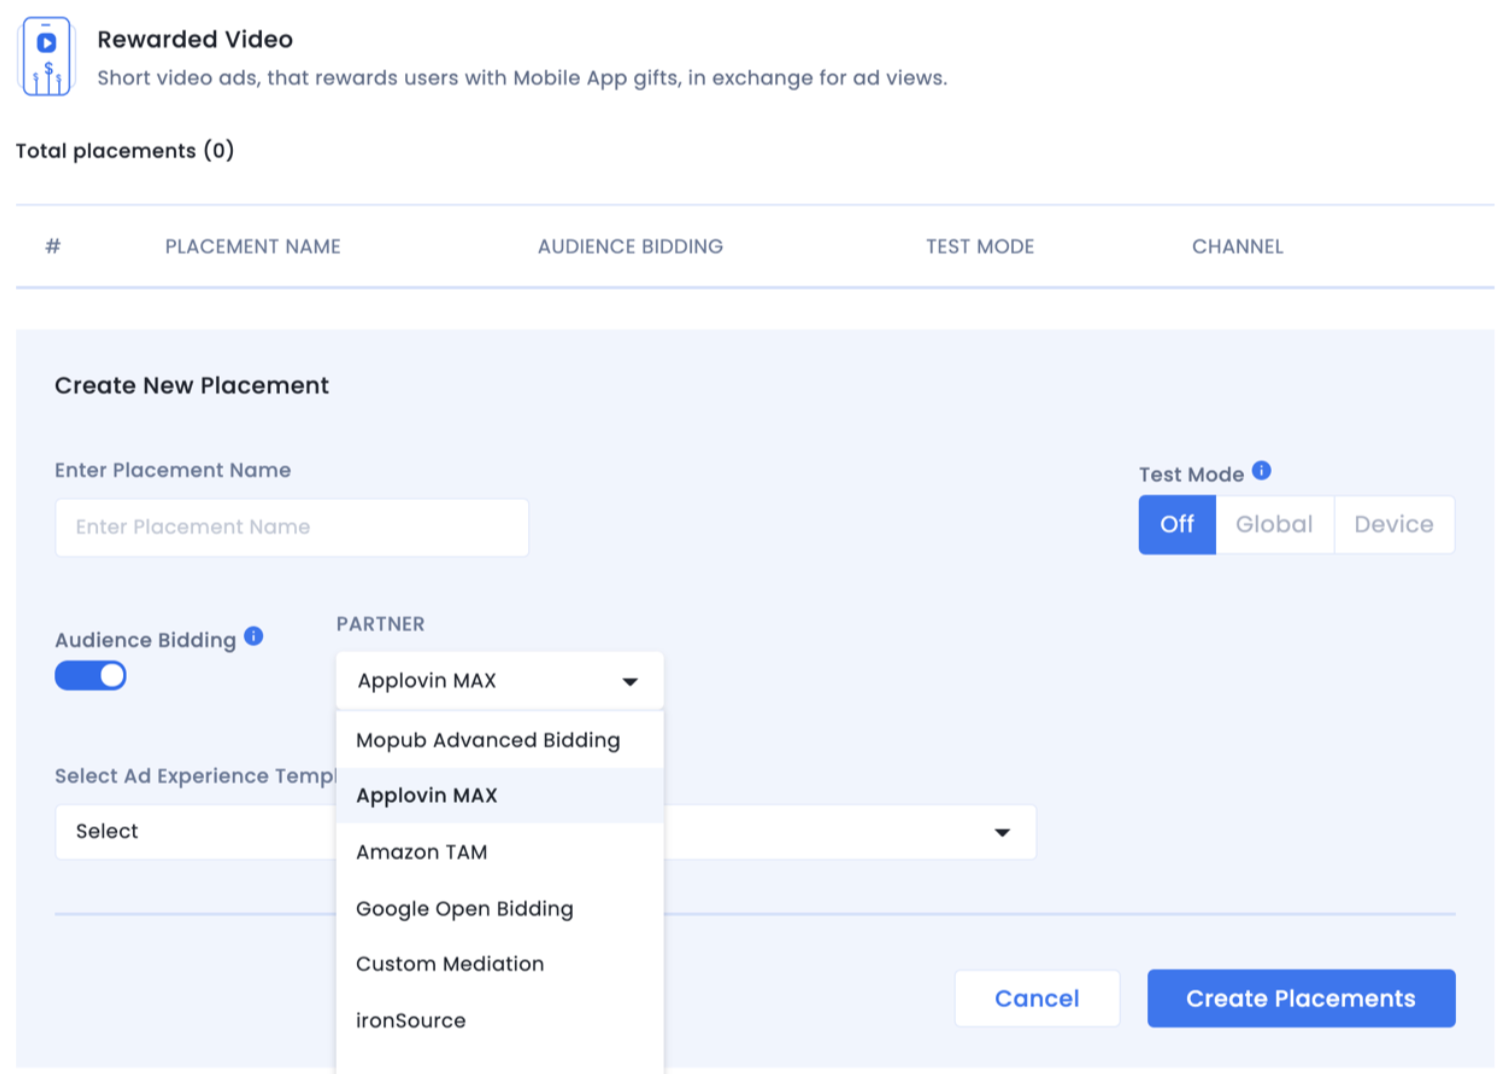
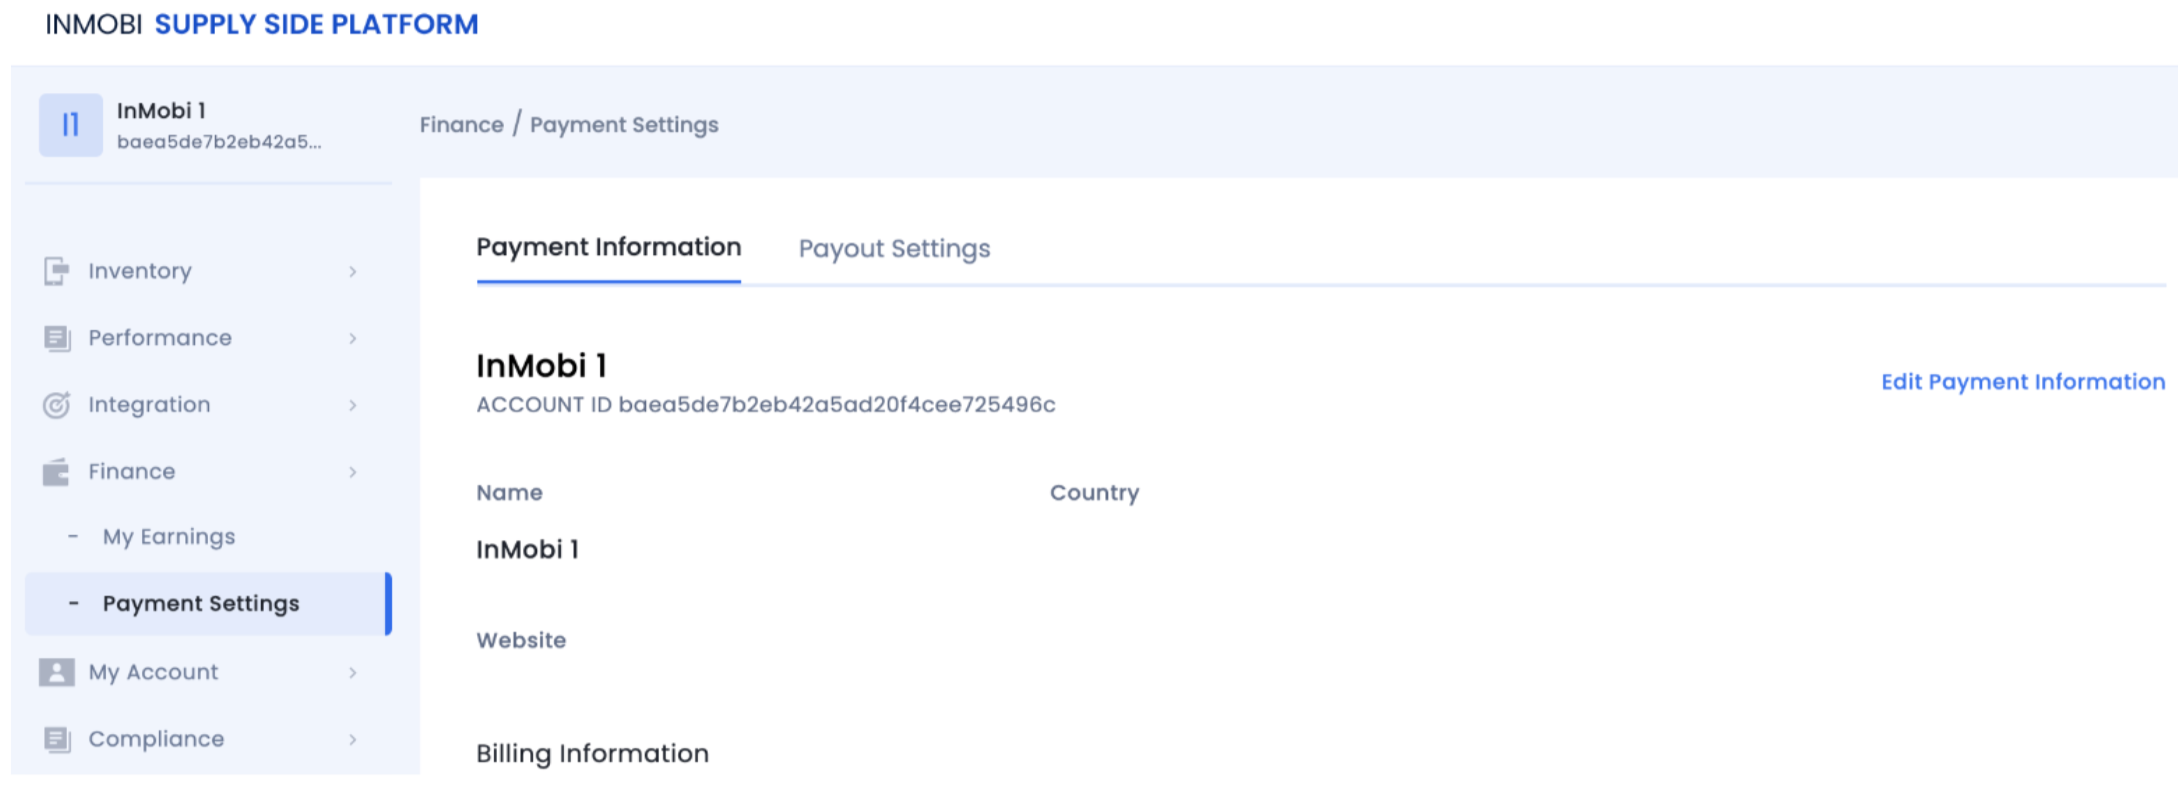

For more details, see InMobi Integration Guide on MAX's documentation.
For more information, see the following links:
iOS: Integration Guide | Enabling Manual Native Ads | Enabling Small/Medium Template
Android: Integration Guide | Enabling Manual Native Ads | Enabling Small/Medium Template
For further assistance, Contact Us.
| Code | Message Description |
|---|---|
| 400 | Invalid input such as missing IDs, invalid targeting fields |
| 401 | Unauthorized - invalid/missing user token or user ID |
| 404 | Deal or page not found |
| 406 | Invalid deal name format |
| 500 | Internal server/database fetch failure |
CloudX is an in-app mediation platform that enables publishers to monetize their inventory through real-time bidding and SDK-based integrations. This guide explains how to integrate InMobi with CloudX for Android and iOS applications using the InMobi SDK.
This integration supports global in-app inventory and key ad formats, including Banner, Interstitial, Native(upcoming), and Rewarded ads.
Before starting the integration, ensure you have the following:

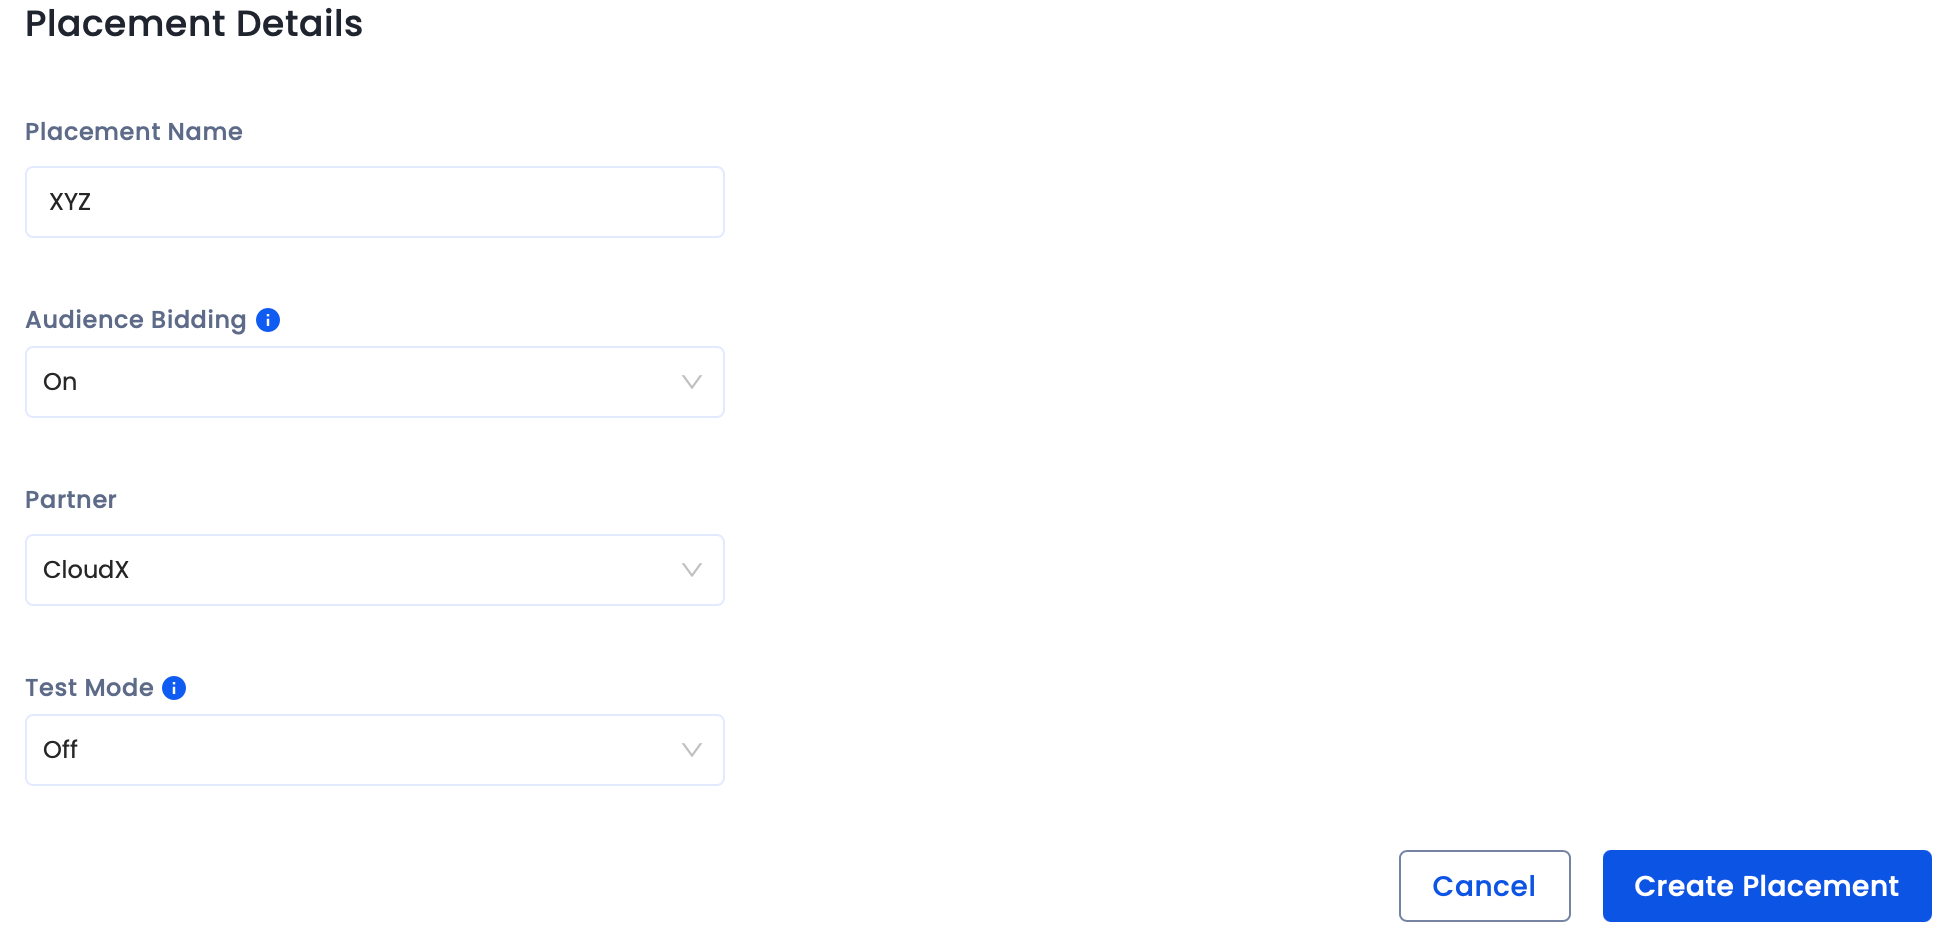
Before you add InMobi to the CloudX dashboard, ensure you have the following:
For further assistance, Contact Us.
This guide outlines how to integrate InMobi as a real-time bidder on DT FairBid, Digital Turbine’s mediation platform. InMobi connects via the oRTB protocol and renders Banner, Interstitial, and Video ads using its SDK. Ideal for global in-app publishers across gaming and non-gaming verticals.
Ensure the following before you get started with this integration:
To get your account and inventory up and running on the InMobi Publisher Dashboard, follow the instructions below:
To create placements for DT FairBid:
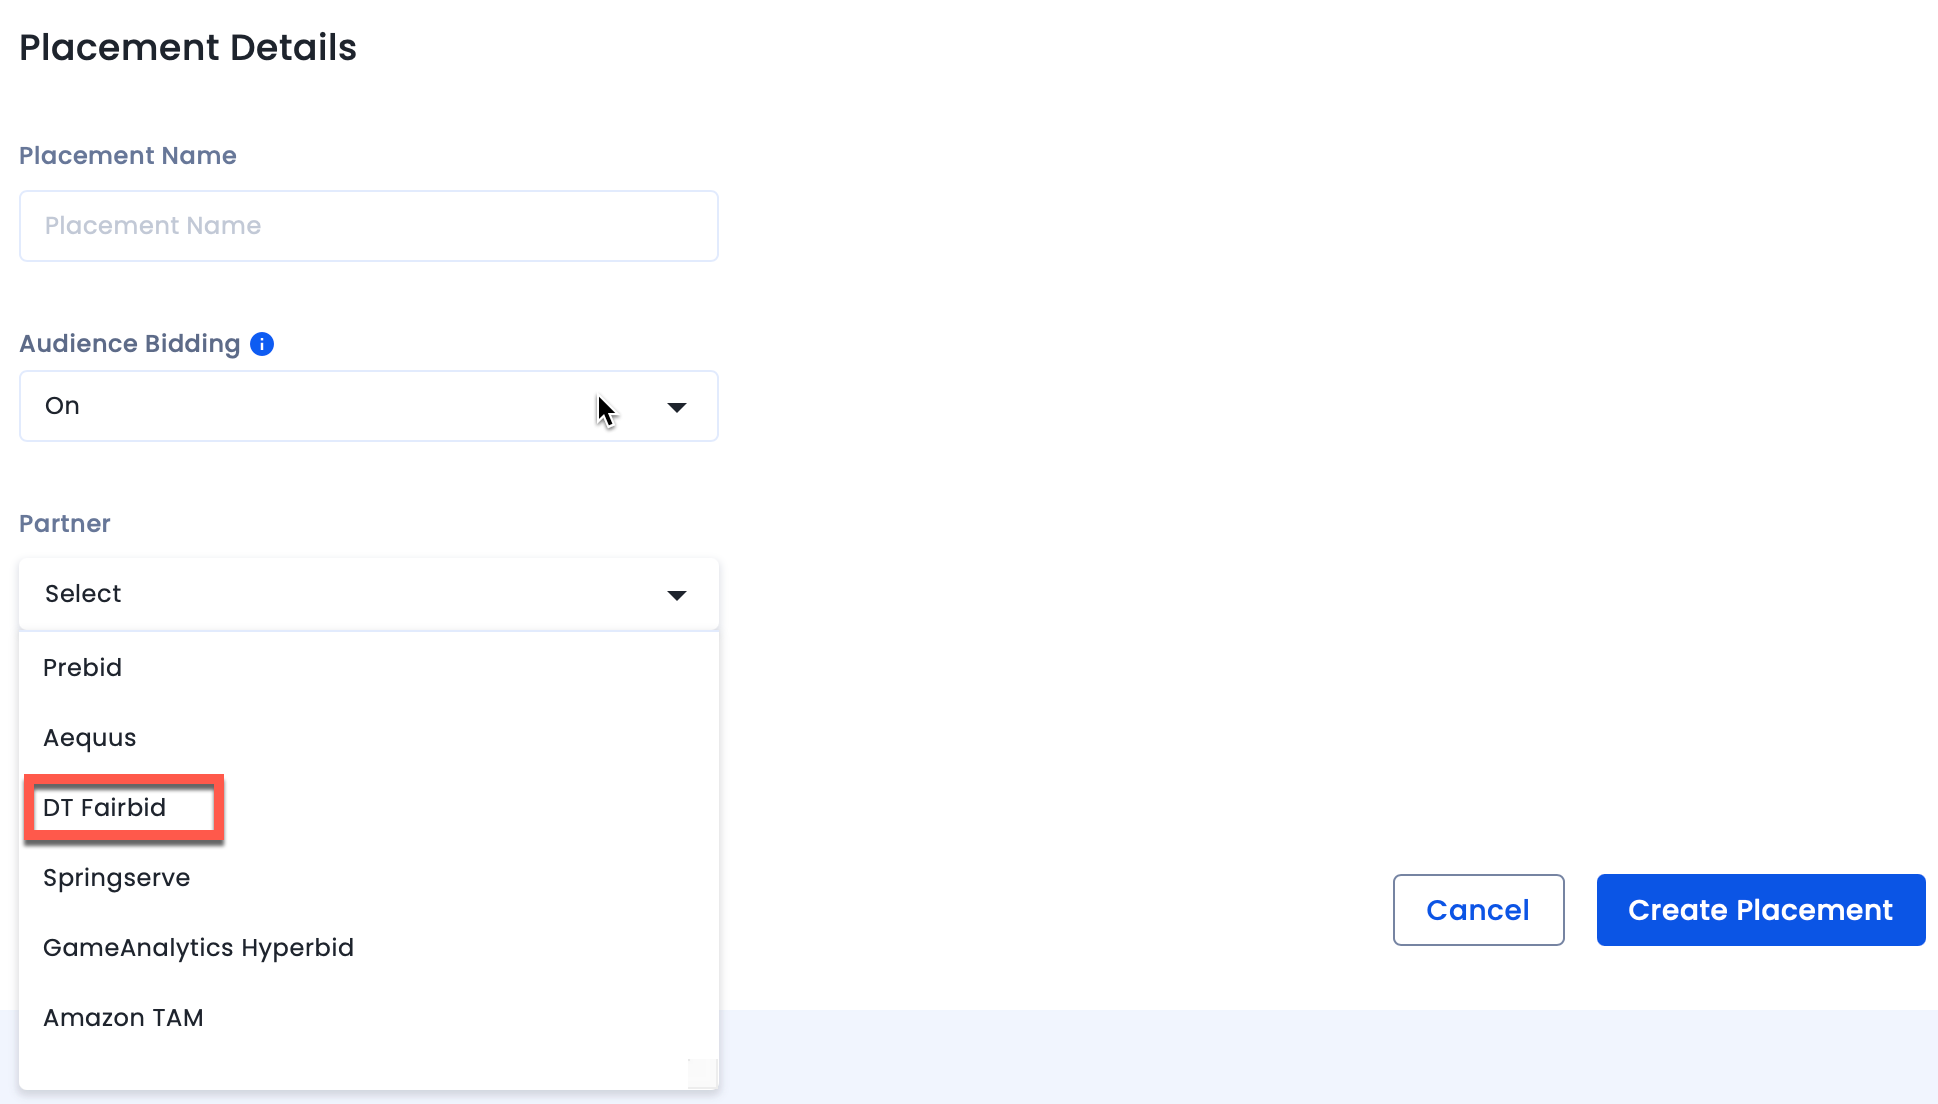
The InMobi Placement ID is present under the placement name. You will need it while configuring InMobi placements on the DT Console.
Before adding InMobi as a mediated network to DT Fairbid, ensure you:
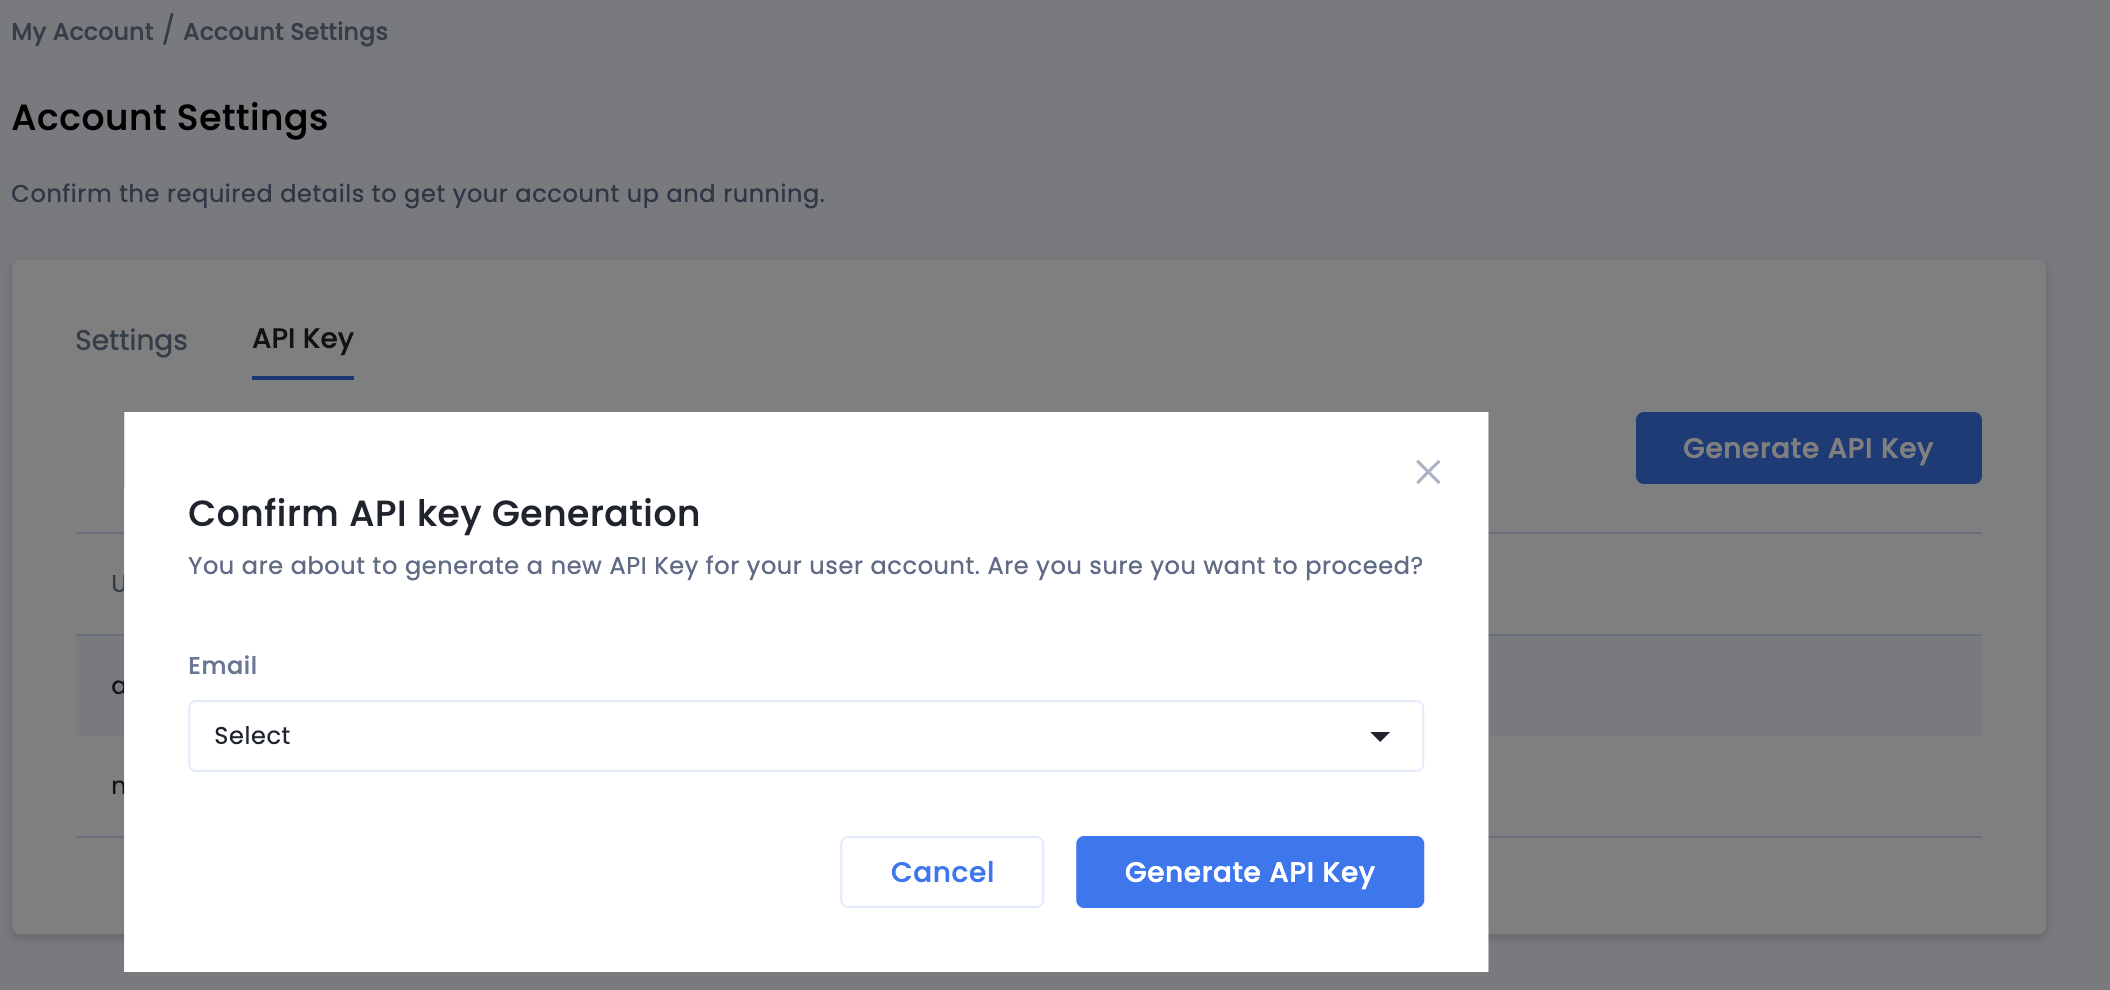
Once done, follow the steps below:
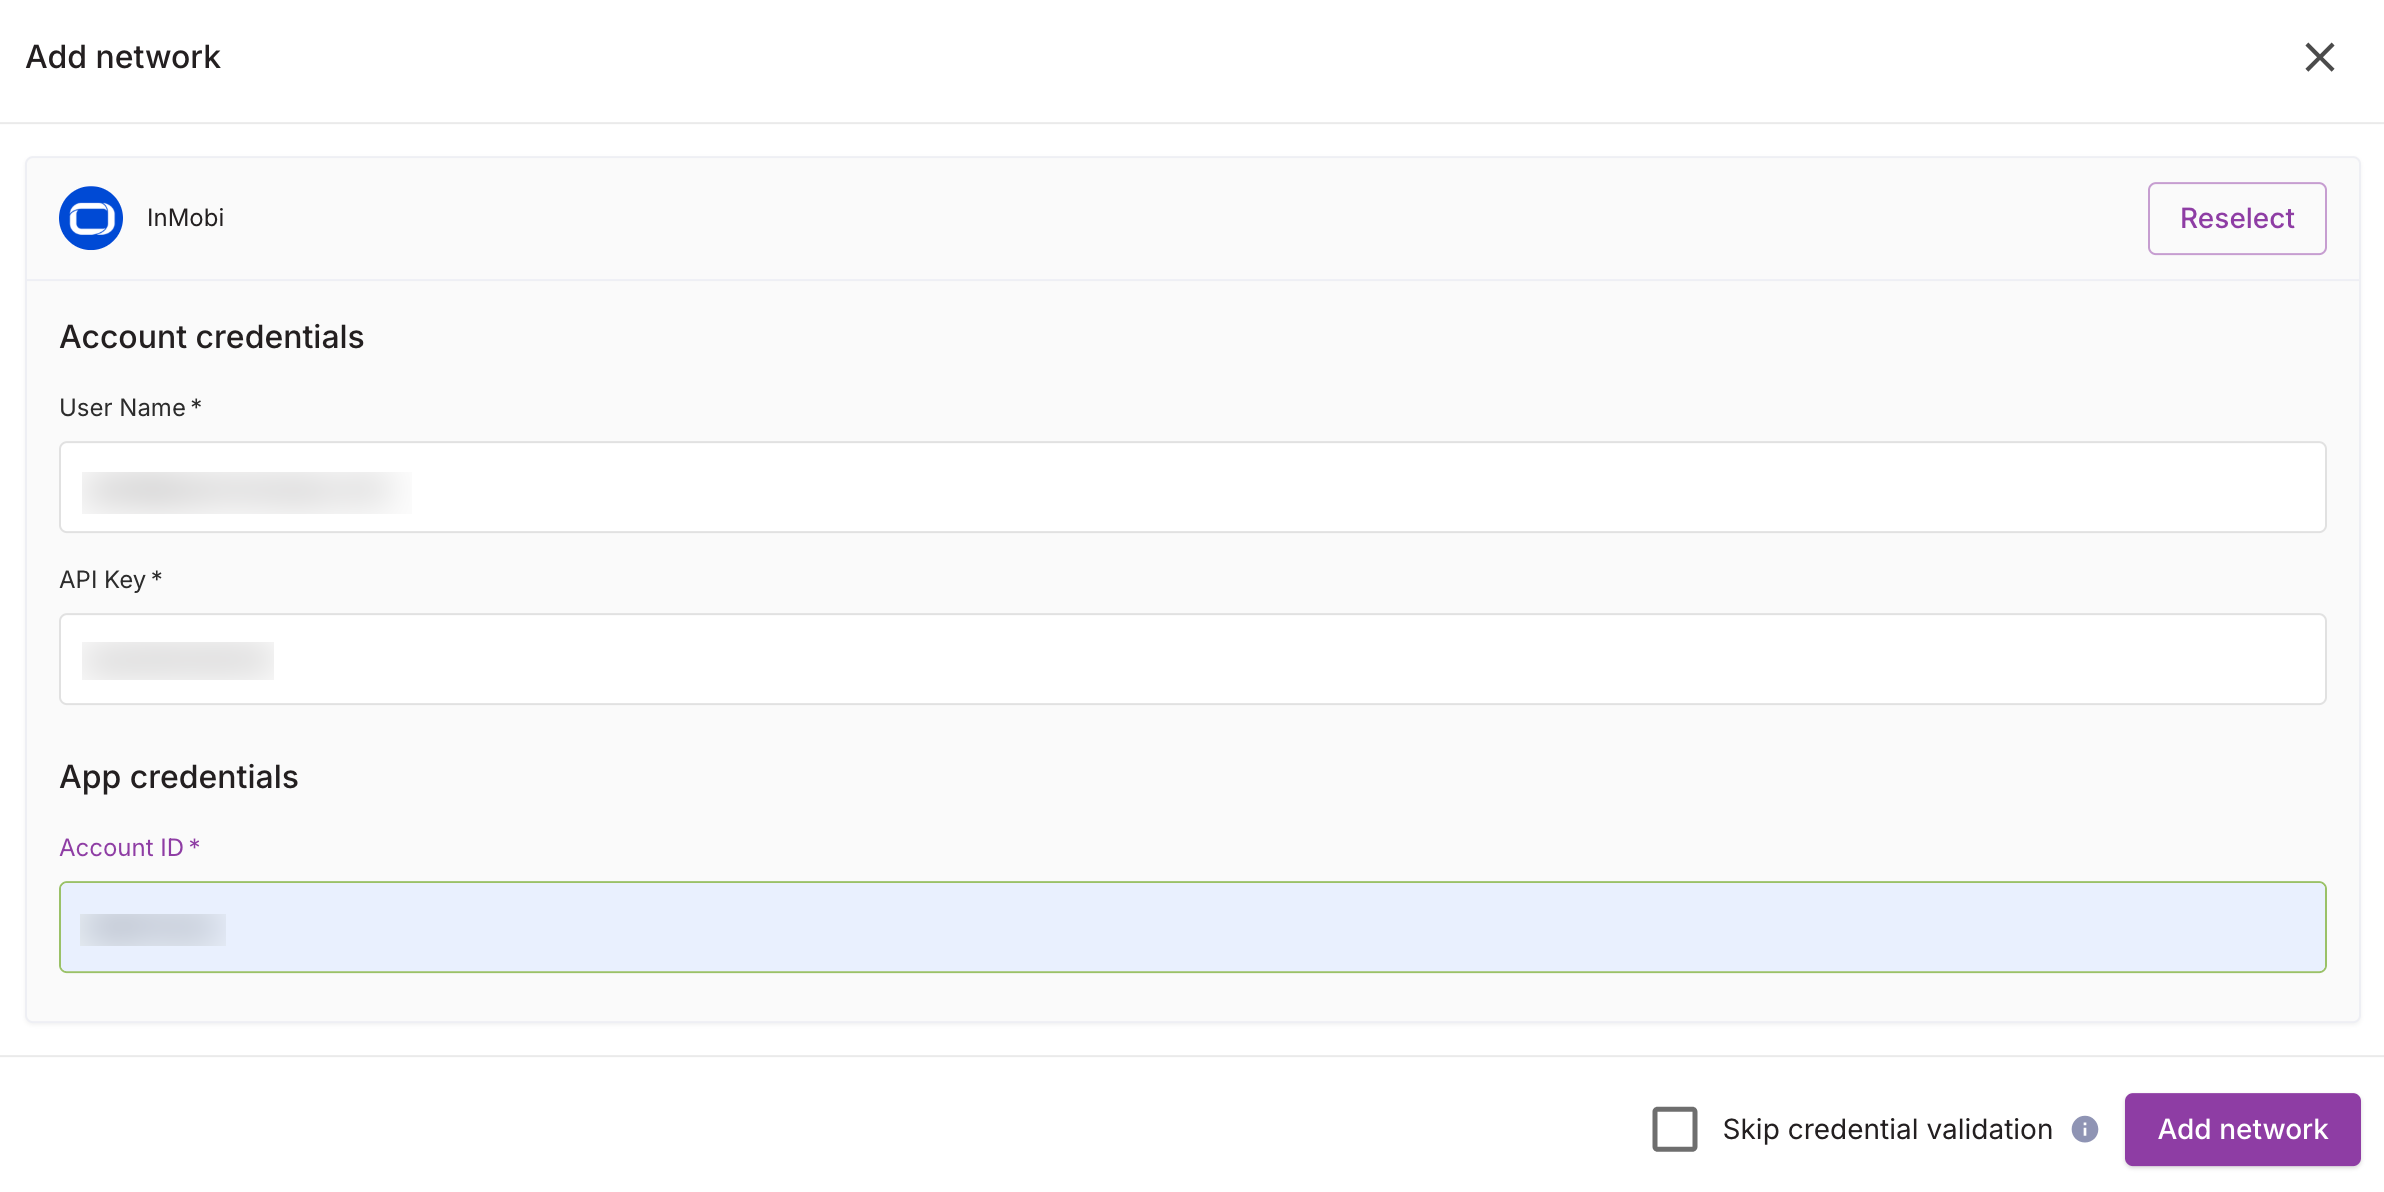
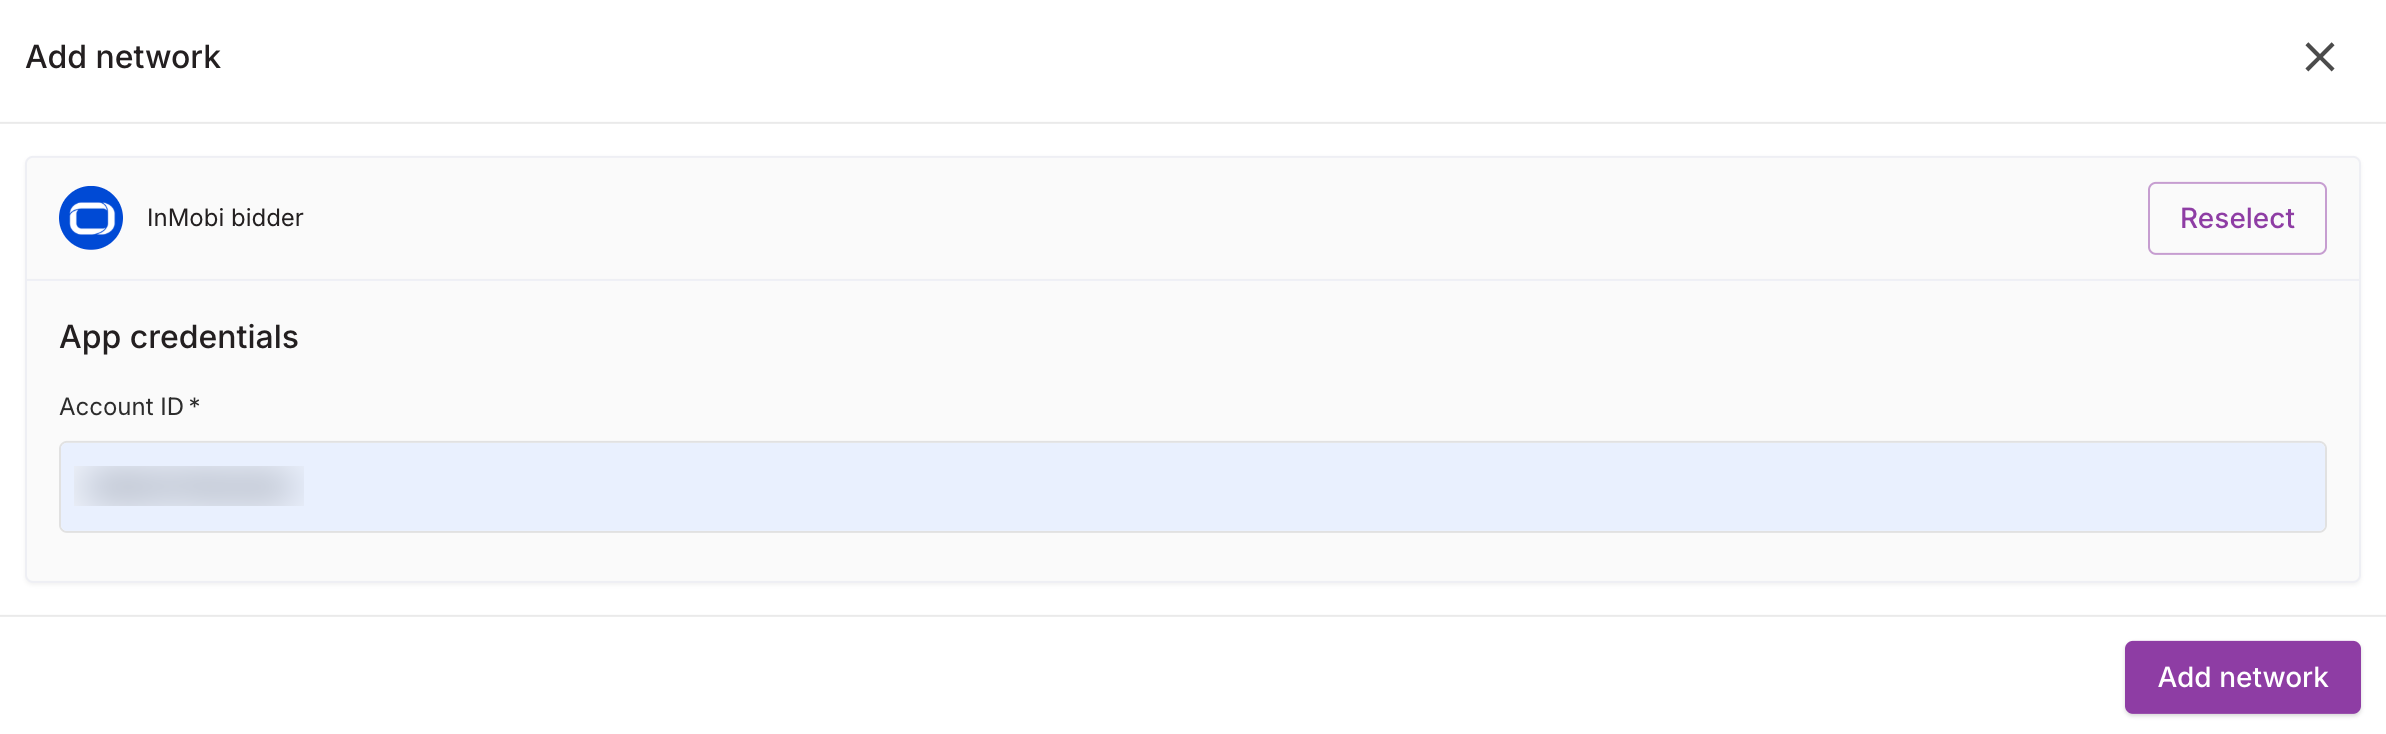
For further assistance, Contact Us.
Integrate InMobi with Google SDK Bidding on Google Ad Manager using a direct supply path for better signal collection and ad rendering. This setup supports Banner, Interstitial, Native, and Rewarded Video formats across gaming and non-gaming apps. It enables hybrid monetization without custom adapters or changes to your existing waterfall.
Ensure you have the following before you begin the integration:
Google manages payment and billing for SDK Bidding on Ad Manager. For payment, billing, or reporting information, please refer to the Google dashboard.
To set up your account and inventory on the InMobi Publisher Dashboard, follow these steps.
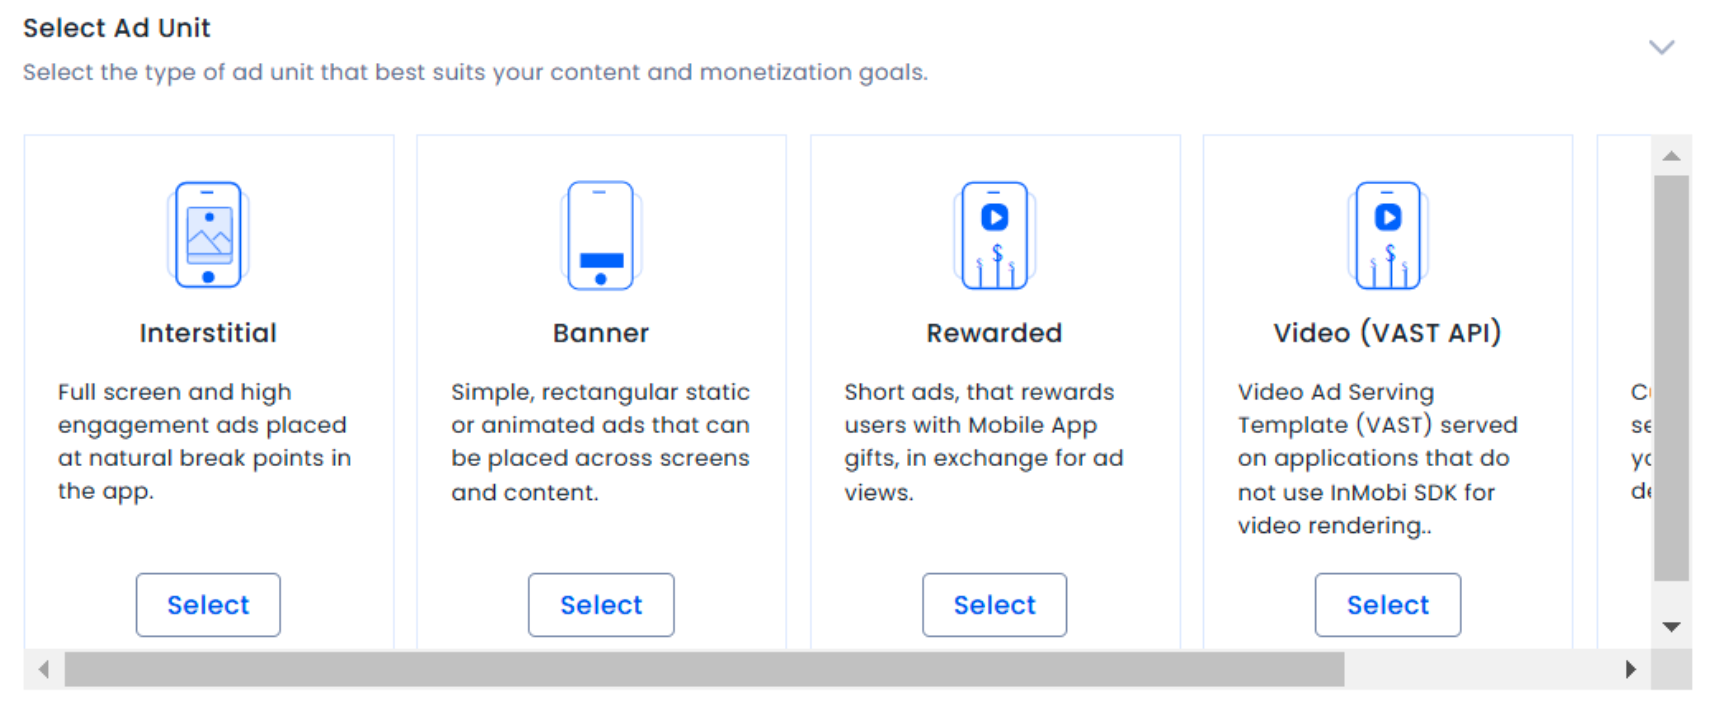
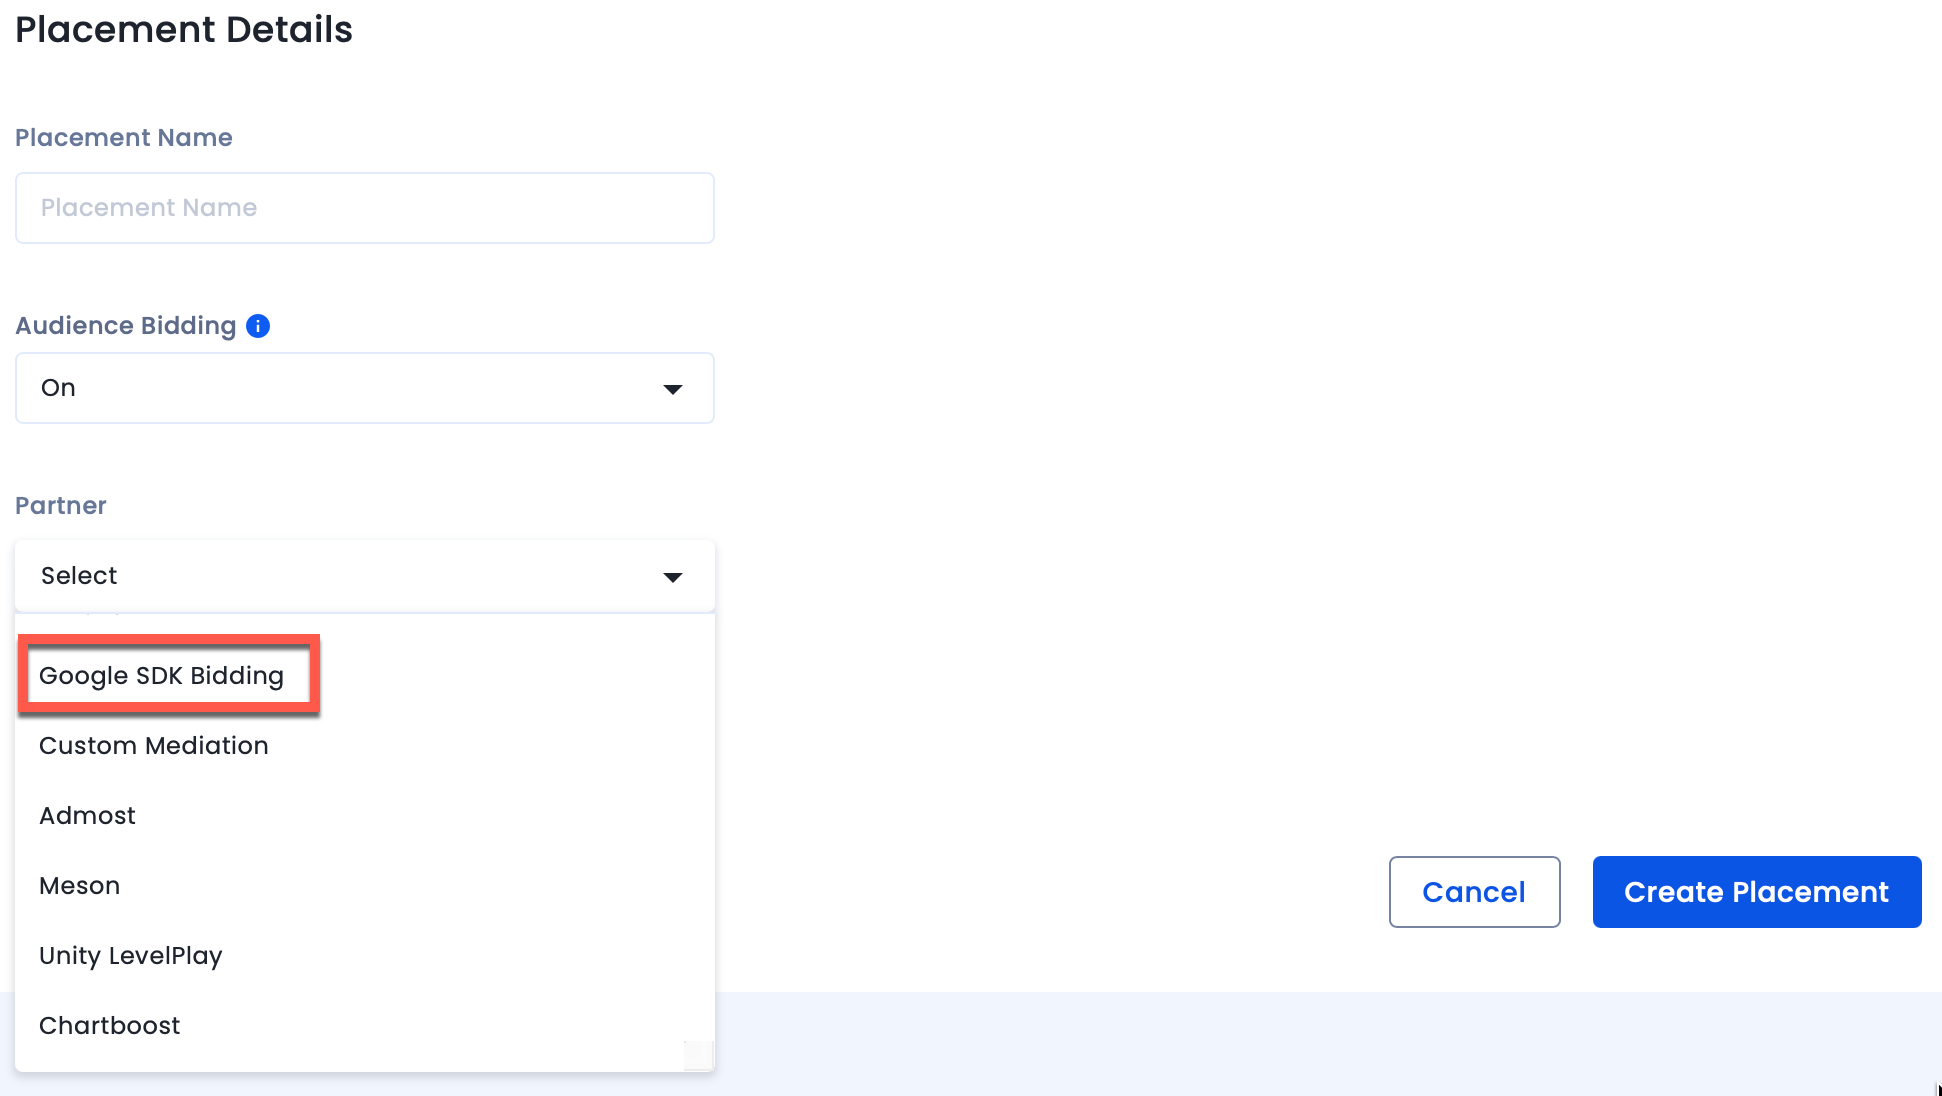
To set up your account and inventory on the InMobi Publisher Dashboard, follow these steps.
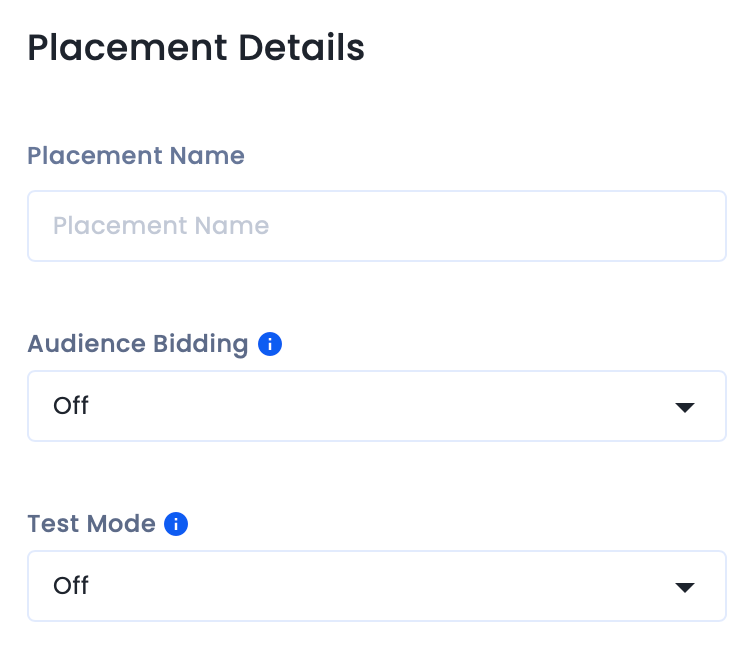
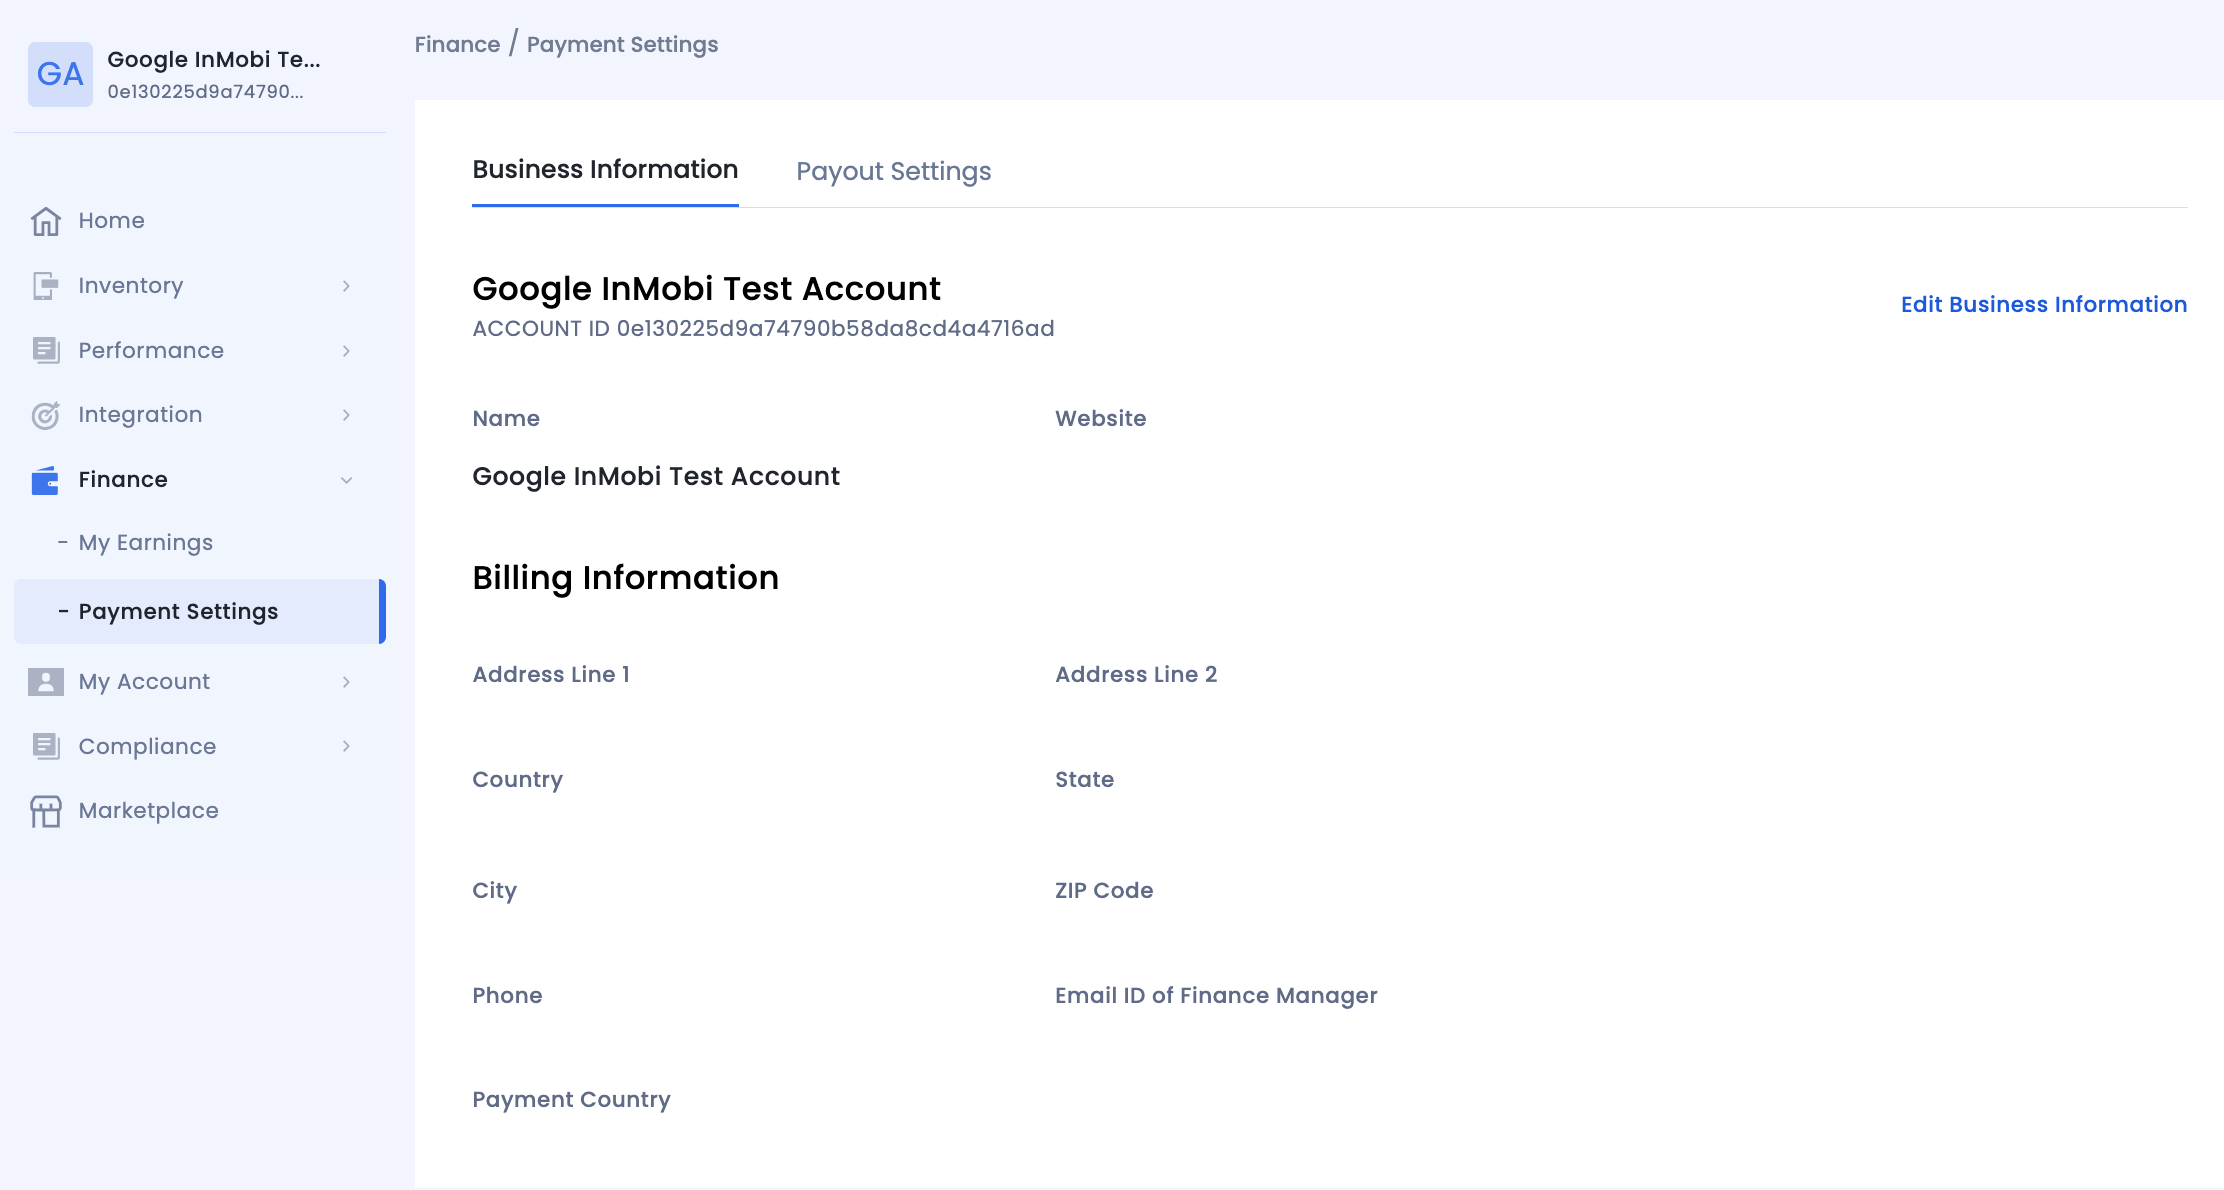

Once you have completed your setup on Google Ad Manager, we recommend you test your integration to ensure seamless functioning.
To test your integration, see Verify your SDK Bidding setup.
To verify your SDK bidding setup, see Verify your SDK Bidding setup.
For Google Ad Manager docs, see Integrate InMobi with mediation for iOS and Android.
After setting up InMobi on the SSP and adding it as a bidder in GAM, import the InMobi SDK and adapter.
Follow the additional instructions below about GDPR settings on your Google dashboard for higher monetization results. The following configuration applies to traffic from European Economic Area and publishers using AdMob/GAM CMP for GDPR consent purposes. Google CMP provides two ways of adding ad partners on their AdMob/GAM platform:
InMobi is not part of ‘Commonly used ad partners’ by default, and you must add it manually by selecting Custom ad partners.
Follow the instructions below to enable InMobi under Custom ad partners on your Google dashboard.

For further assistance, Contact Us.
This guide explains how to integrate InMobi with Google SDK Bidding on AdMob. It uses a direct supply path for better signal collection and ad rendering, supporting Banner, Interstitial, Native, and Rewarded Video formats.
Ensure you have the following before you begin the integration:
Google manages payment and billing for SDK Bidding on AdMob. For payment, billing, or reporting information, refer to the Google dashboard.
Follow these steps to set up your account and inventory on the InMobi Publisher Dashboard.
For troubleshooting, see Get started & troubleshoot partner bidding.
For Google AdMob docs, see Integrate InMobi with mediation for iOS and Android.
To ensure AdMob SDK relays the ad request to InMobi for testing, you can do the following on your AdMob dashboard.
After setting up InMobi on the SSP and adding it as an ad source in AdMob, import the InMobi SDK and adapter.
Follow the additional instructions below about GDPR settings on your Google dashboard for higher monetization results. The following configuration applies to traffic from European Economic Area and publishers using AdMob/GAM CMP for GDPR consent purposes. Google CMP provides two ways of adding ad partners on their AdMob/GAM platform:
InMobi is not part of ‘Commonly used ad partners’ by default, and you must add it manually by selecting Custom ad partners.
Follow the instructions below to enable InMobi under Custom ad partners on your Google dashboard.
For further assistance, Contact Us.
InMobi is a certified bidder on Google Open Bidding (GOB), supporting integration via both Google Ad Manager (GAM) and AdMob across in-app, web, and CTV inventory. This server-side integration uses the OpenRTB protocol and does not require an SDK.
To successfully integrate InMobi with Google Open Bidding, ensure you meet the following prerequisites:
After setting up your InMobi account, you must enable InMobi on your Google dashboard and start sending us traffic. Use the toggles below to view platform-specific integration instructions.
To complete the Google Open Bidding setup, you must view and sign the partnership agreement, fill out the onboarding form, and acknowledge the bidding agreement.
If you already have an InMobi account, you won’t need to fill out the onboarding form again. Instead, you will see a message indicating that an account already exists. This is based on the Google Publisher ID passed by Google, which InMobi uses to identify existing accounts.
All payments and billing-related communication will be made to the intermediary - Google Open Bidding. Contact your intermediary for all billing/payment-related queries.
The following steps are common for both Mobile App and CTV inventory.

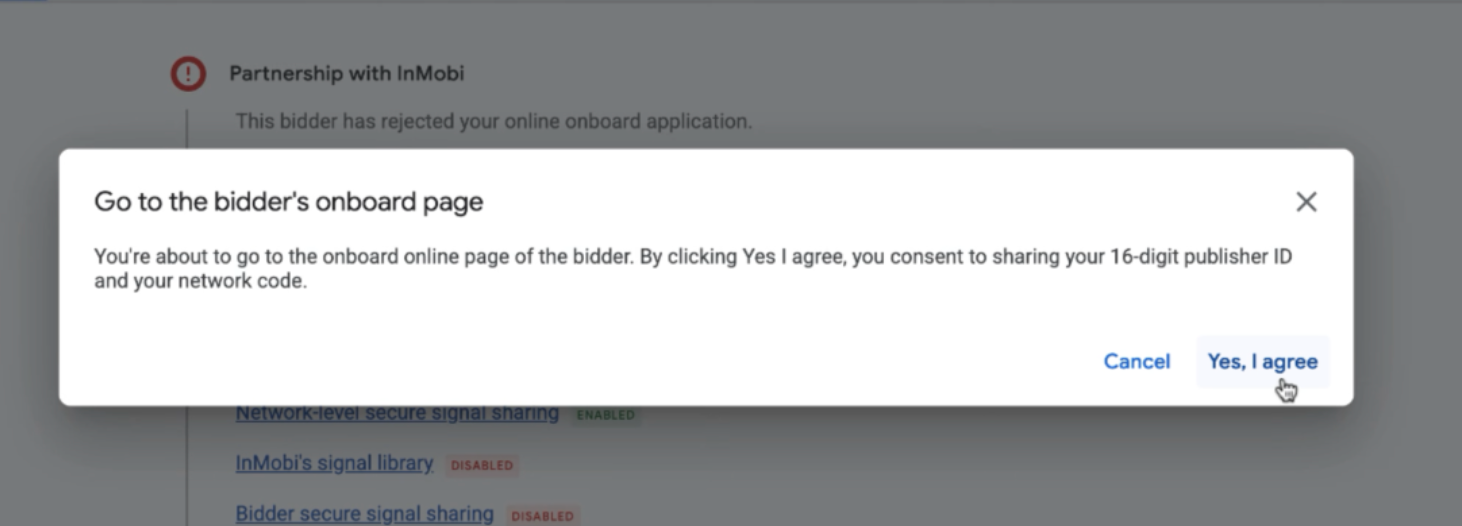
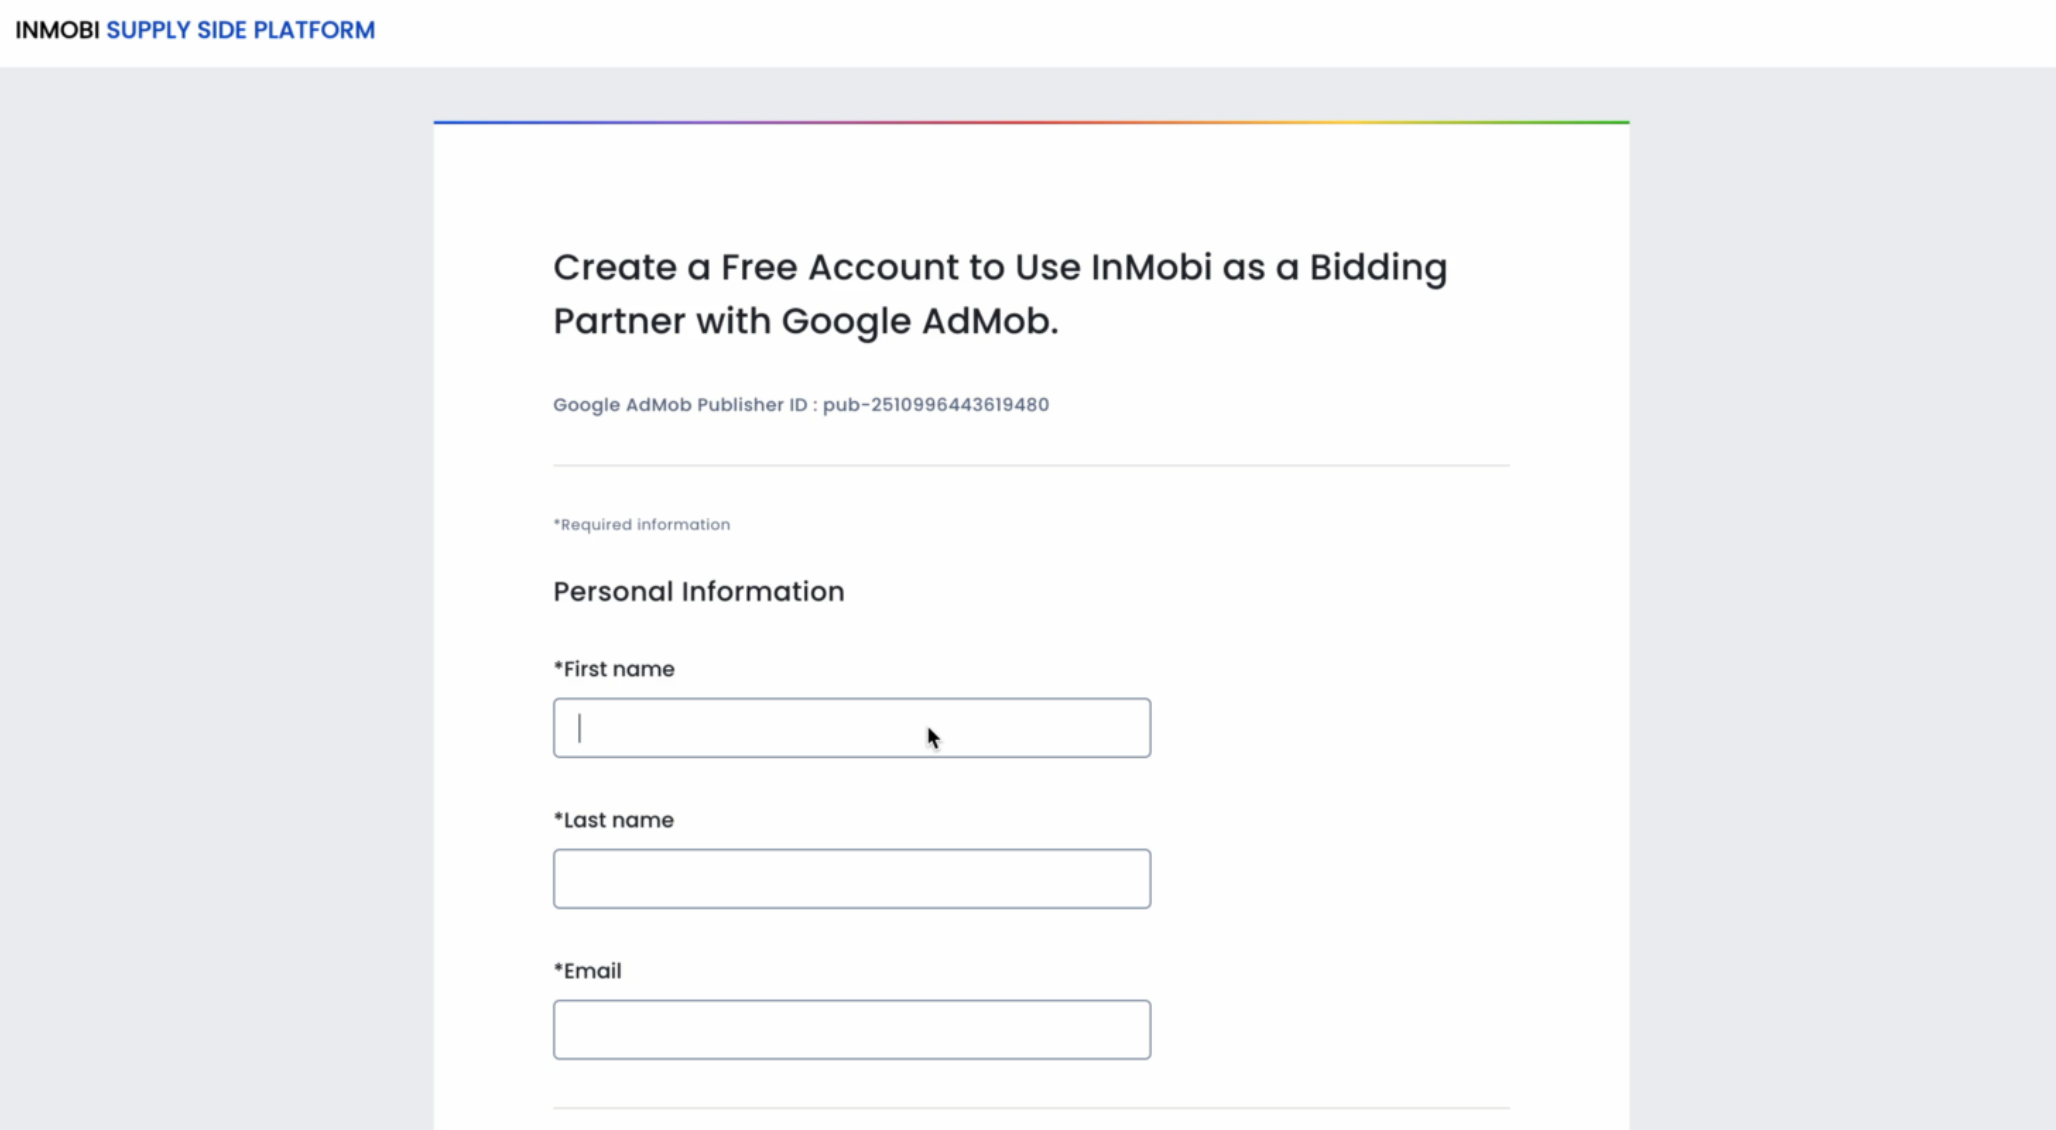
For more information, see Create and manage yield partners.
For more information, see Create and manage yield groups.
In AdMob
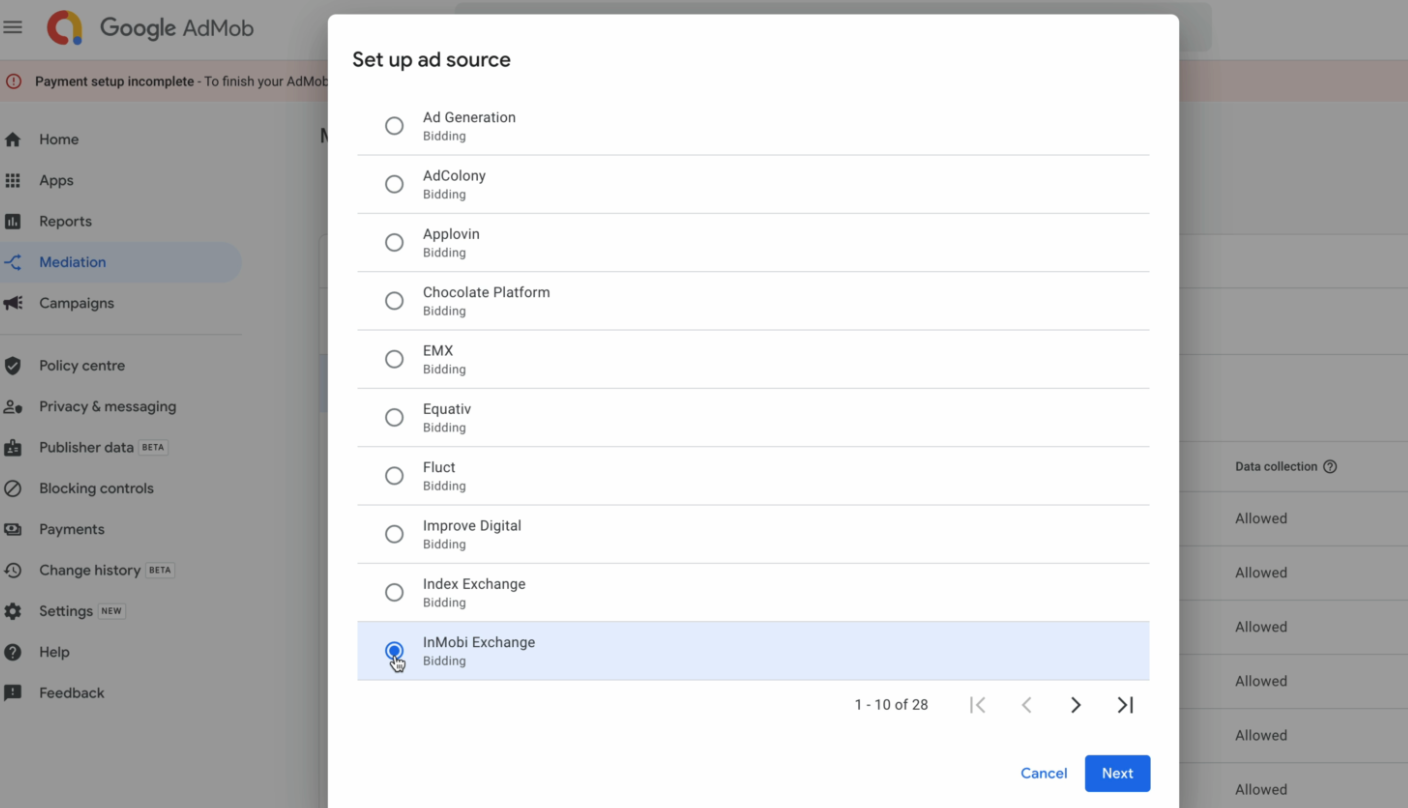
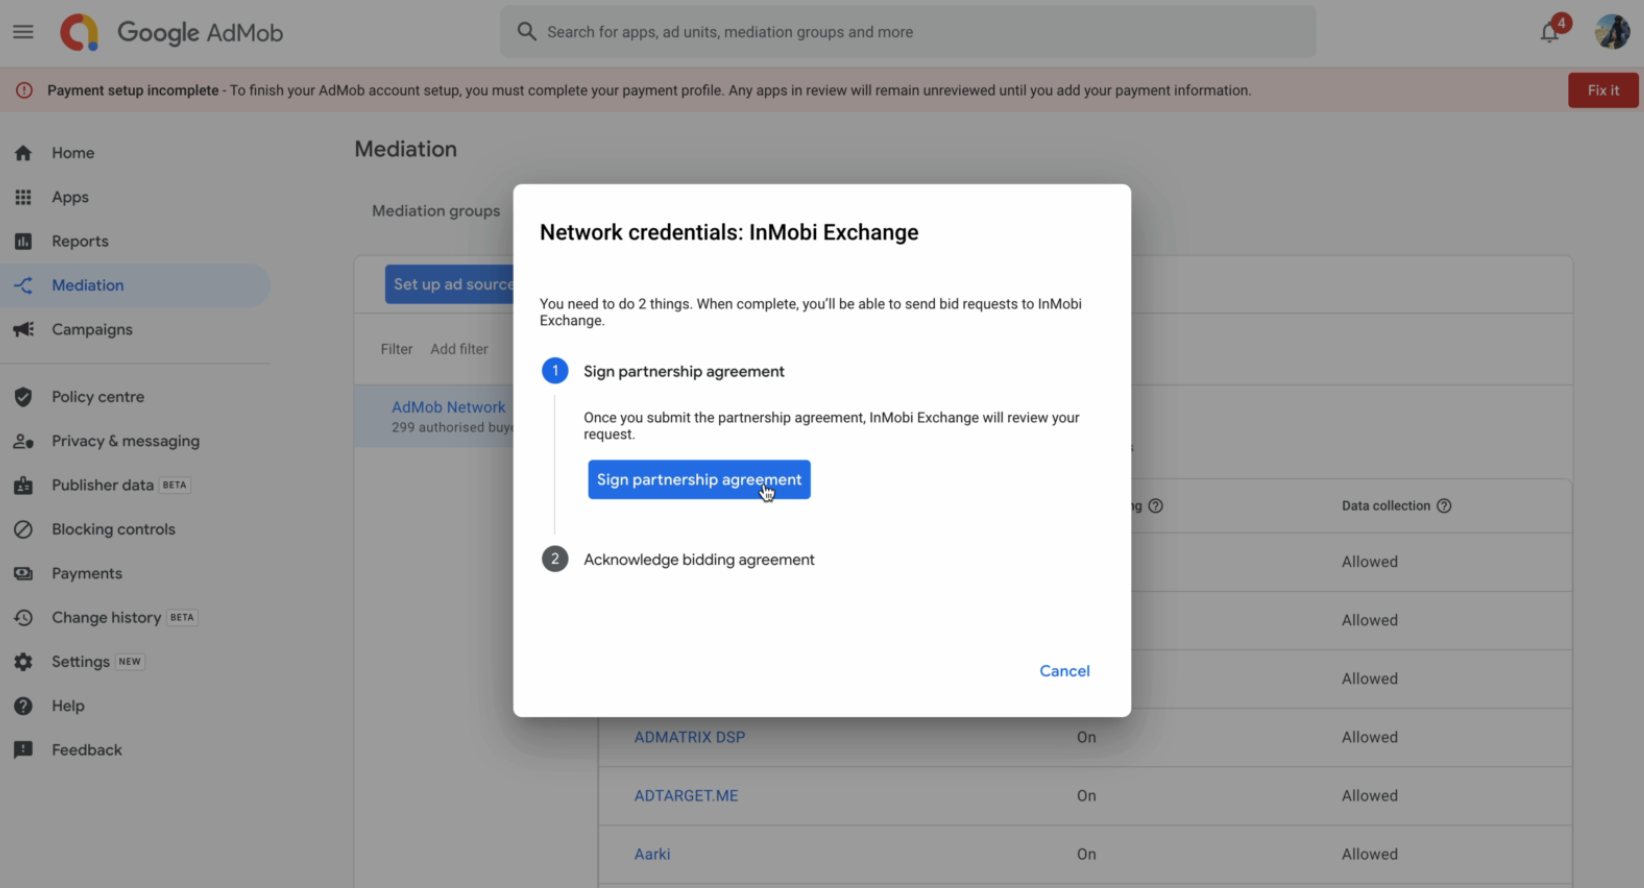
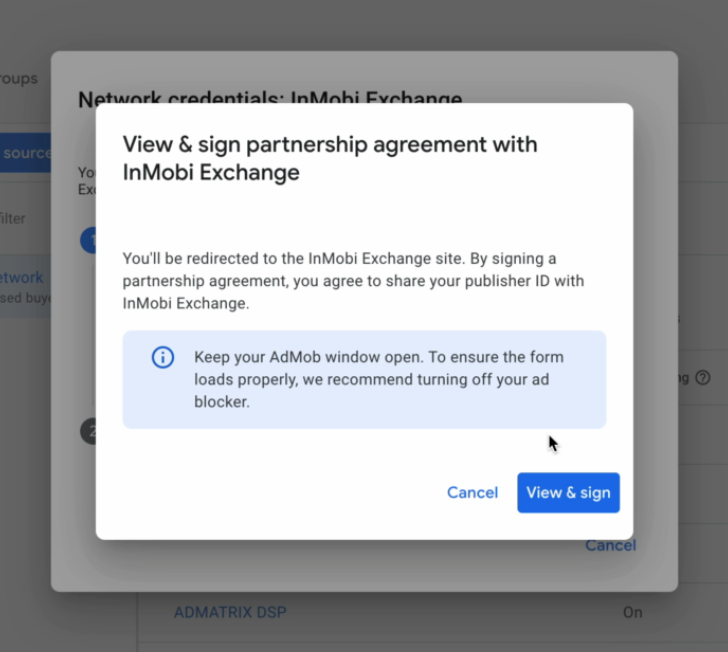
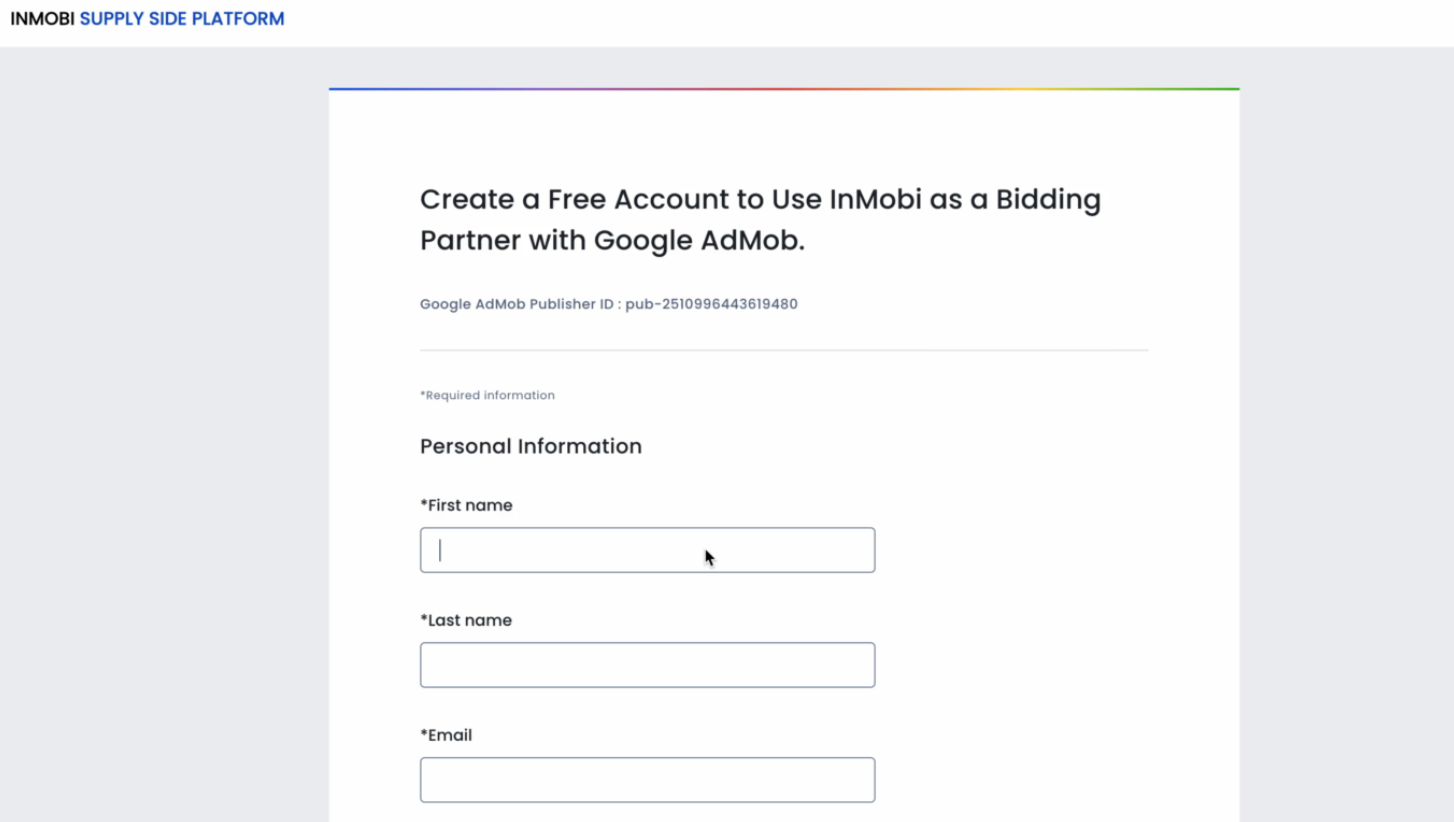
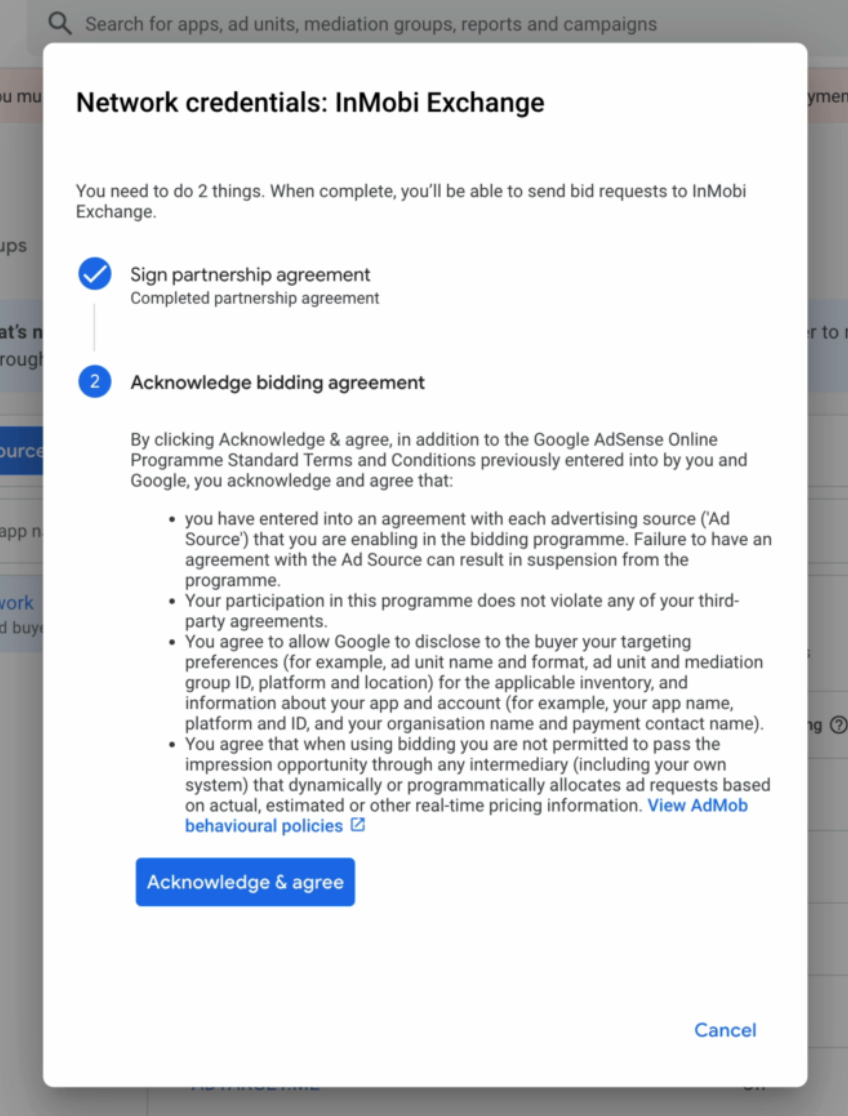
For more information, see Set up a bidding ad source.

For more information, see Create and manage yield partners.
For more information, see Introduction to Open Bidding.
Since Open Bidding does not require an SDK integration, InMobi must approve your request before going live. Once your setup is complete, share your Google Publisher ID with your InMobi Customer Success Manager or email googlebidding@inmobi.com.
Contact InMobi for approval only after completing your setup. Approval activates ad requests, and incomplete setups will result in failed ad responses. If your status shows as Rejected, it can be reversed. This is not permanent and may be due to previous manual clean-ups of pending requests.
Use the toggle below to view the differences in dashboard configuration across platforms.
All payments and billing-related communication will be made to the intermediary - Google Open Bidding. Please contact your intermediary for all billing/payment-related queries.
The following steps are common for both Mobile App and CTV inventory.
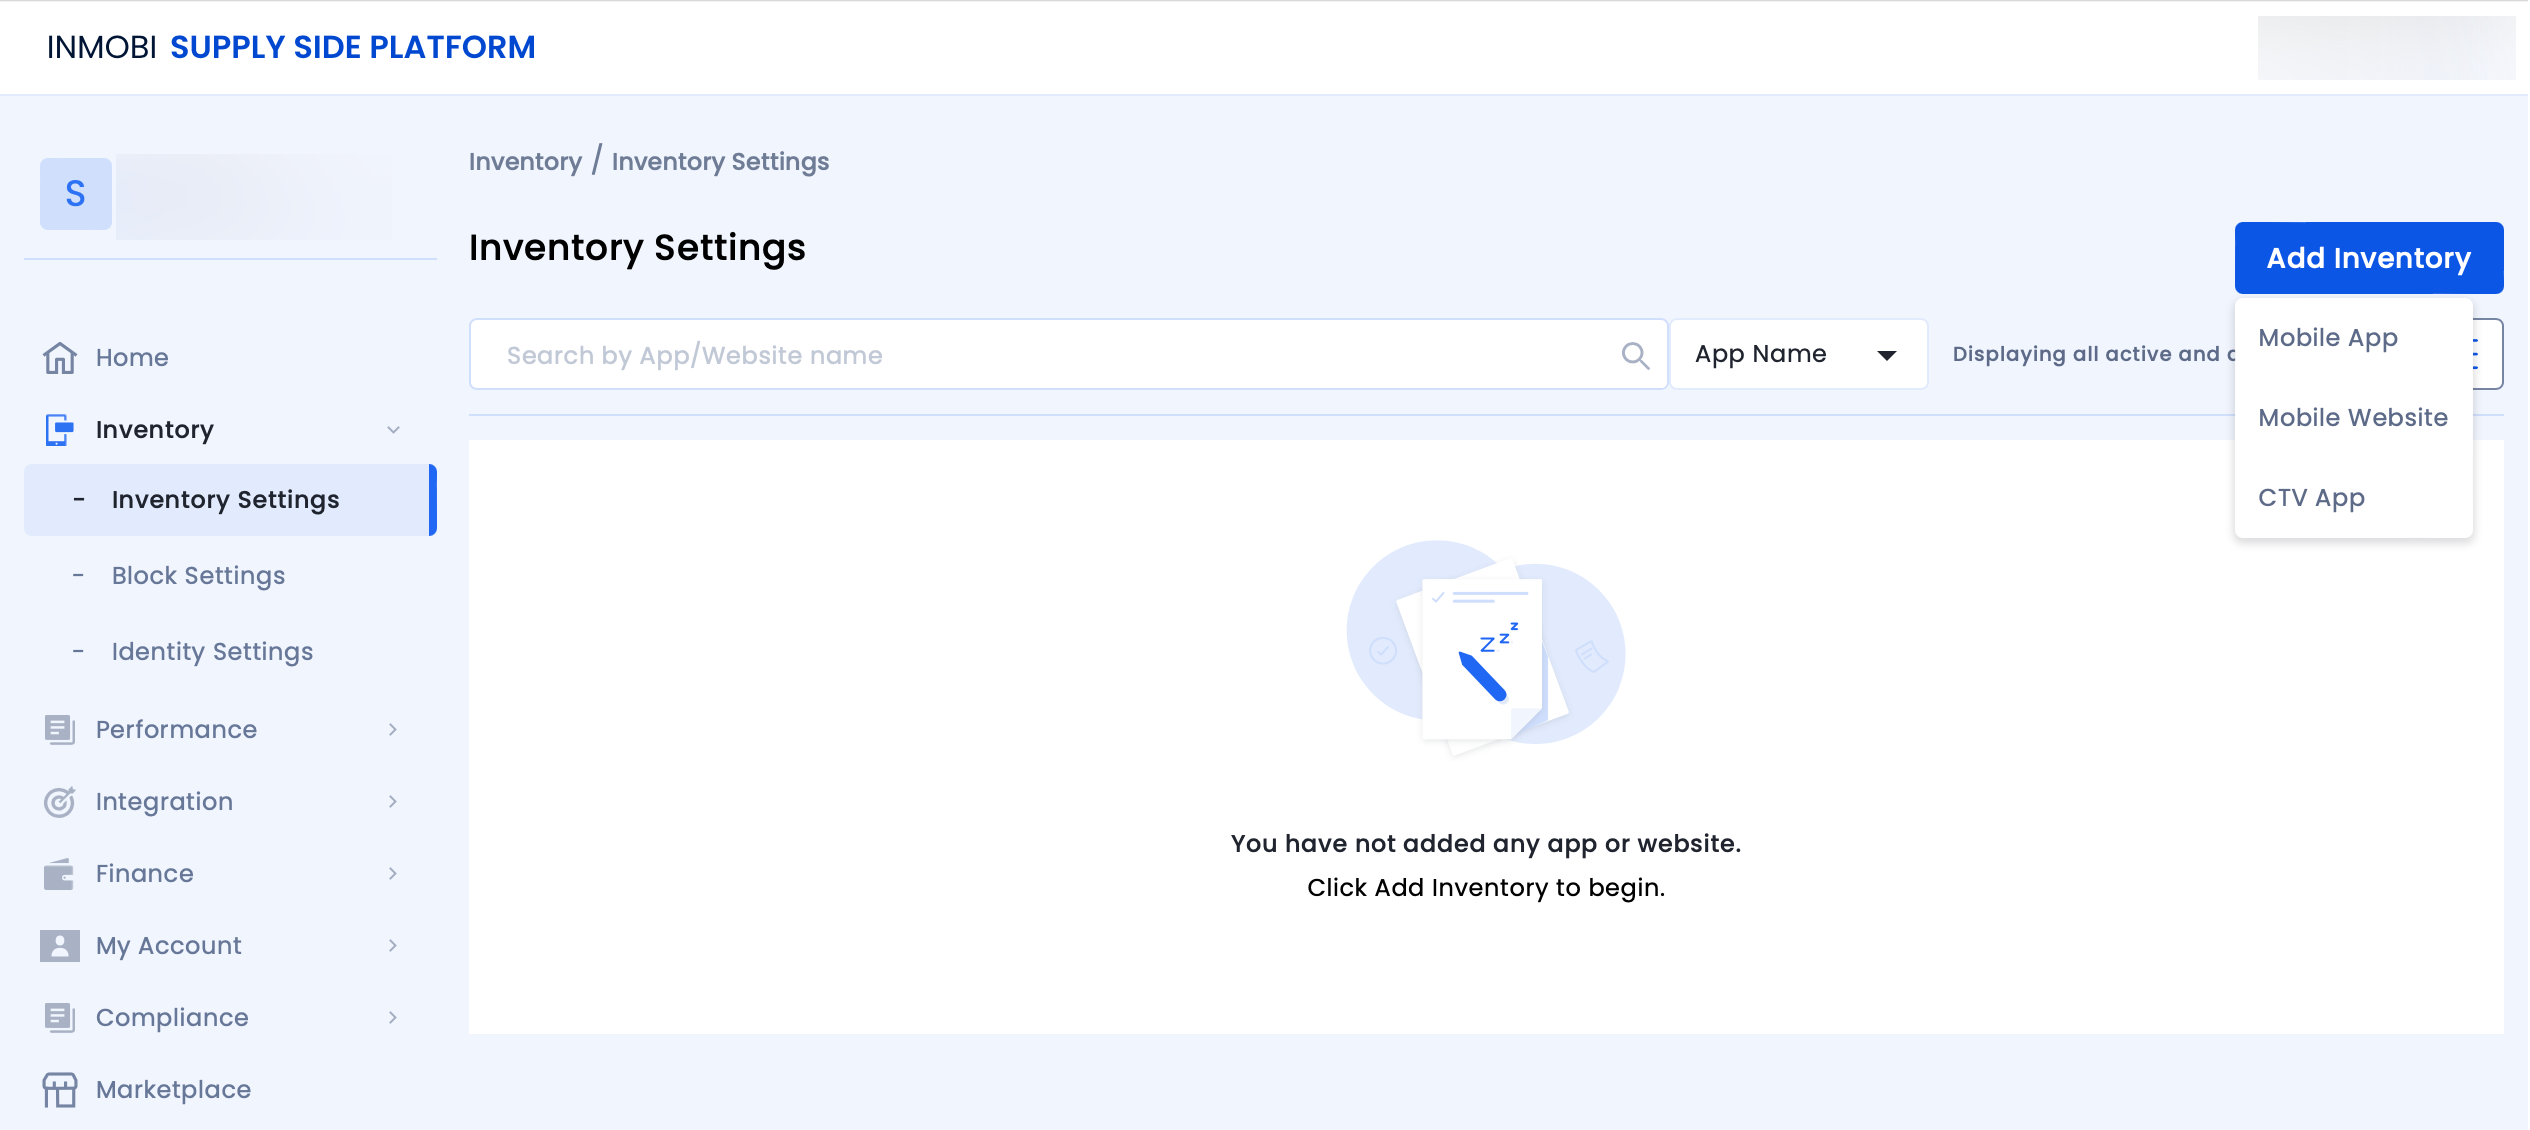


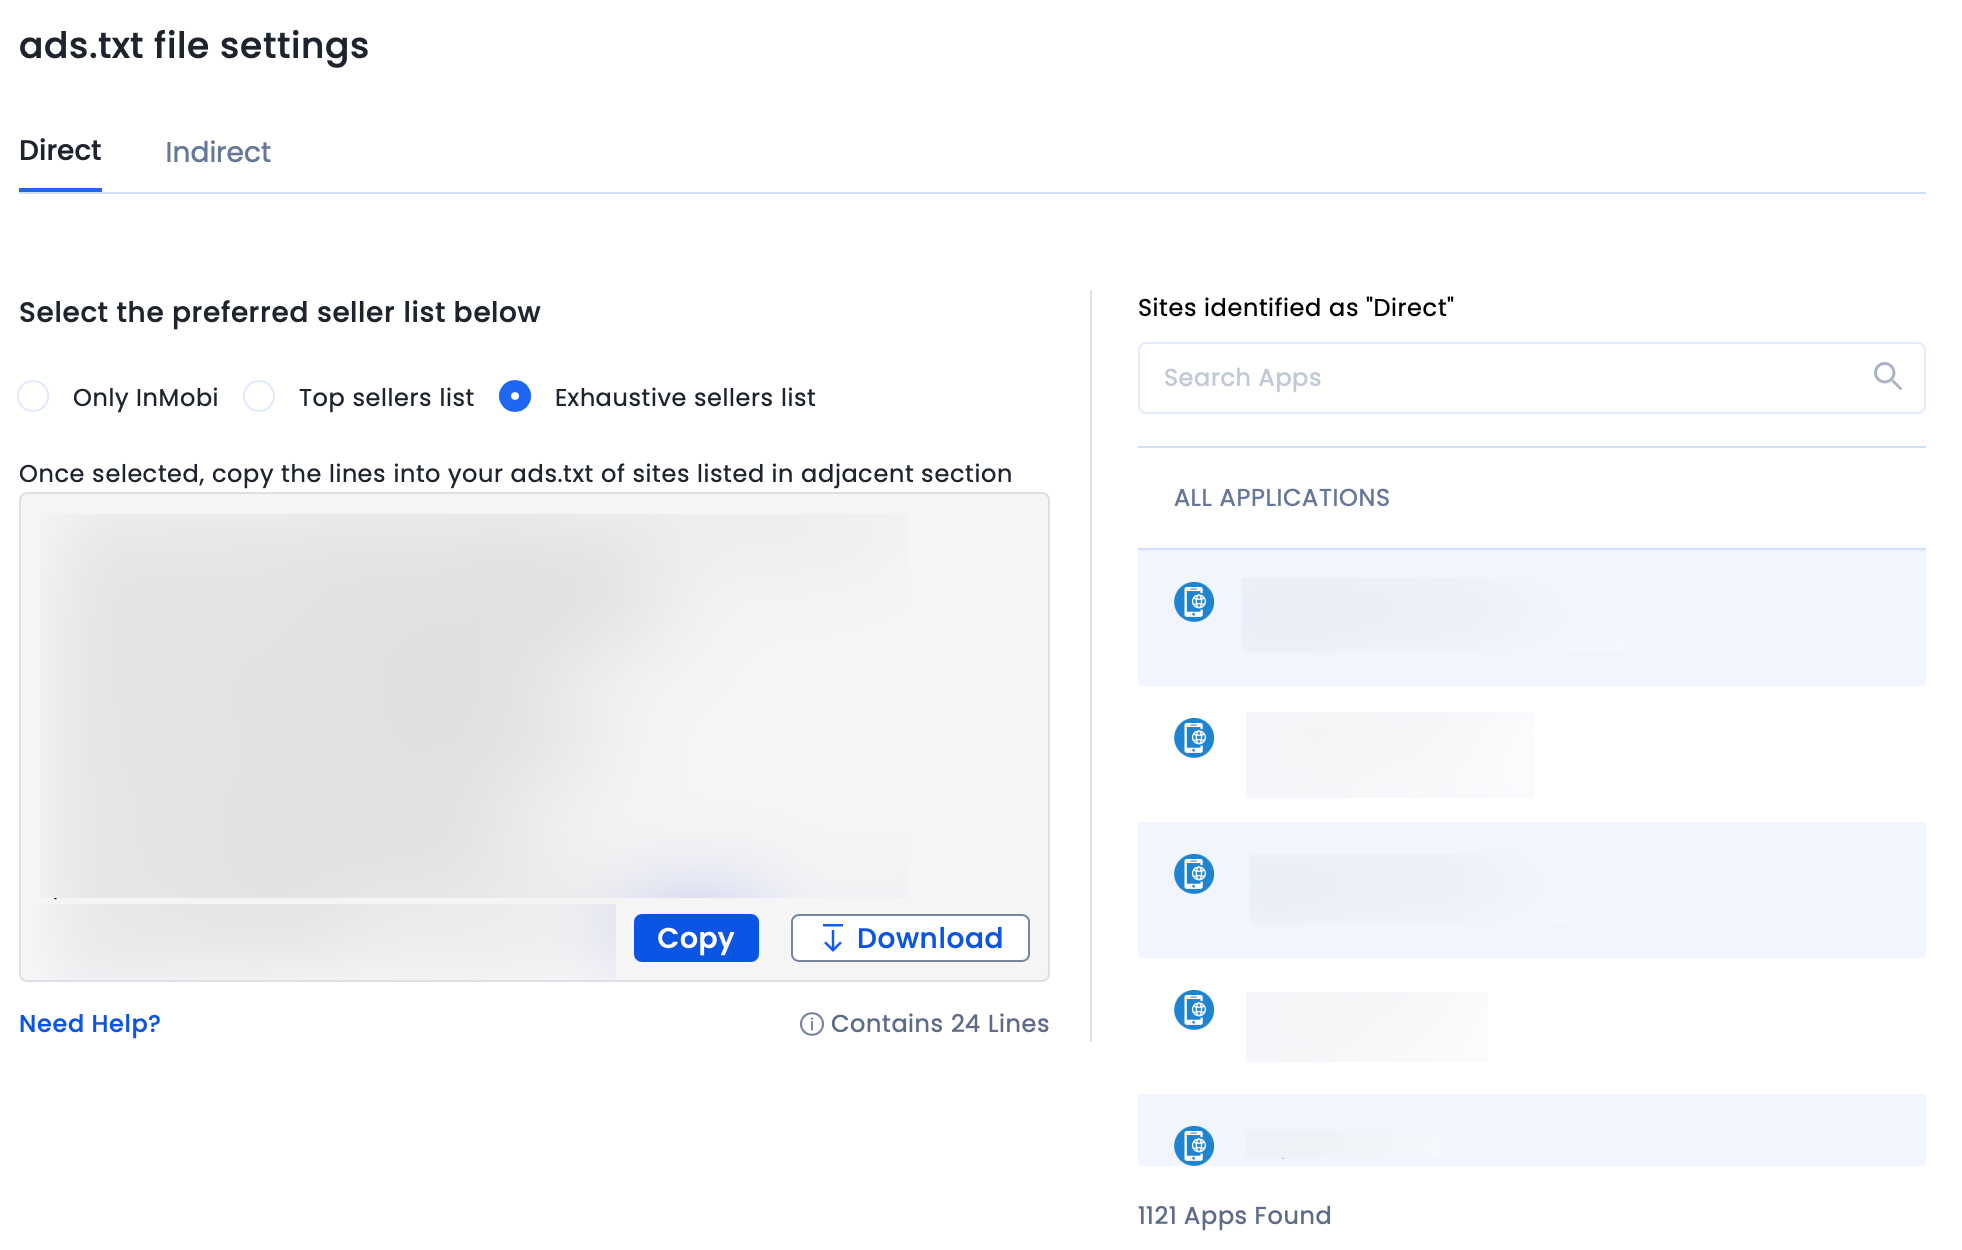
Follow the additional instructions below about GDPR settings on your Google dashboard for higher monetization results. This configuration applies to traffic from European Economic Area (EEA) and publishers using AdMob/GAM CMP for GDPR consent purposes. Google CMP provides two ways of adding ad partners on their AdMob/GAM platform:
InMobi is not part of ‘Commonly used ad partners’ by default, and you must add it manually by selecting Custom ad partners.
Follow the instructions below to enable InMobi under Custom ad partners on your Google dashboard.

For further assistance, Contact Us.
This topic explains how to integrate InMobi as a real-time bidder on Nimbus. InMobi connects via the OpenRTB (oRTB) protocol and uses the InMobi SDK to render ads when it wins an auction.
Before you begin, ensure that you have the following:
If the InMobi SDK is already integrated in your app, ensure that you link the same InMobi account ID with Nimbus. InMobi does not allow using multiple account IDs within the same app.
To set up your account and inventory on the InMobi Publisher Dashboard, follow these steps:
If you are adding apps and placements for the first time, see Add Your App or Website.
Enable Audience Bidding and select Nimbus from the Partner dropdown.
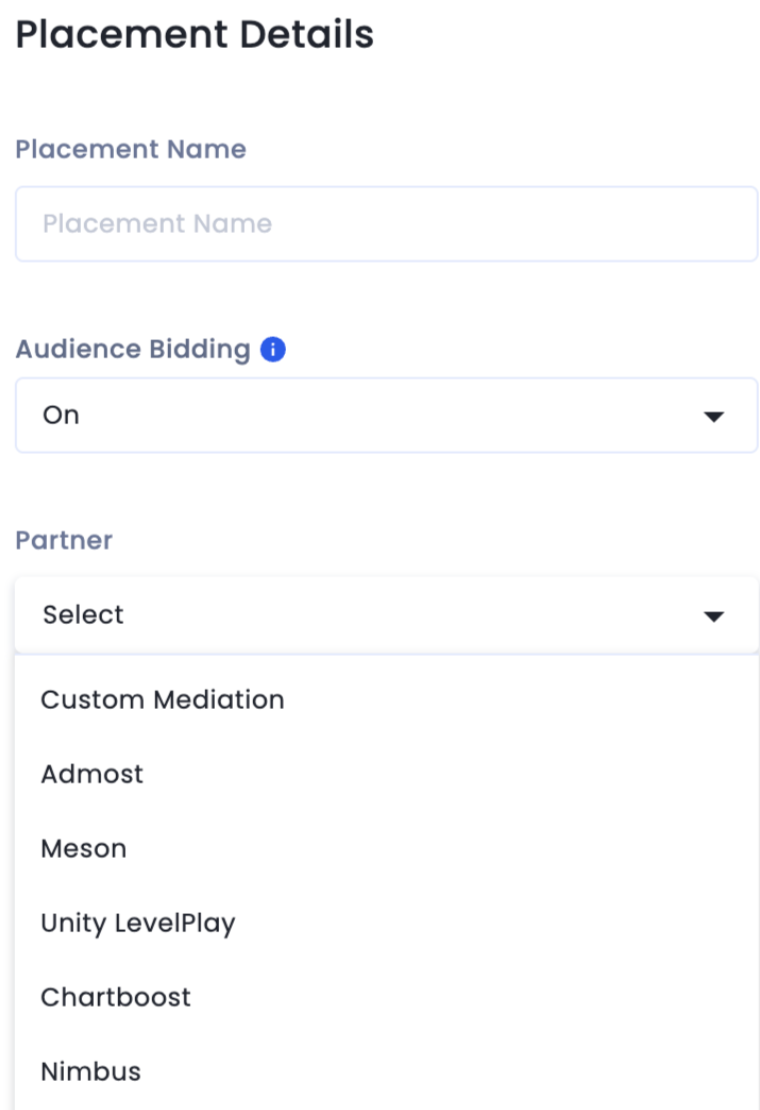
Use the following Nimbus documentation links to complete the integration:
This topic describes how to integrate the InMobi SDK rendering plugin with Prebid SDK and Prebid Server. For more information about Prebid Plugin Renderers and how this setup works, see Prebid Plugin Renderer (Header Bidding).
plc key. For more information, see InMobi for Header Bidding.In your app’s build.gradle file, add the following:
implementation "com.inmobi.monetization:inmobi-prebid-adapter:10.8.2.0"
implementation "com.inmobi.monetization:inmobi-ads-kotlin:10.8.2"
Before initializing Prebid SDK, register the InMobi renderer:
PrebidMobile.registerPluginRenderer(
    InMobiRenderer.getInstance(
        this,
        new InMobiMediationConfiguration("<<account_id>>",
            new InMobiRendererInitListener() {
                @Override
                public void onInitCompleted(@Nullable Error error) {
                    System.out.println("InMobi SDK initialized");
                }
            }
        )
    )
);
If your app already uses InMobi SDK through another mediation, you must provide the same account ID.
This topic provides a unified approach to integrating InMobi with Prebid Server across both mobile (in-app) and web platforms. It outlines the requirements, integration steps, and partner dashboard configurations necessary to enable header bidding through Prebid Server with InMobi demand. Whether you're working with a mobile app, mobile web, or desktop web environment, this guide will walk you through the complete integration process.
To successfully integrate InMobi with Prebid Server, ensure you meet the following prerequisites:
Use the toggles below to view platform-specific integration instructions.
appId and placement ID in the request payload.bidder: 'inmobi' with the required parameters:
{
  code: 'ad-slot-1',
  mediaTypes: { banner: { sizes: [[300, 250]] }},
  bids: [{
    bidder: 'inmobi',
    params: {
      placementId: '<PLACEMENT_ID>',
      publisherId: '<PUBLISHER_ID>',
      tagId: '<TAG_ID>',
    }
  }]
}
Use the toggle below to view the differences in dashboard configuration across platforms.
For further assistance, Contact Us.
InMobi provides a transparent bidding adapter for Prebid.js (client-side integration) and Prebid Server (server-to-server integration). As a Prebid-approved bidder, InMobi continuously updates its adapter with new features and enhancements.

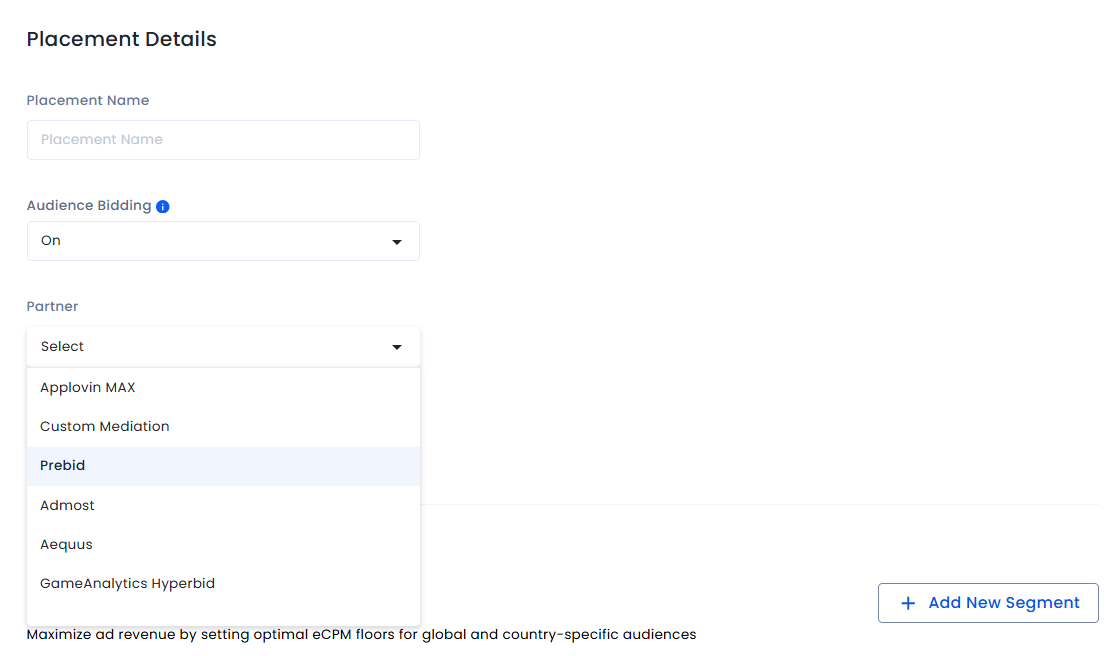
For each website, create at least one placement per ad unit (Banner, Video, and Native).
To configure InMobi in your Prebid.js setup:
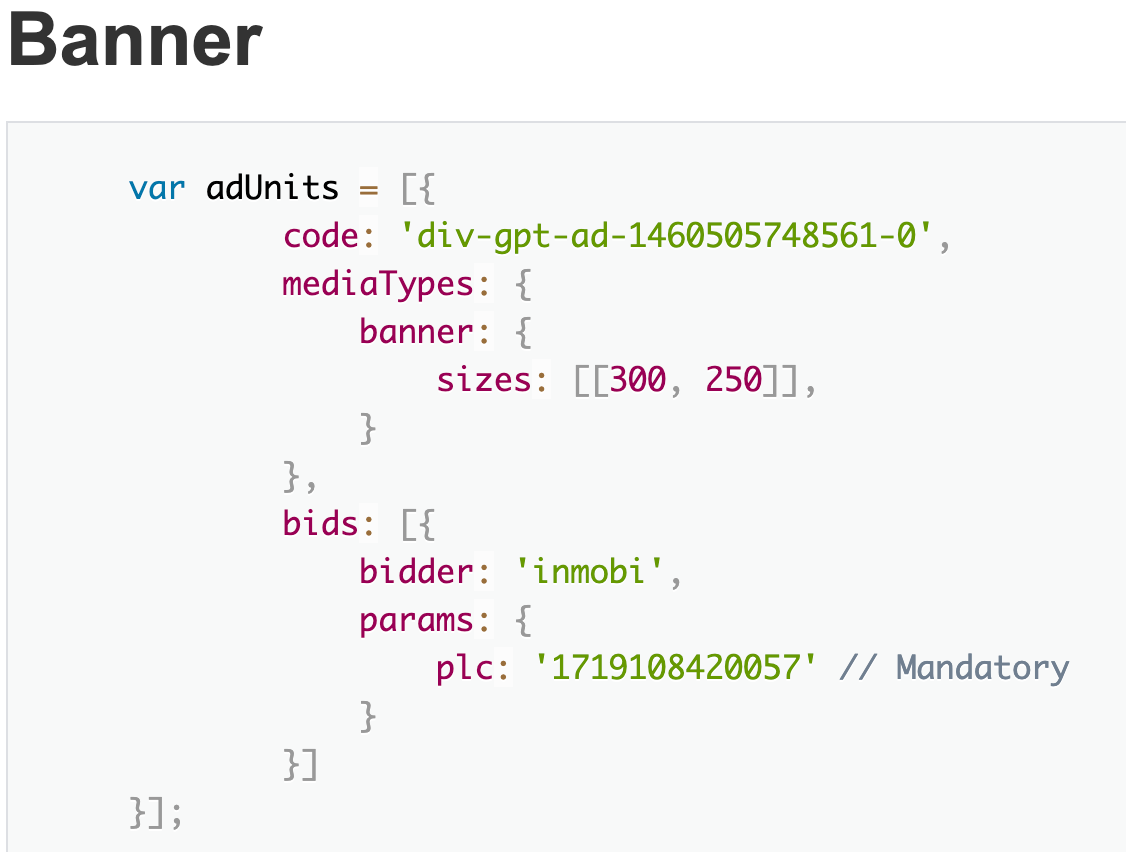

Publica integration is the process of connecting your CTV inventory with the Publica platform, which is a CTV ad server designed to help publishers manage and monetize their video ad inventory. This guide provides step-by-step instructions for connecting your CTV inventory with InMobi via Publica. It lets publishers streamline their CTV ad operations and maximize yield by connecting with demand partners and managing ad decision-making in a flexible and transparent way.
Before starting the integration, ensure you have:
To set up your account and inventory on the InMobi Publisher Dashboard, follow these steps:
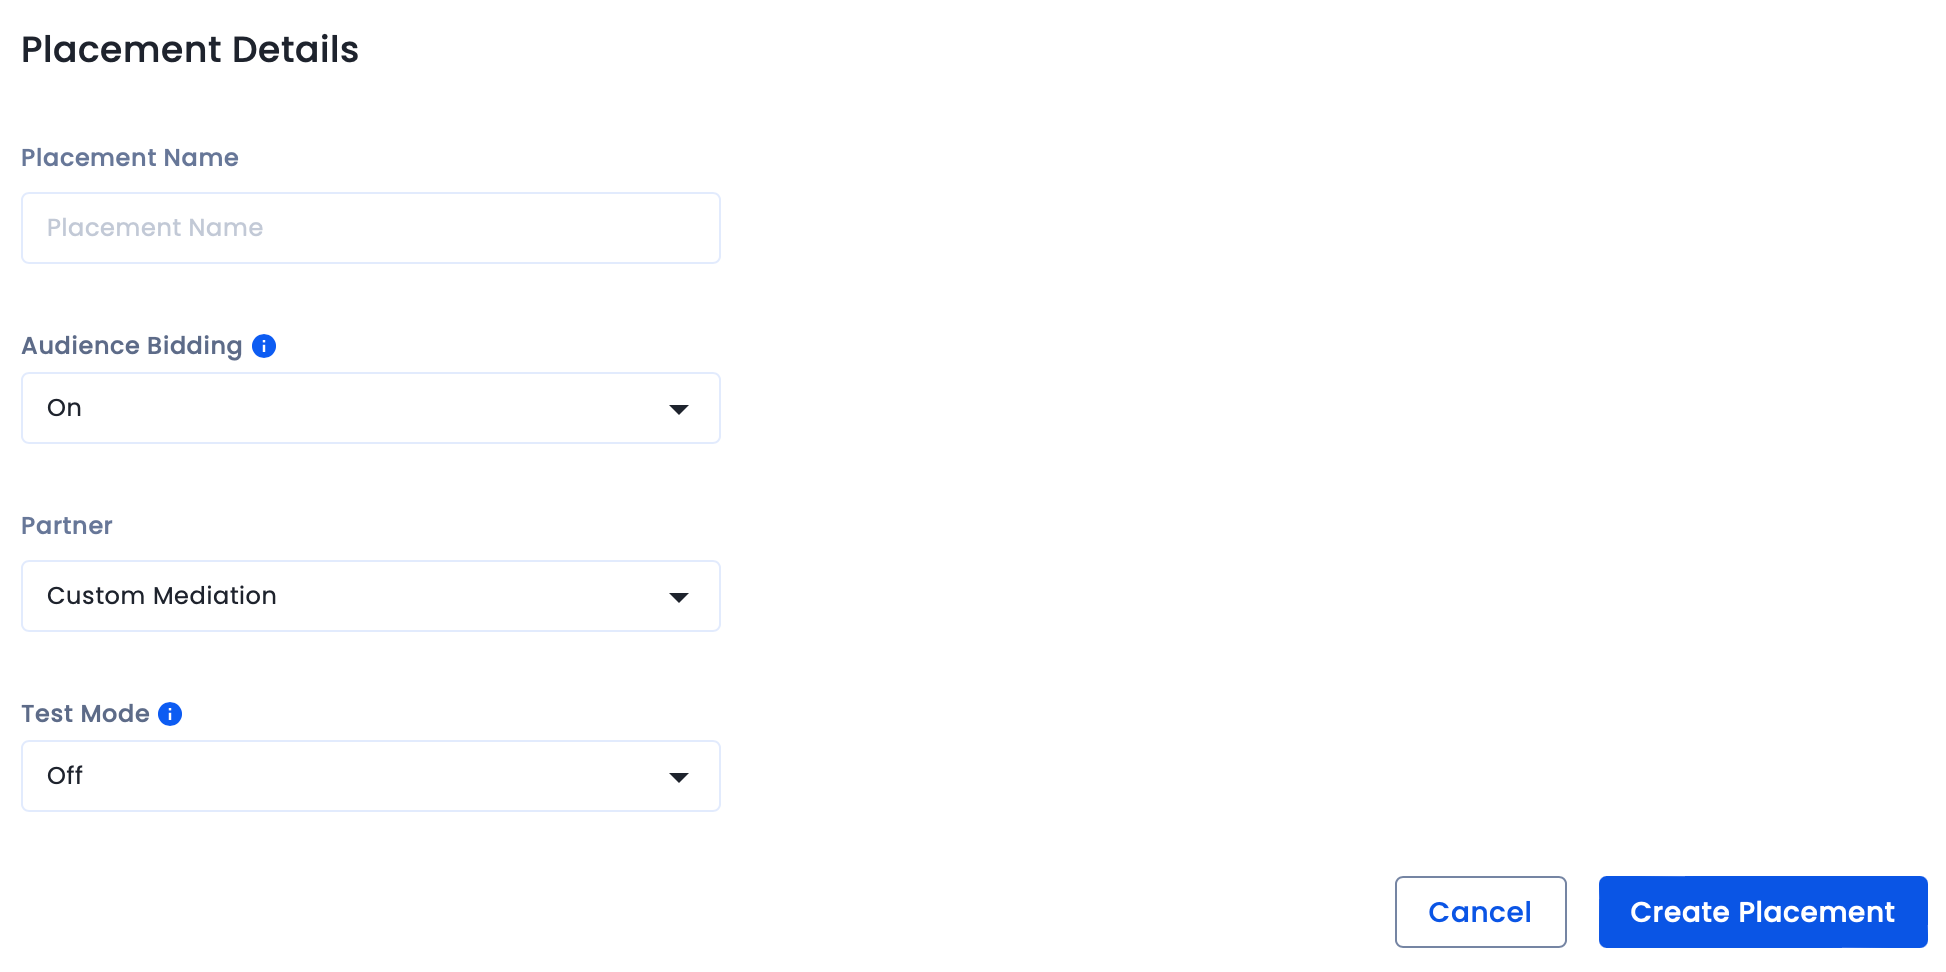
To map the InMobi placements,
For further assistance, Contact Us.
SpringServe integration is the process of connecting your CTV inventory with the SpringServe platform, which is a CTV ad server designed to help publishers manage and monetize their video ad inventory.
Before starting the integration, ensure you have:
To set up your account and inventory on the InMobi Publisher Dashboard, follow these steps:
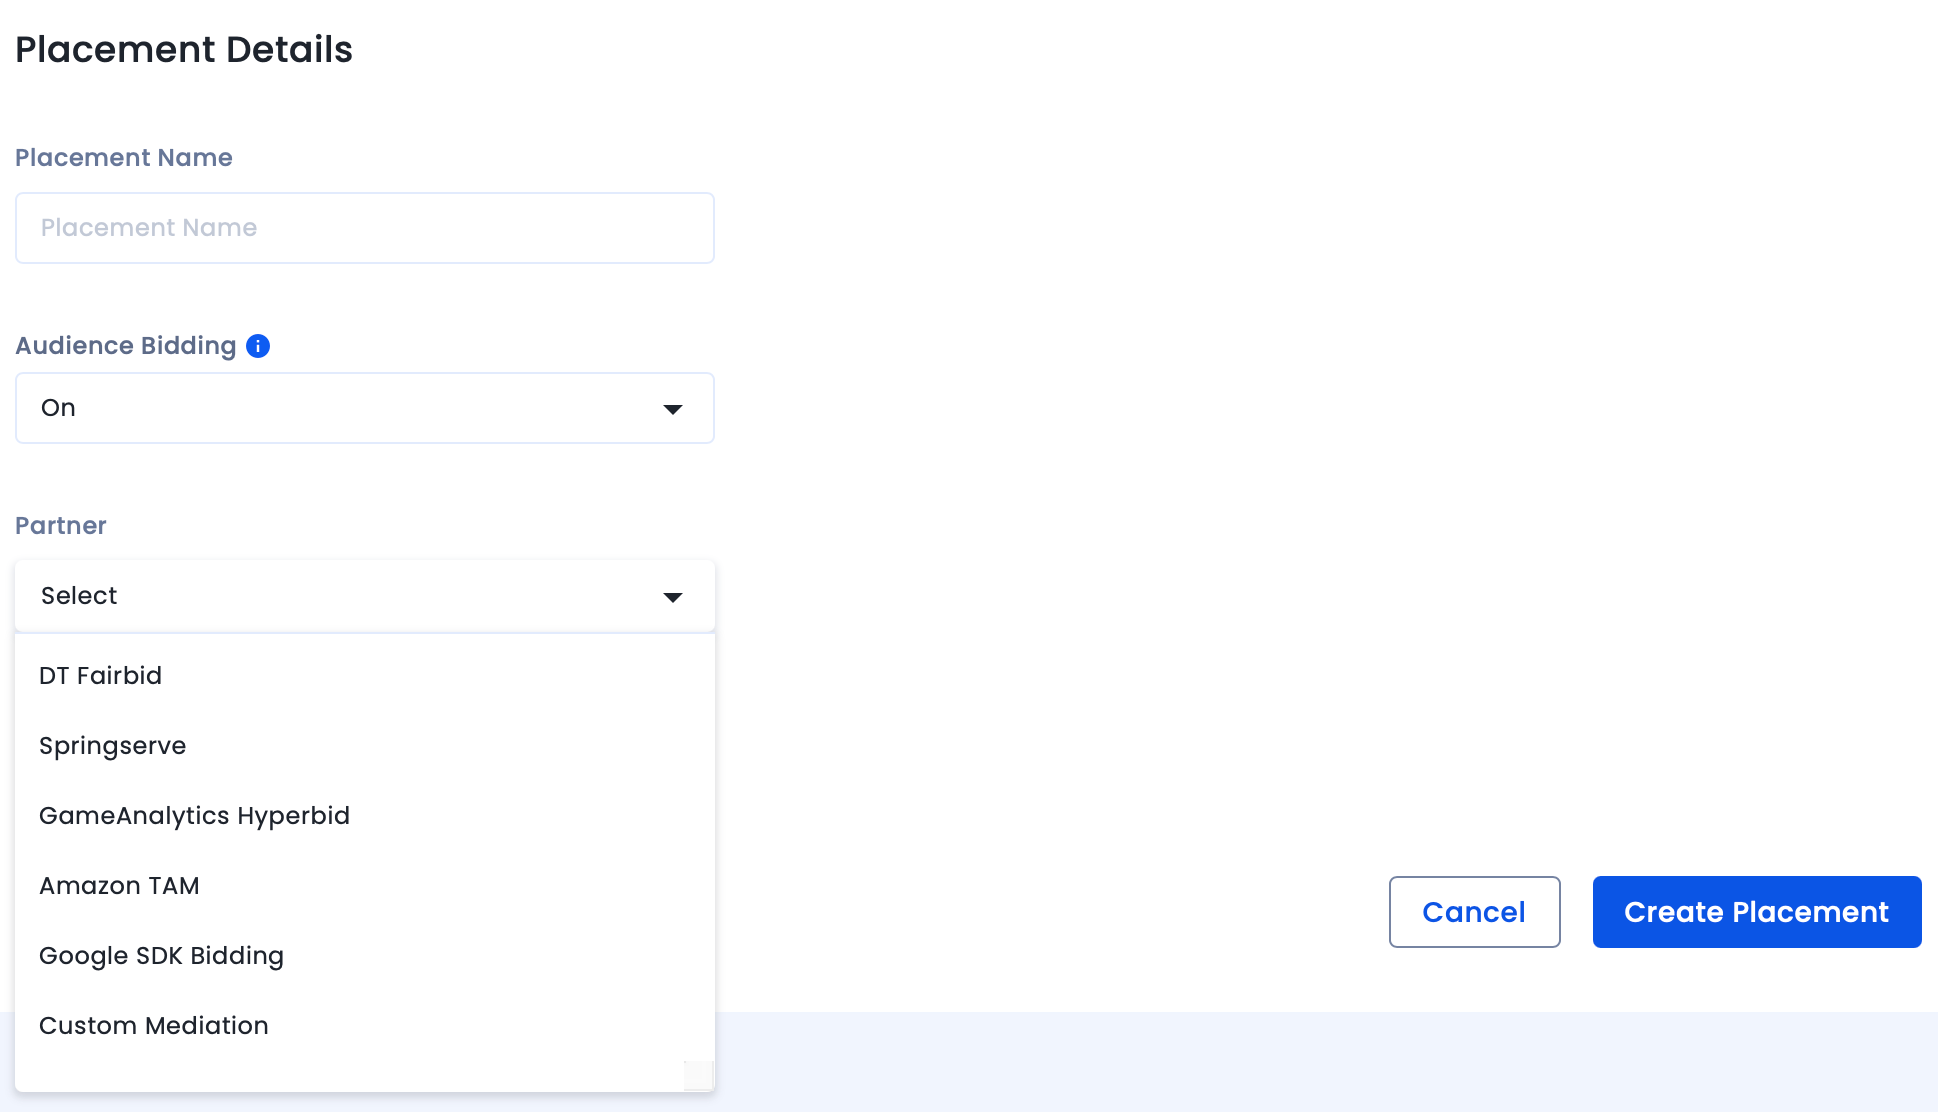
To map the InMobi placements,
Ensure the ad type (e.g., VAST video) and targeting parameters (app/channel name, duration, position) match what’s set on the InMobi dashboard.
For further assistance, Contact Us.
Integrating InMobi SDK with Unity is easy.
You can get the following ad types from InMobi via the Unity plugin on both Android and iOS apps:
You require the following to run the latest version of the Unity plugin:
| SDK Version | |
| Size |
iOS - 692 KB (.IPA Inflation) Android - 375.341 KB (.APK Inflation) |
| Plugins |
Follow these simple steps and start monetizing with InMobi:
Select Assets Import Package Custom Package, and search for the InMobiAdsUnityPlugin.unitypackage file you downloaded.
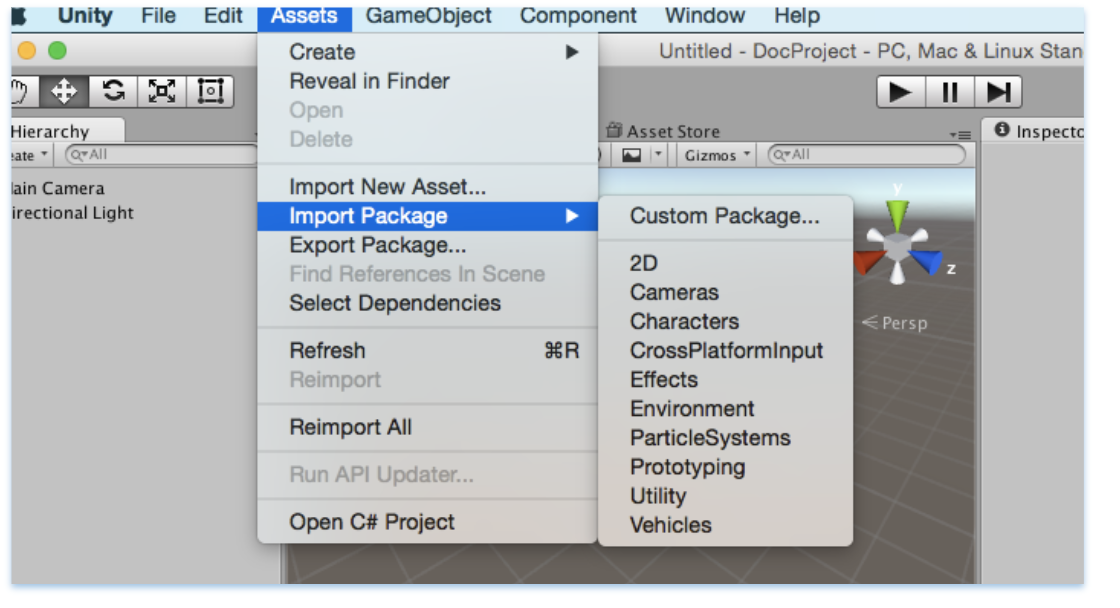
Make sure all the files are selected, and then click Import.

You can use the common C# API in the InMobi Ads plugin to request banner, interstitial, and rewarded video ads. The code can be written once and deployed to both Android and iOS.
There are multiple APIs provided in InMobiPlugin Class to pass on Demographic information to InMobi SDK which helps us in better ad targeting.
Some of them are as follows:
//Set Age
public void SetAge(int age){
inmobiPluginClient.SetAge (age);
}
//Set PostalCode
public void SetPostalCode(string postalCode){
inmobiPluginClient.SetPostalCode (postalCode);
}
//Set Year of Birth
public void SetYearOfBirth(int yearOfBirth){
inmobiPluginClient.SetYearOfBirth (yearOfBirth);
}
//Set Gender GENDER_MALE or GENDER_FEMALE
public void SetGender(string gender){
inmobiPluginClient.SetGender (gender);
}
You can use the InMobiPlugin Class to initialize the InMobi SDK. Account Id is required to initialize the InMobi SDK.
Here is the sample code to initialize the InMobi SDK:
private void initializeInMobiAds () {

//Account id used here is test account id

InMobiPlugin inmobiPlugin = new InMobiPlugin();

    inmobiPlugin.OnInitializationCompleted += this.HandleInitializationStatus;

    Dictionary<string, object=""> consentObject = new Dictionary<string, object="">();

#if UNITY_ANDROID

consentObject.Add(InMobiPlugin.IM_GDPR_CONSENT_AVAILABLE, true);

#elif (UNITY_5 && UNITY_IOS) || UNITY_IPHONE

    consentObject.Add(InMobiPlugin.IM_GDPR_CONSENT_AVAILABLE, “true”);
#endif

    consentObject.Add(InMobiPlugin.IM_GDPR_CONSENT_IAB, "IAB_STRING");
    inmobiPlugin.Init("4028cb8b2c3a0b45012c406824e800ba", consentObject);
}

public void HandleInitializationStatus (object sender, SdkInitializationStatusArgs args) {

Debug.Log("SDK Initialization status code : " + args.status.Code + " and reason : " +
        args.status.Reason);
}
Let’s understand a few things here before you proceed:
What is a consentObject? - A consentObject is a dictionary representation of all kinds of consent provided by the publisher to the SDK. The key is mandatory if you wish to monetize traffic from EEA region. You can read further on GDPR regulations here.
| Key | Type | Inference |
| gdpr_consent | String | A consent string is a series of numbers, which identifies the consent status of an Adtech Vendor. The string must follow the IAB contracts as mentioned here. |
| gdpr_consent_available | String (iOS) | For iOS, the value should be passed as String: "true": User has provided consent to collect and use data. "false": User has not provided consent to collect and use data. Any value other than “true” and “false” is invalid and will be treated as value not provided by user. This key can be accessed via string constant IM_GDPR_CONSENT_IAB. |
| Bool (Android) | For Android, the value should be passed as Bool: true: User has provided consent to collect and use data. false: User has not provided consent to collect and use data. Any value other than true and false is invalid and will be treated as value not provided by user. This key can be accessed via string constant IM_GDPR_CONSENT_IAB. |
|
| gdpr | String | Whether or not the request is subjected to GDPR regulations (0 = No, 1 = Yes), omission indicates Unknown. |
As part of the General Data Protection Regulation (“GDPR”) publishers who collect data on their apps, are required to have a legal basis for collecting and processing the personal data of users in the European Economic Area (“EEA”). Please ensure that you obtain appropriate consent from the user before making ad requests to InMobi for Europe and indicate the same by following our recommended SDK implementation. Please do not pass any demographics information of a user; if you do not have user consent from such user in Europe.
It is mandatory to initialize the InMobi SDK before making any ad request to InMobi. It is advised to do it at the start of the app itself.
For COPPA compliance, you can indicate whether the user is a child. Set to true if the user is under 13 in the US, or the applicable age in other regions.
// Set age restriction for COPPA compliance
// Set to true if the user is a child (under 13 in US)
inMobiPlugin.SetAgeRestriction(true);
Publisher Signals
Publisher Signals allow you to pass contextual data to improve ad targeting and yield. You can signal information about user behavior, acquisition source, and other attributes to help generate better ad performance.
Setting Publisher Signals
Create a dictionary with signal keys and values, then pass it to the SDK. This method must be called after InMobi SDK is successfully initialized. Ensure you call this function and update the values before every ad request.
// Create a dictionary with all required signals and corresponding values
Dictionary<string, object=""> publisherSignals = new Dictionary<string, object="">();

// User monetization signals
publisherSignals.Add("iap", true);              // User has made IAP
publisherSignals.Add("ua_type", "paid");        // User is acquired via paid medium
publisherSignals.Add("iap_type", "minnow");     // User has made low purchases
publisherSignals.Add("iaa_type", "whale");      // User has seen high number of ads

// Session and impression depth signals
publisherSignals.Add("s_dep_rew", 4);           // User has seen 4 rewarded ads in current session
publisherSignals.Add("i_dep_rew", 10);          // User has seen 10 rewarded ads in lifetime

// Performance signals
publisherSignals.Add("ctr_rew", 9.25);          // Historical CTR for user is 9.25%
publisherSignals.Add("abp_5_rew", 0.01720);     // Average winning bid price for last 5 rewarded auctions was $0.01720, eCPM is $17.2

// Pass the signals to InMobi SDK
inMobiPlugin.PutPublisherSignals(publisherSignals);
</string,></string,>
Getting Publisher Signals
You can retrieve the currently set signals to verify what data is being passed.
// Check what signals are set already
Dictionary<string, object=""> currentSignals = inMobiPlugin.GetPublisherSignals();</string,>
Resetting Publisher Signals
Clear all the signals data for the user when needed.
// Clear all the signals data for the user
inMobiPlugin.ResetPublisherSignals();
You must provide a consentObject in every session. SDK does not persist consent, it only keeps the consentObject in memory. If the app is relaunched, SDK will lose the consentObject. Within a session, a consentObject can be updated as below:
Dictionary<string, object=""> consentObject = new Dictionary<string, object="">();

    #if UNITY_ANDROID

        consentObject.Add(InMobiPlugin.IM_GDPR_CONSENT_AVAILABLE, true);

    #elif (UNITY_5 && UNITY_IOS) || UNITY_IPHONE

        consentObject.Add(InMobiPlugin.IM_GDPR_CONSENT_AVAILABLE, “true”);

    #endif

    consentObject.Add(InMobiPlugin.IM_GDPR_CONSENT_IAB, "IAB_STRING");

    inmobiPlugin.UpdateGdprConsentObject(consentObject);
Following is the minimal code to create and load a banner ad:
private void RequestBanner ()
{
  // These placement Ids are configured to always serve test ads.
  #if UNITY_ANDROID
  string placementId = "1467162141987";
  #elif UNITY_IPHONE
  string placementId = "1464947431995";
  #endif
  // Create a 320x50 banner at the bottom of the screen.
  this.bannerAd = new BannerAd (placementId, 320, 50, (int)InMobiAdPosition.BottomCenter);
  // Register for ad events.
this.bannerAd.OnAdLoadSucceeded += this.HandleOnAdLoadSucceeded;    // Called when ad is loaded successfully
this.bannerAd.OnAdLoadFailed += this.HandleAdLoadFailed;            // Called when ad fails to load
this.bannerAd.OnAdFetchSuccessful += this.HandleAdFetchSuccessful;  // Called when ad content is fetched successfully
this.bannerAd.OnAdFetchFailed += this.HandleAdFetchFailed;          // Called when ad fetch fails
this.bannerAd.OnAdImpression += this.HandleAdImpression;            // Called when ad impression is recorded
this.bannerAd.OnAdDisplayed += this.HandleAdDisplayed;              // Called when ad is displayed on screen
this.bannerAd.OnAdDismissed += this.HandleAdDismissed;              // Called when ad is dismissed
this.bannerAd.OnAdInteraction += this.HandleAdInteraction;          // Called when user interacts with ad
this.bannerAd.OnUserLeftApplication += this.HandleUserLeftApplication; // Called when user leaves app via ad
// Load a banner ad.
  this.bannerAd.LoadAd ();
}
InMobiAdPosition enum specifies where to place the banner.
Each platform, iOS and Android, requires a unique placement Id. Rest of the APIs remain same for both platforms.
// Set extras for ad targeting. All values must be passed as string.
Dictionary<string, string=""> extras = new Dictionary<string, string="">();
extras.Add("tp", "admob");           // Mediation partner name
extras.Add("tp_ver", "19.0.0");      // Mediation partner SDK version
this.bannerAd.SetExtras(extras);

</string,></string,>
Please note that the integration for interstitial and full-screen video ads is same. Following is the minimal code to load an interstitial ad:
  private void RequestInterstitial ()
{
  // These placement Ids are configured to always serve test ads.
  #if UNITY_ANDROID
  string placementId = "1469137441636";
  #elif UNITY_IPHONE
  string placementId = "1467548435003";
  #endif
  // Create an interstitial.
  this.interstitialAd = new InterstitialAd (placementId);
  // Register for ad events.
  this.interstitialAd.OnAdLoadSucceeded += this.HandleOnAdLoadSucceeded;    // Called when ad is loaded successfully
this.interstitialAd.OnAdLoadFailed += this.HandleAdLoadFailed;            // Called when ad fails to load
this.interstitialAd.OnAdFetchSuccessful += this.HandleAdFetchSuccessful;  // Called when ad content is fetched successfully
this.interstitialAd.OnAdFetchFailed += this.HandleAdFetchFailed;          // Called when ad fetch fails
this.interstitialAd.OnAdImpression += this.HandleAdImpression;            // Called when ad impression is recorded
this.interstitialAd.OnAdDisplayed += this.HandleAdDisplayed;              // Called when ad is displayed on screen
this.interstitialAd.OnAdDismissed += this.HandleAdDismissed;              // Called when ad is dismissed
this.interstitialAd.OnAdInteraction += this.HandleAdInteraction;          // Called when user interacts with ad
this.interstitialAd.OnUserLeftApplication += this.HandleUserLeftApplication; // Called when user leaves app via ad
  this.interstitialAd.OnAdDisplayFailed += this.HandleAdDisplayFailed;
  this.interstitialAd.OnAdWillDisplay += this.HandleAdWillDisplay;
  // Load an interstitial ad.
  this.interstitialAd.LoadAd ();
}
Interstitial ads need to be shown explicitly, but before that check if interstitial ad is ready or not by calling isReady () as depicted below:
  if (this.interstitialAd.isReady ()) {
   this.interstitialAd.Show ();
  } else {
   MonoBehaviour.print ("Interstitial is not ready yet");
  }
A good place to show an interstitial ad is end of a level or end of session.
// Set extras for ad targeting. All values must be passed as string.
Dictionary<string, string=""> extras = new Dictionary<string, string="">();
extras.Add("tp", "admob");           // Mediation partner name
extras.Add("tp_ver", "19.0.0");      // Mediation partner SDK version
this.interstitialAd.SetExtras(extras);

</string,></string,>
Following is a minimal code to load a rewarded video ad:
  private void RequestRewardBasedVideo ()
{
  // These placement Ids are configured to always serve test ads.
  #if UNITY_ANDROID
  string placementId = "1453753057988";
  #elif UNITY_IPHONE
  string placementId = "1465883204802";
  #endif
  this.rewardedVideoAd = new RewardedVideoAd (placementId);
  // Register for ad events.
  this.rewardedVideoAd.OnAdLoadSucceeded += this.HandleOnAdLoadSucceeded;
  this.rewardedVideoAd.OnAdLoadFailed += this.HandleAdLoadFailed;
  this.rewardedVideoAd.OnAdFetchSuccessful += this.HandleAdFetchSuccessful;
  this.rewardedVideoAd.OnAdFetchFailed += this.HandleAdFetchFailed;
  this.rewardedVideoAd.OnAdDisplayed += this.HandleAdDisplayed;
  this.rewardedVideoAd.OnAdDismissed += this.HandleAdDismissed;
  this.rewardedVideoAd.OnAdImpression += this.HandleAdImpression;
  this.rewardedVideoAd.OnAdInteraction += this.HandleAdInteraction;
  this.rewardedVideoAd.OnUserLeftApplication += this.HandleUserLeftApplication;
  this.rewardedVideoAd.OnAdDisplayFailed += this.HandleAdDisplayFailed;
  this.rewardedVideoAd.OnAdWillDisplay += this.HandleAdWillDisplay;
  this.rewardedVideoAd.OnAdRewardActionCompleted += this.HandleRewardActionCompleted;
  this.rewardedVideoAd.LoadAd ();
}
Rewarded video ads work in a similar way to interstitial ads and need to be checked whether they are ready before calling show ().
  private void ShowRewardBasedVideo ()
{
  if (this.rewardedVideoAd.isReady ()) {
   this.rewardedVideoAd.Show ();
  } else {
   MonoBehaviour.print ("Rewarded video ad is not ready yet");
  }
}
You can set the following ad events on a banner, interstitial, and rewarded video ad.
 #region callback handlers
   public void HandleOnAdLoadSucceeded(object sender, AdLoadSuccessEventArgs args)
{
    MonoBehaviour.print("HandleOnAdLoadSucceeded event received");
    // Access ad metadata from the event args
    MonoBehaviour.print("Creative ID: " + args.AdMetaInfo.CreativeID);
    MonoBehaviour.print("Bid: " + args.AdMetaInfo.Bid);
    MonoBehaviour.print("Bid Keyword: " + args.AdMetaInfo.BidKeyword);
}
   public void HandleAdLoadFailed (object sender, AdLoadFailedEventArgs args)
{
  MonoBehaviour.print ("HandleAdLoadFailed event received with message: " + args.Error);
}
   public void HandleAdDisplayed (object sender, EventArgs args)
{
  MonoBehaviour.print ("HandleAdDisplayed event received");
}
  public void HandleAdDismissed (object sender, EventArgs args)
{
  MonoBehaviour.print ("HandleAdDismissed event received");
}
  public void HandleAdInteraction (object sender, AdInteractionEventArgs args)
{
  MonoBehaviour.print ("HandleAdDismissed event received " + args.Message);
}
  public void HandleUserLeftApplication (object sender, EventArgs args)
{
  MonoBehaviour.print ("HandleUserLeftApplication event received");
}
#endregion
#region Interstitial specific callback handlers
public void HandleAdReceived (object sender, EventArgs args)
{
  MonoBehaviour.print ("HandleAdReceived event received");
}
  public void HandleAdWillDisplay (object sender, EventArgs args)
{
  MonoBehaviour.print (
   "HandleAdWillDisplay event received with message: ");
}
  public void HandleAdDisplayFailed (object sender, EventArgs args)
{
  MonoBehaviour.print ("HandleAdDisplayFailed event received");
}
   #endregion
  #region RewardBasedVideo specific callback handlers
   public void HandleRewardActionCompleted (object sender, AdRewardActionCompletedEventArgs args)
{
  MonoBehaviour.print (
   "HandleRewardActionCompleted event received for " + args.Rewards);
}

public void HandleAdFetchSuccessful(object sender, AdFetchSuccessEventArgs args)
{
    // Called when ad content is successfully fetched
    // Access ad metadata from the event args
    MonoBehaviour.print("HandleAdFetchSuccessful event received");
    MonoBehaviour.print("Creative ID: " + args.AdMetaInfo.CreativeID);
    MonoBehaviour.print("Bid: " + args.AdMetaInfo.Bid);
}

public void HandleAdFetchFailed(object sender, AdFetchFailedEventArgs args)
{
    // Called when ad fetch fails
    MonoBehaviour.print("HandleAdFetchFailed event received");
    MonoBehaviour.print("Error: " + args.Error);
}

public void HandleAdImpression(object sender, EventArgs args)
{
    // Called when an ad impression is recorded
    MonoBehaviour.print("HandleAdImpression event received");
}

#endregion
The args.Rewards, specific to rewarded video ad, is in JSON String format.
| Class | Properties |
| AdFetchSuccessEventArgs | AdMetaInfo |
| AdFetchFailedEventArgs | Error (string) |
| AdLoadSuccessEventArgs | AdMetaInfo |
| Property | Type | Description |
| CreativeID | string | Unique identifier for the ad creative |
| Bid | double | Bid value for the ad |
| BidInfo | JObject | Additional bid information |
| BidKeyword | string | Keyword associated with the bid |
Unity LevelPlay Mediation is one of InMobi’s top-performing bidding platforms, especially among gaming publishers. This guide explains how to integrate InMobi as a real-time bidder via SDK-based oRTB on Unity LevelPlay Mediation.
Ensure the following before you get started with this integration:
Reach out to your Customer Success Manager to know more about enabling waterfall for InMobi via Custom Adapter on Unity LevelPlay Mediation.
To get your account and inventory up and running on the InMobi Publisher Dashboard, follow the instructions given below:
To create placements for Unity LevelPlay:
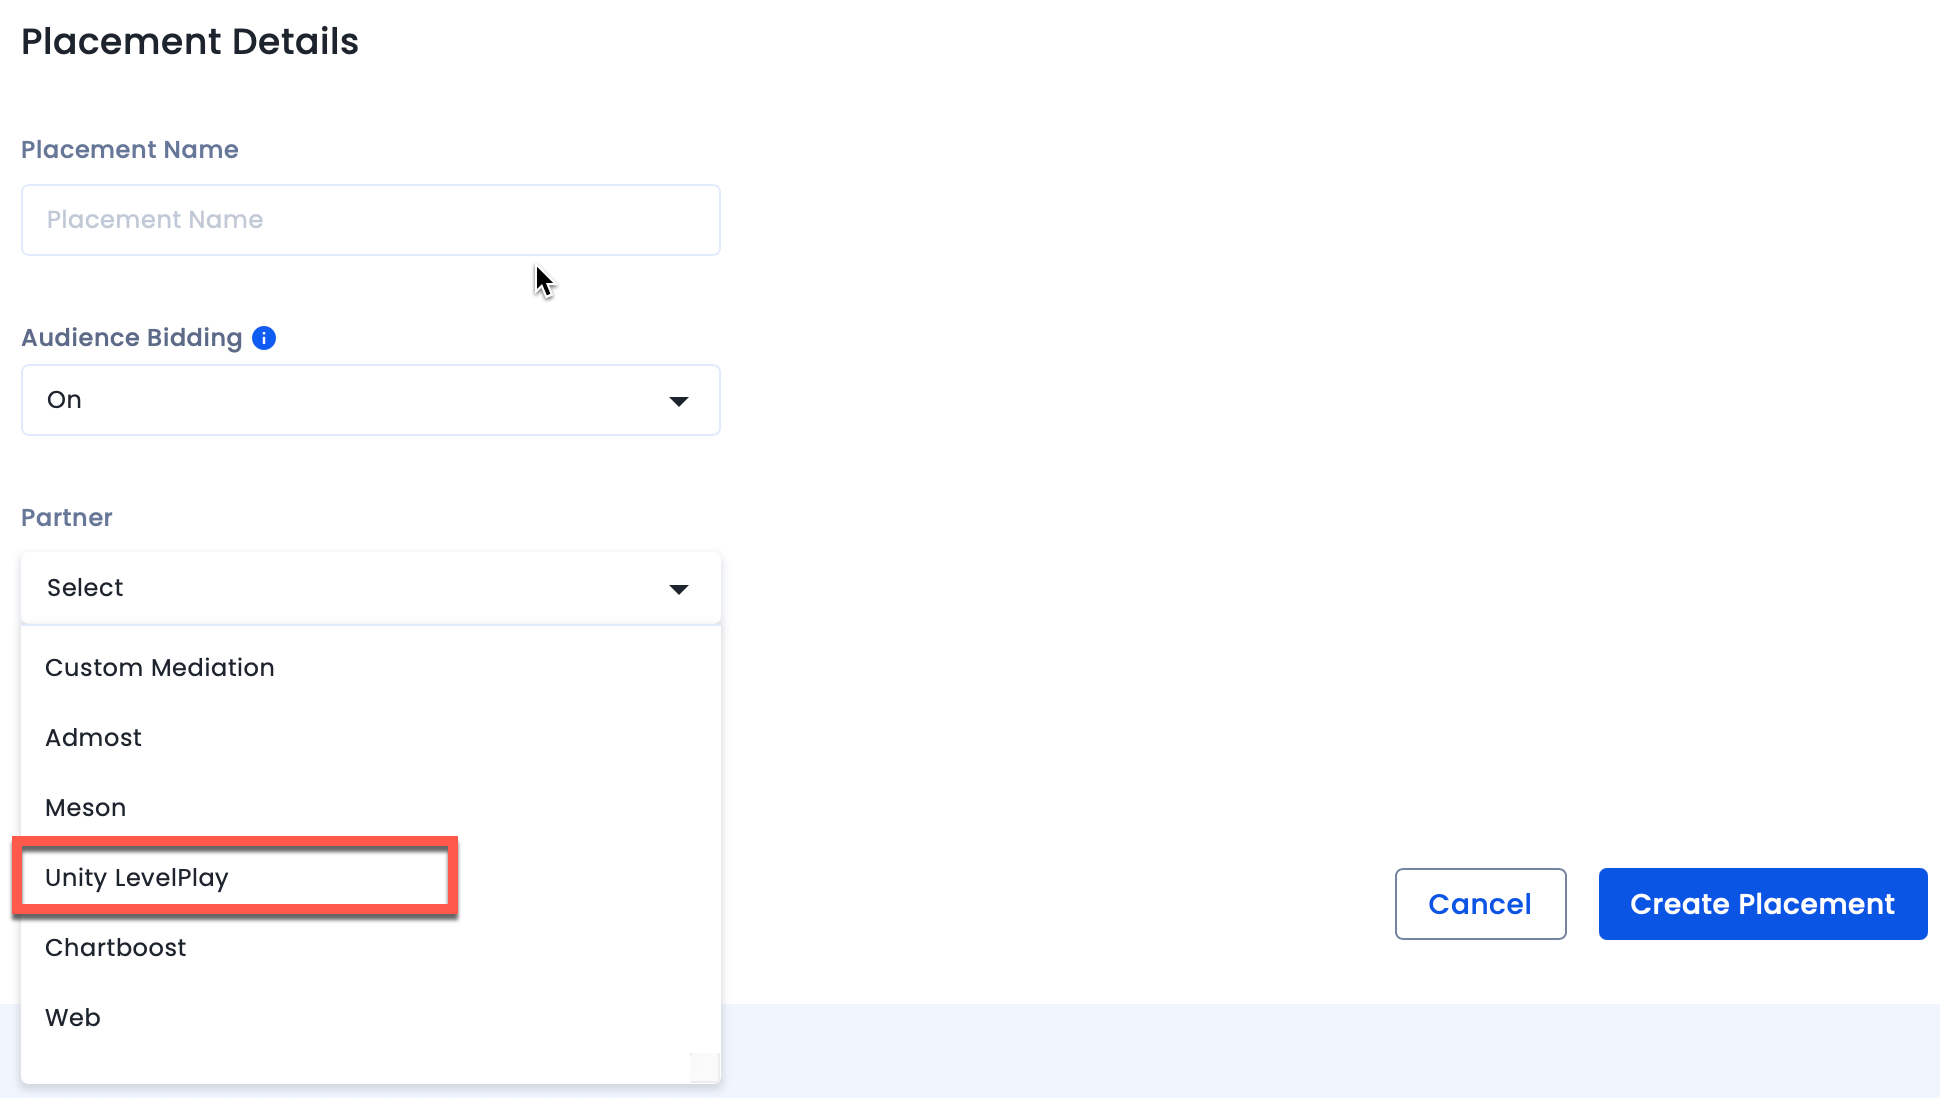
After you are done setting up your account and inventory on InMobi, the next steps would be to add InMobi as a network on the Unity LevelPlay Mediation dashboard, followed by mapping the created placements in the network on the Unity LevelPlay Mediation dashboard. Follow the instructions below:
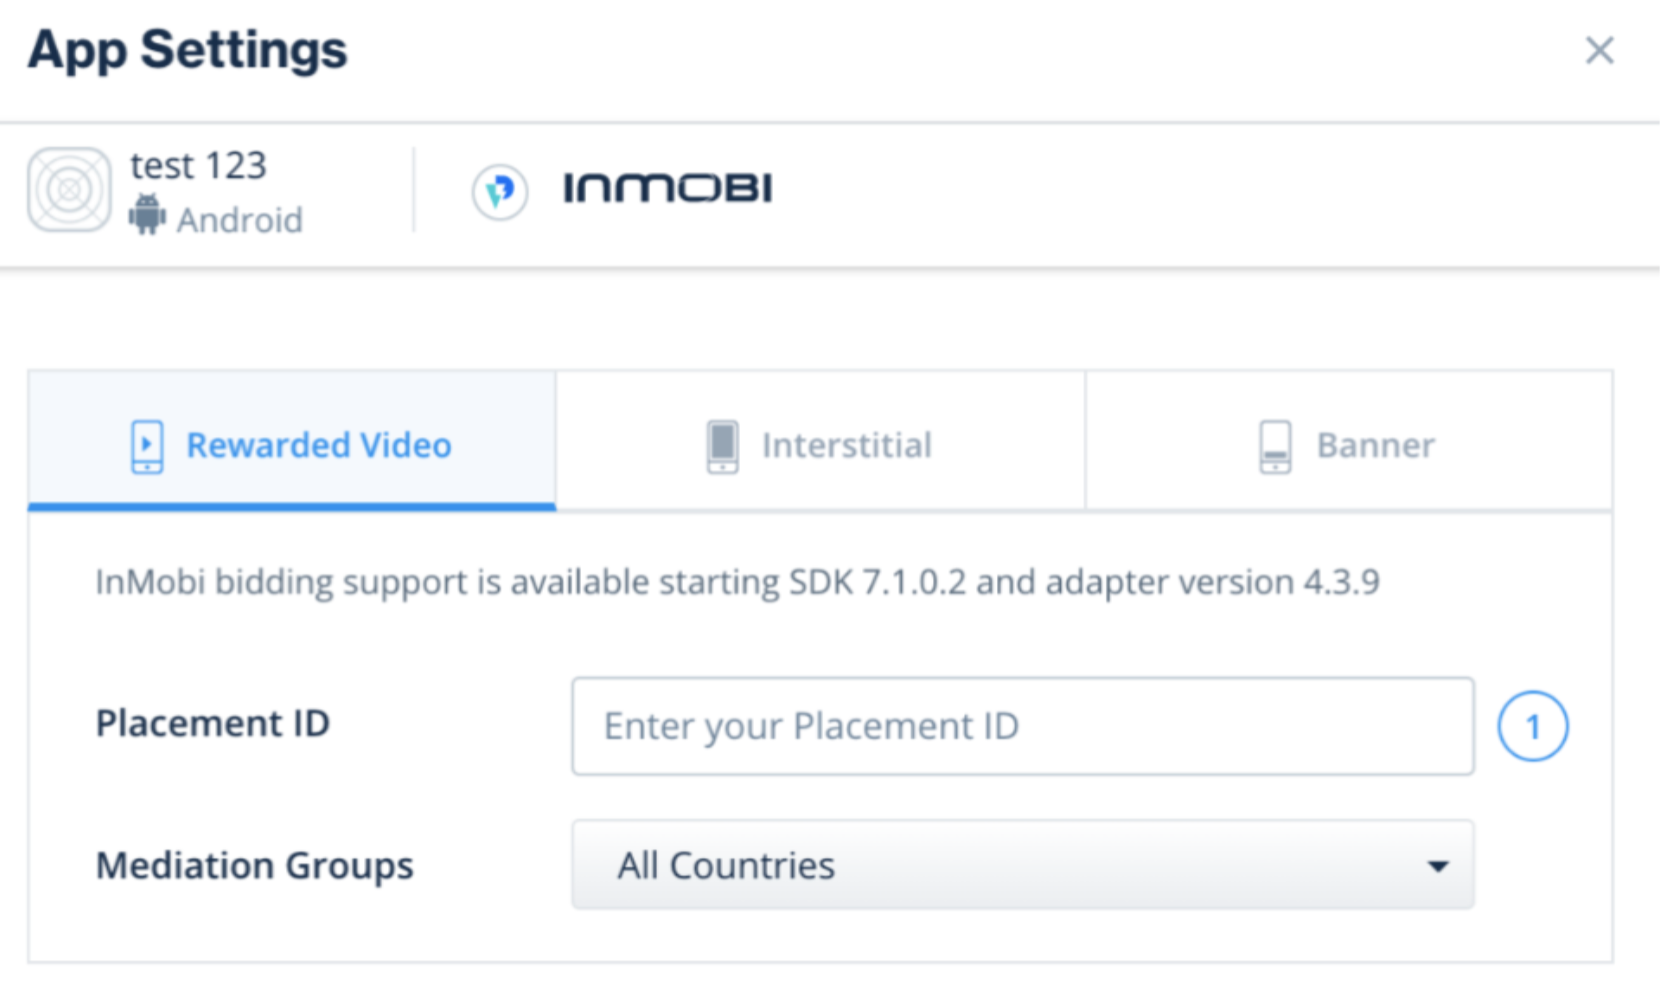
For any further assistance, Contact Us.
This topic provides the technical implementation of opt-outs covered under the U.S. state data privacy regulations, currently under MSPA from Alabama to Delaware.
Businesses must include a 'do not sell my personal information' link on their homepage and all web pages collecting data. The opt-out link should provide comprehensive details about consumer rights and enable them to decline the sale and sharing of their personal information.
| Field name | GPP Field Type | Description | Auto-display consent screen or via link | Do not Auto-display consent screen |
| SaleOptOutNotice | Int(2) |
Notice of the Opportunity to Opt Out of the Sale of the Consumer's Personal Information
2 No, notice was not provided |
This field will be set as |
This field will be set as 2 for both apps and web. |
| SharingOptOutNotice | Int(2) |
Notice of the Opportunity to Opt Out of the Sharing of the Consumer's Personal Information
2 No, notice was not provided |
This field will be set as |
This field will be set as 2 for both apps and web. |
| SensitiveDataLimitUseNotice | Int(2) |
Notice of the Opportunity to Limit Use or Disclosure of the Consumer's Sensitive Personal Information
2 No, notice was not provided |
This field will be set as 1 for both apps and web. |
This field will be set as 2 till the user clicks on the opt-out link, for both apps and web. |
| SaleOptOut | Int(2) |
Opt-Out of the Sale of the Consumer's Personal Information
2 Did Not Opt Out |
This field will be set as 2 for both apps and web. |
This field will be set as |
| SharingOptOut | Int(2) |
Opt-Out of the Sharing of the Consumer's Personal Information
|
This field will be set as 2 for both apps and web. |
This field will be set as |
| SensitiveDataProcessing | N-Bitfield(2,9) |
Two bits for each Data Activity:
Data Activities: (1) Opt-Out of the Use or Disclosure of the Consumer's Sensitive Personal Information Which Reveals a Consumer's Social Security, Driver's License, State Identification Card, or Passport Number. (2) Opt-Out of the Use or Disclosure of the Consumer's Sensitive Personal Information Which Reveals a Consumer's Account Log-In, Financial Account, Debit Card, or Credit Card Number in Combination with Any Required Security or Access Code, Password, or Credentials Allowing Access to an Account. (3) Opt-Out of the Use or Disclosure of the Consumer's Sensitive Personal Information Which Reveals a Consumer's Precise Geolocation. (4) Opt-Out of the Use or Disclosure of the Consumer's Sensitive Personal Information Which Reveals a Consumer's Racial or Ethnic Origin, Religious or Philosophical Beliefs, or Union Membership. (5) Opt-Out of the Use or Disclosure of the Consumer's Sensitive Personal Information Which Reveals the contents of a Consumer's Mail, Email, and Text Messages unless You Are the Intended Recipient of the Communication. (6) Opt-Out of the Use or Disclosure of the Consumer's Sensitive Personal Information Which Reveals a Consumer's Genetic Data. (7) Opt-Out of the Use or Disclosure of the Consumer's Sensitive Personal Information Consisting of Biometric Information for the Purpose of Uniquely Identifying a Consumer. (8) Opt-Out of the Use or Disclosure of the Consumer's Sensitive Personal Information Consisting of Personal Information Collected and Analyzed Concerning a Consumer's Health. (9) Opt-Out of the Use or Disclosure of the Consumer's Sensitive Personal Information Consisting of Personal Information Collected and Analyzed Concerning a Consumer's Sex Life or Sexual Orientation. |
This field will be set as |
This field will be set as |
| PersonalDataConsents | Int(2) |
Consent to Collection, Use, Retention, Sale, and/or Sharing of the Consumer's Personal Data that Is Unrelated to or Incompatible with the Purpose(s) for which the Consumer's Personal Data Was Collected or Processed
|
This field will be set as |
This field will be set as |
|
KnownChildSensitiveDataConsents |
N-Bitfield(2,2) |
Two bits for each Data Activity: 0 Not Applicable. The Business does not have actual knowledge that it Processes Personal Information of Consumers Less Than 16 years of Age.
Data Activities: (1) Consent to Sell the Personal Information of Consumers Less Than 16 years of Age (2) Consent to Share the Personal Information of Consumers Less Than 16 years of Age |
This field will be set as |
This field will be set as |
Companies are obligated to provide consumers the choice to opt-out of the sale or targeted advertising use of their personal data. Consumers can express their preferences through a Universal Opt-Out Mechanism (UOOM).
| Field name | GPP Field Type | Description | Auto-display consent screen or via link | Do not Auto-display consent screen |
| SaleOptOutNotice | Int(2) |
Notice of the Opportunity to Opt Out of the Sale of the Consumer's Personal Information
2 No, notice was not provided |
This field will be set as |
This field will be set as |
| SharingNotice | Int(2) |
Notice of the Sharing of Personal Data with Third Parties
|
This field will be set as 1 for both apps and web. |
This field will be set as 2 till the user clicks on the opt-out link, for both apps and web. |
| TargetedAdvertisingOptOutNotice | Int(2) |
Notice of the Opportunity to Opt Out of Processing of the Consumer's Personal Data for Targeted Advertising
|
This field will be set as 1 for both apps and web. |
This field will be set as 2 till the user clicks on the opt-out link, for both apps and web. |
| SaleOptOut | Int(2) |
Opt-Out of the Sale of the Consumer's Personal Information
2 Did Not Opt Out |
This field will be set as 2 for both apps and web. |
This field will be set as |
| Sharing OptOut | Int(2) |
Opt-Out of the Sharing of the Consumer's Personal Information
2 Did Not Opt Out |
This field will be set as 2 for both apps and web. |
This field will be set as |
| TargetedAdvertisingOptOut | Int(2) |
Opt-Out of Processing the Consumer's Personal Data for Targeted Advertising
2 Did Not Opt Out |
This field will be set as 2 for both apps and web. |
This field will be set as |
| SensitiveDataProcessing | N-Bitfield(2,7) |
Two bits for each Data Activity:
(1) Consent to Process the Consumer's Sensitive Data Consisting of Personal Data Revealing Racial or Ethnic Origin. (2) Consent to Process the Consumer's Sensitive Data Consisting of Personal Data Revealing Religious Beliefs. (3) Consent to Process the Consumer's Sensitive Data Consisting of Personal Data Revealing a Mental or Physical Health Condition or Diagnosis. (4) Consent to Process the Consumer's Sensitive Data Consisting of Personal Data Revealing Sex Life or Sexual Orientation. (5) Consent to Process the Consumer's Sensitive Data Consisting of Personal Data Revealing Citizenship or Citizenship Status. (6) Consent to Process the Consumer's Sensitive Data Consisting of Genetic Data that May Be Processed for the Purpose of Uniquely Identifying an Individual. (7) Consent to Process the Consumer's Sensitive Data Consisting of Biometric Data that May Be Processed for the Purpose of Uniquely Identifying an Individual. |
This field will be set as |
This field will be set as |
|
KnownChildSensitiveDataConsents |
Int(2) |
Consent to Process Sensitive Data from a Known Child
|
This field will be set as |
This field will be set as |
As per the law, data controllers must provide "clear and conspicuous" opt-out links on their websites.
| Field name | GPP Field Type | Description | Auto-display consent screen or via link | Do not Auto- display consent screen |
| SaleOptOutNotice | Int(2) |
Notice of the Opportunity to Opt Out of the Sale of the Consumer's Personal Information
2 No, notice was not provided |
This field will be set as |
This field will be set as |
| SharingNotice | Int(2) |
Notice of the Sharing of Personal Data with Third Parties
|
This field will be set as 1 for both apps and web. |
This field will be set as 2 till the user clicks on the opt-out link, for both apps and web. |
| TargetedAdvertisingOptOutNotice | Int(2) |
Notice of the Opportunity to Opt Out of Processing of the Consumer's Personal Data for Targeted Advertising
|
This field will be set as 1 for both apps and web. |
This field will be set as 2 till the user clicks on the opt-out link, for both apps and web. |
| SaleOptOut | Int(2) |
Opt-Out of the Sale of the Consumer's Personal Information
2 Did Not Opt Out |
This field will be set as 2 for both apps and web. |
This field will be set as |
| SharingOptOut | Int(2) |
Opt-Out of the Sharing of the Consumer's Personal Information
2 Did Not Opt Out |
This field will be set as 2 for both apps and web. |
This field will be set as |
| TargetedAdvertisingOptOut | Int(2) |
Opt-Out of Processing the Consumer's Personal Data for Targeted Advertising
2 Did Not Opt Out |
This field will be set as 2 for both apps and web. |
This field will be set as |
| SensitiveDataProcessing | N-Bitfield(2,8) |
Two bits for each Data Activity:
(1) Opt-Out of the Processing of the Consumer's Sensitive Data Consisting of Personal Data Revealing Racial or Ethnic Origin. (2) Opt-Out of the Processing of the Consumer's Sensitive Data Consisting of Personal Data Revealing Religious Beliefs. (3) Opt-Out of the Processing of the Consumer's Sensitive Data Consisting of Personal Data Revealing Sexual Orientation. (4) Opt-Out of the Processing of the Consumer's Sensitive Data Consisting of Personal Data Revealing Citizenship or Immigration Status. (5) Opt-Out of the Processing of the Consumer's Sensitive Data Consisting of Personal Data Revealing Medical History, Mental or Physical Health Condition, or Medical Treatment or Diagnosis by a Health Care Professional. (6) Opt-Out of the Processing of the Consumer's Sensitive Data Consisting of Genetic Data for the Purpose of Identifying a Specific Individual. (7) Opt-Out of the Processing of the Consumer's Sensitive Data Consisting of Biometric Data for the Purpose of Identifying a Specific Individual. (8) Opt-Out of the Processing of the Consumer's Sensitive Data Consisting of Specific Geolocation Data. |
This field will be set as |
This field will be set as |
|
KnownChildSensitiveDataConsents |
N-Bitfield(2,3) |
Two bits for each Data Activity:
(1) Consent to Process Sensitive Data from a Known Child. (2) Consent to Sell the Personal Data of Consumers At Least 13 Years of Age but Younger Than 16 Years of Age. (3) Consent to Process the Personal Data of Consumers At Least 13 Years of Age but Younger Than 16 Years of Age for Purposes of Targeted Advertising. |
This field will be set as |
This field will be set as |
Controllers must give consumers a clear privacy notice explaining what data is collected, how it’s used and shared, and how they can opt out of data sales or targeted ads, as well as exercise their privacy rights.
| Field name | GPP Field Type | Description | Auto-display consent screen or via link | Do not Auto-display consent screen |
| ProcessingNotice | Int(2) |
Notice of the Processing of Personal Data.
2 No, notice was not provided |
This field will be set as 1 for both apps and web. |
This field will be set as 2 till the user clicks on the opt-out link, for both apps and web. |
| SaleOptOutNotice | Int(2) |
Notice of the Opportunity to Opt Out of the Sale of the Consumer’s Personal Data
2 No, notice was not provided |
This field will be set as 1 for both apps and web. |
This field will be set as 2 till the user clicks on the opt-out link, for both apps and web. |
| TargetedAdvertisingOptOutNotice | Int(2) |
Notice of the Opportunity to Opt Out of Processing of the Consumer’s Personal Data for Targeted Advertising
2 No, notice was not provided |
This field will be set as 1 for both apps and web. |
This field will be set as 2 till the user clicks on the opt-out link, for both apps and web. |
| TargetedAdvertisingOptOut | Int(2) |
Opt-Out of Processing the Consumer’s Personal Data for Targeted Advertising
2 Did Not Opt Out |
This field will be set as 2 for both apps and web. | This field will be set as 2 till the user clicks on the opt-out link, for both apps and web. |
| SaleOptOut | Int(2) |
Opt-Out of the Sale of the Consumer's Personal Data
2 Did Not Opt Out |
This field will be set as 2 for both apps and web. |
This field will be set as |
| SensitiveDataProcessing | N-Bitfield(2,9) |
Two bits for each Data Activity:
(1) Consent to Process the Consumer’s Sensitive Data Consisting of Personal Data Revealing Racial or Ethnic Origin. (2) Consent to Process the Consumer’s Sensitive Data Consisting of Personal Data Revealing Religious Beliefs. (3) Consent to Process the Consumer’s Sensitive Data Consisting of Personal Data Revealing a Mental or Physical Health Condition or Diagnosis (Including Pregnancy). (4) Consent to Process the Consumer’s Sensitive Data Consisting of Personal Data Revealing Sex Life or Sexual Orientation. (5) Consent to Process the Consumer’s Sensitive Data Consisting of Personal Data Revealing Citizenship or Immigration Status.. (6) Consent to Process the Consumer’s Sensitive Data Consisting of Genetic Data. (7) Consent to Process the Consumer’s Sensitive Data Consisting of Biometric Data. (8) Consent to Process the Consumer’s Sensitive Data Consisting of Precise Geolocation Data. (9) Consent to Process the Consumer’s Sensitive Data Consisting of Personal Data Revealing Status as Transgender or Nonbinary. |
This field will be set as 1 for both apps and web. |
This field will be set as |
| AdditionalDataProcessingConsent | Int(2) |
Consent to Processing of the Consumer’s Personal Data that Is Not Reasonably Necessary for nor Compatible with the Disclosed Purpose(s) for which the Consumer’s Personal Data Was Processed
|
This field will be set as 1 for both apps and web. |
This field will be set as |
|
KnownChildSensitiveDataConsents |
N-Bitfield(2,5) |
Two bits for each Data Activity: 0 Not Applicable, the Controller does not Process Sensitive Data of a known Child.
Data Activities: (1) Consent to Process Sensitive Data from a Known Child. (2) Consent to Sell the Personal Data of Consumers At Least 13 Years of Age but Younger Than 16 Years of Age. (3) Consent to Process the Personal Data of Consumers At Least 13 Years of Age but Younger Than 16 Years of Age for Purposes of Targeted Advertising. (4) onsent to Sell the Personal Data of Consumers At Least 16 Years of Age but Younger Than 18 Years of Age. (5) Consent to Process the Personal Data of Consumers At Least 16 Years of Age but Younger Than 18 Years of Age for Purposes of Targeted Advertising. |
This field will be set as 1 for both apps and web. |
This field will be set as |
This topic provides the technical implementation of opt-outs covered under the U.S. state data privacy regulations, currently under MSPA from Florida to Louisiana.
Businesses must provide opt-outs for the processing and sale of personal data for targeted advertising.
| Field name | GPP Field Type | Description | Auto-display consent screen or via link | Do not Auto-display consent screen |
| ProcessingNotice | Int(2) |
Notice of the Processing of Personal Data.
2 No, notice was not provided |
This field will be set as 1 for both apps and web. |
This field will be set as 2 till the user clicks on the opt-out link, for both apps and web. |
| SaleOptOutNotice | Int(2) |
Notice of the Opportunity to Opt Out of the Sale of the Consumer's Personal Data
2 No, notice was not provided |
This field will be set as |
This field will be set as |
| TargetedAdvertisingOptOutNotice | Int(2) |
Notice of the Opportunity to Opt Out of Processing of the Consumer’s Personal Data for Targeted Advertising
|
This field will be set as 1 for both apps and web. |
This field will be set as 2 till the user clicks on the opt-out link, for both apps and web. |
| SaleOptOut | Int(2) |
Opt-Out of the Sale of the Consumer’s Personal Data
2 Did Not Opt Out |
This field will be set as 2 for both apps and web. |
This field will be set as 0 till the user clicks on the opt-out link, for both apps and web. |
| TargetedAdvertisingOptOut | Int(2) |
Opt-Out of Processing the Consumer’s Personal Data for Targeted Advertising
2 Did Not Opt Out |
This field will be set as 2 for both apps and web. |
This field will be set as 0 till the user clicks on the opt-out link, for both apps and web. |
| SensitiveDataProcessing | N-Bitfield(2,8) |
Two bits for each Data Activity:
(1) Consent to Process the Consumer's Sensitive Data Consisting of Personal Data Revealing Racial or Ethnic Origin. (2) Consent to Process the Consumer's Sensitive Data Consisting of Personal Data Revealing Religious Beliefs. (3) Consent to Process the Consumer's Sensitive Data Consisting of Personal Data Revealing a Mental or Physical Health Diagnosis. (4) Consent to Process the Consumer's Sensitive Data Consisting of Personal Data Revealing Sexual Orientation. (5) Consent to Process the Consumer's Sensitive Data Consisting of Personal Data Revealing Citizenship or Immigration Status. (6) Consent to Process the Consumer's Sensitive Data Consisting of Genetic Data for the Purpose of Uniquely Identifying a Natural Person. (7) Consent to Process the Consumer's Sensitive Data Consisting of Biometric Data for the Purpose of Uniquely Identifying a Natural Person. (8) Consent to Process the Consumer's Sensitive Data Consisting of Precise Geolocation Data. |
This field will be set as 1 for both apps and web. |
This field will be set as 0 till the user clicks on the opt-out link, for both apps and web. |
|
KnownChildSensitiveDataConsents |
Int(2) |
Consent to Process Sensitive Data from a Known Child
|
This field will be set as 1 for both apps and web. |
This field will be set as 0 till the user clicks on the opt-out link, for both apps and web. |
| AdditionalDataProcessingConsent |
Consent to Processing of the Consumer’s Personal Data that Is Not Reasonably Necessary for nor Compatible with the Disclosed Purpose(s) for which the Consumer’s Personal Data Was Processed
|
This field will be set as 1 for both apps and web. |
This field will be set as 0 till the user clicks on the opt-out link, for both apps and web. |
Companies are obligated to clearly outline the use of personal data for targeted advertising and give them an option to opt-out.
| Field name | GPP Field Type | Description | Auto-display consent screen or via link | Do not Auto-display consent screen |
| ProcessingNotice | Int(2) |
Notice of the Processing of Personal Data.
2 No, notice was not provided |
This field will be set as 1 for both apps and web. | This field will be set as 2 till the user clicks on the opt-out link, for both apps and web. |
| SaleOptOutNotice | Int(2) |
Notice of the Opportunity to Opt Out of the Sale of the Consumer's Personal Information
2 No, notice was not provided |
This field will be set as 1 for both apps and web. |
This field will be set as |
| SensitiveDataOptOutNotice | Int(2) |
Notice of the Opportunity to Opt Out of the Processing of the Consumer’s Sensitive Data
|
This field will be set as 2 for both apps and web. | This field will be set as 2 till the user clicks on the opt-out link, for both apps and web. |
| TargetedAdvertisingOptOutNotice | Int(2) |
Notice of the Opportunity to Opt Out of Processing of the Consumer's Personal Data for Targeted Advertising
|
This field will be set as 1 for both apps and web. | This field will be set as 2 till the user clicks on the opt-out link, for both apps and web. |
| SaleOptOut | Int(2) |
Opt-Out of the Sale of the Consumer’s Personal Data
2 Did Not Opt Out |
This field will be set as 1 for both apps and web. |
This field will be set as 0 till the user clicks on the opt-out link, for both apps and web. |
| TargetedAdvertisingOptOut | Int(2) |
Opt-Out of Processing the Consumer’s Personal Data for Targeted Advertising
2 Did Not Opt Out |
This field will be set as 1 for both apps and web. |
This field will be set as 0 till the user clicks on the opt-out link, for both apps and web. |
| SensitiveDataProcessing | N-Bitfield(2,8) |
Two bits for each Data Activity:
(1) Opt-Out of the Processing of the Consumer’s Sensitive Data Consisting of Personal Data Revealing Racial or Ethnic Origin. (2) Opt-Out of the Processing of the Consumer’s Sensitive Data Consisting of Personal Data Revealing Religious Beliefs. (3) Opt-Out of the Processing of the Consumer’s Sensitive Data Consisting of Personal Data Revealing a Mental or Physical Health Diagnosis. (4) Opt-Out of the Processing of the Consumer’s Sensitive Data Consisting of Personal Data Revealing Sexual Orientation. (5) Opt-Out of the Processing of the Consumer’s Sensitive Data Consisting of Personal Data Revealing Citizenship or Citizenship Status. (6) Opt-Out of the Processing of the Consumer’s Sensitive Data Consisting of Genetic Data that May Be Processed for the Purpose of Uniquely Identifying an Individual. (7) Opt-Out of the Processing of the Consumer’s Sensitive Data Consisting of Biometric Data that May Be Processed for the Purpose of Uniquely Identifying an Individual. (8) Opt-Out of the Processing of the Consumer’s Sensitive Data Consisting of Precise Geolocation Data. |
This field will be set as 1 for both apps and web. |
This field will be set as 0 till the user clicks on the opt-out link, for both apps and web. |
|
KnownChildSensitiveDataConsents |
Int(2) |
Consent to Process Sensitive Data from a Known Child
|
This field will be set as 1 for both apps and web. |
This field will be set as 0 till the user clicks on the opt-out link, for both apps and web. |
This topic provides the technical implementation of opt-outs covered under the U.S. state data privacy regulations, currently under MSPA from Maine to North Dakota.
Businesses/controllers must provide consumers with a reasonably accessible, clear, and meaningful privacy notice outlining the categories of personal data for processing, the third parties with which they share the personal data, and how consumers can contact the controller to exercise their rights.
| Field name | GPP Field Type | Description | Auto-display consent screen or via link | Do no Auto-display consent screen |
| SaleOptOutNotice | Int(2) |
Notice of the Opportunity to Opt Out of the Sale of the Consumer’s Personal Data
2 No, notice was not provided |
This field will be set as |
This field will be set as
|
| SharingNotice | Int(2) |
Notice of the Processing of Personal Data.
|
This field will be set as 1 for both apps and web. |
This field will be set as 2 till the user clicks on the opt-out link, for both apps and web. |
| TargetedAdvertisingOptOutNotice | Int(2) |
Notice of the Opportunity to Opt Out of Processing of the Consumer’s Personal Data for Targeted Advertising
|
This field will be set as 1 for both apps and web. |
This field will be set as 2 till the user clicks on the opt-out link, for both apps and web. |
| SaleOptOut | Int(2) |
Opt-Out of the Sale of the Consumer’s Personal Data
2 Did Not Opt Out |
This field will be set as 2 for both apps and web. |
This field will be set as 0 till the user clicks on the opt-out link, for both apps and web. |
| TargetedAdvertisingOptOut | Int(2) |
Opt-Out of Processing the Consumer’s Personal Data for Targeted Advertising
2 Did Not Opt Out |
This field will be set as 2 for both apps and web. |
This field will be set as 0 till the user clicks on the opt-out link, for both apps and web. |
| SensitiveDataProcessing | N-Bitfield(2,8) |
Two bits for each Data Activity:
(1) Opt-Out of the Processing of the Consumer's Sensitive Data Consisting of Personal Data Revealing Racial or Ethnic Origin. (2) Opt-Out of the Processing of the Consumer's Sensitive Data Consisting of Personal Data Revealing Religious Beliefs. (3) Consent to Process the Consumer’s Sensitive Data Consisting of Personal Data Revealing a Mental or Physical Health Condition or Diagnosis. (4) Consent to Process the Consumer’s Sensitive Data Consisting of Personal Data Revealing Sex Life or Sexual Orientation. (5) Consent to Process the Consumer’s Sensitive Data Consisting of Personal Data Revealing Citizenship or Immigration Status. (6) Consent to Process the Consumer’s Sensitive Data Consisting of Genetic Data that May Be Processed for the Purpose of Uniquely Identifying an Individual. (7) Consent to Process the Consumer’s Sensitive Data Consisting of Biometric Data that May Be Processed for the Purpose of Uniquely Identifying an Individual. (8) Consent to Process the Consumer’s Sensitive Data Consisting of Precise Geolocation Data. |
This field will be set as 1 for both apps and web. |
This field will be set as 0 till the user clicks on the opt-out link, for both apps and web. |
|
KnownChildSensitiveDataConsents |
N-Bitfield(2,3) |
(1) Consent to Process Sensitive Data from a Known Child. (2) Consent to Sell the Personal Data of Consumers At Least 13 Years of Age but Younger Than 16 Years of Age. (3) Consent to Process the Personal Data of Consumers At Least 13 Years of Age but Younger Than 16 Years of Age for Purposes of Targeted Advertising. |
This field will be set as 1 for both apps and web. |
This field will be set as 0 till the user clicks on the opt-out link, for both apps and web. |
| AdditionalDataProcessingConsent | Int(2) |
Consent to Processing of the Consumer’s Personal Data that Is Not Reasonably Necessary for nor Compatible with the Disclosed Purpose(s) for which the Consumer’s Personal Data Was Processed
2 Consent |
This field will be set as 1 for both apps and web. |
This field will be set as 0 till the user clicks on the opt-out link, for both apps and web. |
As per the law, data controllers must provide "clear and conspicuous" opt-out links on their websites.
| Field name | GPP Field Type | Description | Auto-display consent screen or via link | Do not Auto- display consent screen |
|
ProcessingNotice |
Int(2) |
Notice of the Processing of Personal Data.
2 No, notice was not provided |
This field will be set as 1 for both apps and web. |
This field will be set as |
|
SaleOptOutNotice |
Int(2) |
Notice of the Opportunity to Opt Out of the Sale of the Consumer’s Personal Data
|
This field will be set as 1 for both apps and web. | This field will be set as 2 till the user clicks on the opt-out link, for both apps and web. |
| TargetedAdvertisingOptOutNotice | Int(2) |
Notice of the Opportunity to Opt Out of Processing of the Consumer’s Personal Data for Targeted Advertising
|
This field will be set as 1 for both apps and web. | This field will be set as 2 till the user clicks on the opt-out link, for both apps and web. |
| SaleOptOut | Int(2) |
Opt-Out of the Sale of the Consumer's Personal Information
2 Did Not Opt Out |
This field will be set as 2 for both apps and web. |
This field will be set as 0 till the user clicks on the opt-out link, for both apps and web. |
| TargetedAdvertisingOptOut | Int(2) |
Opt-Out of Processing the Consumer's Personal Data for Targeted Advertising
2 Did Not Opt Out |
This field will be set as 2 for both apps and web. |
This field will be set as 0 till the user clicks on the opt-out link, for both apps and web. |
| SensitiveDataProcessing | N-Bitfield(2,8) |
Two bits for each Data Activity:
(1) Opt-Out of the Processing of the Consumer's Sensitive Data Consisting of Personal Data Revealing Racial or Ethnic Origin. (2) Opt-Out of the Processing of the Consumer's Sensitive Data Consisting of Personal Data Revealing Religious Beliefs. (3) Consent to Process the Consumer’s Sensitive Data Consisting of Personal Data Revealing a Mental or Physical Health Diagnosis. (4) Consent to Process the Consumer’s Sensitive Data Consisting of Personal Data Revealing Sexual Orientation. (5) Consent to Process the Consumer’s Sensitive Data Consisting of Personal Data Revealing Citizenship or Immigration Status. (6) Consent to Process the Consumer’s Sensitive Data Consisting of Genetic Data for the Purpose of Uniquely Identifying an Individual. (7) Consent to Process the Consumer’s Sensitive Data Consisting of Biometric Data for the Purpose of Uniquely Identifying an Individual. (8) Consent to Process the Consumer’s Sensitive Data Consisting of Precise Geolocation Data. |
This field will be set as 1 for both apps and web. |
This field will be set as 0 till the user clicks on the opt-out link, for both apps and web. |
|
KnownChildSensitiveDataConsents |
Int(2) |
Consent to Process Personal Data from a Known Child.
|
This field will be set as 1 for both apps and web. |
This field will be set as 0 till the user clicks on the opt-out link, for both apps and web. |
| AdditionalDataProcessingConsent | Int(2) |
Consent to Processing of the Consumer’s Personal Data that Is Not Reasonably Necessary for nor Compatible with the Disclosed Purpose(s) for which the Consumer’s Personal Data Was Processed.
|
This field will be set as 1 for both apps and web. |
This field will be set as 0 till the user clicks on the opt-out link, for both apps and web. |
Businesses must provide a mechanism for consumers to revoke consent that is as easy as the mechanism to provide consent.
| Field name | GPP Field Type | Description | Auto-display consent screen or via link | Do not Auto-display consent screen |
| ProcessingNotice | Int(2) |
Notice of the Processing of Personal Data.
2 No, notice was not provided |
This field will be set as 1 for both apps and web. | This field will be set as 2 till the user clicks on the opt-out link, for both apps and web. |
| SaleOptOutNotice | Int(2) |
Notice of the Opportunity to Opt Out of the Sale of the Consumer’s Personal Data
2 No, notice was not provided |
This field will be set as 1 for both apps and web. | This field will be set as 2 till the user clicks on the opt-out link, for both apps and web. |
| TargetedAdvertisingOptOutNotice | Int(2) |
Notice of the Opportunity to Opt Out of Processing of the Consumer’s Personal Data for Targeted Advertising
2 No, notice was not provided |
This field will be set as 1 for both apps and web. | This field will be set as 2 till the user clicks on the opt-out link, for both apps and web. |
| TargetedAdvertisingOptOut | Int(2) |
Opt-Out of Processing the Consumer’s Personal Data for Targeted Advertising
2 Did Not Opt Out |
This field will be set as 2 for both apps and web. | This field will be set as 2 till the user clicks on the opt-out link, for both apps and web. |
| SaleOptOut | Int(2) |
Opt-Out of the Sale of the Consumer's Personal Data
2 Did Not Opt Out |
This field will be set as 2 for both apps and web. |
This field will be set as 0 till the user clicks on the opt-out link, for both apps and web. |
| SensitiveDataProcessing | N-Bitfield(2,8) |
Two bits for each Data Activity:
(1) Consent to Process the Consumer’s Sensitive Data Consisting of Personal Data Revealing Racial or Ethnic Origin. (2) Consent to Process the Consumer’s Sensitive Data Consisting of Personal Data Revealing Religious Beliefs. (3) Consent to Process the Consumer’s Sensitive Data Consisting of Personal Data Revealing a Mental or Physical Health Condition or Diagnosis. (4) Consent to Process the Consumer’s Sensitive Data Consisting of Personal Data Revealing Sex Life or Sexual Orientation. (5) Consent to Process the Consumer’s Sensitive Data Consisting of Personal Data Revealing Citizenship or Immigration Status. (6) Consent to Process the Consumer’s Sensitive Data Consisting of Genetic Data. (7) Consent to Process the Consumer’s Sensitive Data Consisting of Biometric Data. (8) Consent to Process the Consumer’s Sensitive Data Consisting of Precise Geolocation Data. |
This field will be set as 1 for both apps and web. |
This field will be set as 0 till the user clicks on the opt-out link, for both apps and web. |
| AdditionalDataProcessingConsent | Int(2) |
Consent to Processing of the Consumer’s Personal Data that Is Not Reasonably Necessary for nor Compatible with the Disclosed Purpose(s) for which the Consumer’s Personal Data Was Processed0 = Not Applicable, the Controller does not Process Personal Data that is Not Reasonably Necessary for nor Compatible with the Disclosed Purpose(s)
|
This field will be set as 1 for both apps and web. |
This field will be set as 0 till the user clicks on the opt-out link, for both apps and web. |
|
KnownChildSensitiveDataConsents |
N-Bitfield(2,3) |
Two bits for each Data Activity: 0 Not Applicable, the Controller does not Process Sensitive Data of a known Child.
Data Activities: (1) Consent to Process Sensitive Data from a Known Child. (2) Consent to Sell the Personal Data of Consumers At Least 13 Years of Age but Younger Than 16 Years of Age. (3) Consent to Process the Personal Data of Consumers At Least 13 Years of Age but Younger Than 16 Years of Age for Purposes of Targeted Advertising. |
This field will be set as 1 for both apps and web. |
This field will be set as 0 till the user clicks on the opt-out link, for both apps and web. |
Businesses must provide opt-outs for the processing and sale of personal data for targeted advertising.
| Field name | GPP Field Type | Description | Auto-display consent screen or via link | Do not Auto-display consent screen |
| ProcessingNotice | Int(2) |
Notice of the Processing of Personal Data.
2 No, notice was not provided |
This field will be set as 1 for both apps and web. | This field will be set as 2 till the user clicks on the opt-out link, for both apps and web. |
| SaleOptOutNotice | Int(2) |
Notice of the Opportunity to Opt Out of the Sale of the Consumer's Personal Data
2 No, notice was not provided |
This field will be set as 1 for both apps and web. |
This field will be set as |
| TargetedAdvertisingOptOutNotice | Int(2) |
Notice of the Opportunity to Opt Out of Processing of the Consumer’s Personal Data for Targeted Advertising
|
This field will be set as 1 for both apps and web. | This field will be set as 2 till the user clicks on the opt-out link, for both apps and web. |
| SaleOptOut | Int(2) |
Opt-Out of the Sale of the Consumer’s Personal Data
2 Did Not Opt Out |
This field will be set as 2 for both apps and web. |
This field will be set as 0 till the user clicks on the opt-out link, for both apps and web. |
| TargetedAdvertisingOptOut | Int(2) |
Opt-Out of Processing the Consumer’s Personal Data for Targeted Advertising
2 Did Not Opt Out |
This field will be set as 2 for both apps and web. |
This field will be set as 0 till the user clicks on the opt-out link, for both apps and web. |
| SensitiveDataProcessing | N-Bitfield(2,10) |
Two bits for each Data Activity:
(1) Consent to Process the Consumer's Sensitive Data Consisting of Personal Data Revealing Racial or Ethnic Origin. (2) Consent to Process the Consumer's Sensitive Data Consisting of Personal Data Revealing Religious Beliefs. (3) Consent to Process the Consumer's Sensitive Data Consisting of Personal Data Revealing a Mental or Physical Health Diagnosis. (4) Consent to Process the Consumer's Sensitive Data Consisting of Personal Data Revealing Sexual Orientation. (5) Consent to Process the Consumer's Sensitive Data Consisting of Personal Data Revealing Citizenship or Immigration Status. (6) Consent to Process the Consumer's Sensitive Data Consisting of Genetic Data for the Purpose of Uniquely Identifying a Natural Person. (7) Consent to Process the Consumer's Sensitive Data Consisting of Biometric Data for the Purpose of Uniquely Identifying a Natural Person. (8) Consent to Process the Consumer's Sensitive Data Consisting of Precise Geolocation Data. (9) Consent to Process the Consumer’s Sensitive Data Consisting of Personal Data Revealing Status as Transgender or Nonbinary. (10) Consent to Process the Consumer’s Sensitive Data Consisting of Financial Information, in Combination with any Required Security Code, Access Code, or Password that Would Permit Access to a Consumer’s Financial Account. |
This field will be set as 1 for both apps and web. |
This field will be set as 0 till the user clicks on the opt-out link, for both apps and web. |
|
KnownChildSensitiveDataConsents |
Int(2) |
Two bits for each Data Activity: 0 Not Applicable, the Controller does not Process Sensitive Data of a known Child.
Data Activities: (1) Consent to Process Sensitive Data from a Known Child. (2) Consent to Sell the Personal Data of Consumers At Least 13 Years of Age but Younger Than 16 Years of Age. (3) Consent to Process the Personal Data of Consumers At Least 13 Years of Age but Younger Than 16 Years of Age for Purposes of Targeted Advertising. (4) Consent to Sell the Personal Data of Consumers At Least 16 Years of Age but Younger Than 17 Years of Age. (5) Consent to Process the Personal Data of Consumers At Least 16 Years of Age but Younger Than 17 Years of Age for Purposes of Targeted Advertising. |
This field will be set as 1 for both apps and web. |
This field will be set as 0 till the user clicks on the opt-out link, for both apps and web. |
| AdditionalDataProcessingConsent | Int(2) |
Consent to Processing of the Consumer’s Personal Data that Is Not Reasonably Necessary for nor Compatible with the Disclosed Purpose(s) for which the Consumer’s Personal Data Was Processed.
|
This field will be set as 1 for both apps and web. |
This field will be set as 0 till the user clicks on the opt-out link, for both apps and web. |
This topic provides the technical implementation of opt-outs covered under the U.S. state data privacy regulations, currently under MSPA from Ohio to Texas.
Businesses/controllers must provide consumers with a reasonably accessible, clear, and meaningful privacy notice outlining the categories of personal data for processing, the third parties with which they share the personal data, and how consumers can contact the controller to exercise their rights.
| Field name | GPP Field Type | Description | Auto-display consent screen or via link | Do no Auto-display consent screen |
| SaleOptOutNotice | Int(2) |
Notice of the Opportunity to Opt Out of the Sale of the Consumer’s Personal Data
2 No, notice was not provided |
This field will be set as |
This field will be set as
|
| SharingNotice | Int(2) |
Notice of the Processing of Personal Data.
|
This field will be set as 1 for both apps and web. |
This field will be set as 2 till the user clicks on the opt-out link, for both apps and web. |
| TargetedAdvertisingOptOutNotice | Int(2) |
Notice of the Opportunity to Opt Out of Processing of the Consumer’s Personal Data for Targeted Advertising
|
This field will be set as 1 for both apps and web. |
This field will be set as 2 till the user clicks on the opt-out link, for both apps and web. |
| SaleOptOut | Int(2) |
Opt-Out of the Sale of the Consumer’s Personal Data
2 Did Not Opt Out |
This field will be set as 2 for both apps and web. |
This field will be set as 0 till the user clicks on the opt-out link, for both apps and web. |
| TargetedAdvertisingOptOut | Int(2) |
Opt-Out of Processing the Consumer’s Personal Data for Targeted Advertising
2 Did Not Opt Out |
This field will be set as 2 for both apps and web. |
This field will be set as 0 till the user clicks on the opt-out link, for both apps and web. |
| SensitiveDataProcessing | N-Bitfield(2,11) |
Two bits for each Data Activity:
(1) Opt-Out of the Processing of the Consumer's Sensitive Data Consisting of Personal Data Revealing Racial or Ethnic Origin. (2) Opt-Out of the Processing of the Consumer's Sensitive Data Consisting of Personal Data Revealing Religious Beliefs. (3) Consent to Process the Consumer’s Sensitive Data Consisting of Personal Data Revealing a Mental or Physical Health Condition or Diagnosis. (4) Consent to Process the Consumer’s Sensitive Data Consisting of Personal Data Revealing Sex Life or Sexual Orientation. (5) Consent to Process the Consumer’s Sensitive Data Consisting of Personal Data Revealing Status as Transgender or Nonbinary. (6) Consent to Process the Consumer’s Sensitive Data Consisting of Personal Data Revealing Citizenship or Immigration Status. (7) Consent to Process the Consumer’s Sensitive Data Consisting of Personal Data Revealing National Origin. (8) Consent to Process the Consumer’s Sensitive Data Consisting of Personal Data Revealing Status as Victim of a Crime. (9) Consent to Process the Consumer’s Sensitive Data Consisting of Genetic Data. (10) Consent to Process the Consumer’s Sensitive Data Consisting of Biometric Data. (11) Consent to Process the Consumer’s Sensitive Data Consisting of Precise Geolocation Data. |
This field will be set as |
This field will be set as 0 till the user clicks on the opt-out link, for both apps and web. |
|
KnownChildSensitiveDataConsents |
N-Bitfield(2,3) |
(1) Consent to Process Sensitive Data from a Known Child. (2) Consent to Sell the Personal Data of Consumers At Least 13 Years of Age but Younger Than 16 Years of Age. (3) Consent to Process the Personal Data of Consumers At Least 13 Years of Age but Younger Than 16 Years of Age for Purposes of Targeted Advertising. |
This field will be set as |
This field will be set as 0 till the user clicks on the opt-out link, for both apps and web. |
| AdditionalDataProcessingConsent | Int(2) |
Consent to Processing of the Consumer’s Personal Data that Is Not Reasonably Necessary for nor Compatible with the Disclosed Purpose(s) for which the Consumer’s Personal Data Was Processed
2 Consent |
This field will be set as |
This field will be set as 0 till the user clicks on the opt-out link, for both apps and web. |
As per the law, data controllers must provide "clear and conspicuous" opt-out links on their websites.
| Field name | GPP Field Type | Description | Auto-display consent screen or via link | Do not Auto- display consent screen |
|
ProcessingNotice |
Int(2) |
Notice of the Processing of Personal Data.
2 No, notice was not provided |
This field will be set as |
This field will be set as |
|
SaleOptOutNotice |
Int(2) |
Notice of the Opportunity to Opt Out of the Sale of the Consumer’s Personal Data
|
This field will be set as 1 for both apps and web. |
This field will be set as 2 till the user clicks on the opt-out link, for both apps and web. |
| TargetedAdvertisingOptOutNotice | Int(2) |
Notice of the Opportunity to Opt Out of Processing of the Consumer’s Personal Data for Targeted Advertising
|
This field will be set as 1 for both apps and web. |
This field will be set as 2 till the user clicks on the opt-out link, for both apps and web. |
| SaleOptOut | Int(2) |
Opt-Out of the Sale of the Consumer's Personal Information
2 Did Not Opt Out |
This field will be set as 2 for both apps and web. |
This field will be set as 0 till the user clicks on the opt-out link, for both apps and web. |
| TargetedAdvertisingOptOut | Int(2) |
Opt-Out of Processing the Consumer's Personal Data for Targeted Advertising
2 Did Not Opt Out |
This field will be set as 2 for both apps and web. |
This field will be set as 0 till the user clicks on the opt-out link, for both apps and web. |
| SensitiveDataProcessing | N-Bitfield(2,8) |
Two bits for each Data Activity:
(1) Opt-Out of the Processing of the Consumer's Sensitive Data Consisting of Personal Data Revealing Racial or Ethnic Origin. (2) Opt-Out of the Processing of the Consumer's Sensitive Data Consisting of Personal Data Revealing Religious Beliefs. (3) Consent to Process the Consumer’s Sensitive Data Consisting of Personal Data Revealing a Mental or Physical Health Diagnosis. (4) Consent to Process the Consumer’s Sensitive Data Consisting of Personal Data Revealing Sexual Orientation. (5) Consent to Process the Consumer’s Sensitive Data Consisting of Personal Data Revealing Citizenship or Immigration Status. (6) Consent to Process the Consumer’s Sensitive Data Consisting of Genetic Data for the Purpose of Uniquely Identifying an Individual. (7) Consent to Process the Consumer’s Sensitive Data Consisting of Biometric Data for the Purpose of Uniquely Identifying an Individual. (8) Consent to Process the Consumer’s Sensitive Data Consisting of Precise Geolocation Data. |
This field will be set as 1 for both apps and web. |
This field will be set as 0 till the user clicks on the opt-out link, for both apps and web. |
|
KnownChildSensitiveDataConsents |
Int(2) |
Consent to Process Personal Data from a Known Child.
|
This field will be set as 1 for both apps and web. |
This field will be set as 0 till the user clicks on the opt-out link, for both apps and web. |
| AdditionalDataProcessingConsent | Int(2) |
Consent to Processing of the Consumer’s Personal Data that Is Not Reasonably Necessary for nor Compatible with the Disclosed Purpose(s) for which the Consumer’s Personal Data Was Processed.
|
This field will be set as 1 for both apps and web. |
This field will be set as 0 till the user clicks on the opt-out link, for both apps and web. |
Businesses must provide a mechanism for consumers to revoke consent that is as easy as the mechanism to provide consent.
| Field name | GPP Field Type | Description | Auto-display consent screen or via link | Do not Auto-display consent screen |
| ProcessingNotice | Int(2) |
Notice of the Processing of Personal Data.
2 No, notice was not provided |
This field will be set as 1 for both apps and web. | This field will be set as 2 till the user clicks on the opt-out link, for both apps and web. |
| SaleOptOutNotice | Int(2) |
Notice of the Opportunity to Opt Out of the Sale of the Consumer’s Personal Data
2 No, notice was not provided |
This field will be set as 1 for both apps and web. | This field will be set as 2 till the user clicks on the opt-out link, for both apps and web. |
| TargetedAdvertisingOptOutNotice | Int(2) |
Notice of the Opportunity to Opt Out of Processing of the Consumer’s Personal Data for Targeted Advertising
2 No, notice was not provided |
This field will be set as 1 for both apps and web. | This field will be set as 2 till the user clicks on the opt-out link, for both apps and web. |
| TargetedAdvertisingOptOut | Int(2) |
Opt-Out of Processing the Consumer’s Personal Data for Targeted Advertising
2 Did Not Opt Out |
This field will be set as 2 for both apps and web. | This field will be set as 0 till the user clicks on the opt-out link, for both apps and web. |
| SaleOptOut | Int(2) |
Opt-Out of the Sale of the Consumer's Personal Data
2 Did Not Opt Out |
This field will be set as 2 for both apps and web. |
This field will be set as 0 till the user clicks on the opt-out link, for both apps and web. |
| SensitiveDataProcessing | N-Bitfield(2,8) |
Two bits for each Data Activity:
(1) Consent to Process the Consumer’s Sensitive Data Consisting of Personal Data Revealing Racial or Ethnic Origin. (2) Consent to Process the Consumer’s Sensitive Data Consisting of Personal Data Revealing Religious Beliefs. (3) Consent to Process the Consumer’s Sensitive Data Consisting of Personal Data Revealing a Mental or Physical Health Condition or Diagnosis. (4) Consent to Process the Consumer’s Sensitive Data Consisting of Personal Data Revealing Sex Life or Sexual Orientation. (5) Consent to Process the Consumer’s Sensitive Data Consisting of Personal Data Revealing Citizenship or Immigration Status. (6) Consent to Process the Consumer’s Sensitive Data Consisting of Genetic Data. (7) Consent to Process the Consumer’s Sensitive Data Consisting of Biometric Data. (8) Consent to Process the Consumer’s Sensitive Data Consisting of Precise Geolocation Data. |
This field will be set as 1 for both apps and web. |
This field will be set as 0 till the user clicks on the opt-out link, for both apps and web. |
| AdditionalDataProcessingConsent | Int(2) |
Consent to Processing of the Consumer’s Personal Data that Is Not Reasonably Necessary for nor Compatible with the Disclosed Purpose(s) for which the Consumer’s Personal Data Was Processed0 = Not Applicable, the Controller does not Process Personal Data that is Not Reasonably Necessary for nor Compatible with the Disclosed Purpose(s)
|
This field will be set as 1 for both apps and web. |
This field will be set as 0 till the user clicks on the opt-out link, for both apps and web. |
|
KnownChildSensitiveDataConsents |
Int(2)) |
Two bits for each Data Activity: 0 Not Applicable, the Controller does not Process Sensitive Data of a known Child.
|
This field will be set as 1 for both apps and web. |
This field will be set as 0 till the user clicks on the opt-out link, for both apps and web. |
This topic provides the technical implementation of opt-outs covered under the U.S. state data privacy regulations, currently under MSPA from Utah to Wyoming.
The UCPA does not prescribe specific opt-out methods. In contrast to the CCPA, which mandates an opt-out link, the UCPA grants flexibility for organizations to establish their preferred methods for enabling consumers to opt out of data sales or targeted advertising.
| Field name | GPP Field Type | Description | Auto-display consent screen or via link | Do no Auto-display consent screen |
| SaleOptOutNotice | Int(2) |
Notice of the Opportunity to Opt Out of the Sale of the Consumer's Personal Information
2 No, notice was not provided |
This field will be set as |
This field will be set as
|
| SharingNotice | Int(2) |
Notice of the Sharing of Personal Data with Third Parties
|
This field will be set as 1 for both apps and web. |
This field will be set as 2 till the user clicks on the opt-out link, for both apps and web. |
| TargetedAdvertisingOptOutNotice | Int(2) |
Notice of the Opportunity to Opt Out of Processing of the Consumer's Personal Data for Targeted Advertising
|
This field will be set as 1 for both apps and web. |
This field will be set as 2 till the user clicks on the opt-out link, for both apps and web. |
|
SensitiveDataProcessingOptOutNotice |
Int(2) |
Notice of the Opportunity to Opt Out of the Processing of the Consumer's Sensitive Data
|
This field will be set as 2 for both apps and web. | This field will be set as 0 till the user clicks on the opt-out link, for both apps and web. |
| SaleOptOut | Int(2) |
Opt-Out of the Sale of the Consumer's Personal Information
2 Did Not Opt Out |
This field will be set as 2 for both apps and web. |
This field will be set as 0 till the user clicks on the opt-out link, for both apps and web. |
| TargetedAdvertisingOptOut | Int(2) |
Opt-Out of Processing the Consumer's Personal Data for Targeted Advertising
2 Did Not Opt Out |
This field will be set as 2 for both apps and web. |
This field will be set as 0 till the user clicks on the opt-out link, for both apps and web. |
| SensitiveDataProcessing | N-Bitfield(2,8) |
Two bits for each Data Activity:
(1) Opt-Out of the Processing of the Consumer's Sensitive Data Consisting of Personal Data Revealing Racial or Ethnic Origin. (2) Opt-Out of the Processing of the Consumer's Sensitive Data Consisting of Personal Data Revealing Religious Beliefs. (3) Opt-Out of the Processing of the Consumer's Sensitive Data Consisting of Personal Data Revealing Sexual Orientation. (4) Opt-Out of the Processing of the Consumer's Sensitive Data Consisting of Personal Data Revealing Citizenship or Immigration Status. (5) Opt-Out of the Processing of the Consumer's Sensitive Data Consisting of Personal Data Revealing Medical History, Mental or Physical Health Condition, or Medical Treatment or Diagnosis by a Health Care Professional. (6) Opt-Out of the Processing of the Consumer's Sensitive Data Consisting of Genetic Data for the Purpose of Identifying a Specific Individual. (7) Opt-Out of the Processing of the Consumer's Sensitive Data Consisting of Biometric Data for the Purpose of Identifying a Specific Individual. (8) Opt-Out of the Processing of the Consumer's Sensitive Data Consisting of Specific Geolocation Data. |
This field will be set as 1 for both apps and web. |
This field will be set as 0 till the user clicks on the opt-out link, for both apps and web. |
|
KnownChildSensitiveDataConsents |
Int(2) |
Consent to Process Sensitive Data from a Known Child
|
This field will be set as 1 for both apps and web. |
This field will be set as 0 till the user clicks on the opt-out link, for both apps and web. |
Businesses may obtain consent by getting consumers to check a blank checkbox or by typing a written statement.
| Field name | GPP Field Type | Description | Auto-display consent screen or via link | Do not Auto-display consent screen |
| SaleOptOutNotice | Int(2) |
Notice of the Opportunity to Opt Out of the Sale of the Consumer's Personal Information
2 No, notice was not provided |
This field will be set as 1 for both apps and web. |
This field will be set as |
| SharingNotice | Int(2) |
Notice of the Sharing of Personal Data with Third Parties
|
This field will be set as 1 for both apps and web. | This field will be set as 2 till the user clicks on the opt-out link, for both apps and web. |
| TargetedAdvertisingOptOutNotice | Int(2) |
Notice of the Opportunity to Opt-Out of Processing of the Consumer's Personal Data for Targeted Advertising
|
This field will be set as 1 for both apps and web. | This field will be set as 2 till the user clicks on the opt-out link, for both apps and web. |
| SaleOptOut | Int(2) |
Opt-Out of the Sale of the Consumer's Personal Information
2 Did Not Opt Out |
This field will be set as 2 for both apps and web. |
This field will be set as 0 till the user clicks on the opt-out link, for both apps and web. |
| TargetedAdvertisingOptOut | Int(2) |
Opt-Out of Processing the Consumer's Personal Data for Targeted Advertising
2 Did Not Opt Out |
This field will be set as 2 for both apps and web. |
This field will be set as 0 till the user clicks on the opt-out link, for both apps and web. |
| SensitiveDataProcessing | N-Bitfield(2,8) |
Two bits for each Data Activity:
(1) Consent to Process the Consumer's Sensitive Data Consisting of Personal Data Revealing Racial or Ethnic Origin. (2) Consent to Process the Consumer's Sensitive Data Consisting of Personal Data Revealing Religious Beliefs. (3) Consent to Process the Consumer's Sensitive Data Consisting of Personal Data Revealing a Mental or Physical Health Diagnosis. (4) Consent to Process the Consumer's Sensitive Data Consisting of Personal Data Revealing Sexual Orientation. (5) Consent to Process the Consumer's Sensitive Data Consisting of Personal Data Revealing Citizenship or Immigration Status. (6) Consent to Process the Consumer's Sensitive Data Consisting of Genetic Data for the Purpose of Uniquely Identifying a Natural Person. (7) Consent to Process the Consumer's Sensitive Data Consisting of Biometric Data for the Purpose of Uniquely Identifying a Natural Person. (8) Consent to Process the Consumer's Sensitive Data Consisting of Precise Geolocation Data. |
This field will be set as 1 for both apps and web. |
This field will be set as 0 till the user clicks on the opt-out link, for both apps and web. |
|
KnownChildSensitiveDataConsents |
Int(2) |
Consent to Process Sensitive Data from a Known Child
|
This field will be set as 1 for both apps and web. |
This field will be set as 0 till the user clicks on the opt-out link, for both apps and web. |
To receive your payments from InMobi, you must update your company details and payment information. Prerequisites for Publisher Payouts (in the given order) include:
You must enter your company information and billing address to verify your identity. Follow these instructions to update your payment information.
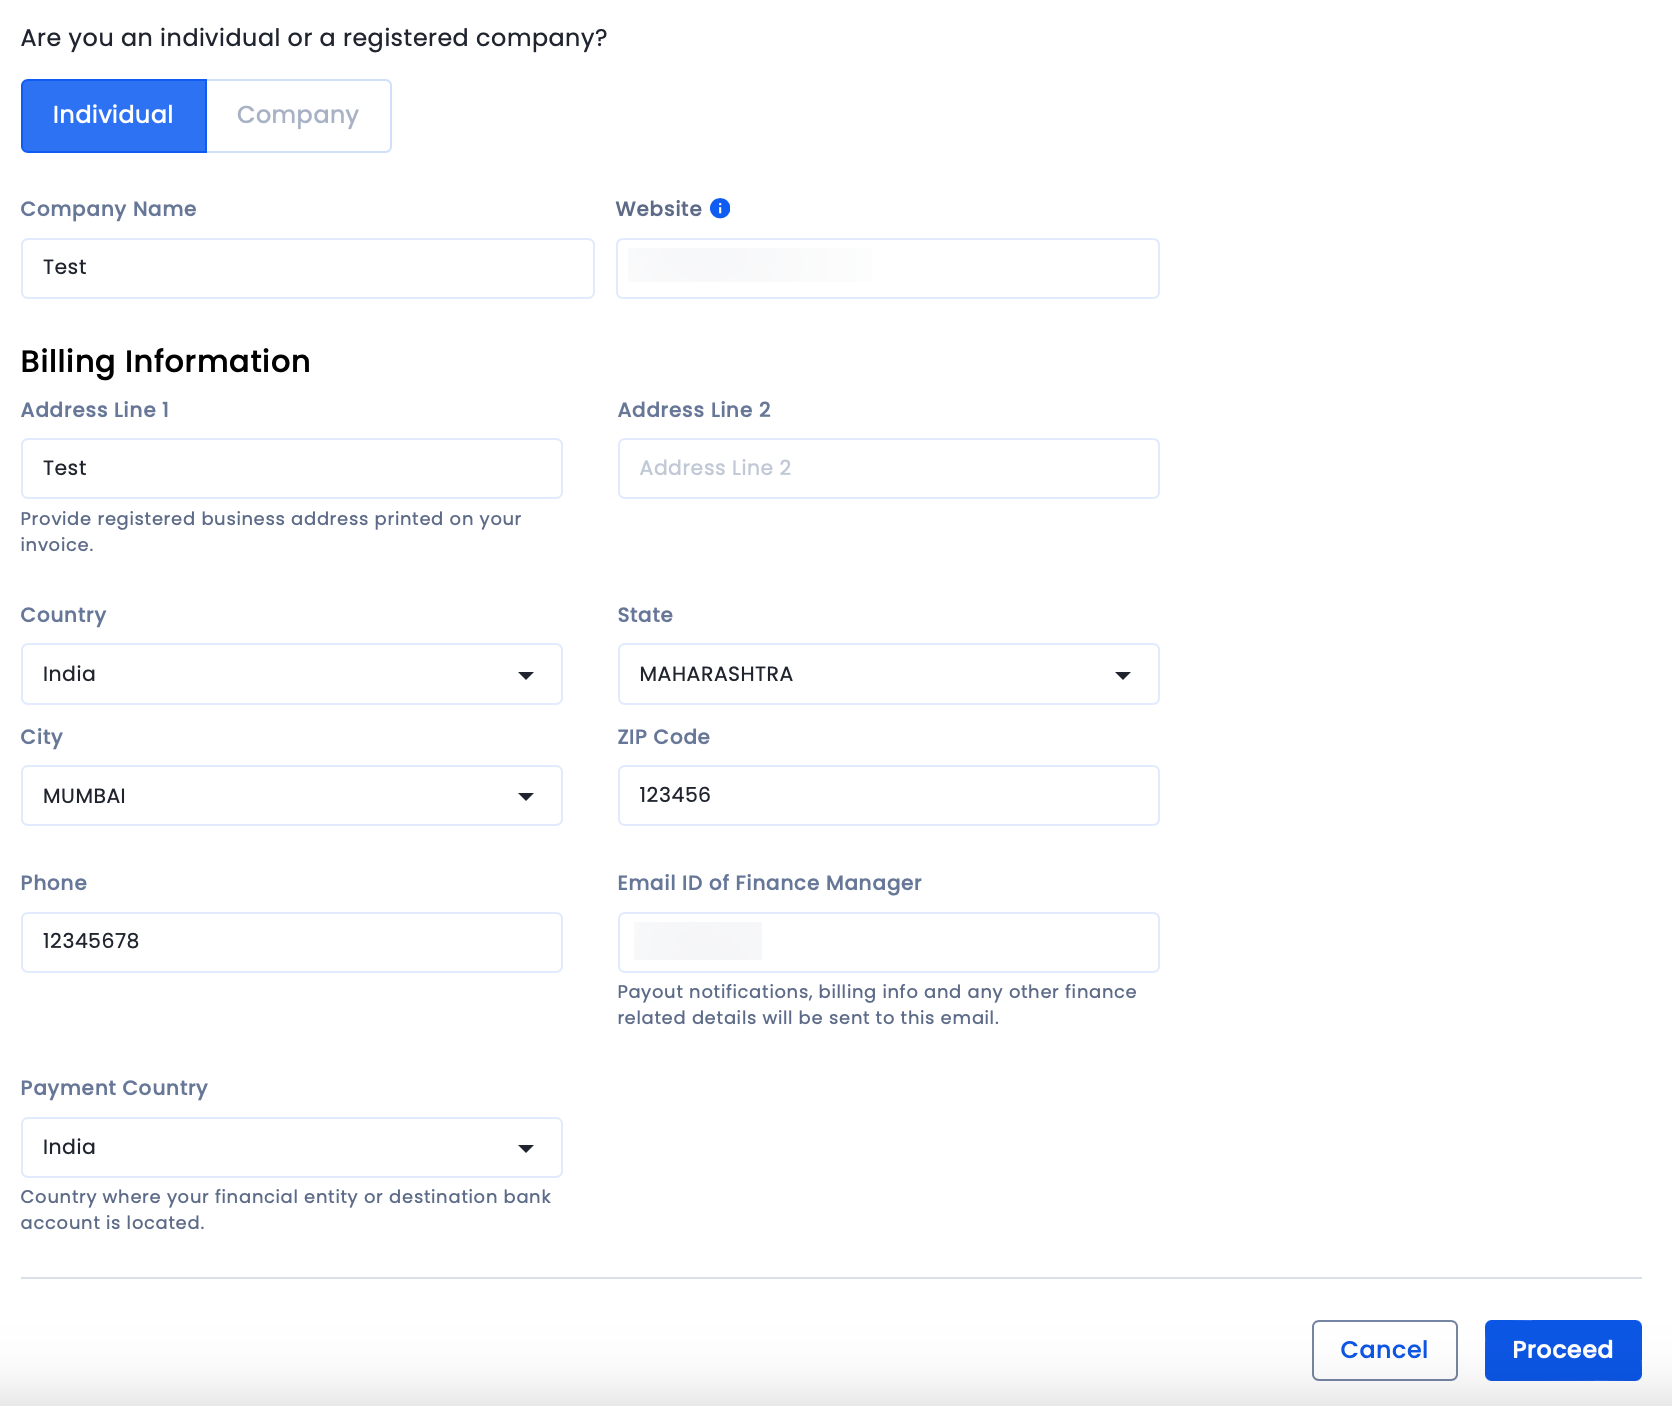
InMobi follows a payout cycle of 60 days. This means that your earnings for a given month will be credited to you at the end of the 60-day payout cycle.
For payments to be made to you, you must add a mode of payment. You can receive your payouts via Electronic Fund Transfer or PayPal. Perform the following steps to add your preferred mode of payment:
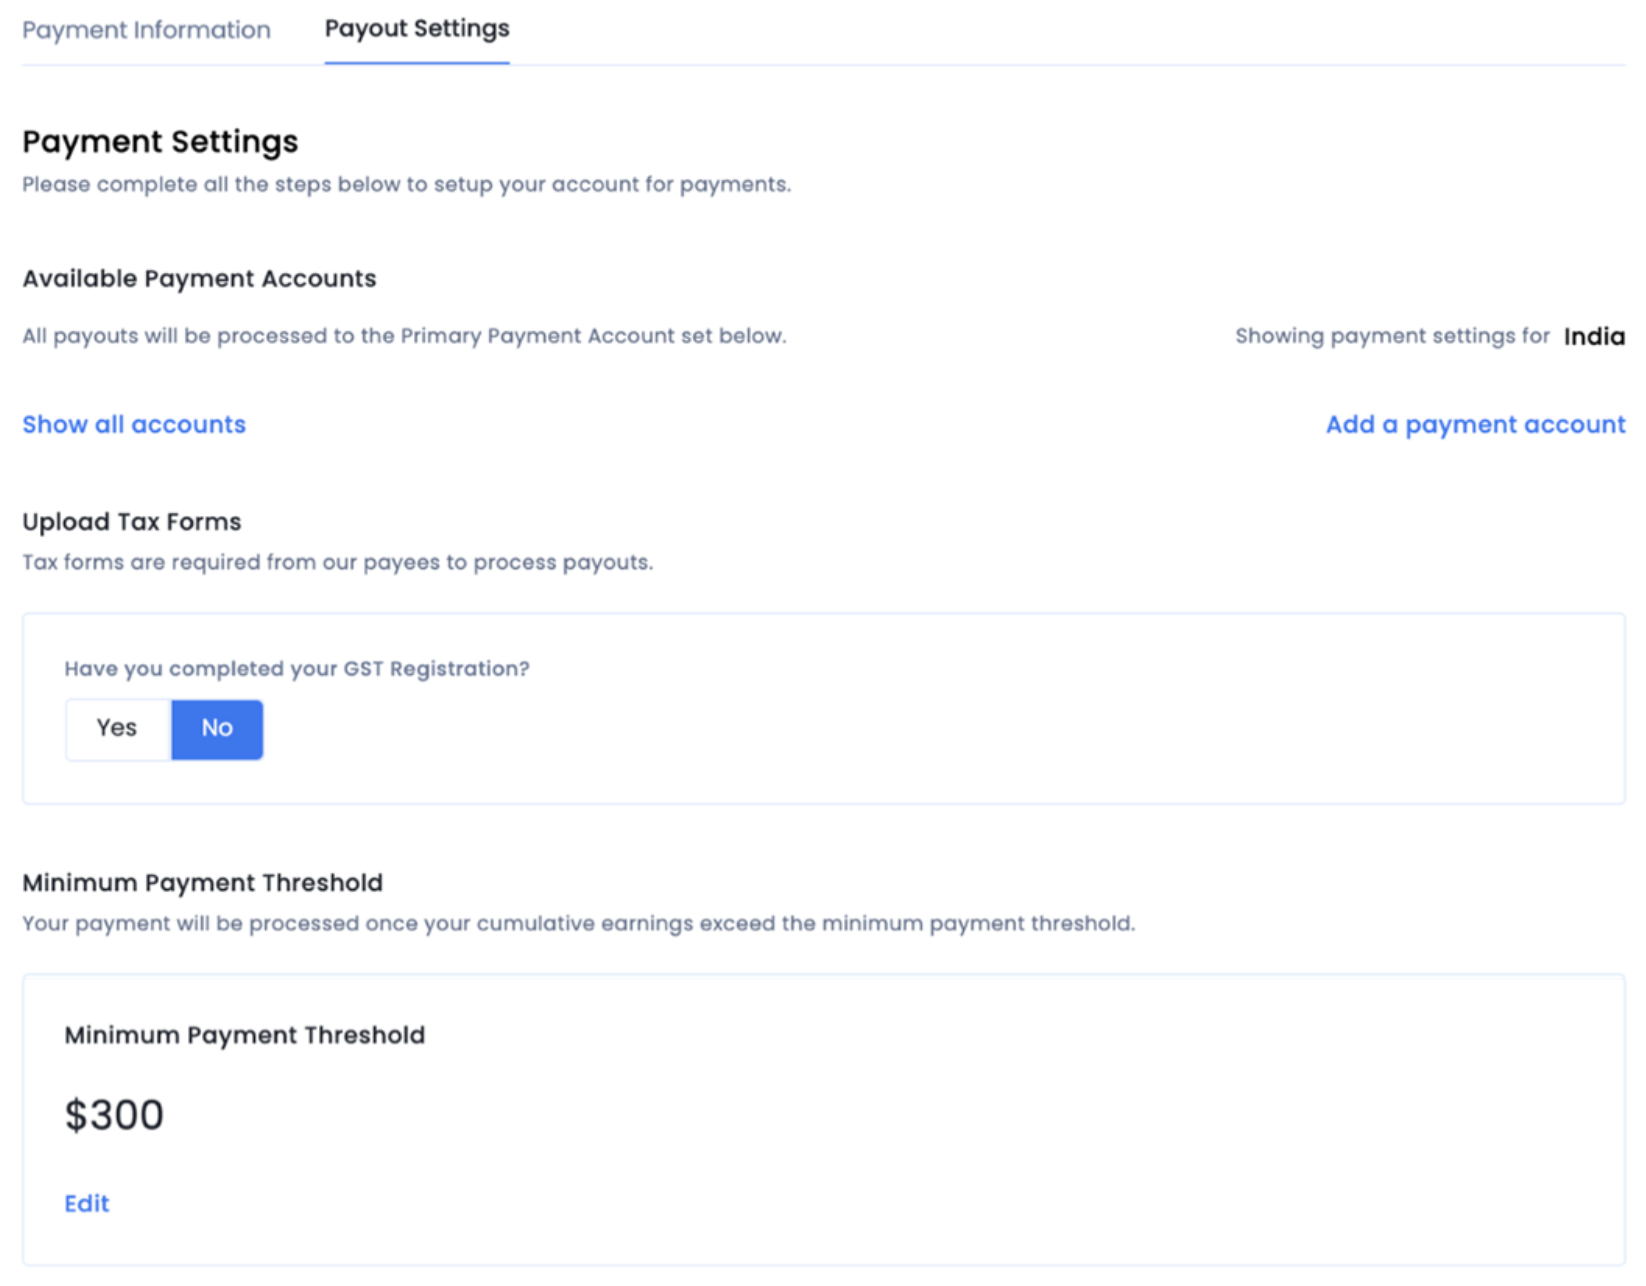
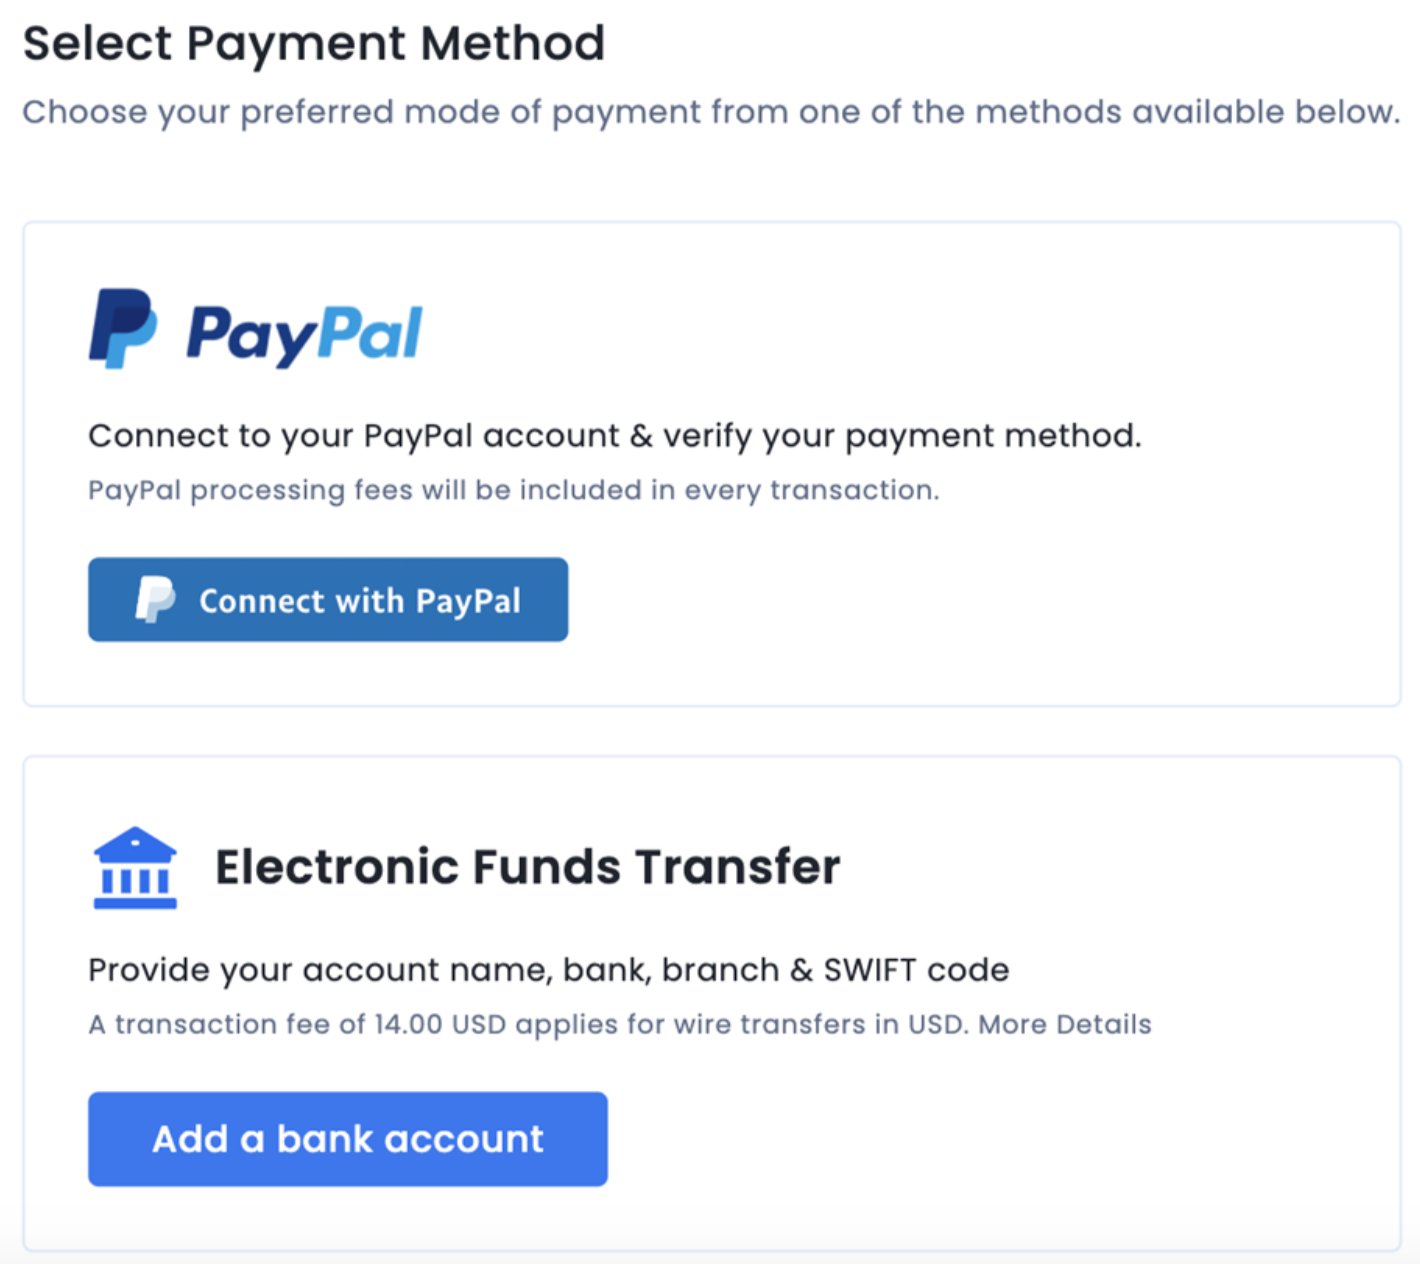
You can add more than one payment account. However, only one of the payment accounts can be set as the primary bank account. Payouts will be processed to the Primary Payment Account selected.
The tax forms need to be uploaded depending on the payment country. If the Payment Country is India, GST details need to be entered.
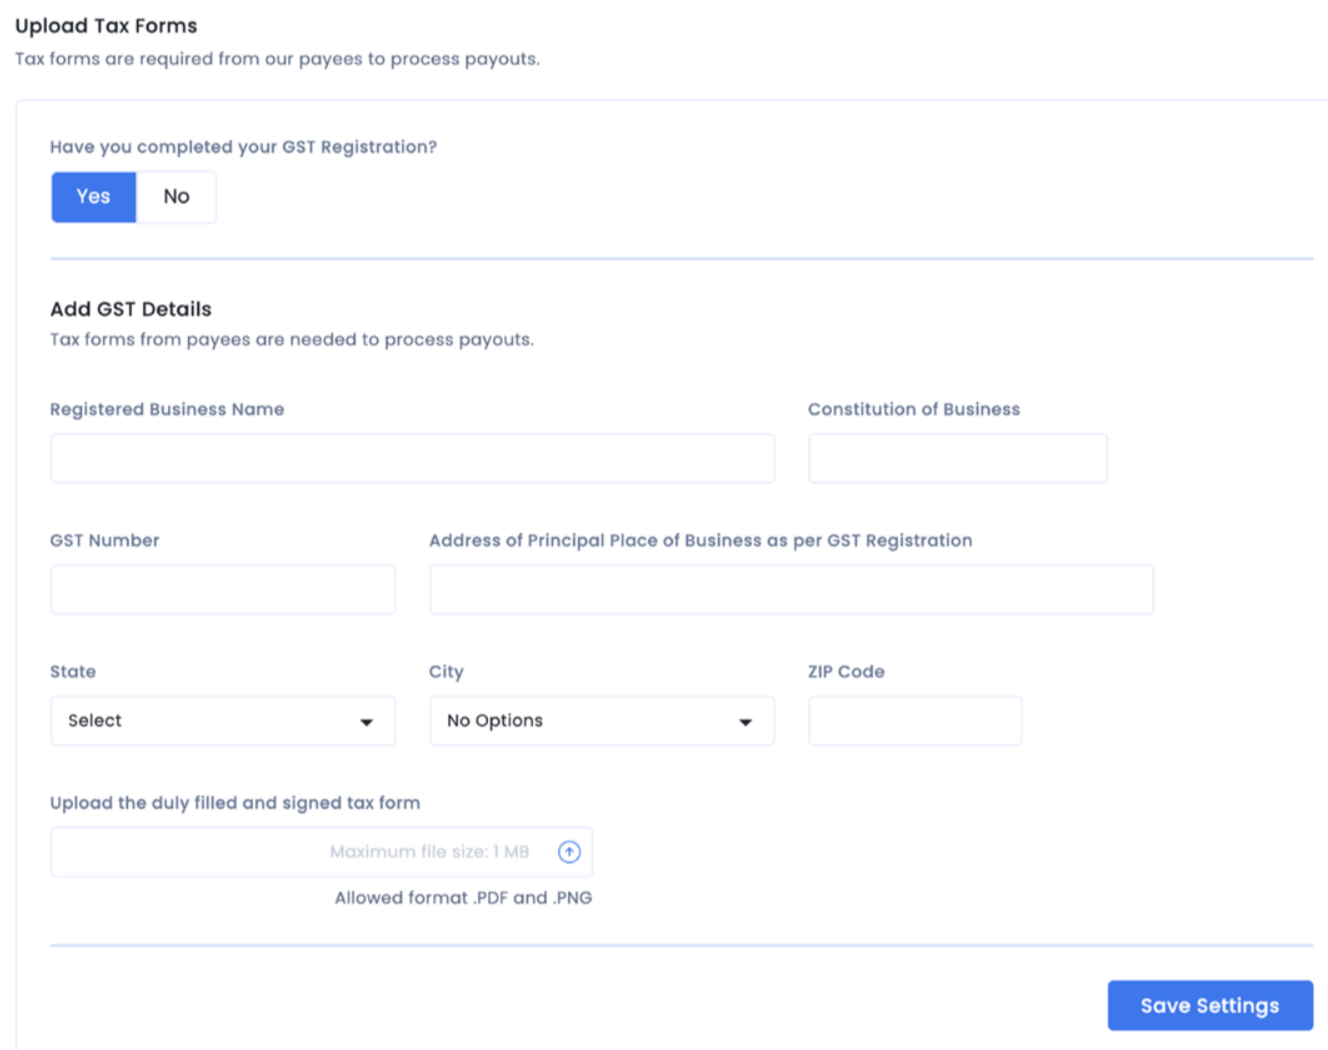
We can process payments once your cumulative earnings exceed the minimum payment threshold set. The threshold range must be between $300 - $10000.
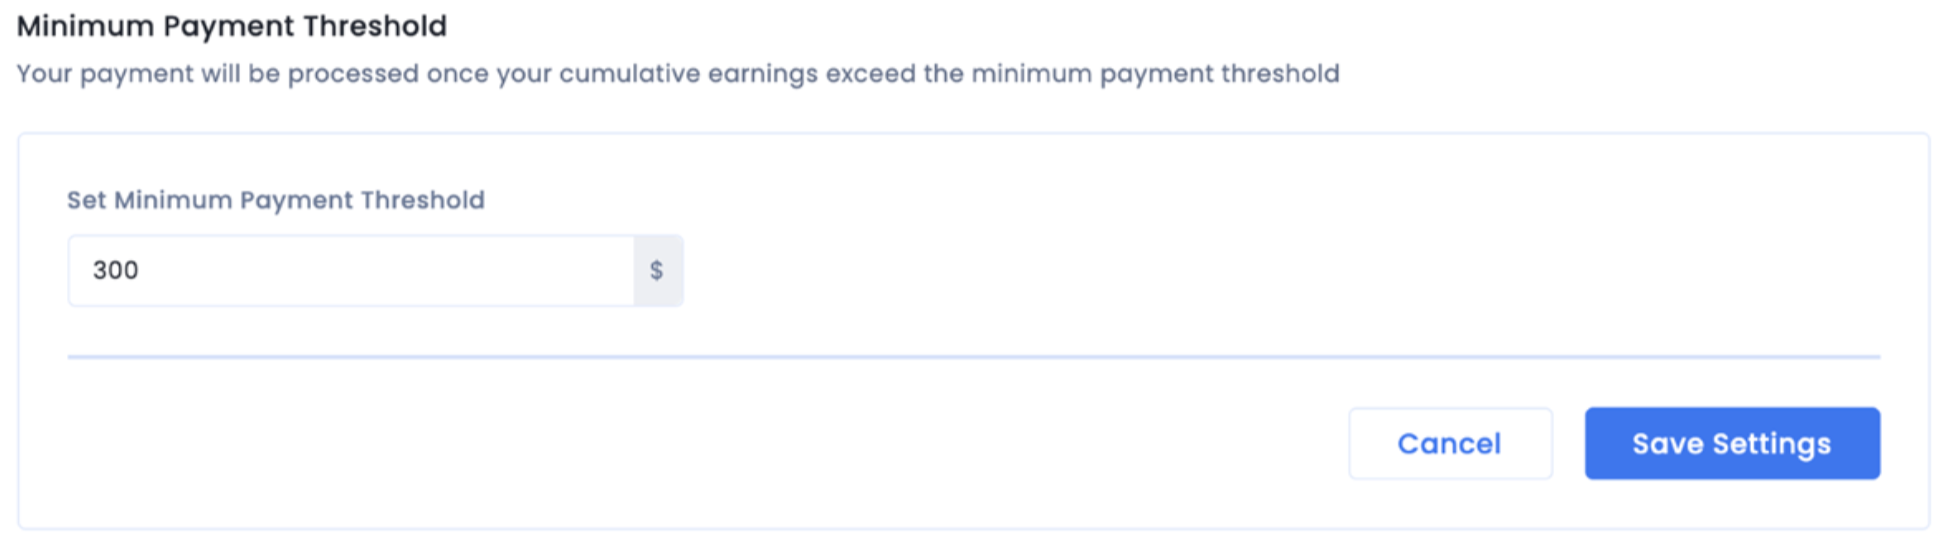
The My Earnings sub-tab contains information on your earnings and payouts made by InMobi to your account. You can check the estimated earnings for the current month, the estimated balance due, total payouts made to date, and more.
To view your transaction history, go to Finance My Earnings.
![]()
Since November 20th, 2023, CMPs are required to implement IAB’s new policies and specifications (TCF v2.2). From January 16th, 2024, if a publisher does not adopt a Google-certified CMP, no Ads from Google AdSense, Ad Manager, or AdMob will be eligible to serve on EEA and UK traffic. Having a Google and IAB-compliant CMP is crucial for the following reasons:
Our free CMP enables you to maintain compliance with data privacy regulations (like GDPR, CCPA, and many others), helping you to foster user trust whilst elevating Ad revenue. By using our CMP, you can leverage TCF v2.2 strings, aligning with the preferences of advertisers and enhancing your monetization potential. Some of our publishers have observed up to 35% uplift in eCPM in certain regions.
At present, the InMobi CMP is a free solution for both existing and new customers.
Currently, InMobi CMP does not support user management directly.
InMobi CMP offers a wide array of customization options, allowing you to personalize elements such as button colors, backgrounds, and fonts. You can see the complete list of customization features available for iOS here and Android here.
The InMobi CMP currently supports 25 languages, with more coming in the future.
| Bulgarian | Croatian | Finnish | Italian | Portuguese |
| English | Estonian | Irish | Polish | Spanish |
| Greek | Hungarian | Norwegian | Slovenian | |
| Lithuanian | Maltese | Slovak | Dutch | |
| Romanian | Russian | Danish | French | |
| Swedish | Czech | Flemish | Latvian |
InMobi CMP provides reporting and analytics on user consent-related data. This data can help you monitor and optimize your compliance efforts. In its current state, the publisher can track the following metrics:
Yes, we strongly believe that users should always have complete control over the data they choose to disclose. Our CMP is designed to offer users the flexibility to adjust their consent preferences at any point, ensuring a high level of control over their decisions related to data sharing. This can be done via the Themes tab.
InMobi CMP does not currently allow re-adding a site property with a previously deleted URL for data integrity reasons.
Contact Us and we can restore the deleted site property from the backend if necessary.
Once the site property is restored, check:
The integration process is composed of 3 simple steps:
We recommend watching the video below for a visual overview of the entire process. You can also explore the comprehensive details available on this support portal, where each step is thoroughly outlined.
InMobi CMP is designed to be applicable to Android and iOS, in-app and web. It offers seamless integration and consent management capabilities for both mobile operating systems, ensuring comprehensive coverage across different devices and providing a consistent user experience for all your app users.
Yes, we have a Unity package available here. Please note, whilst UI customization for Unity is not currently supported, it is currently on our roadmap to be available in Q2 2024.
At present, it is a standalone SDK for in-app consent management. In our ongoing efforts to enhance the experience for our publishers, we plan to seamlessly integrate the CMP into our monetization SDK in the first half of 2024. This integration will allow you to effortlessly enable or disable the CMP module, providing you with greater flexibility and control over your app’s consent management approach.
Integration with Google Mobile Ads and other Ad providers through InMobi CMP requires publishers to configure consent preferences and vendors within the CMP interface. The CMP SDK handles user consent collection, TCF string generation, and storage. Ad providers can access the TCF string either through their SDK's API, with publishers passing the consent string, or by retrieving it from shared storage. This string helps Ad providers determine whether to display personalized Ads, ensuring compliance with user consent choices and data protection regulations.
If you're seeing CMP warning in the browser, check the following:
If the CMP pop-up is missing despite setup, check the following:
If you're experiencing issues with Google Analytics data or missing consent signals, check whether Google Basic Consent is enabled. This issue typically occurs when it is disabled.
If enabled, verify that all required consent signals are correctly configured. For more information, see Google Basic Consent with InMobi CMP.
These are some common questions that publishers may have while implementing MSPA.
If the end-user changes state, there is no mapping of the consents between different sections. Instead, the InMobi CMP will signal to the publisher (via an API) that the end-user has changed states and needs to be re-shown the consent screen. The publisher is responsible for then re-triggering the consent screen. To see the APIs to check user location and trigger the consent screen, see iOS APIs, Android APIs, and Web APIs.
If the end-user travels from the US to EEU/UK, then the GPP string for the US will not be deleted. Instead, the GDPR consent screen for EEU/UK will be shown. Similarly, if the user travels from the EEU/UK to the US, then the GDPR will not be deleted and the MSPA consent popup will be shown for the U.S region.
If a user has a CCPA string and the publisher enables GPP, the US Privacy consent string will not be deleted. Depending on whether the publisher has set the auto-display of the consent screen, the MSPA consent popup will be shown to the user.
To understand why GDPR is not applicable in the US and why US regulations are applicable only in the US, see Why doesn’t InMobi CMP support GDPR in the U.S?
InMobi CMP complies with GDPR (General Data Protection Regulation), CCPA (California Consumer Privacy Act), ePrivacy, as well as Google’s and IAB's new policies and specifications (TCF v2.2). Read more about how we comply with these regulations and standards here.
We plan to support new regulations and standards in Q1 2024 such as the Digital Personal Data Protection Act (DPDPA) or IAB's Global Privacy Platform (GPP).
Yes, our CMP is IAB TCF 2.2 and Google-certified. Click here for more information.
As part of our roadmap for 2024, we are focusing on being compliant with global regulations and frameworks such as GPP and DPDPA.
InMobi CMP is completely neutral and strictly adheres to privacy protocols, only transmitting consent strings to partners whitelisted in the vendor tab of our customer interface. Its certification by Google and the IAB ensures a trustworthy handling of your data. You can rely on InMobi CMP for secure and compliant data processing.
InMobi CMP is self-serve, so you should find all the information and guides you need on this support portal. If this is not the case, you can raise a ticket via the support portal.
To access InMobi CMP, log in to the InMobi CMP portal and enter the email address associated with your account. You will then be prompted to reset your password. If you encounter any issues, you can submit a ticket via the support portal.
If the CMP pop-up shows on every visit, it is likely due to local storage or cookies being cleared every time the site is reloaded or after a user logs in. Ensure that local storage/cookies are not being cleared automatically, as CMP relies on them to retain user consent data.
If personalized ads are missing, revenue is low, or you see errors like: "We received a request from the EEA, UK, or Switzerland, but it lacks TCF signals", it likely means the consent string is missing from the ad request.
To troubleshoot, check the following:
Getting started with InMobi is quick and easy. Here’s a step-by-step walkthrough to begin with.
You might come across the following terms while you set up an account on the InMobi platform. We would recommend that you go through the same so that you are comfortable navigating our platform.
If you have created a Google Open Bidding or Direct account and want to switch, you must create a new one. However, you cannot create a new account with the same email address. Additionally, signing a contract only applies to Google Open Bidding accounts (Google Open Bidding SDK connections don't require new accounts).
Blank ads may appear due to issues with ad creatives, targeting criteria, or ad-serving limitations. Ensure the setup is correct and Contact Us in case of any issues.
You can enable your placement for Test Mode without affecting the live app. Global means the test ad can be served across all your Live apps with InMobi, while Device means the test ad can be served across the Test Devices added as per the Integration Tab section.
To add more users, go to your account settings and select "Manage Users." Add details such as first and last names, designation, email ID, etc to invite additional users. For more details, follow the steps in the My Account tab.
Manually adding the app is only applicable in cases where the system cannot fetch the app's details through the URL. In such cases, you need to manually add the URL, Category, Rating, and other details to add the app to your inventory.
You can find your account ID by logging into your account and navigating to the My Account tab. Here, you can view your profile and account details.
You cannot delete your account from the platform. To delete your account, Contact Us.
Currently, changing or merging accounts is not supported. If you need assistance, Contact Us.
Check your spam or junk folder; the link might be there. Ensure you’ve entered the correct email address and your inbox is not full. If the issue persists, request the link again or, Contact Us.
If you're unable to reset your password, it may be due to an incorrect email or username, a locked account, or a temporary system issue. Double-check your details, ensure your account isn't locked, and try again later. If the problem persists, Contact Us.
If you have additional queries or need further assistance, Contact Us.
The standard time for app approval is 24 working hours.
InMobi's content guidelines and policies ensure that all ads comply with legal standards, protect user experience, and avoid prohibited content, such as adult material, illegal activities, and misleading claims.
Your inventory may be rejected or flagged due to non-compliance with platform guidelines, quality issues, or discrepancies in the provided data. Refer to our content guidelines and policies for more details.
We usually take 24 working hours for app approval. However, if your app/website belongs to a sensitive category, our team may take longer than expected to review.
"Under Review" indicates that your submission is being evaluated and hasn't been approved or rejected yet.
Data privacy enables organizations to stay compliant with legal and regulatory standards, reducing risks, enhancing trust, and ensuring ethical operations. InMobi Publisher Platform is compliant with multiple regulations such as COPPA, CCPA, GDPR, and LGPD. You can follow the steps on the Compliance Declaration page to set your compliance settings.
InMobi is a Joint Controller with the Publisher.
InMobi does not gather user consent directly and will rely on the publisher to obtain appropriate consent from data subjects and pass that on to InMobi.
InMobi will never collect or pass user data to an advertiser or a publisher without user consent.
Publishers must notify InMobi where consent is withdrawn or revoked, and accordingly, InMobi will honor such data subject’s request.
For all requests originating from users who have not given consent, InMobi will serve non-targeted ads to these users. To comply with GDPR, upgrade your SDK today.
You can now set the floor price yourself, but this is an access-only feature, Contact Us to get your access.
To choose the correct ad format, ensure the size aligns with standard industry dimensions such as banners (320x50), medium rectangles (300x250), or interstitials (320x480). Each format serves specific ad placement needs like banners for mobile screens and interstitials for immersive experiences.
Select ad formats that match the dimensions of your ad slot, such as 320x50 for banners, 300x250 for medium rectangles, and 320x480 for interstitial ads.
Yes, InMobi supports Outstream video ads. You can create a video ad in the format compatible with the CI platform, ensuring it meets standard dimensions and specifications for seamless integration.
Your sellers.json may not be updated due to: Pending Verification: Your account details are still under review. Incomplete Information: Ensure your payment and business details are accurate.
Banner (display), In-stream (video), and Native.
Publishers will need to list InMobi.com as DIRECT in the ads.txt file and InMobi will list the publisher as PUBLISHER in the Sellers.Json file. Note that there is no change required vis-a-vis the in-app flow.
We do not support category and domain blocks sent to us via the oRBT request. Publishers will need to add blocks while creating the placement field in the Media UI setup.
If you have additional queries or need further assistance, Contact Us.
Payments may be delayed for the following reasons: Publishers registered in Singapore and India are required to send GST invoices. If exempted from GST, they must provide a declaration via email to bd-finance@inmobi.com. Incorrect bank details. Please ensure your bank details are updated correctly.
You can upload your invoice directly through your account's dashboard on the platform or Contact Us for further assistance.
To upload an invoice, ensure that the file is in PDF format. Follow the guidelines provided on the InMobi platform for invoice submission, including any mandatory details such as invoice number, date, and corresponding campaign ID. For specific instructions, reach out to support@inmobi.com.
InMobi processes publisher payments every month, provided your account meets the minimum payout threshold. Payments are initiated within 60 days after the end of the month in which your earnings are generated. For example, earnings from January will be processed and paid by the end of March, and you can expect to receive the payment by the first week of April.
Here are a few key points to keep in mind:
For more information or to track the status of your payments, visit the Payments section in your InMobi account dashboard. If you experience any delays or have further questions, Contact Us.
InMobi processes payments 60 days after the end of the month in which earnings are generated. For example, January earnings are paid by the end of March and payment is received by the first week of April. Ensure your account meets the minimum payout threshold ($300 for wire and $ 50 for PayPal, $50 for India publisher) and that your payment details are up to date to avoid delays.
Bank charges vary based on your payment method and bank policies. InMobi does not cover these charges, so ensure you check with your bank for applicable fees, such as wire transfers or currency conversion charges.
Discrepancies in your payout may occur due to:
For detailed information, review the Payments section in your dashboard or Contact Us.
You may be unable to update your bank details due to:
For further assistance, Contact Us.
Please follow the below steps to view your earning history
The maximum amount you can enter here is the value of your current pending earnings.
If you have additional queries or need further assistance, Contact Us.
Your ads.txt may not be verified due to:
For guidance, see InMobi Support Portal or Contact Us.
Verification requires both 10k ad requests and the correct implementation of your ads.txt file. Ensure:
If the issue persists, Contact Us.
Updating reseller or ads.txt lines ensures: Ad Authorization: Advertisers can verify you as an authorized seller. Higher Revenue: Proper implementation improves demand and fill rates. Policy Compliance: Aligns with industry standards like Ads.txt and App-ads.txt. For more information, see App.ads.txt.
For ads.txt, ensure you include all lines provided by InMobi exactly as instructed. These lines authorize InMobi to sell your inventory and comply with industry standards. Missing or incorrect lines may impact monetization.
Your sellers.json may not be updated due to:
If you have additional queries or need further assistance, Contact Us.
You may be unable to add InMobi as a bidder due to:
For more information, see Third Party Mediation Platforms or Contact Us.
Your GOB account may not be approved due to:
For assistance, Contact Us.
Your GOB publisher ID can be found in your InMobi account dashboard. To locate it:
For more information, see Google’s Open Bidding, or for assistance, Contact Us.
Oh yes, Absolutely! InMobi supports major mediation platforms like Google AdMob, AppLovin's MAX, Unity LevelPlay, and Digital Turbine, to name the major ones. For directions on integrating each mediation provider, see our integration guidelines page.
Here’s a quick guide on some of the best practices in ad mediation.
Visit the Download SDK page to get the latest iOS or Android SDK or learn more about third-party ad mediation platforms supported by InMobi here.
InMobi supports only Android and iOS devices.
You can download the InMobi SDK for Android and iOS devices from here.
You can sign up with InMobi here. If you face trouble signing up, please sign out of the account, clear your browsing data and try again. If you still face any issues, please contact sales@inmobi.com
Our team is here for you 24/7. Feel free to write to sales@inmobi.com or to your dedicated InMobi
InMobi’s latest SDK is robust and featherlight ensuring that your app remains unbloated and performs efficiently to deliver the best user experience. Details on the SDK specifications including its size can be found here.
InMobi currently supports Cocos2dX and Unity. Please note that we no longer support Cordova.
VAST is an IAB specification which defines the mechanism to render a video in a publishing environment. InMobi currently supports VAST 4.0 on different platforms.
Yes, publishers who choose to work with InMobi are required to adhere to the following InMobi guidelines. If you fail to comply with these guidelines, we may disable your InMobi account.
This contract shall commence on the date on which you accept these conditions upon your registration with InMobi and shall remain in full force and effect unless and until terminated by either Party in accordance with the terms of the Contract.
We have explained the reasons for opting for Kotlin and Swift in our blog.
We will be releasing our latest monetization and addressability features only on the InMobi SDK available in Kotlin and Swift SDKs from September 2023 onwards. You will not be able to access our latest features if you are on the InMobi 10.1.X SDK versions.
If you are integrated with InMobi via a mediation platform, upgrade to the latest adapter provided by your mediation platform. You can find more details on our blog. If you are integrated with the InMobi SDK via direct integration, follow our migration guide for iOS and Android.
We will be releasing our latest monetization and addressability features only on the InMobi SDK available in Kotlin and Swift SDKs from September 2023 onwards. You will not be able to access our latest features if you are on the InMobi 10.1.X SDK versions.
To find your Publisher Reporting API key:
If you don't have access, ensure your account has the required permissions or Contact Us for assistance.
The InMobi SDK supports a variety of ad formats, including:
To integrate these formats, ensure you have the latest version of the InMobi SDK in your app.
Low fill rates may be due to:
Yes, the SDK integration must be completed before setting up third-party mediation. The InMobi SDK is essential to enable the flow of ad requests and responses, allowing third-party networks to be integrated into your mediation setup. Once the SDK is integrated, you can proceed with configuring mediation to maximize revenue from multiple demand sources.
If you have additional queries or need further assistance, Contact Us.
The earnings are reported in US dollars.
There is no limit on the number of requests per session.
You can fetch a maximum of 15 sessions in a day.
Once the issue is detected, the usual ETA is 24-48 hours.
The usual data delay is 4-5 hours. Also, InMobi follows the GMT.
6 months.
This topic explains dimensions, metrics, and filters such as visits, sessions/consent screen displays, consent status, and others on the InMobi CMP Analytics dashboard.
A Session/Consent Screen Display is an instance where a user is prompted through a popup screen to manage their data privacy preferences when they access a website or application. This screen typically appears during the initial visit or when a new consent action is required due to policy changes, regulatory updates, or session expiry.
For example, when a user visits a website for the first time. The CMP displays a consent screen to manage privacy settings. It would be counted as one session/consent screen display.
A Visit occurs whenever a user interacts with a website or application.
For example, a visit begins when a user accesses a website or app for the first time.
Additionally, if a user visits a website or an app, and comes back after 30 mins of inactivity, this would count as another visit.
In a third scenario, if a user visits a website or app, leaves, and returns the next day (UTC) of their previous visit, this would also be counted as a separate visit.
Consent States are reflected differently for each regulation such as GDPR, CCPA, and GBC, in InMobi CMP. The following table shows how you can select consent states for each regulation for analytics purposes.
| GDPR | CCPA | GBC | |
| Accept All |
Under Dimension, select Regulation GDPR. Under Metric, select Accept All. |
Under Dimension, select Regulation CCPA. Under Metric, select Accept All. |
Under Dimension, select GBC. |
| Reject All |
Under Dimension, select Regulation GDPR. Under Metric, select Reject All. |
Under Dimension, select Regulation CCPA. Under Metric, select RejectAll. |
Under Dimension, select GBC. |
| Partial Accept |
Under Dimension, select Regulation GDPR. Under Metric, select Partial Accept. |
Under Dimension, select Regulation CCPA. Under Metric, select Partial Accept. |
Under Dimension, select GBC. |
| Bounce |
Under Dimension, select Regulation GDPR. Under Metric, select Bounce. |
Under Dimension, select Regulation CCPA. Under Metric, select Bounce. |
Under Dimension, select GBC. |
Consent or Pay Enabled is a dimension and filter provided by InMobi CMP allowing you to view analytics only for the sites for which Consent or Pay has been enabled by you. This is a convenient option as it saves you the time of selecting each site while generating reports.
The total number of users marked as paid users out of visits where consent or pay was applicable.
The total number of CMP sessions that were triggered.
The percentage of total sessions that resulted in the CMP status being accepted.
The percentage of total sessions that resulted in the CMP status being rejected.
The percentage of total sessions where no CMP status was received.
The percentage of total sessions that resulted in the CMP status being partially accepted.
The total number of visit events received, limited to visits where CMP is relevant.
The percentage of total traffic where the final CMP status was "accepted." The CMP status for a visit is marked as "accept" in the following scenarios:
The percentage of total traffic where the final CMP status was "reject." This status is determined in the following scenarios:
The percentage of total traffic where the final CMP status was "partially accept." This status is determined in the following scenarios:
The percentage of total traffic for which no valid CMP status was received. This occurs when CMP is auto-triggered, but the user does not respond to the CMP session screen.
The percentage of total sessions where GBC was applicable, and the GBC status was "accept."
The percentage of total sessions where GBC was applicable, and the GBC status was "reject."
The percentage of total sessions where GBC was applicable, and the GBC status was "partially accept."
The percentage of total traffic where GBC was applicable, and the final GBC status was "accept."
The percentage of total traffic where GBC was applicable, and the final GBC status was "reject."
The percentage of total traffic where GBC was applicable, and the final GBC status was "partially accept."
This document outlines common errors encountered during Android SDK implementation, along with their causes and solutions. It aims to help developers troubleshoot issues quickly and ensure seamless integration.
oncmpError callbackOne of the callbacks within ChoiceCMPCallback is onCmpError, which gets fired whenever there’s an issue in CMP. This function has a parameter: error which contains information about the error that has occurred.
Here’s a list of error messages that error can have:
| Message | Possible Reasons | Actions |
| No connection found to load CMP | There is no internet connection on the device. | Check internet connection on the device. Make sure the app is given permission to use the network. |
| Given pCode is invalid | The PCode is invalid. | Look for any spaces. Make sure the PCode is copied from the portal without the “p-”. |
| Could not find configuration for this packageId. Have you set it up in InMobi Choice web portal? | The combination of pcode and packageId is not found on the portal. Either pcode or packageId is invalid. | Check pcode and packageId provided during initialization. Check the spaces in packageId. Make sure packageId is a valid entry in portal. |
SDK must be initialized first by calling startChoice method |
Trying to call cmp api before initializing sdk. | Initialise SDK first by calling startChoice method. Wait for the onCmpLoaded callback before calling any API. |
| An error has occurred when CMP tried to execute a network call | Some exception occured while doing a network call. | If the issue persists, contact InMobi |
| An invalid json format has been found when CMP tried to read the data | There is some issue with the json response format returned after doing a network call. | If the issue persists, contact InMobi |
| Couldn't load publisher logo, url is empty or it doesn't return an image | The logo on the GDPR screen was not loaded. Either the URL was empty or there was no image on the given URL. | If the logo is to be displayed on the GDPR consent screen, make sure the image URL on the portal is not empty and the URL is valid. |
| An error has occurred when a TCModel property was tried to be set | There was some error while setting TCModel property. | Make sure cmp is initialized properly. If the issue persists, contact InMobi. |
| An unexpected value was received from GeoIp service | Occurs while setting default CCPA consent. Value received for location from geoip is invalid. | If the issue persists, contact InMobi. |
| An unexpected error has occurred when CMP tried to do a network call | Unknown exception occured while trying to do a network call. | Some unknown exception occurred during network call. If the issue persists, contact InMobi. |
| CFileNotFoundException has been captured when CMP tried to do a network call | FileNotFound Exception occured while trying to do a network call. | If the issue persists, contact InMobi |
| An invalid URL has been passed | The URL passed to the privacy policy link of the GDPR screen is invalid | Make sure that the URL given for the privacy policy link under the GDPR section is valid, check for spaces in the field. |
| Some error occurred while saving consent | There was some issue in saving MSPA consent. | If the issue persists, contact InMobi |
| Init screen texts are missing | Some screen texts are missing and not configured properly on the portal. | Check all the fields are filled and saved properly on the portal. |
Debug and Error Logs are logged in the console to track any misbehavior or errors in SDK. Here's a list of Error Logs and their description:
| Message | Possible Reasons | Actions |
| The value is too large to be encode into the number of bits passed | Internal system behaviour related log caused due to long encoding failure | Report to InMobi |
| Invalid bit length | Internal system behaviour related log caused due to decoding failure | Report to InMobi |
| Some unknown error occurred | Some unknown error occurred while saving MSPA consent. | Check the network connection and try again. If the issue still persists, contact InMobi. |
| Some error occurred while saving consent | There was some error while saving MSPA consent. | Check the network connection and try again. If the issue still persists, contact InMobi. |
Info messages are logged in console to convey meaningful messages in SDK. Here is a list of those messages and description:
| Message | Possible Reasons |
| Either US Privacy is not applicable or disabled for the current location | Either US privacy is not applicable for current region or is disabled from portal. |
| This consent is not available for the given country | Regulation applied is not valid for the current country. |
| GDPR is not applicable for this scenario | Either GDPR is not applicable for current country or is disabled from portal. |
| Either GBC is not applicable or disabled for the current location | GBC is not applicable for current region or is disabled from portal. |
| Auto pop-up is disabled and not applicable for this region because CCPA is enabled for this region | Auto pop-up is disabled and will not be applicable even if enabled as CCPA is applicable for this region. Auto pop-up is shown if MSPA/GDPR is applicable. |
| Auto pop-up is not applicable for this region as CCPA is enabled | CCPA is applicable for the current region so auto pop up will not be displayed. Auto pop-up is shown if MSPA/GDPR is applicable. |
| Auto pop-up is disabled so no dialog will be shown | MSPA auto pop-up is disabled from the portal so no dialog will be shown automatically. |
| MSPA is applicable but no need to re-trigger the screen | MSPA is applicable and consent is present |
This document outlines common errors encountered during iOS SDK implementation, along with their causes and solutions. It aims to help developers troubleshoot issues quickly and ensure seamless integration.
cmpDidError delegateOne of the delegate functions within ChoiceCMPDelegate delegate is cmpDidError which gets fired whenever there’s an issue with the initialisation due to any reason. This function has a parameter: error which contains information about the error occurred.
Here’s a list of error messages that error.localizedDescription with have:
| Message | Possible Reasons | Actions |
| The data couldn’t be read because it is missing. | There’s an issue in the configuration on the portal. | Check all the fields are filled and saved properly. Also check if the same bundle identifier is used in the App and on the portal. |
| Malformed portal configuration URL, check pCode and bundleIdentifier | Either PCode or bundle identifier is not correct. | Look for any spaces. Make sure the PCode is copied from the portal without the “p-”. |
| Malformed app-config.json file at NewPremiumUILabels level | Some of the key data is missing or incorrect in translations | If the issue persists, contact InMobi |
It is not known yet if GDPR Applies so this value may be misleading. Always check `gdprAppliesIsKnown` first |
If you are using doesGdprApply (in Objc) before initialisation, you may encounter this error. |
Check if the initialisation is done by implementing the cmpDidLoad delegate and then check this value. |
| Unsupported language | The selected language or device language is not supported. | If the issue persists, contact InMobi |
| Could not find rootView controller. Make sure your rootViewController is attached to a keywindow before starting CMP | CMP couldn’t find the ViewController. |
Make sure the SDK is properly setup and configured before initialisation. |
| CMP has not loaded yet, run startChoice with the pCode first. | ForceDisplayUI is called before initialisation. |
Wait for the cmpDidLoad callback before calling the API |
| US Regulation is not configured in the portal | showUSRegulations has been called but CCPA / MSPA not configured properly on the portal |
Make sure the configurations are correct from the portal |
| CCPA is not configured in the portal. | ShowCCPA is called but not configured from the portal |
Make sure CCPA is configured properly from the portal |
| Could not find rootView controller. Make sure your rootViewController is attached to a keywindow before starting CCPA | CMP couldn’t find the ViewController. |
Make sure the SDK is properly setup and configured before initialisation. |
| Could not find rootView controller. Make sure your rootViewController is attached to a keywindow before showing Google Basic Consent | CMP couldn’t find the ViewController. |
Make sure the SDK is properly setup and configured before initialisation. |
| Color named: {key} is malformed with value: {color string provided}. Color must start with #") | The colour string value provided during the initialisation is incorrect. | Check for all the provided colour values on initialisation. The colour values string must start with “#” character followed by three or six digits colour code. |
| Could not find MSPA Viewcontroller | CMP couldn’t find the ViewController. |
Make sure the SDK is properly setup and configured before initialisation. |
Debug and Error Logs are logged in console in order to track any misbehaviour or errors in SDK. Here's a list of Error Logs and their description:
| Message | Possible Reasons | Actions |
| Error encoding the object | Internal system behaviour related log caused due to data encoding failure | Report to InMobi |
| MSPA Jurisdiction not found | Missing values in configuration file | Check the MSPA related values in the portal and save properly. |
| Region not found | Missing values in configuration file | Check the network connection and if the issue still persists, report to InMobi |
| Error loading iabgpp | Internal error in GPP encoding | Report to InMobi |
Failed to decode GoogleVendor data |
Invalid google vendor format encountered while retrieving from storage. | If occurred during testing, reinstall the app and if the issue persists, report to InMobi |
| Could not find the geo location | One of the internal configurations failed to download | Check the network connection and try again |
| Error downloading GVL version. Using Cache | Global vendor list failed to download. | Check the network connection and try again. If the issue still persists, contact InMobi |
| Error decoding global vendor list | There’s some inconsistencies with the newly downloaded GVL | Report to InMobi |
| No locations found | Missing values in configuration file | Check the MSPA related values in the portal and save properly. |
| Current geo location not found | One of the internal configurations failed to download | Check the network connection and try again |
| Failed to load custom font | There’s some issue when using the custom font provided during the initialisation. | Check if the font is properly added to the bundle and in Info.plist as per the Apple documentation. Also check if the correct font name is passed in the initialisation |
This topic explains the concept of Concept or Pay and how publishers can honor end-user consent preferences by giving them a free opt-out option to limit data tracking.
“Consent or Pay" is a concept where users are given a choice to either provide consent for data collection or pay to access content without consenting to data tracking or advertising. The three main options are:
In November 2023, Meta introduced a paid subscription for Instagram and Facebook users who don't want to be tracked. This was referred to as the 'Pay or okay' model.
In response to this, the European Data Protection Board (EDPB) has published an opinion stating the following:
“In most cases, it will not be possible for large online platforms to confront users only with a binary choice”.
A free alternative should be given without behavioral advertising, e.g. involving the processing of less or no personal data.
The scope of this opinion is for “large online platforms“ (evaluated on a case-by-case basis).
Consent or Pay 2.0 emerged after the EDPB's guidance to offer users a free opt-out of personalized ads.
This documentation outlines implementing the Consent or Pay model with InMobi CMP. InMobi CMP enables publishers to provide a free option to opt out of data tracking and receiving personalized ads with the Partial Accept option. For more information on Consent or Pay, see Overview.

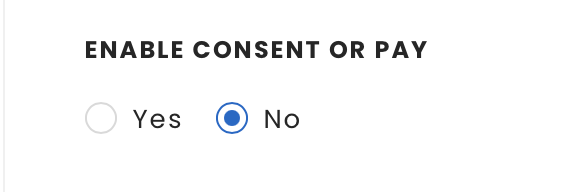
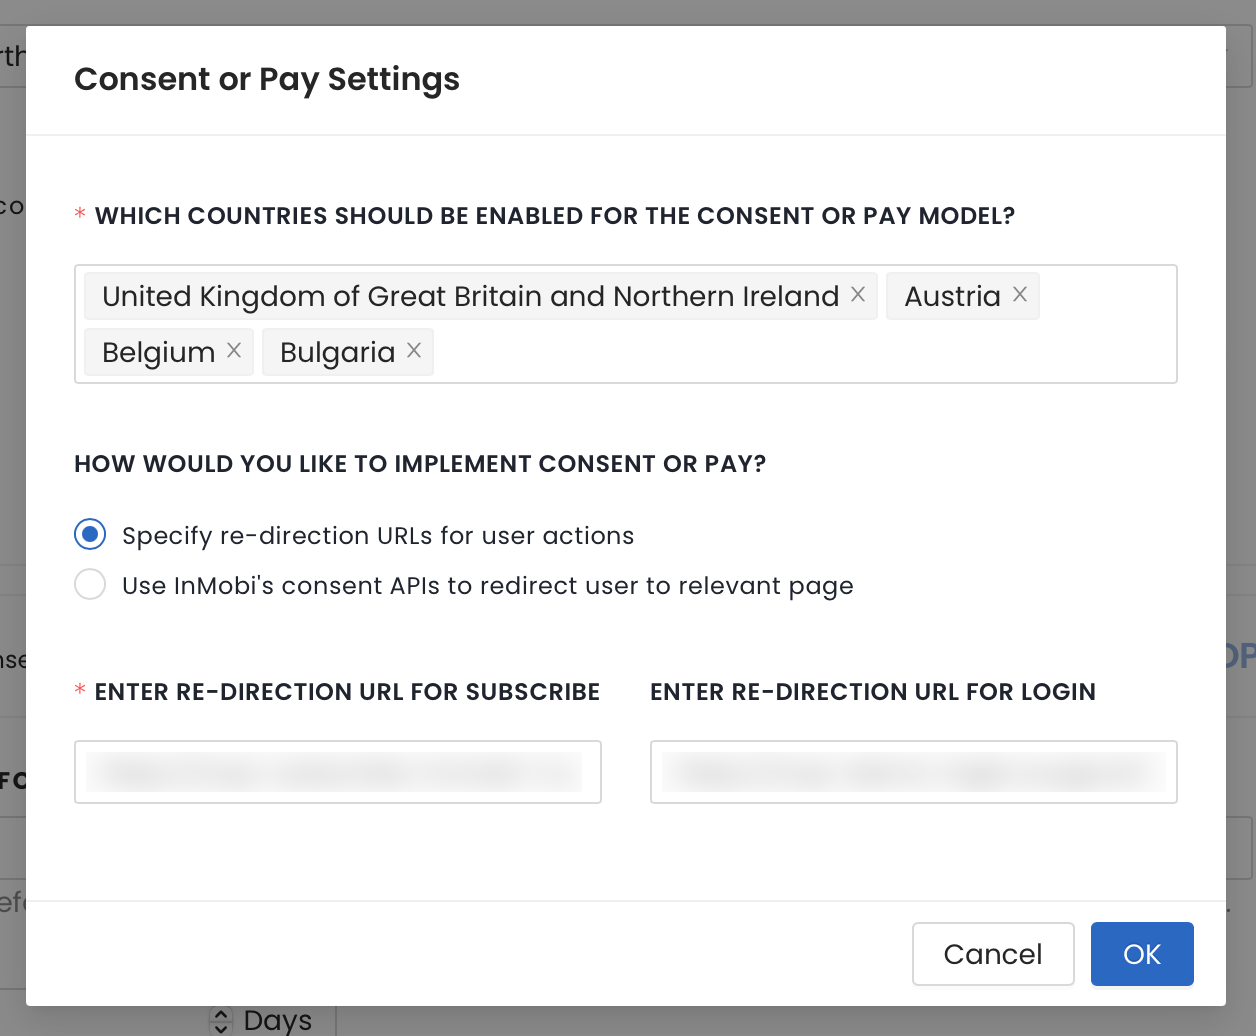
Consent or Pay will only be implemented for the selected countries. For the remaining countries, GDPR will apply.
Configuring Themes settings allows you to manage the look and feel of the consent screen.


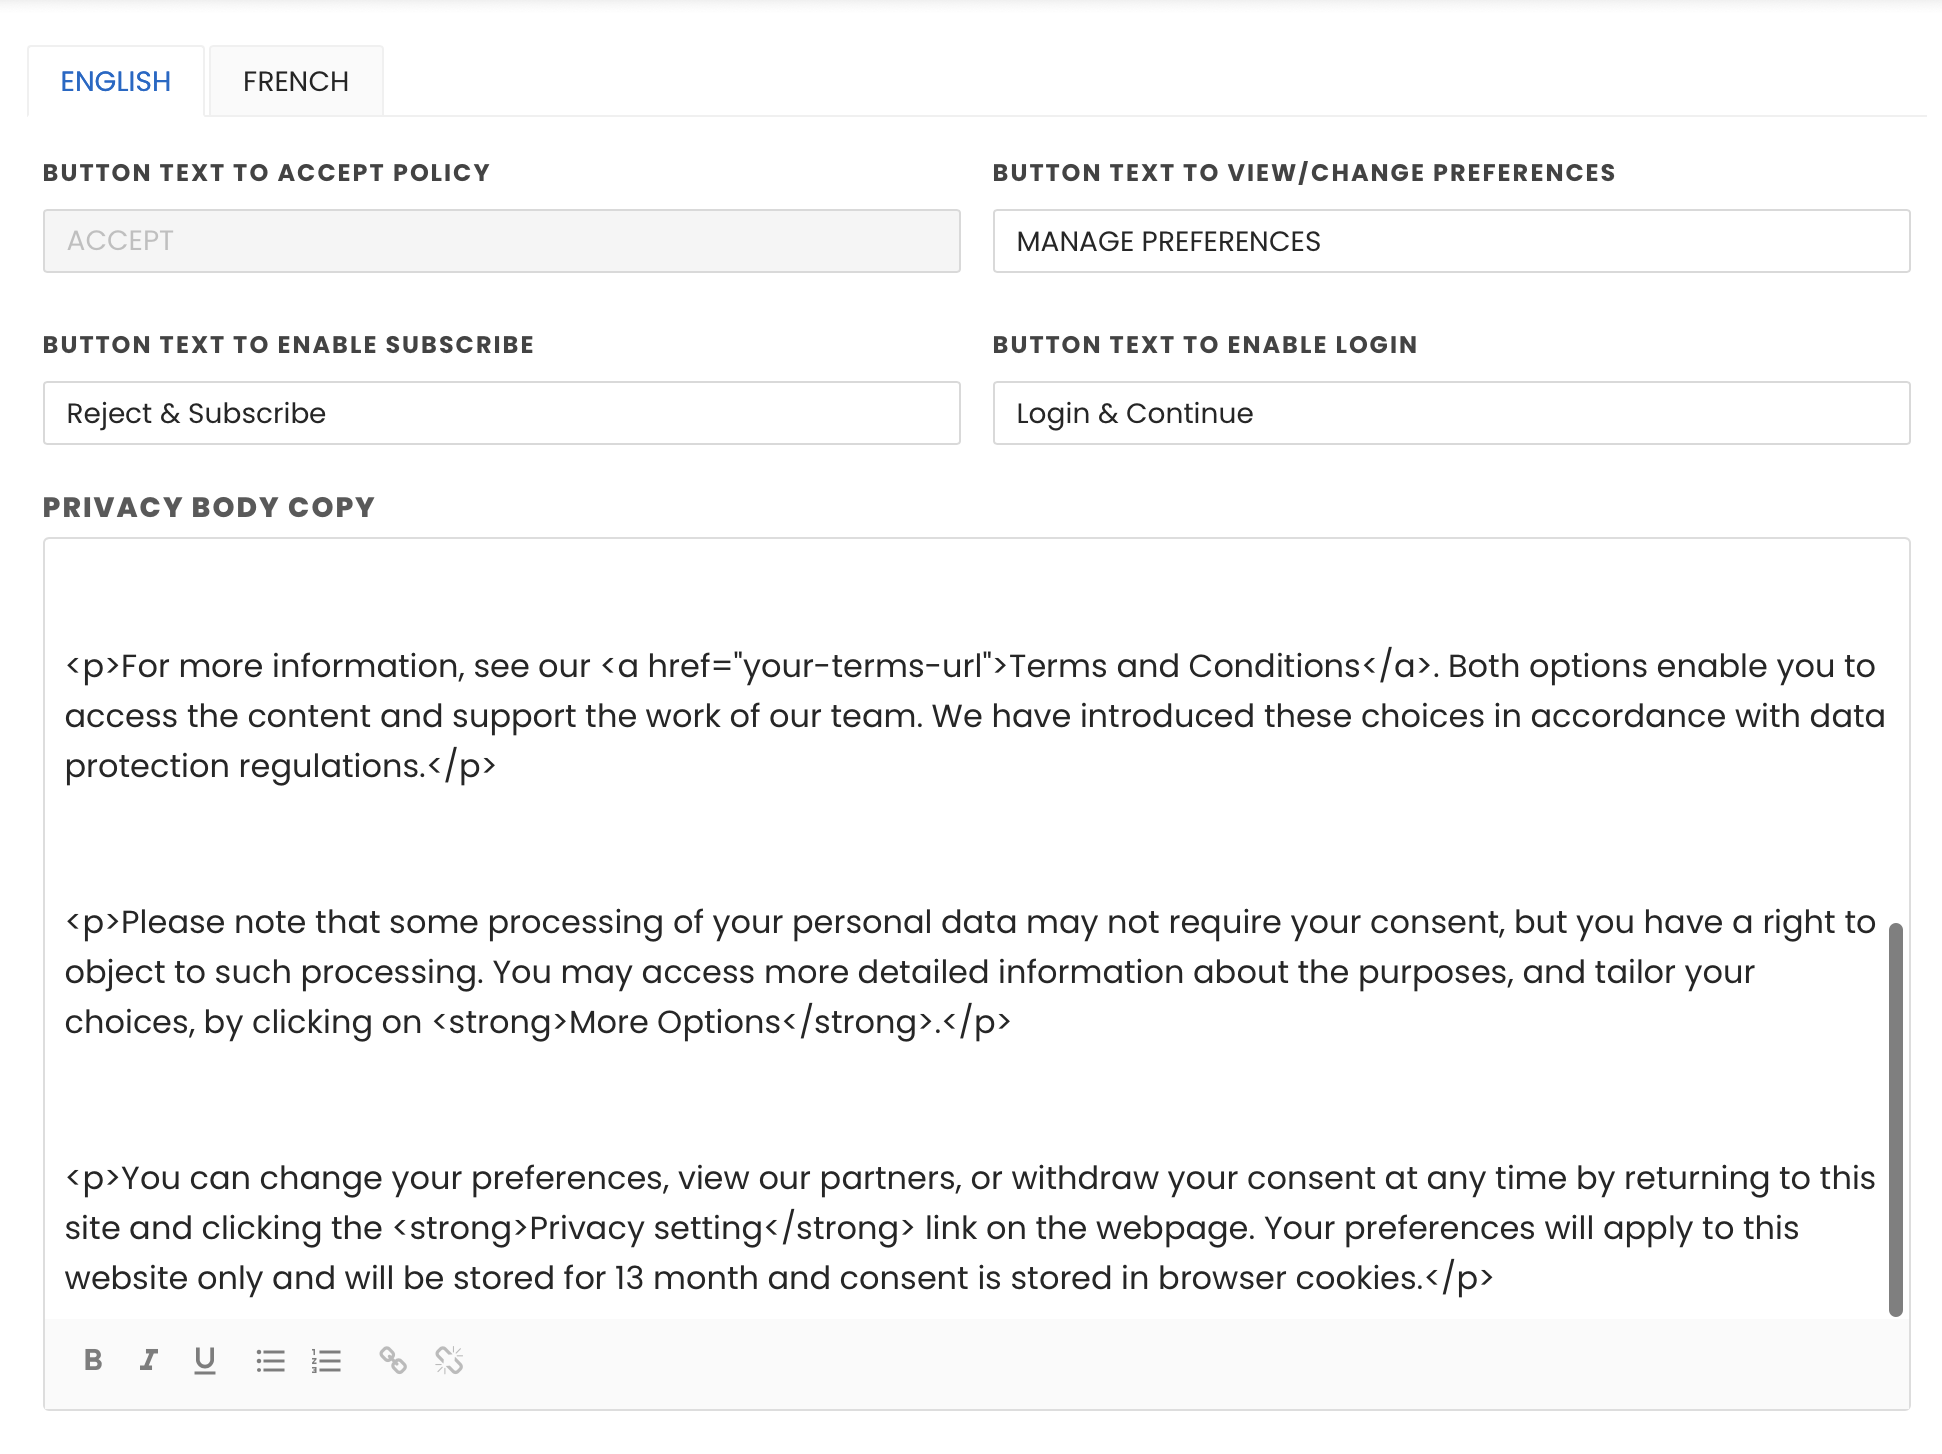
Certain sections of the CMP banner text (L1, L2, L3, and L4) must remain unchanged to ensure compliance with IAB-TCF guidelines. However, you can add content before, after, or between these sections without requiring approval. If you attempt to edit these sections, a structured review request process will be triggered to ensure flexibility for you to have desired content but as per IAB guidelines.
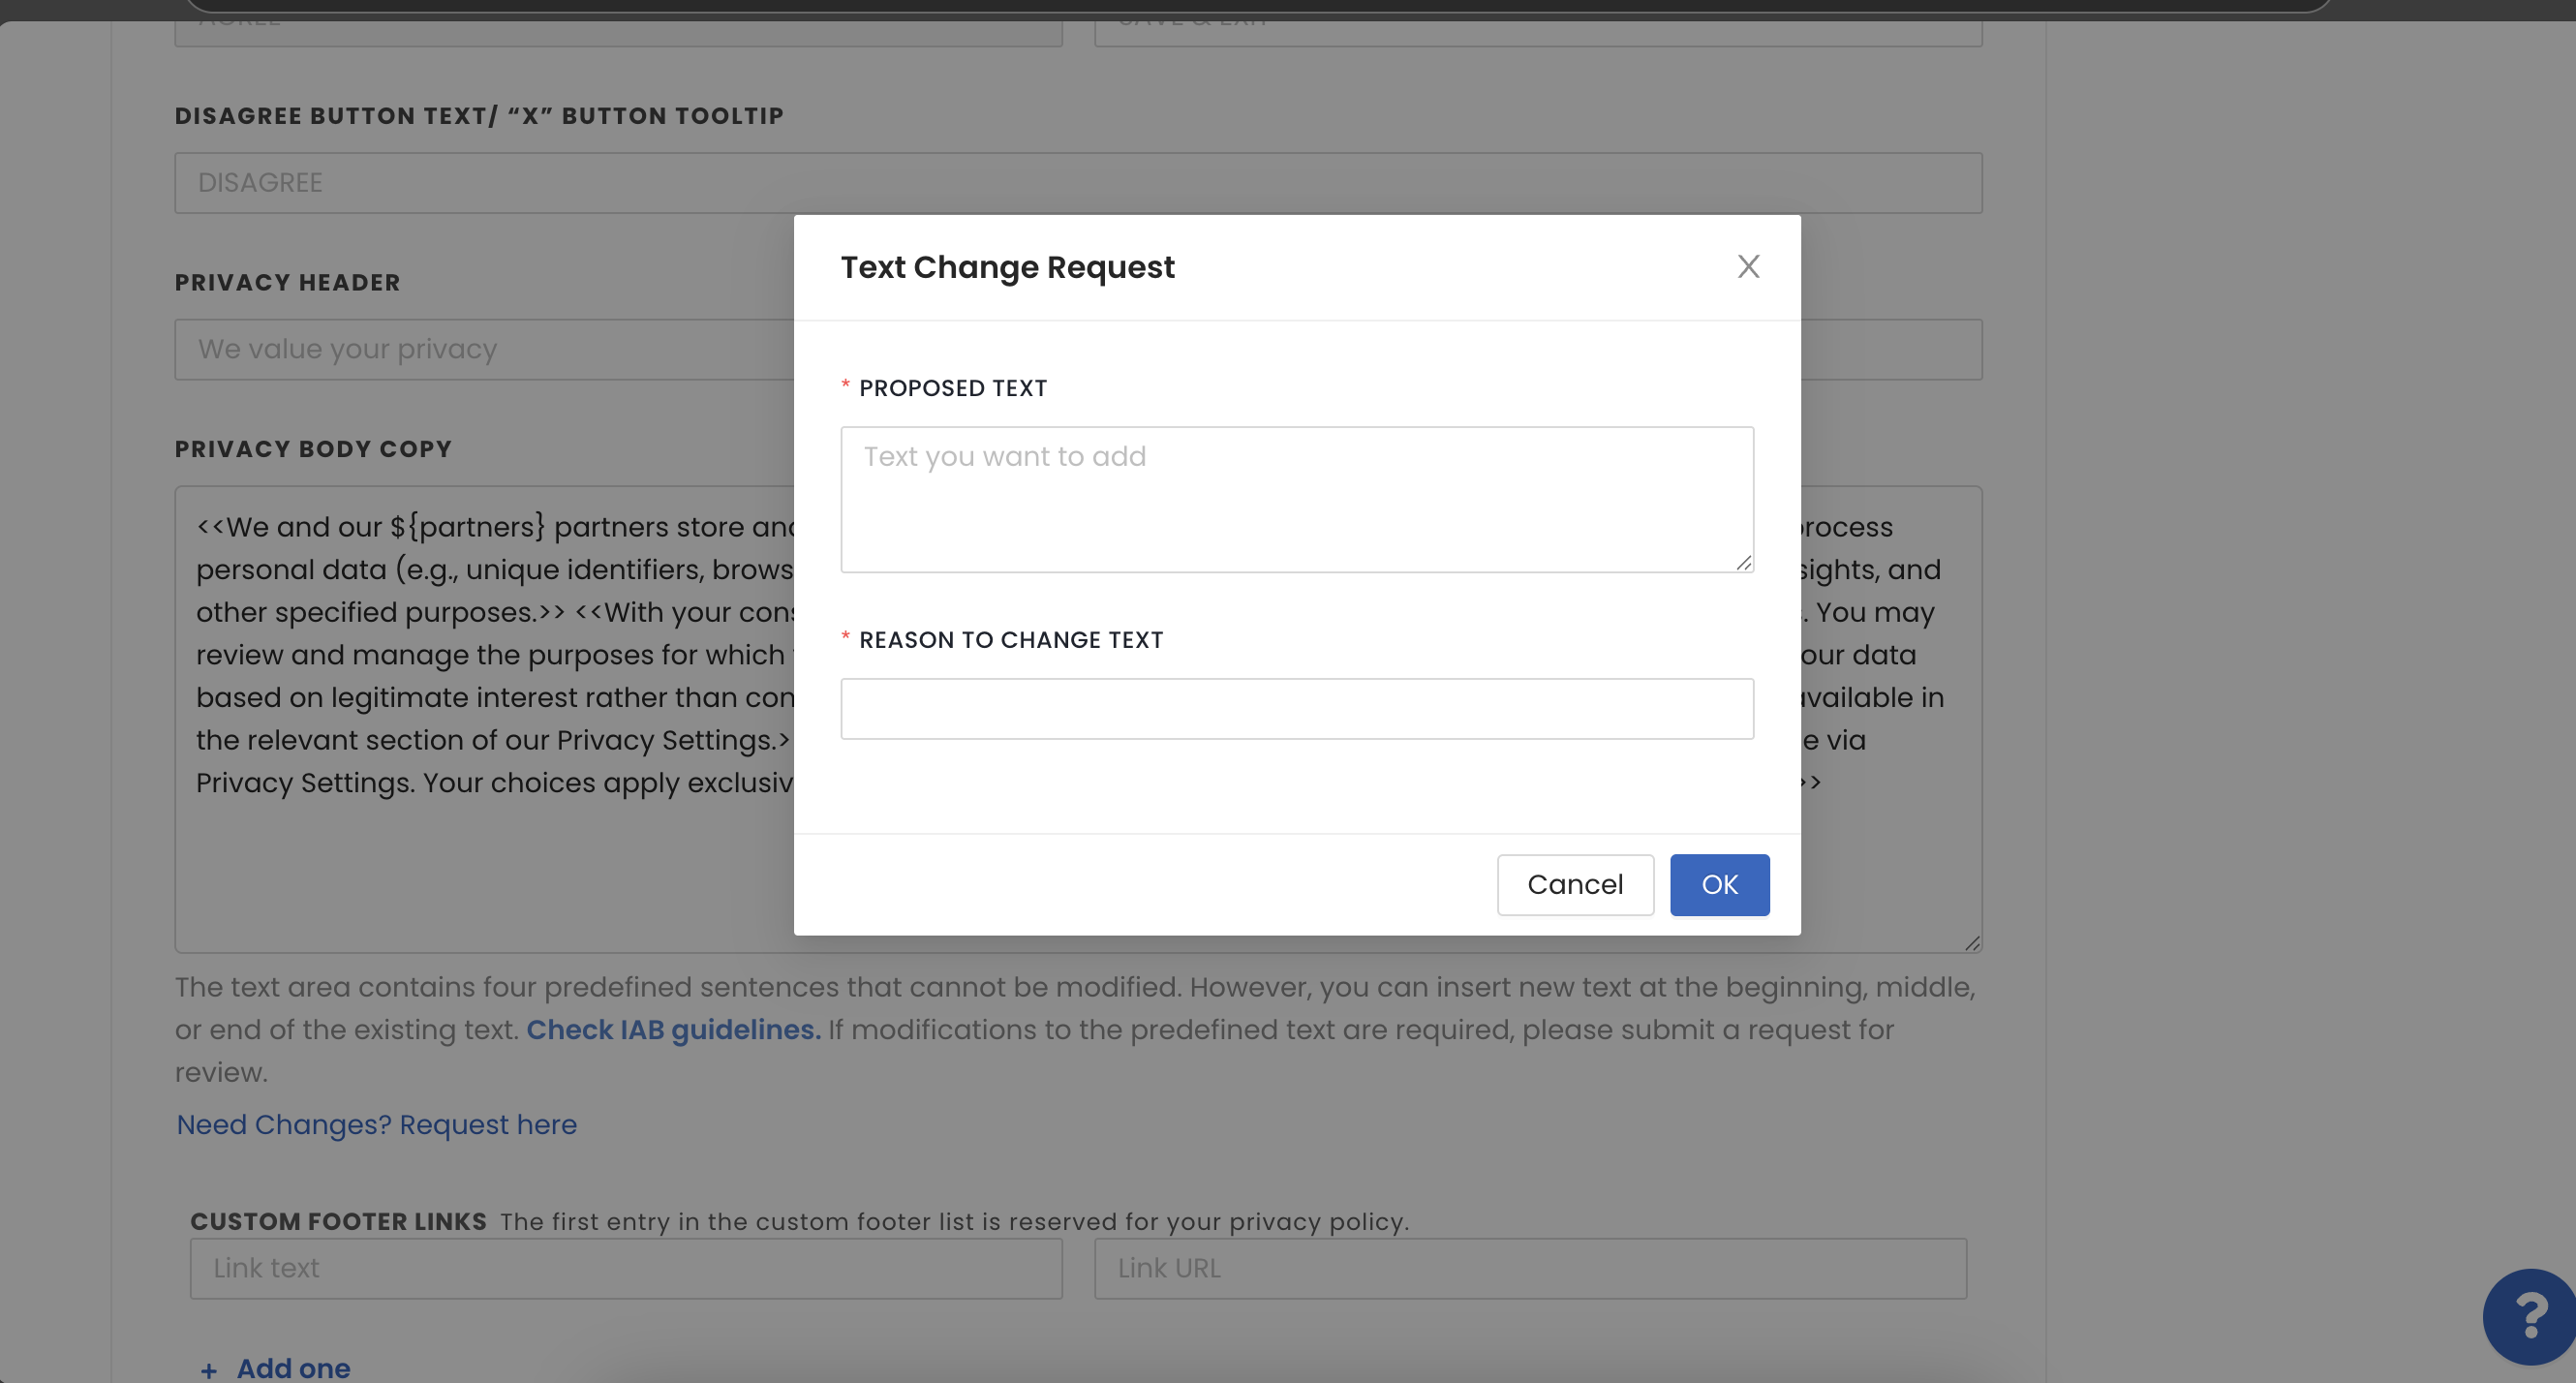
Once the request is raised:
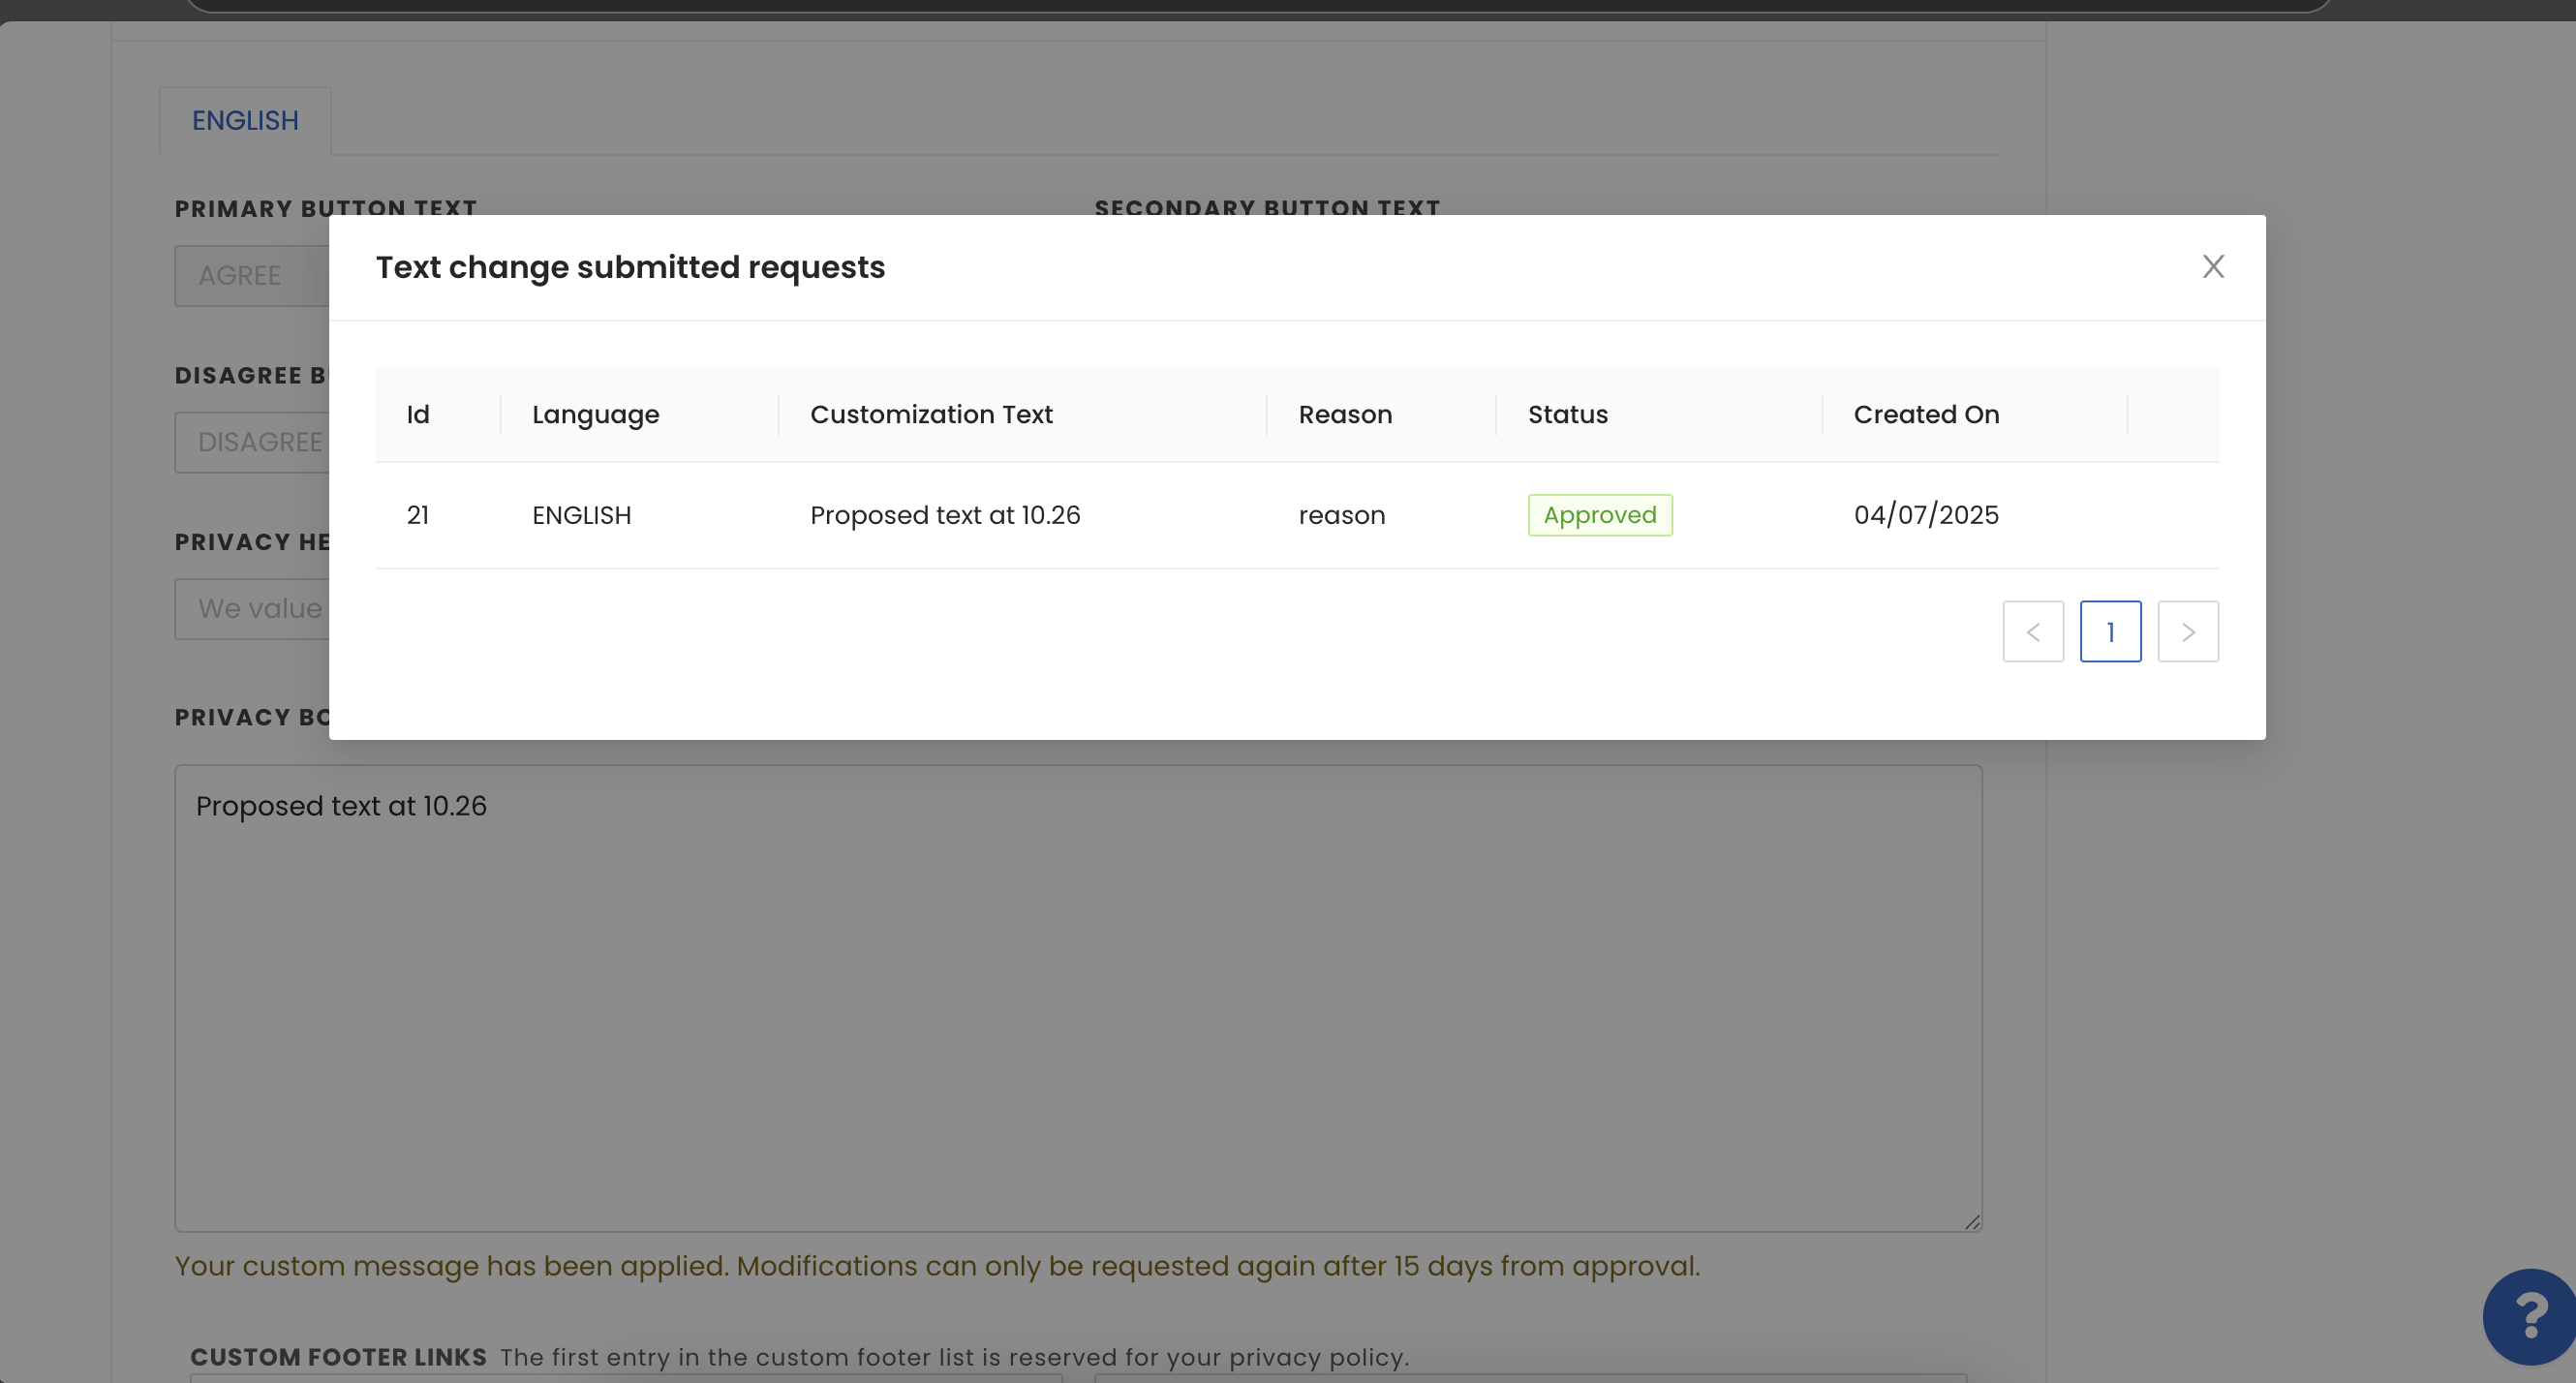


For Android implementation and SDK-related changes, see Android.
For iOS implementation and SDK-related changes, see iOS.
For Web APIs, see Handling Consent APIs.
This document details the APIs to enable Consent or Pay on your app or website.
ChoiceCmp.setUserSubscriptionStatus(SUBSCRIPTION_STATE)
ChoiceCmp.setUserSubscriptionStatus(SUBSCRIPTION_STATE);
We recommend you use this API:
onActionButtonClicked will be triggered when the user clicks any of the Action buttons. The parameter actionButton will contain the info about whether it’s ActionButton1 or ActionButton2.
override fun onActionButtonClicked(actionButton: ActionButton) {
   /* code */
}
@Override
public void onActionButtonClicked(@NonNull ActionButton actionButton) {
    // code
}
Ensure consent or pay is enabled in the portal and applicable for the country. To know more about Consent or Pay, see Overview.
[[ChoiceCmp shared] setUserLoginOrSubscriptionStatus:(BOOL)];
ChoiceCmp.shared.setUserLoginOrSubscriptionStatus(Bool)
This API is recommended to be used:
startChoice API).
- (BOOL)application:(UIApplication *)application didFinishLaunchingWithOptions:(NSDictionary *)launchOptions {
    // Initialise InMobiCMP
    [[ChoiceCmp shared] setUserLoginOrSubscriptionStatus:true];
    [self startChoice];
    return YES;
}
@main
class AppDelegate: UIResponder, UIApplicationDelegate, ChoiceCmpDelegate, CCPADelegate {
    func application(_ application: UIApplication, didFinishLaunchingWithOptions launchOptions: [UIApplication.LaunchOptionsKey: Any]?) -> Bool {
        ChoiceCmp.shared.setUserLoginOrSubscriptionStatus(true)
        ChoiceCmp.shared.startChoice(pcode: "< YOUR PCODE >", delegate: self)
        return true
    }
}
ActionButtons update.
(void) didReceiveActionButtonTapWithAction:(enum ActionButtons)action {
  switch (action) {
    case ActionButtonsAction1:
    // Your implementation here..
    break;

    case ActionButtonsAction2:
    // Your implementation here..
    break;

    default:
    break;
    }
}
func didReceiveActionButtonTap(action: ActionButtons) {
  switch action {
    case .action1:
    // Your implementation here..

    case .action2:
    // Your implementation here..
    }
   }
didReceiveActionButtonTap will be triggered when the user clicks any of the Action buttons. The parameter actionButton will contain the info about whether it’s ActionButton1 or ActionButton2.
(void) didReceiveActionButtonTapWithAction:(enum ActionButtons)action {
  switch (action) {
    case ActionButtonsAction1:
    // Your implementation here..
    break;

    case ActionButtonsAction2:
    // Your implementation here..
    break;

    default:
    break;
    }
}
func didReceiveActionButtonTap(action: ActionButtons) {
  switch action {
    case .action1:
    // Your implementation here..

    case .action2:
    // Your implementation here..
    }
   }
If the user has consent or pay enabled, moves to more options screen, then rejects all the consents, and then saves and exits, it will be treated as action button 1 press, and the same delegate will be called with ActionButton value as action1.
To indicate whether the user is subscribed, the publisher can set a JavaScript variable in the global window object. This can be used by the Consent Management Platform (CMP) to determine whether or not to display the consent popup.
window.__user_status = 'subscribed';
window.__user_status = 'subscribed'; when a user is confirmed to be subscribed.window.__user_status === 'subscribed'), the CMP skips the consent popup display.The Advanced Customisation page allows publishers to tailor the text of their consent banners. All edits made in this section must comply with IAB standards and are subject to the CMP approval process before going live.

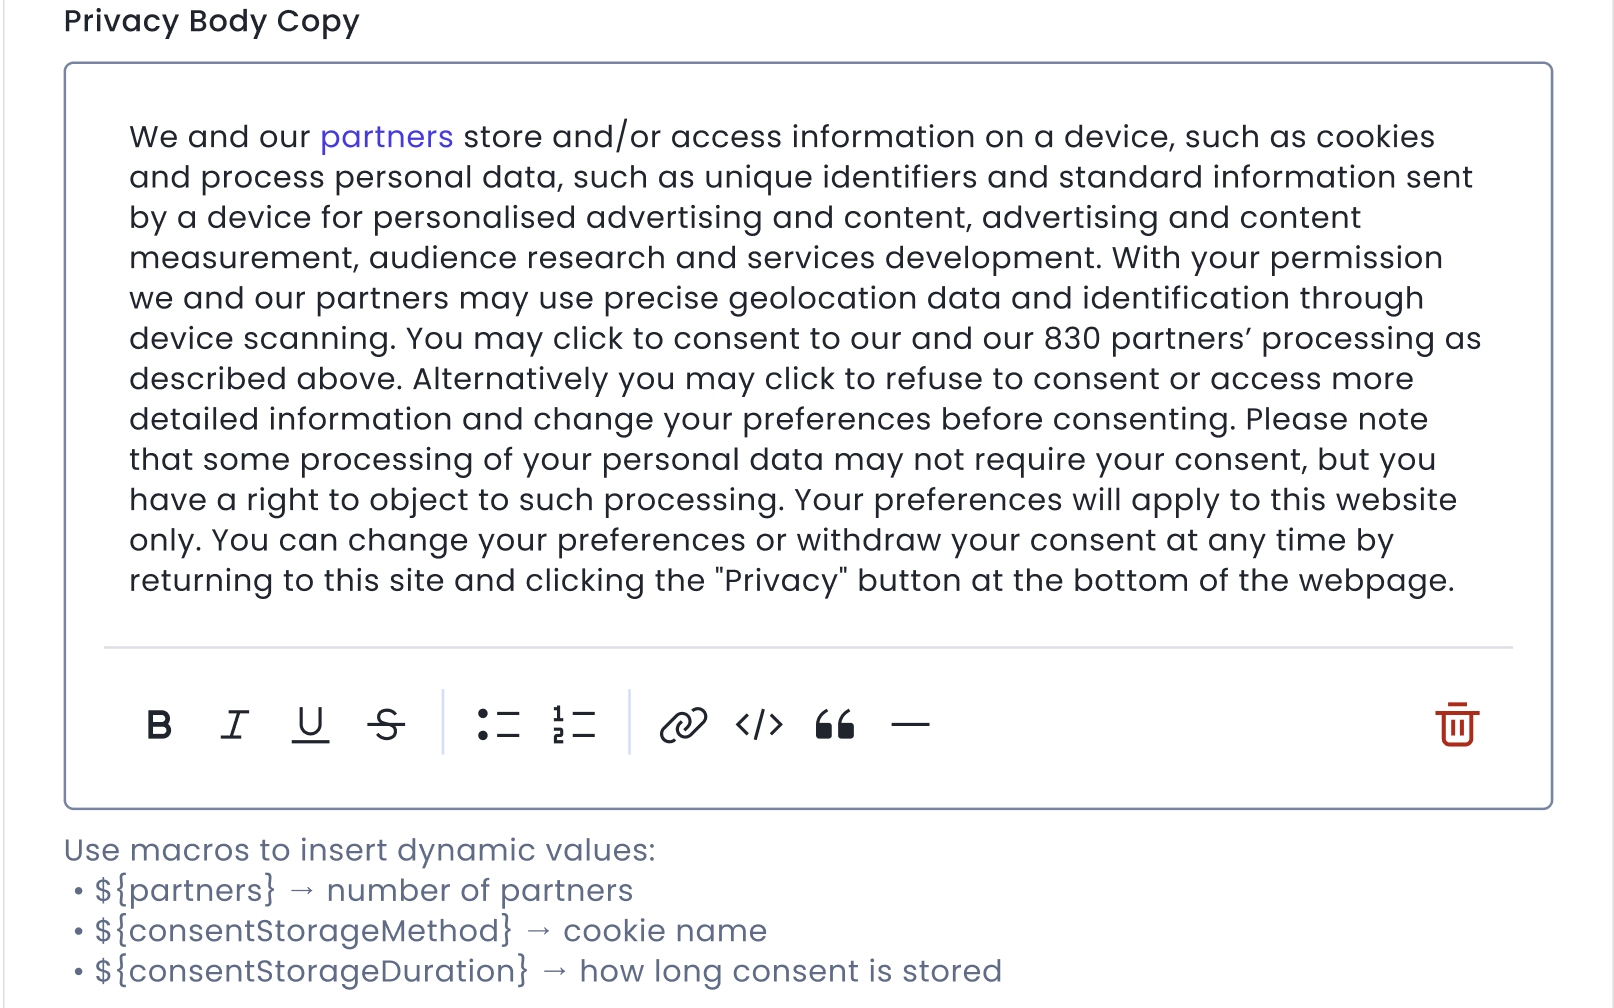
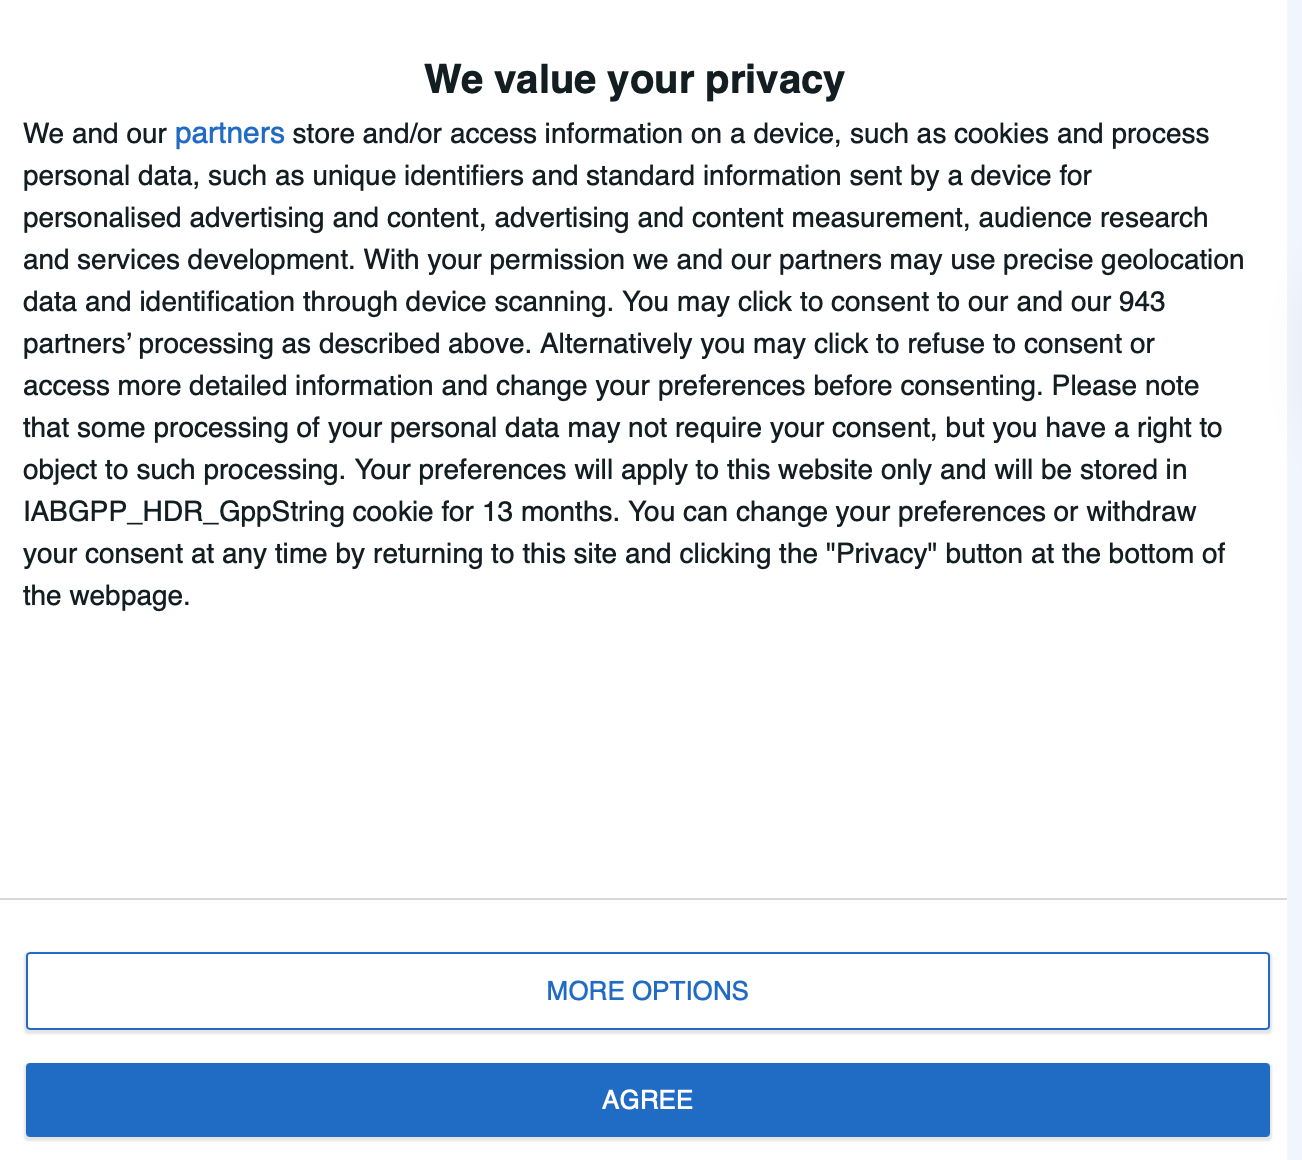
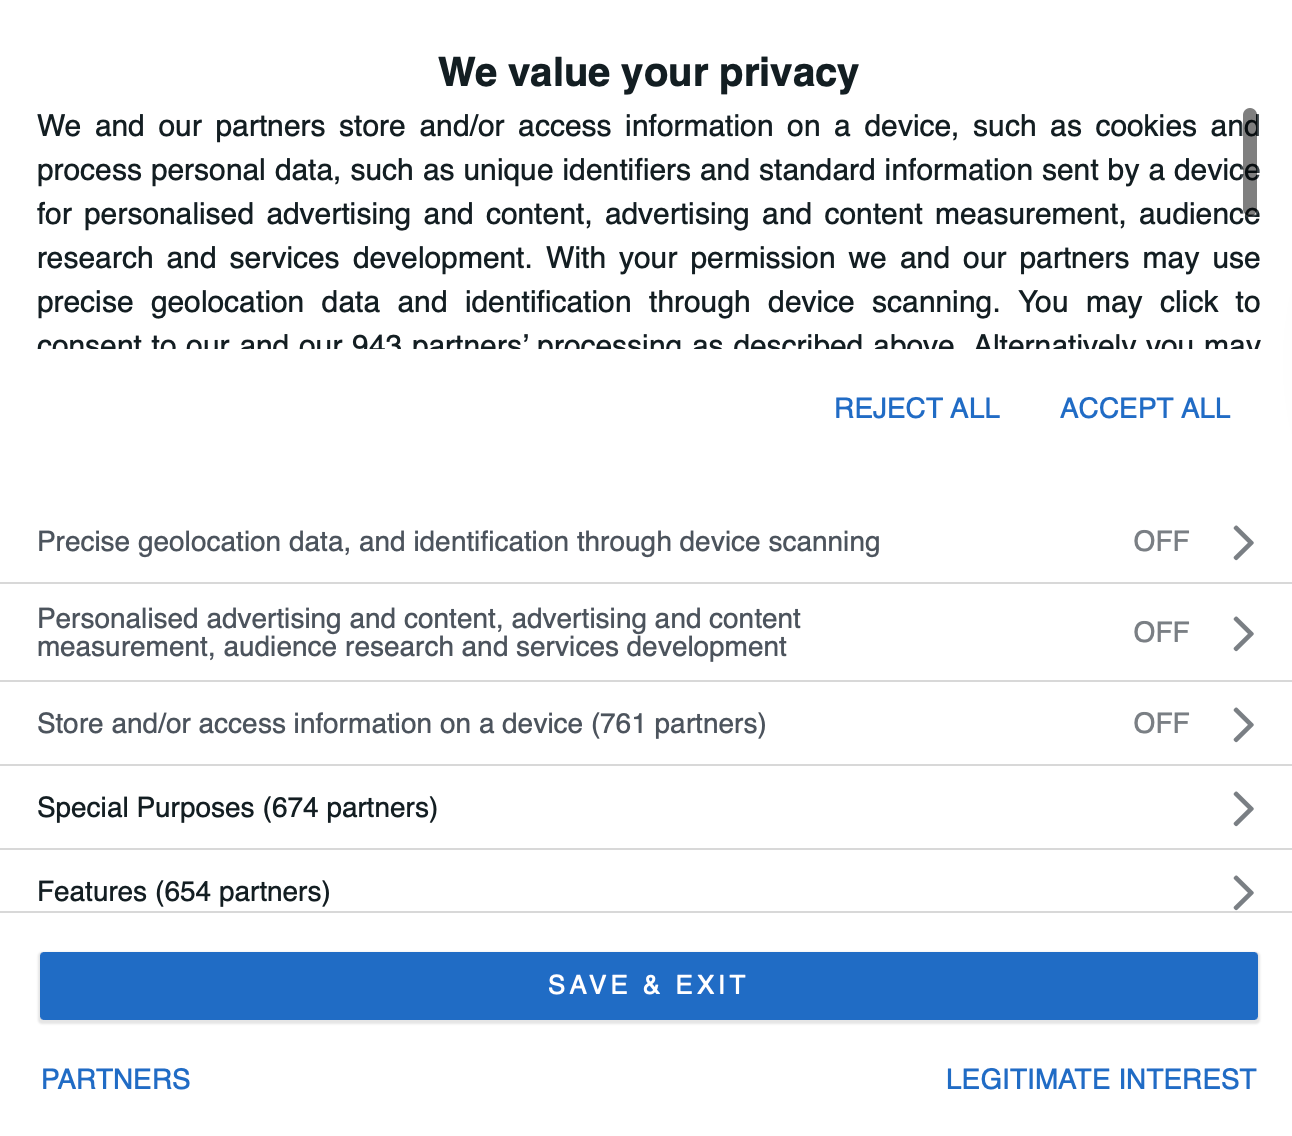
Once the request is raised:
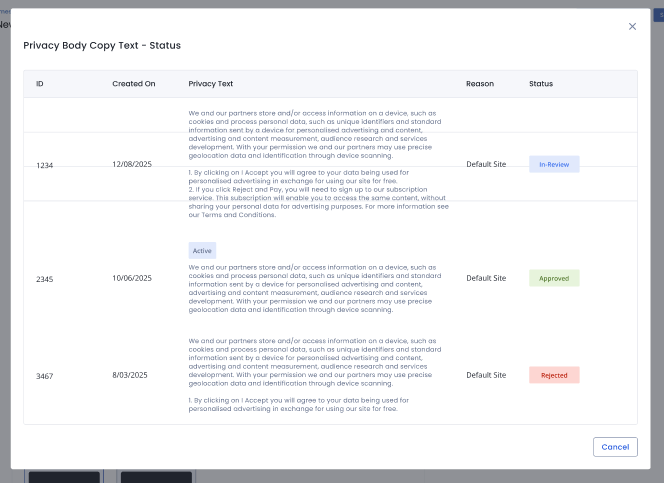

This is a premium feature and will be applied only if a property is premium; else it will default to standard text applied to them/es.
Ads.txt (Authorized Digital Sellers) is an IAB Tech Lab initiative. It is a simple, flexible, and secure method that you can use to publicly declare the companies you authorize to sell your digital inventory.
During the real-time bidding process, the ad monetization space saw fraud in ad inventory offered to buyers with a misrepresented label and account. Typically, the webpage's domain, or the mobile app's ID, has been falsified to look like a site or app they do not have authorization to sell. Ads.txt and App-ads.txt enable buyers to spend only programmatic dollars through channels explicitly trusted and authorized by the originating publisher.
Create your ads.txt file using the following file format and data record:
Data encoding details:
| Field | Name | Mandatory/Optional | Description |
|---|---|---|---|
| Field #1 | Domain name of the advertising system | Mandatory | The canonical domain name of the SSP, Exchange, Header Wrapper, and so on that bidders connect to. |
| Field #2 | Publisher’s Account ID | Mandatory | The identifier associated with the seller or reseller account within the advertising system in field #1. |
| Field #3 | Type of Account/Relationship | Mandatory | Indicates the type of account. ‘DIRECT’ indicates that the Publisher directly controls the account. This means a direct business contract between the Publisher and the advertising system. ‘RESELLER’ indicates that the Publisher has authorized another entity to control their account and resell their ad space. |
| Field #4 | Certification Authority ID | Optional | An ID that uniquely identifies the advertising system within a certification authority (this ID maps to the entity listed in field #1). |
For the ads.txt setup, you must ensure to:
After the maximum line entries, you must include details about the Direct or Reseller Apps to simplify the process of managing both direct and reseller inventory.
Ensure you add the "direct" line only for apps listed under the Direct tab and the "reseller" line only for those under the Reseller tab.
Follow the instructions below to get your personalized ads.txt entries, which include your InMobi payment ID:
InMobi's ads.txt crawler locates your file using the website URL provided for that inventory on the dashboard. Per ads.txt specs, the crawler checks the file at:
Determine the hostname from your website URL. It's the website's root domain, as explained below.
Refer to the table for examples where the InMobi crawler checks for an ads.txt file based on different website root domains.
| If the website is: | Crawler looks in the following order: |
|---|---|
| https://example.com/game | https://example.com/ads.txt http://example.com/ads.txt |
| http://help.example.com/game | https://example.com/ads.txt http://example.com/ads.txt |
The ads.txt specification outlines rules for root domains and subdomains. Crawlers will explore up to five redirections within a root domain and one outside the root domain.
To verify correct publication, ensure the ads.txt URL displays its content when accessed through your web browser. If it is visible in your browser, crawlers will probably locate it successfully.
Ensure the ads.txt is accessible via both HTTP and HTTPS.
Monitor your ads.txt files in your InMobi account:
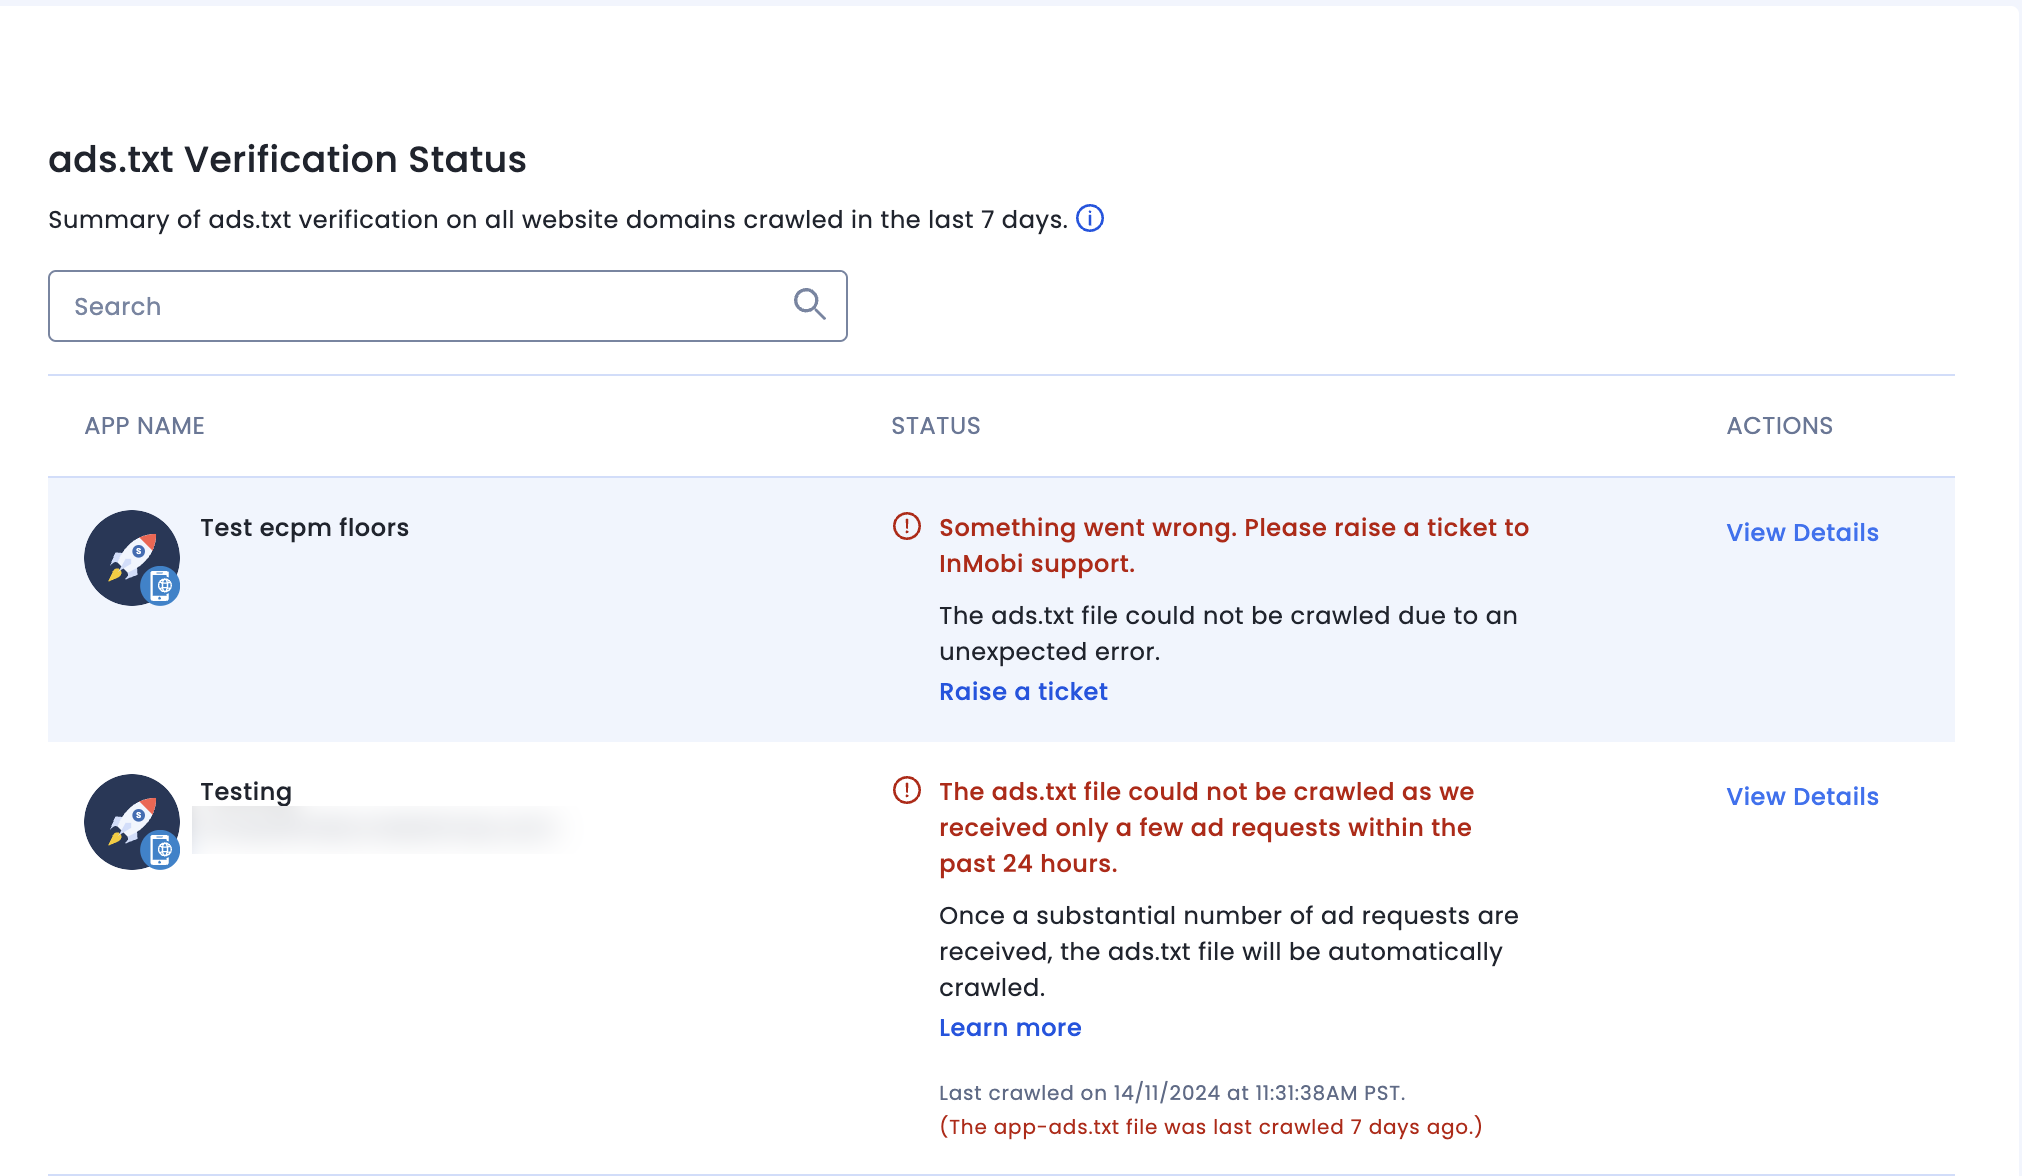
If your file wasn't located or verified, review the details in your InMobi account or explore troubleshooting tips for ads.txt issues.
If you've recently updated your ads.txt file, it may take at least 24 hours for the crawler to display the latest verification status.
Upon creating your account on InMobi and establishing your inventory, access the verification status through Inventory >> ads.txt. Activation of the InMobi crawler occurs once any of the added apps has generated 10 thousand bid requests.
| Verification Status | Action Required |
|---|---|
| X of X sellers are authorized. The ads.txt file is found and verified. InMobi crawled and verified your ads.txt file. |
No action needed |
| X-Y of X sellers are authorized. Please include the missing seller entries in your ads.txt file to sell inventory with all of InMobi’s authorized sellers. |
Please include the missing seller entries in your ads.txt file to sell inventory with all of InMobi’s authorized sellers. Ads.txt helps prevent ad fraud by making it harder for malicious actors to sell fake ad inventory. Most buyers verify whether the reseller is legitimate and may reject the ad request if the reseller ID is missing in the website's ads.txt file. |
| 0 of X sellers are authorized. Please include the missing seller entries in your ads.txt file to avoid unintentional revenue loss. |
Please include the missing seller entries in your ads.txt file to avoid unintentional revenue loss. Ads.txt helps prevent ad fraud by making it harder for malicious actors to sell fake ad inventory. Most buyers verify whether the reseller is legitimate and may reject the ad request if the reseller ID is missing in the website's ads.txt file. |
| The redirection URL did not respond properly. Please ensure that the redirection URL is working properly and the ads.txt file is reachable from root domain. Please ensure that the format of the headers in the response is correct and the response is sent within 1.5 sec. |
The redirection URL did not respond properly. Ensure that the redirection URL is working properly and the ads.txt file is reachable from root domain. Ensure that the format of the headers in the response is correct and the response is sent within 1.5 sec. |
| File not found, the URL responded with invalid MIME type. The URL responded with an unsupported MIME type in the header. Please verify that the ‘content-type’ key in header contains ‘text/plain’ as part of it's value. |
The URL responded with invalid MIME type. The redirection URL responded with headers in incorrect format. This issue generally happens when the header (i.e., Content-Type) for any 200 OK response doesn’t contains text/plain As a resolution, please check the headers being returned in response to contain Content-Type one of a headers which returns text/plain as a value for this header. |
| The ads.txt file was not found because it uses too many redirects. The IAB recommends no more than five redirects from the ads.txt page on the root domain. (Example: domain.com/ads.txt) Please move the ads.txt file to within five redirects from domain.com/ads.txt. |
InMobi crawler supports upto 5 redirections within the root domain and upto 1 redirection outside the root domain. Check the number of redirections happening from the initial URL. Ensure that your web server hosts your ads.txt file or redirects to the correct location when you enter the ads.txt URL shown in your InMobi account. The ads.txt URL shown in your account is the URL InMobi uses to find your file. |
| The ads.txt file was not found because it uses too many redirects away from the root domain. ads.txt files are typically hosted on the root domain. (Example: domain.com/ads.txt) However, redirects can be common. IAB recommends no more than one redirect away from the root domain. Please move the ads.txt file to within one redirect from domain.com/ads.txt. |
InMobi crawler supports upto 5 redirections within the root domain and upto 1 redirection outside the root domain. Check the number of redirections happening from the initial URL. Ensure that your web server hosts your ads.txt file or redirects to the correct location when you enter the ads.txt URL shown in your InMobi account. The ads.txt URL shown in your account is the URL InMobi uses to find your file. |
|
An ads.txt file was not found on the root domain. Please ensure the ads.txt file is hosted in the correct place on your root domain and setup as per InMobi’s guidelines. Example: https://yourwebsite.com/ads.txt |
This usually resembles to a situation when InMobi crawler gets 200 OK response upon crawling, but the body of the response is empty.
Note: If you’ve recently added the ads.txt file in your root domain, allow up to 24 hours for InMobi to detect these changes. The ads.txt crawler is activated only after receiving at least 10,000 bid requests. |
| Something went wrong. Please raise a ticket to InMobi support. The ads.txt file could not be crawled due to an unexpected error. |
Something unexpected happened and the file could not be crawled. Please raise a ticket for InMobi support |
This topic explains GPP, its relevance for publishers to stay compliant with different regulations, and how InMobi Ad Exchange supports GPP through SDK and API integrations.
The Global Privacy Platform (GPP) by the Interactive Advertising Bureau (IAB) is a standardized global framework for managing user consent in digital advertising. For more information, see GPP.
The GPP aims to simplify the conveyance of privacy, consent, and consumer choice signals from websites and applications to ad tech vendors. It empowers advertisers, publishers, and technology vendors to align with regulatory requirements globally.
The GPP centralizes the management of diverse consent signals from various global privacy jurisdictions and additionally accommodates the Global Privacy Control (GPC), a browser-level signal enabling individuals to opt out of information sale or sharing. The GPP currently supports consent strings for the US Privacy and IAB Europe TCF.
The US Privacy String has been deprecated as of April 30, 2024. The legacy US Privacy signal does not support the four US states privacy signals —VA, CO, CT, and UT. For CCPA, only a few of the required consents are supported. In contrast, the new state signals for the other four states will only be supported by the GPP.
InMobi Ad Exchange now supports GPP through InMobi SDK and API integrations.
For SDK integrations, the app can store the GPP strings in Shared Preferences for Android and Managed under the key names for iOS, prescribed by IAB: The key names are : IABGPP_HDR_Version, IABGPP_HDR_Sections, IABGPP_HDR_GppString, IABGPP_GppSID. For more details, see In-App Key Names.
For API integration, you can now send GPP strings via regs → ext → gpp or directly under regs: regs → gpp.
InMobi Performance Solutions offers machine learning-powered end-to-end mobile performance advertising solutions through:
The platform supports managed media buying and trading services, offering features such as ad serving, bidding, user signal enrichment, fraud prevention, brand safety, as well as comprehensive reporting and tracking. These services leverage unified audiences across InMobi’s owned and operated content platform, Glance, along with major ad exchanges like Google Ad Exchange, InMobi Exchange, AppLovin, Unity, Vungle, Digital Turbine, PubMatic, Chartboost, BidMachine, and others.
Glance provides consumer content inventories on the lock screens of popular Android devices, including those from Xiaomi, Realme, Samsung, Vivo, Motorola, and more.
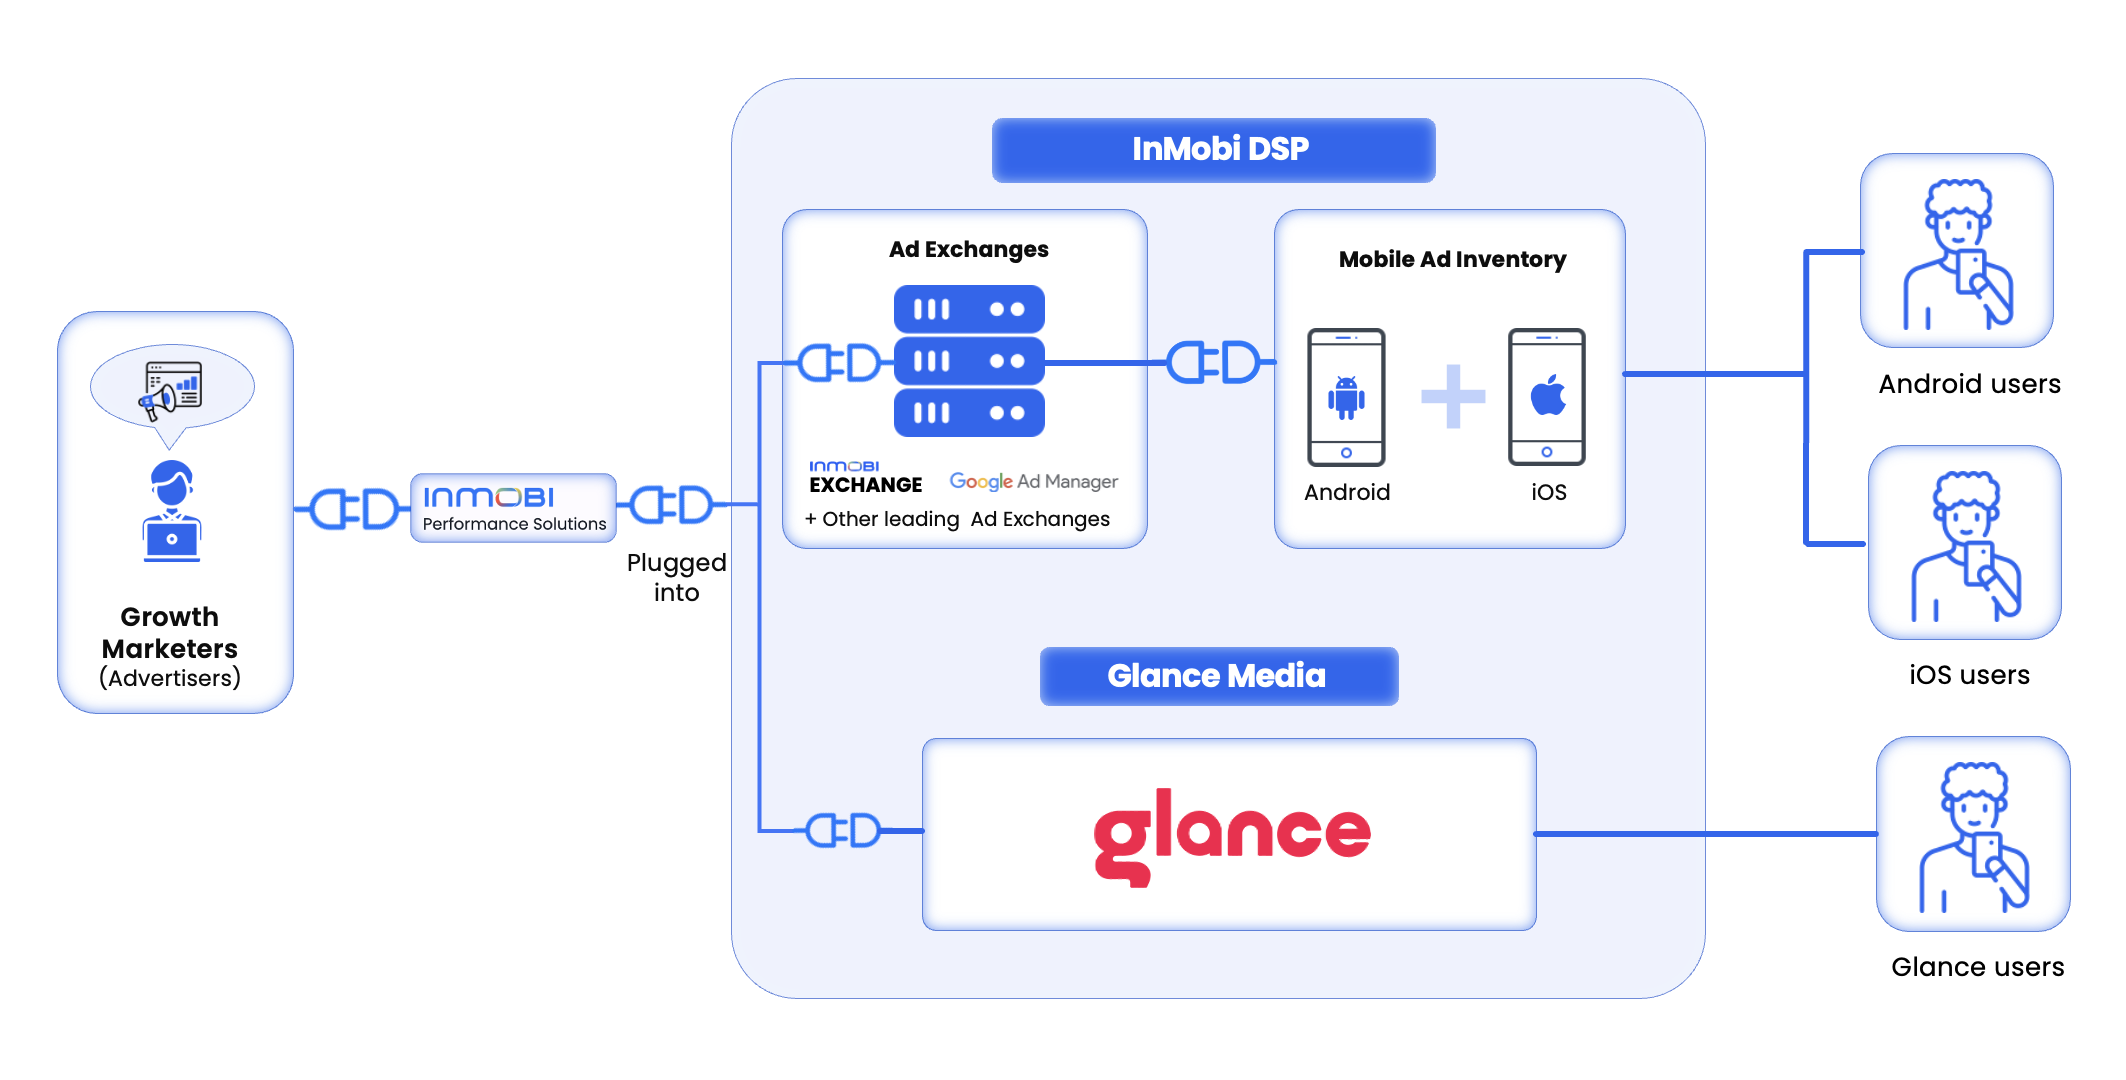
The InMobi DSP supports the latest attribution frameworks, including SKAN, and integrates with leading Mobile Measurement Partners (MMPs) such as AppsFlyer, Adjust, Branch, Kochava, Singular, Airbridge, and Tenjin. Glance also offers integration with top MMPs to enhance attribution accuracy.
In addition, the InMobi DSP provides a reporting dashboard and Cost API integration, allowing you to customize and access reports according to your specific needs.
Glance performance campaigns are currently available in India and Indonesia.
This page offers comprehensive instructions for implementing the InMobi CMP on a website using Google Tag Manager (GTM). This process uses a custom HTML GTM tag and additional GTM variables and triggers/trigger groups. Before finalizing your GTM setup, complete the site and consent configurations.
Importing the GTM InMobi Choice TCFv2 container is the most reliable way to add the custom HTML tag, all of the necessary variables, and sample triggers you can use to configure your container for consent management easily.
Download the GTM Container Import - Tag and Variables. Store it in a local directory on your computer.
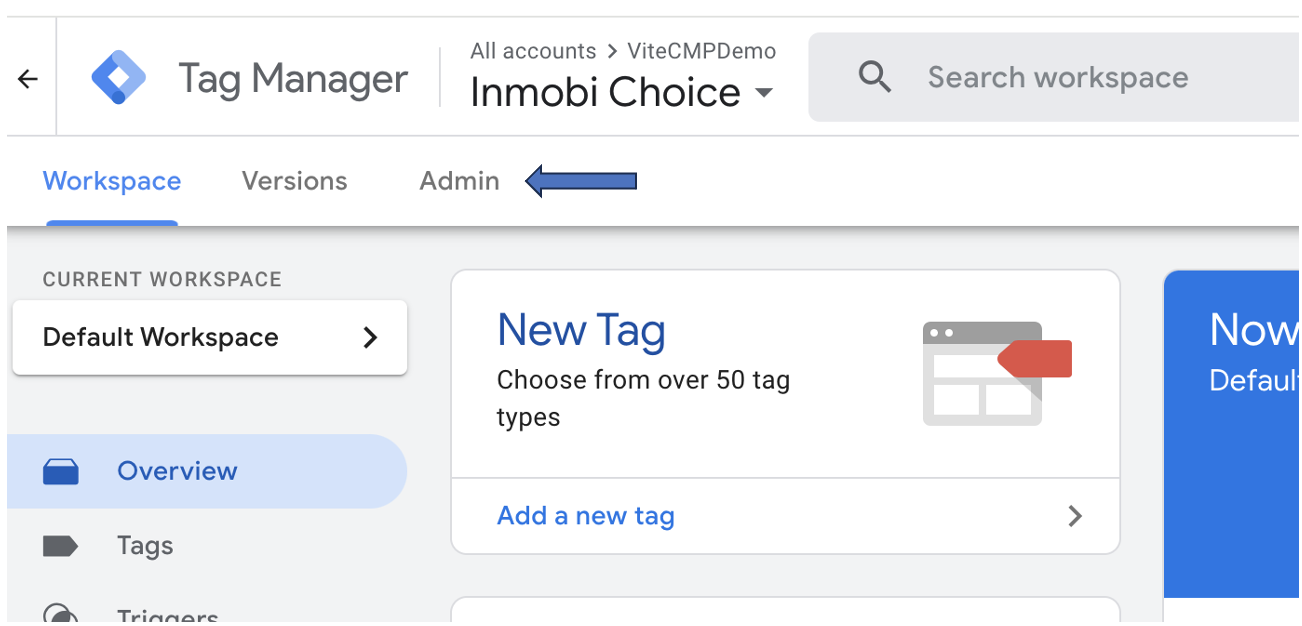
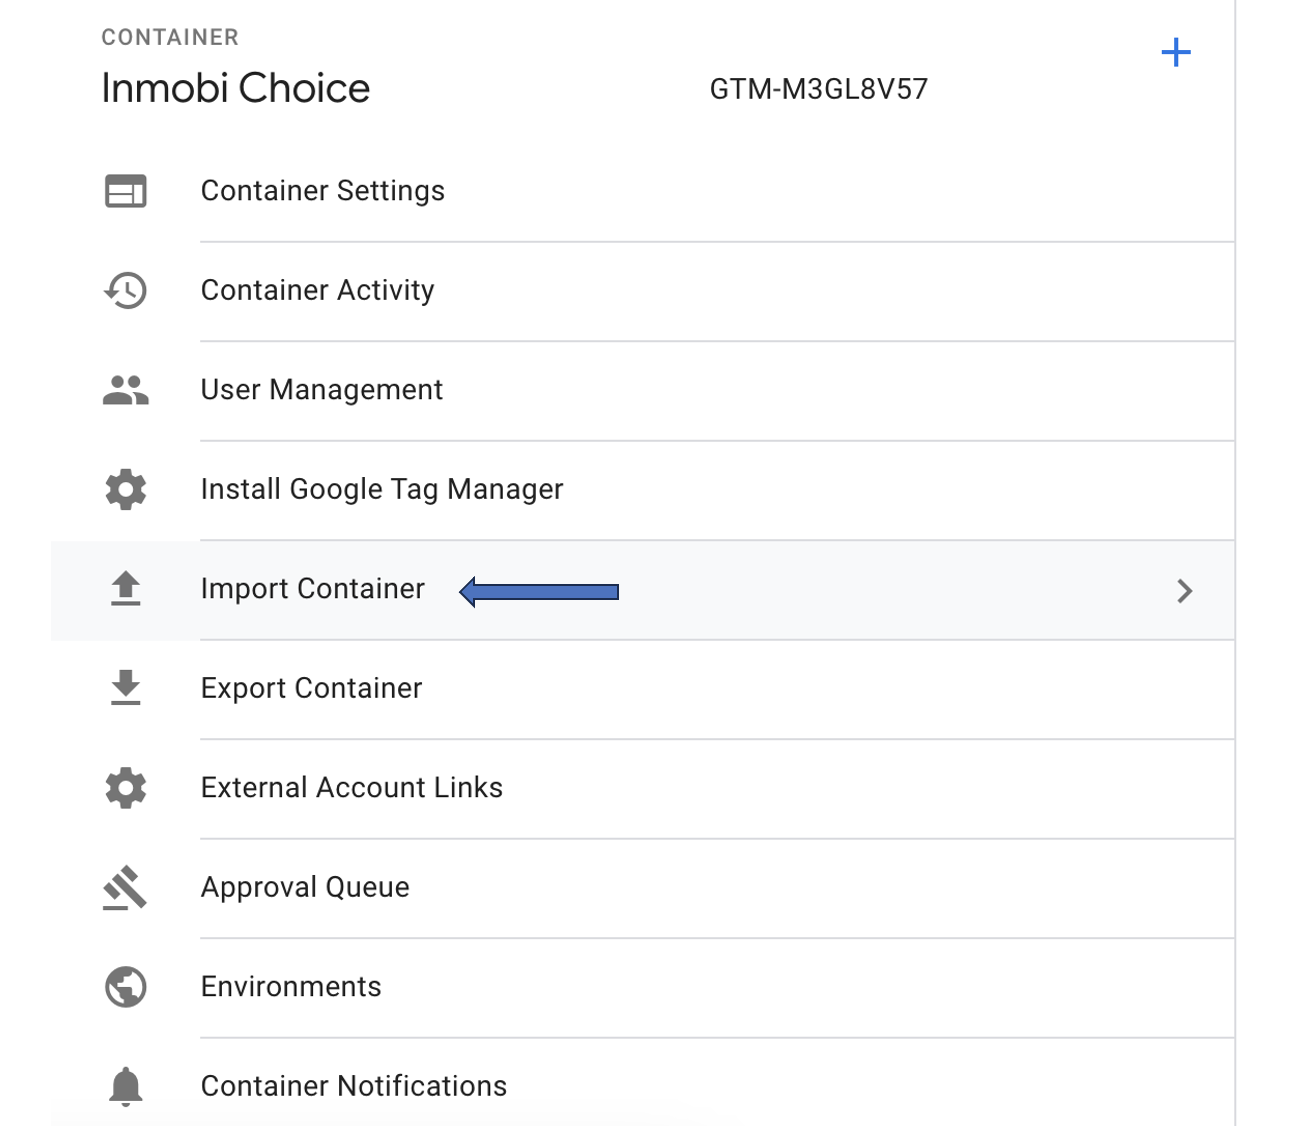
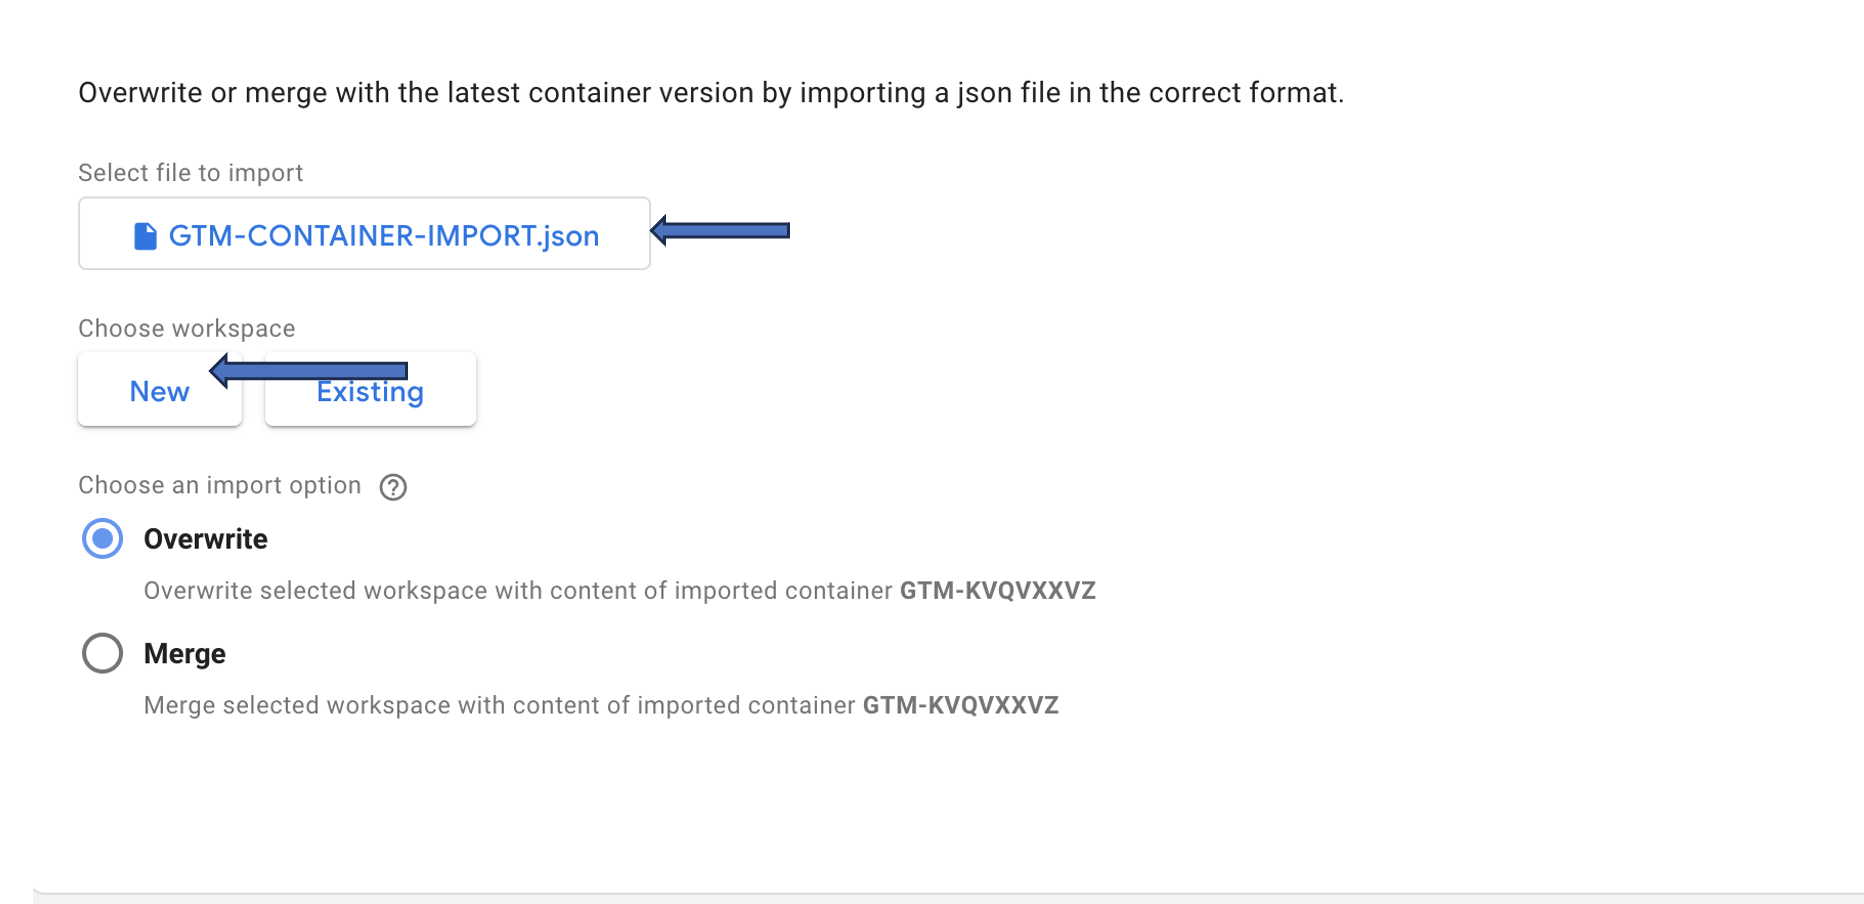
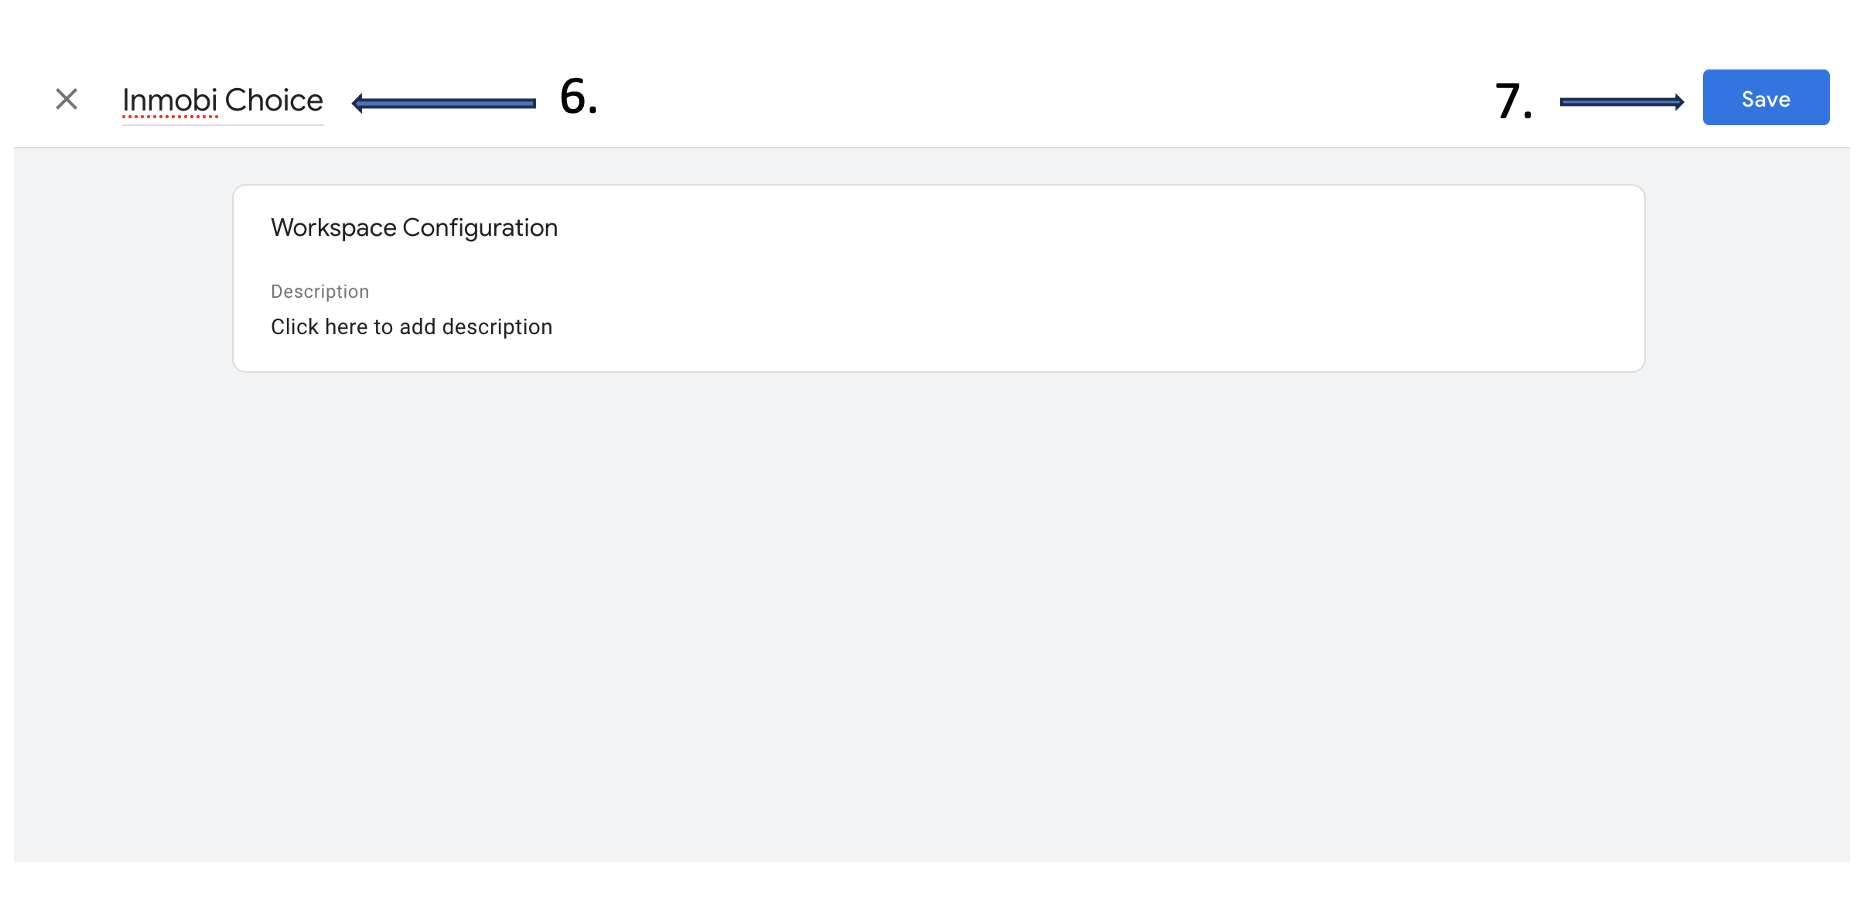
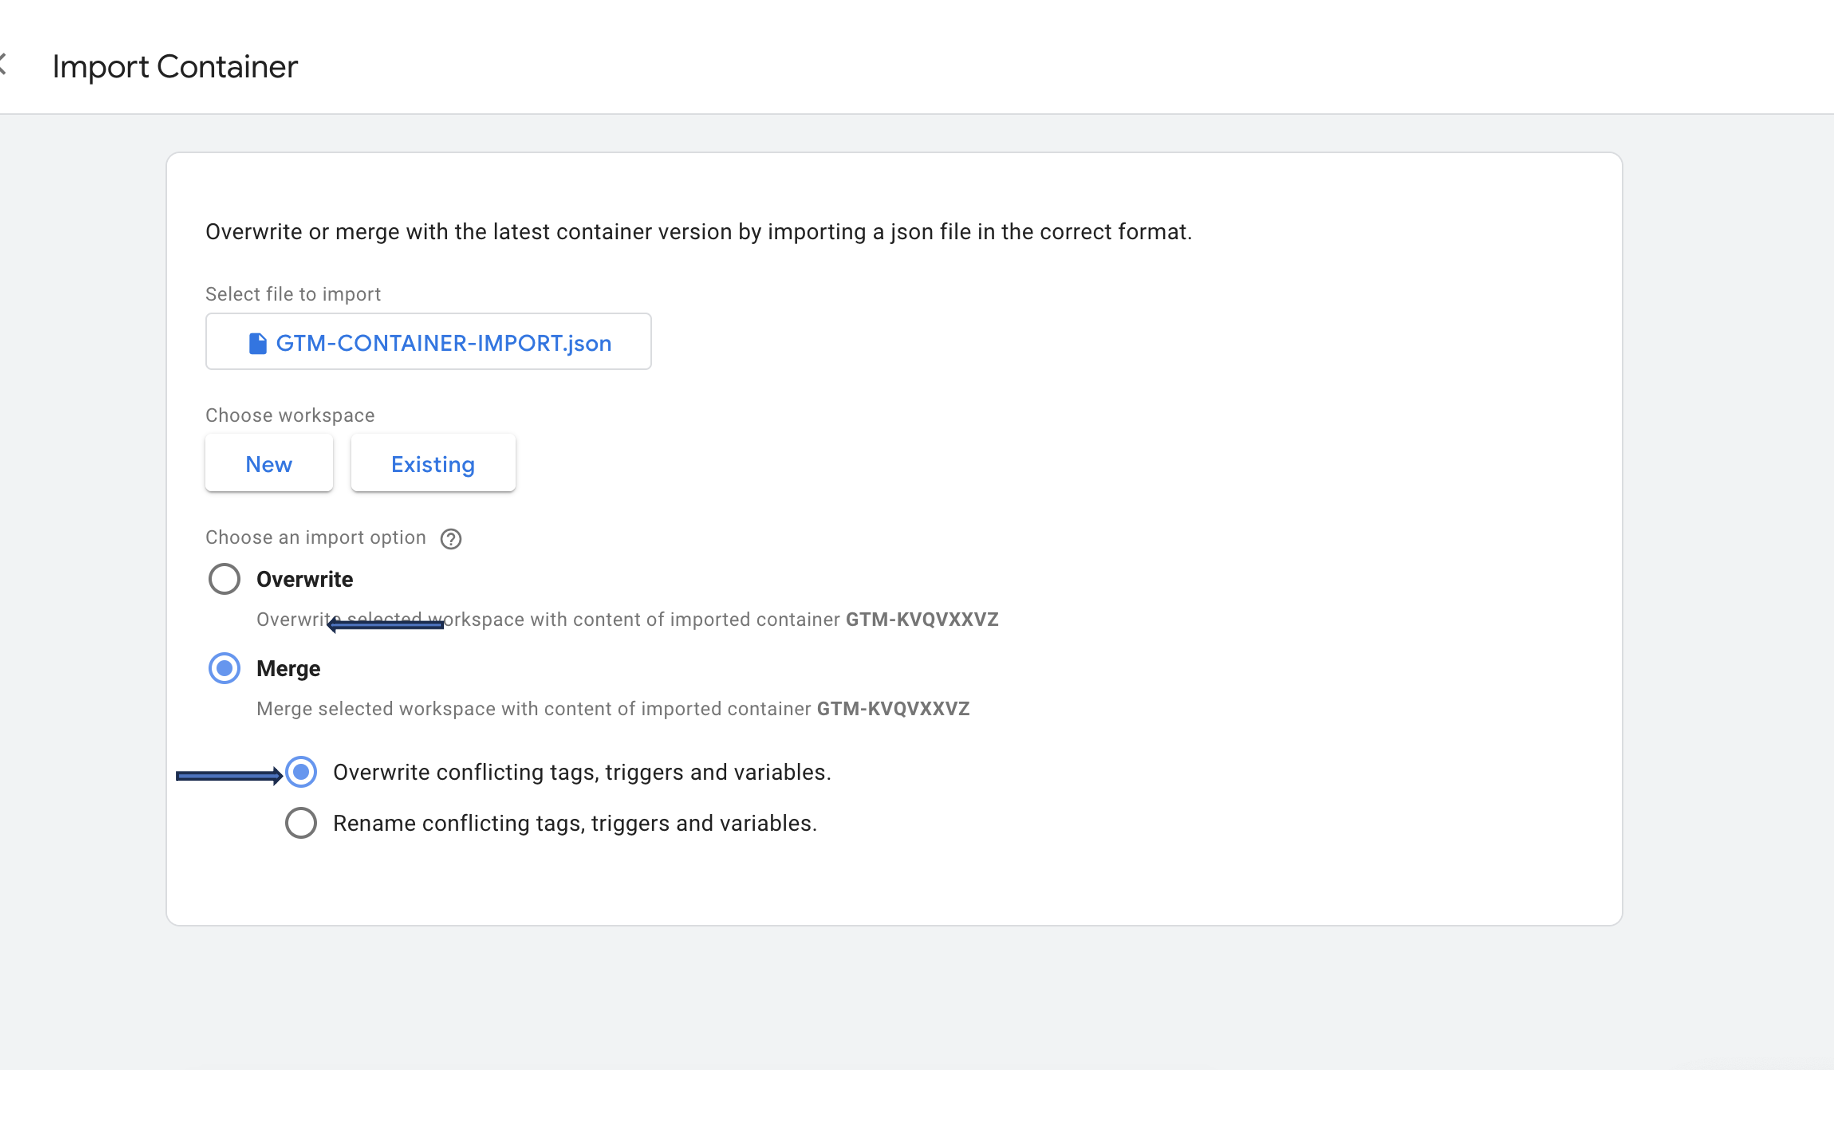
You have now added all the necessary tags, triggers, and variables to get you started. You will have to configure some variables, and you will have to create new triggers to enable consent management in the container. The next chapter will explain this process in more detail.
Here are the steps you need to take to configure the InMobi CMP web tag, and to create and modify the triggers and variables you’ll need for the integration to work.
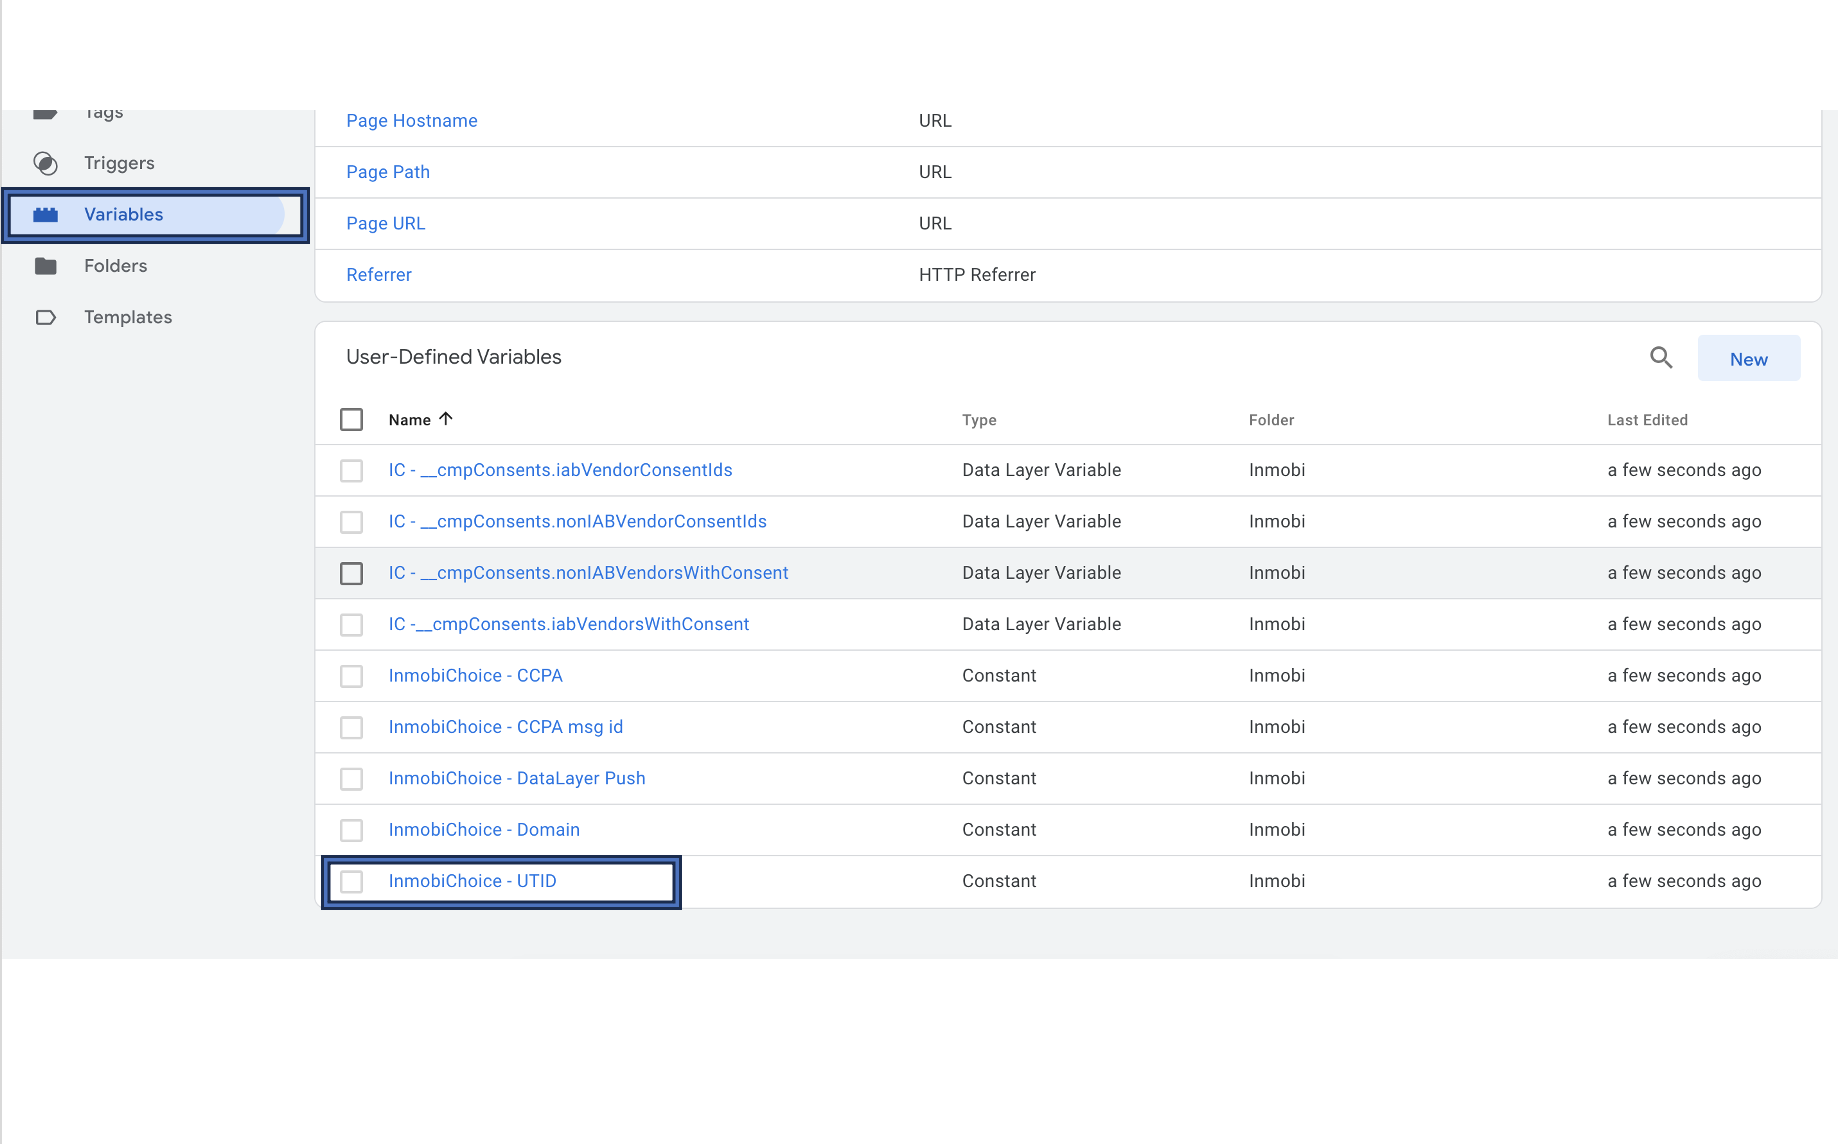
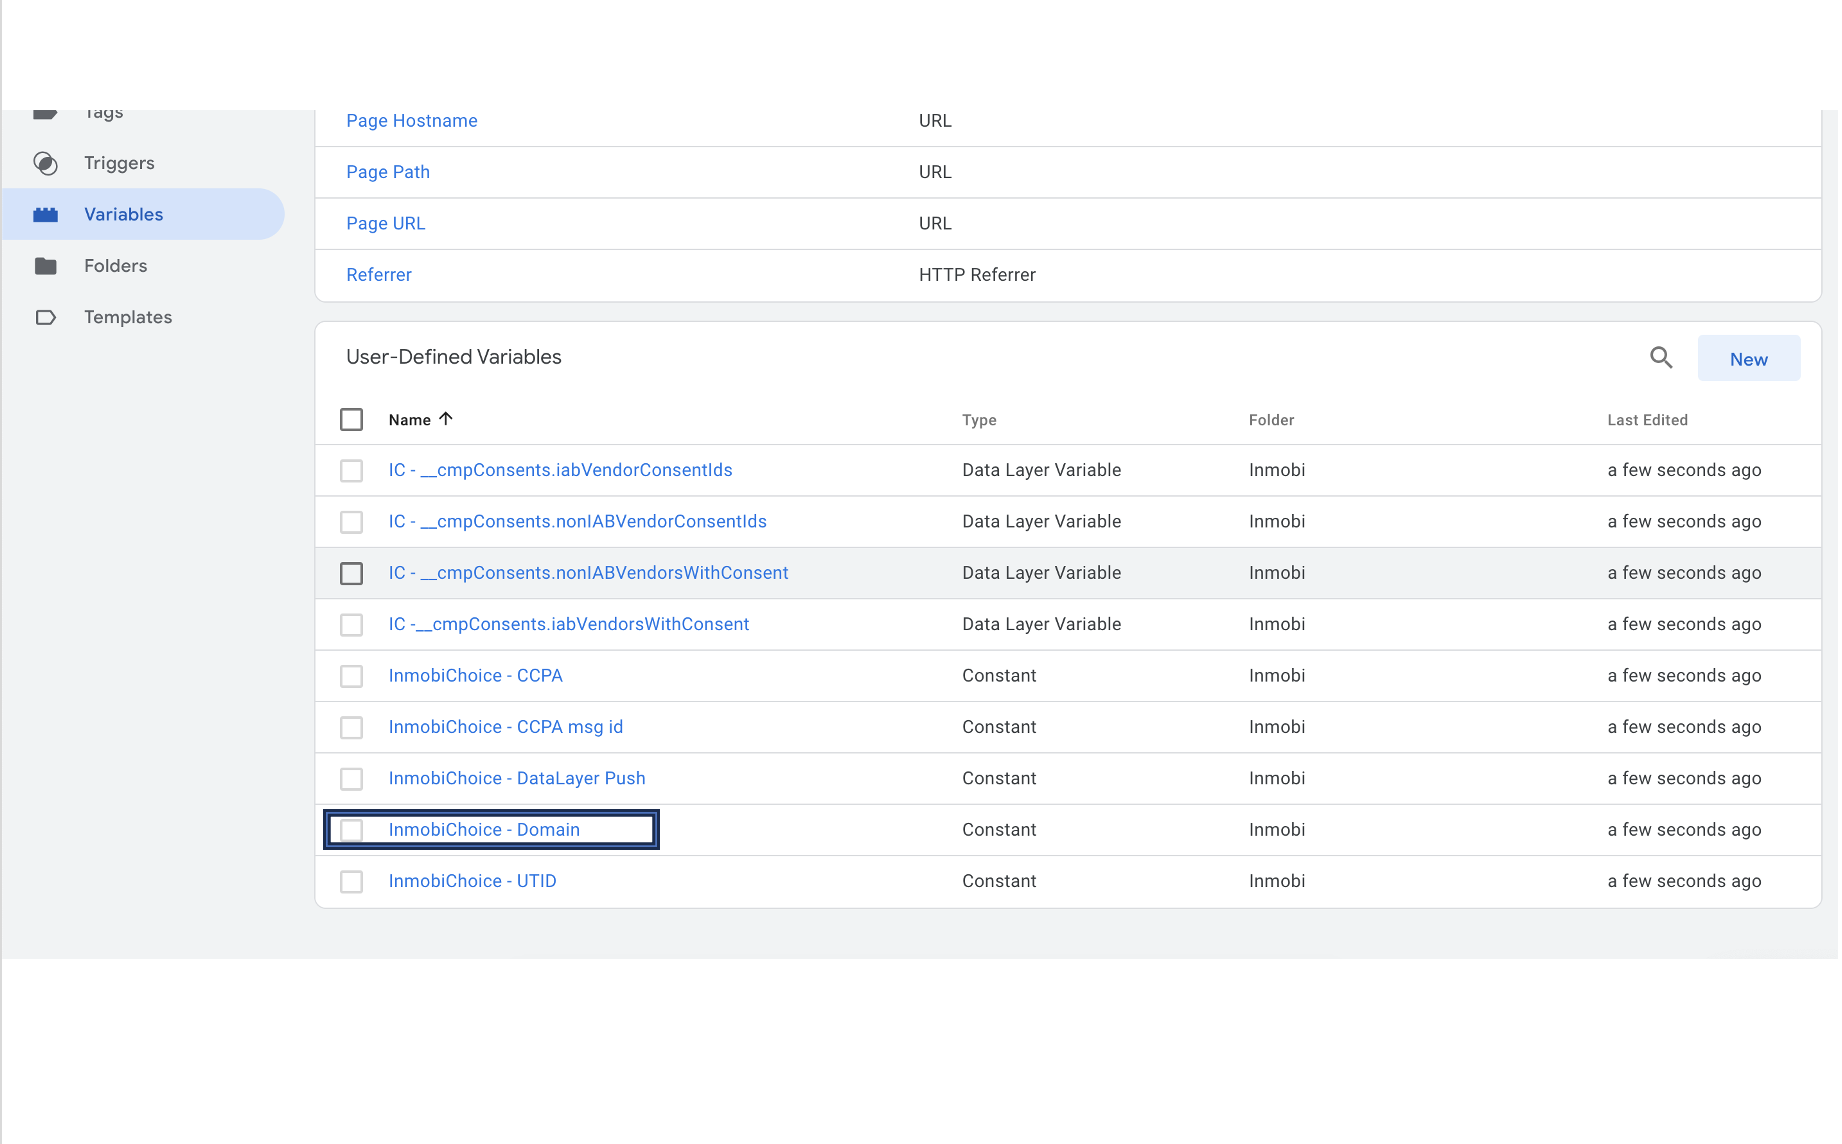
For publishers using our GTM implementation, there is an option to load default consents immediately after consent initialisation without waiting for page load event. To enable the same, follow the steps below:
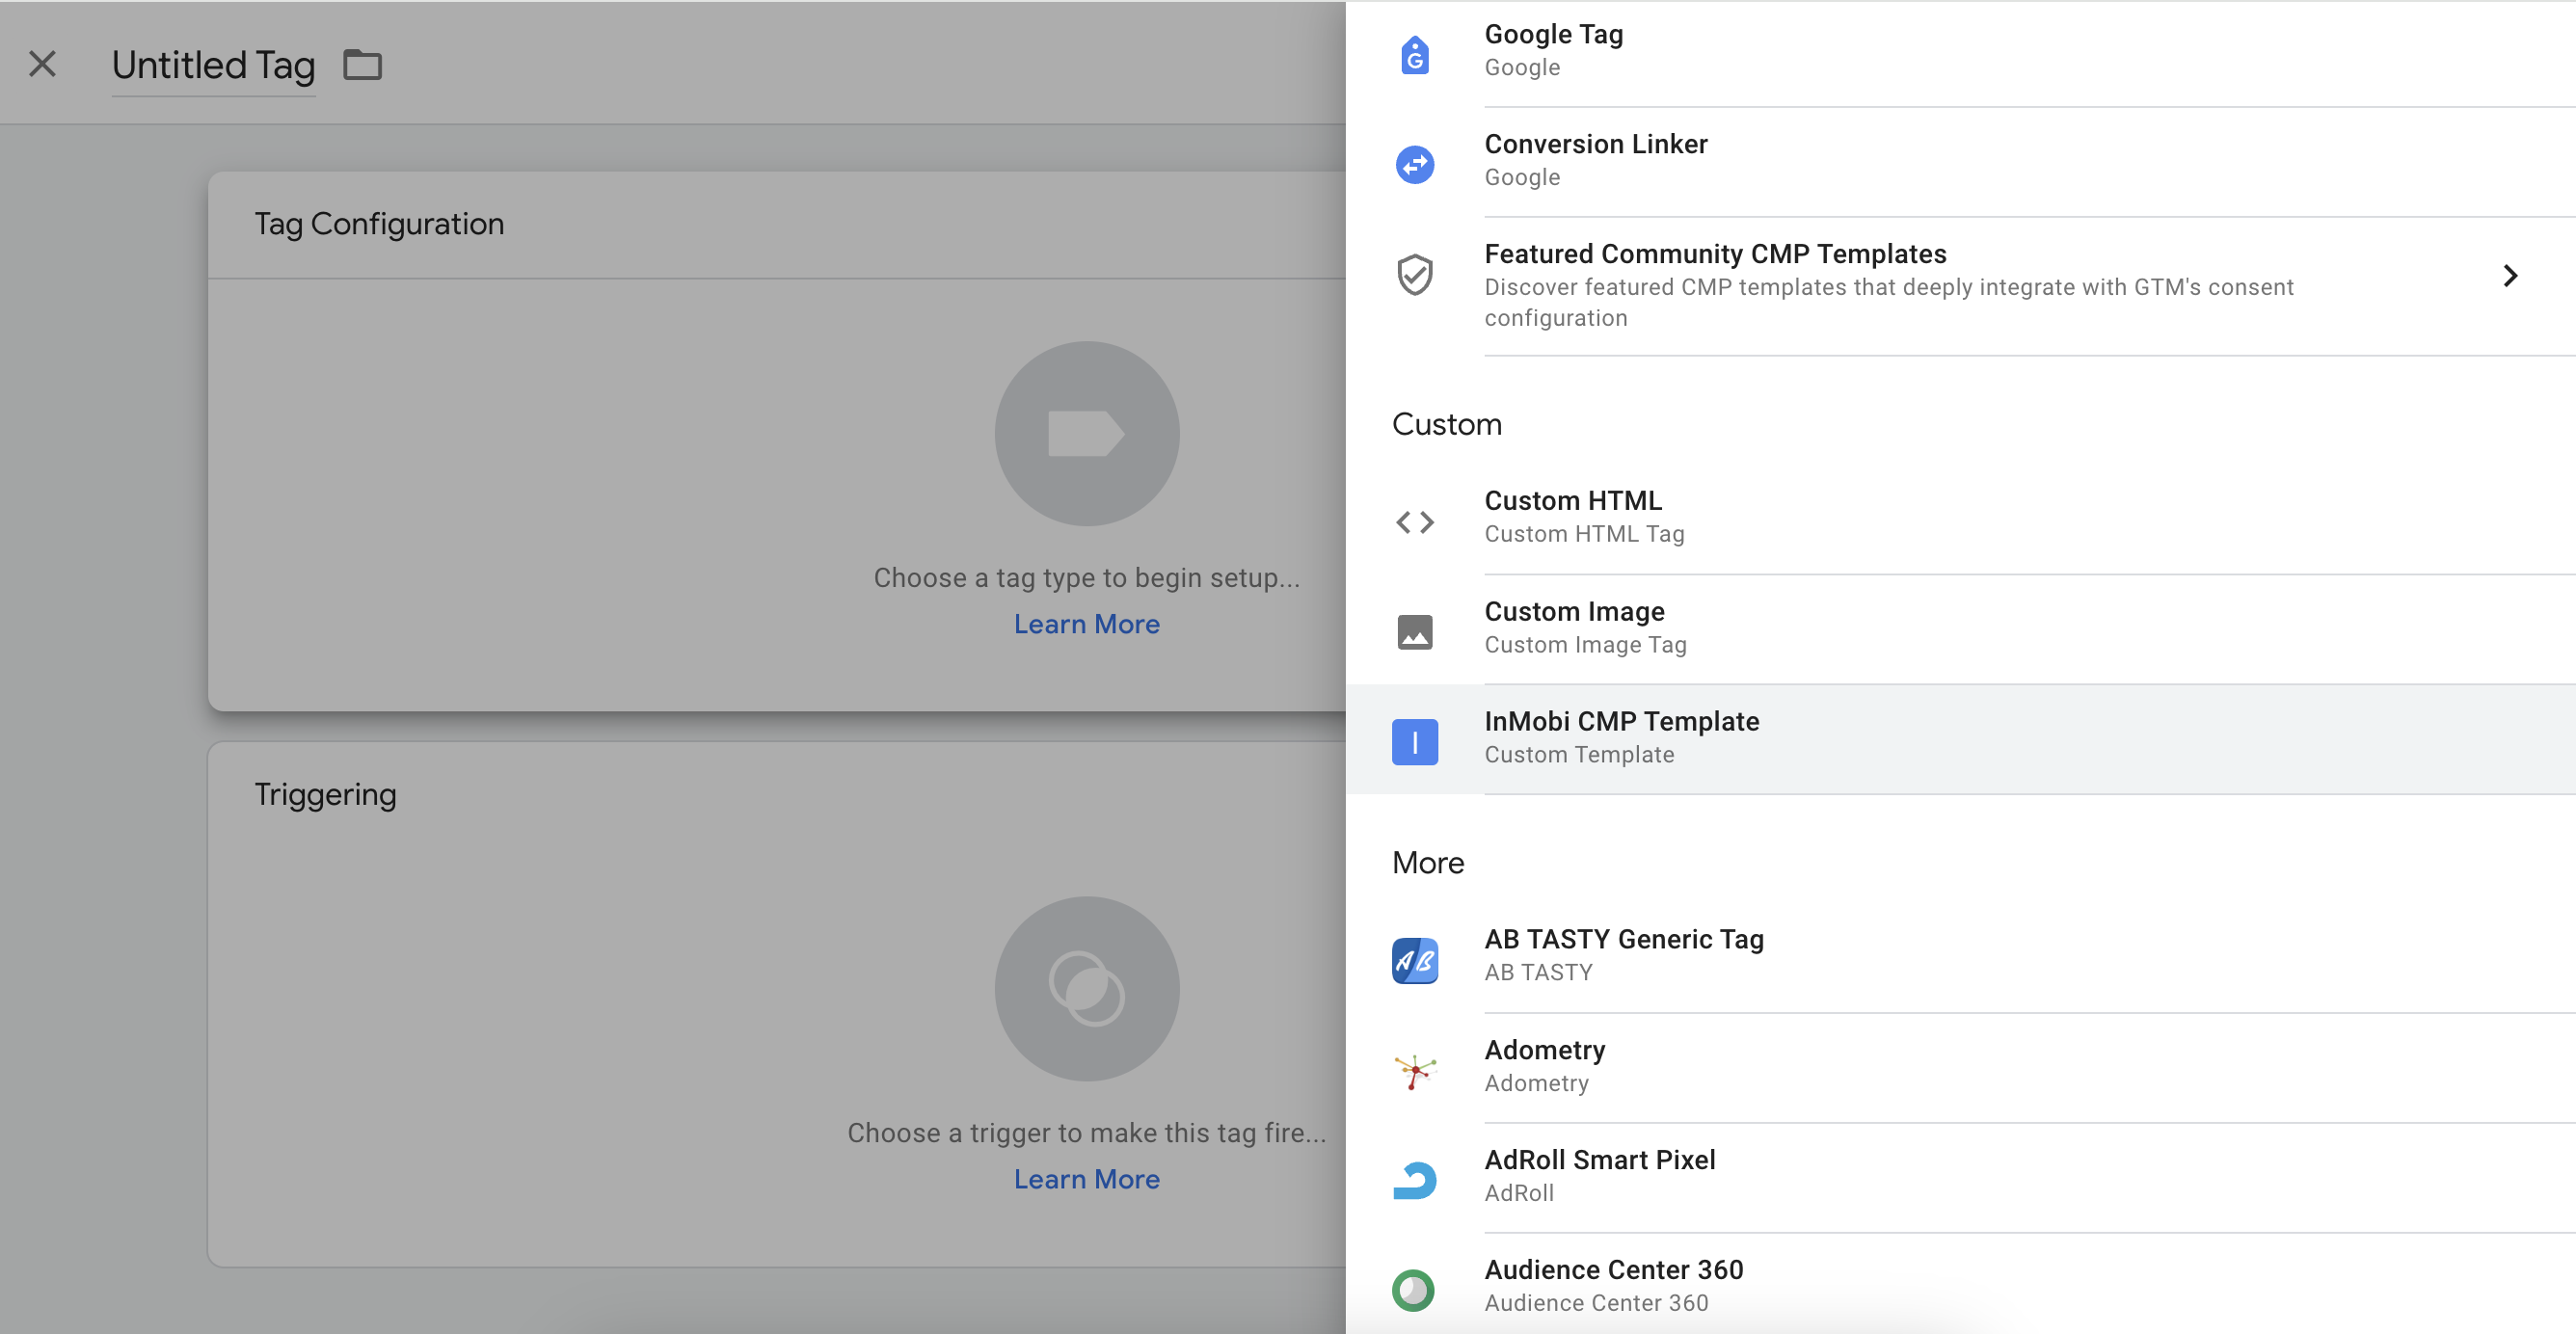
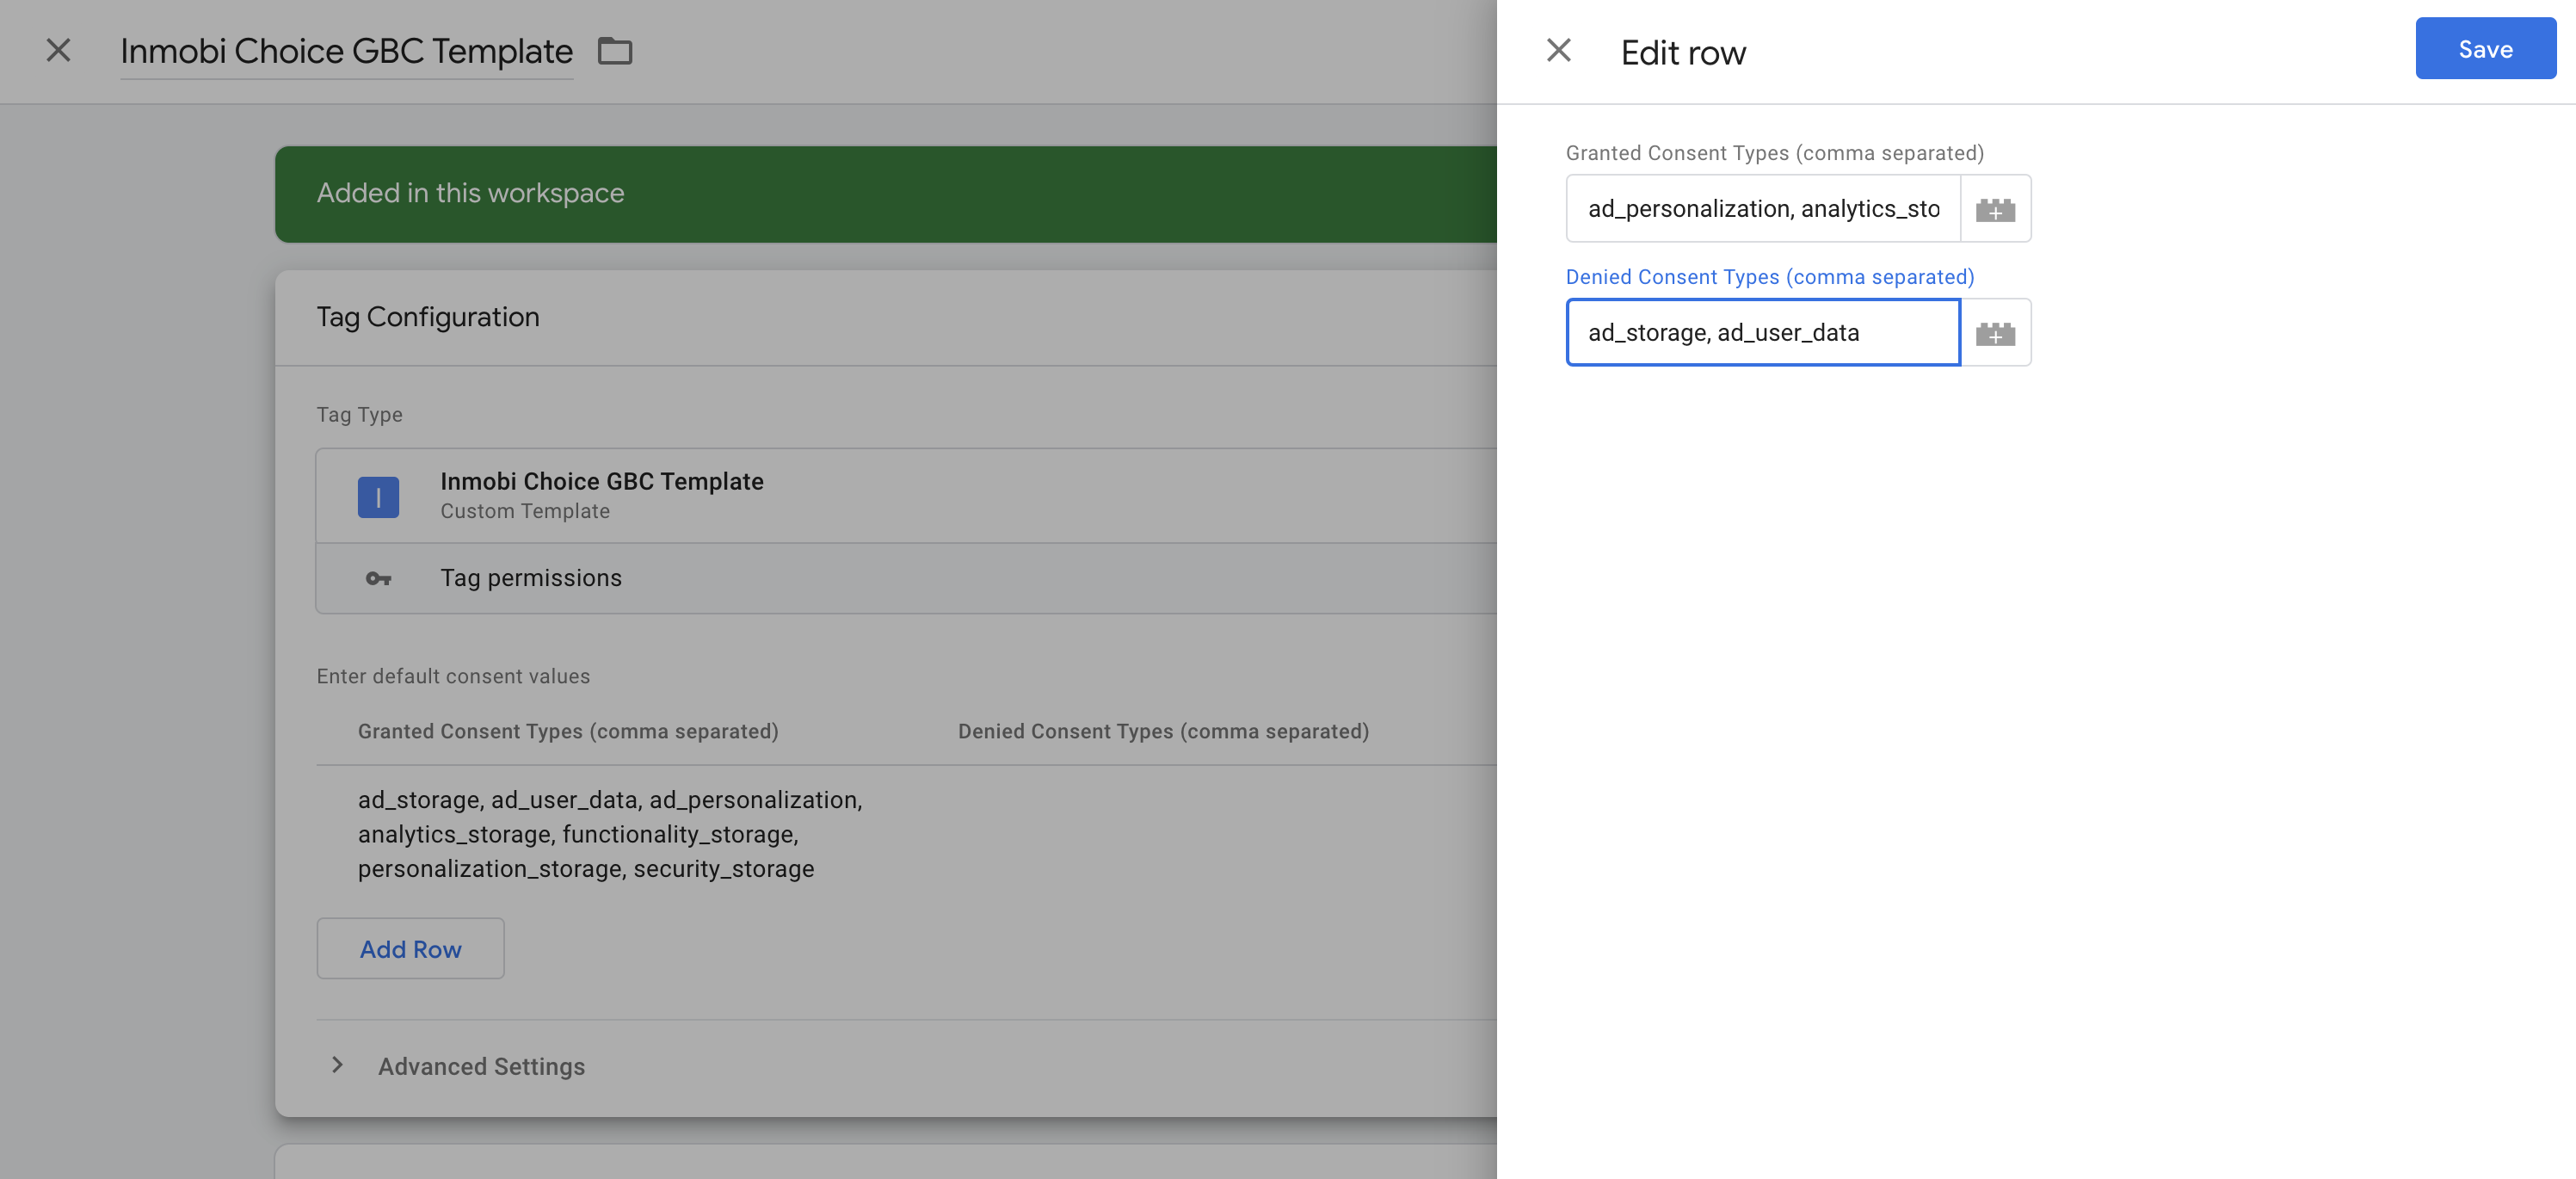
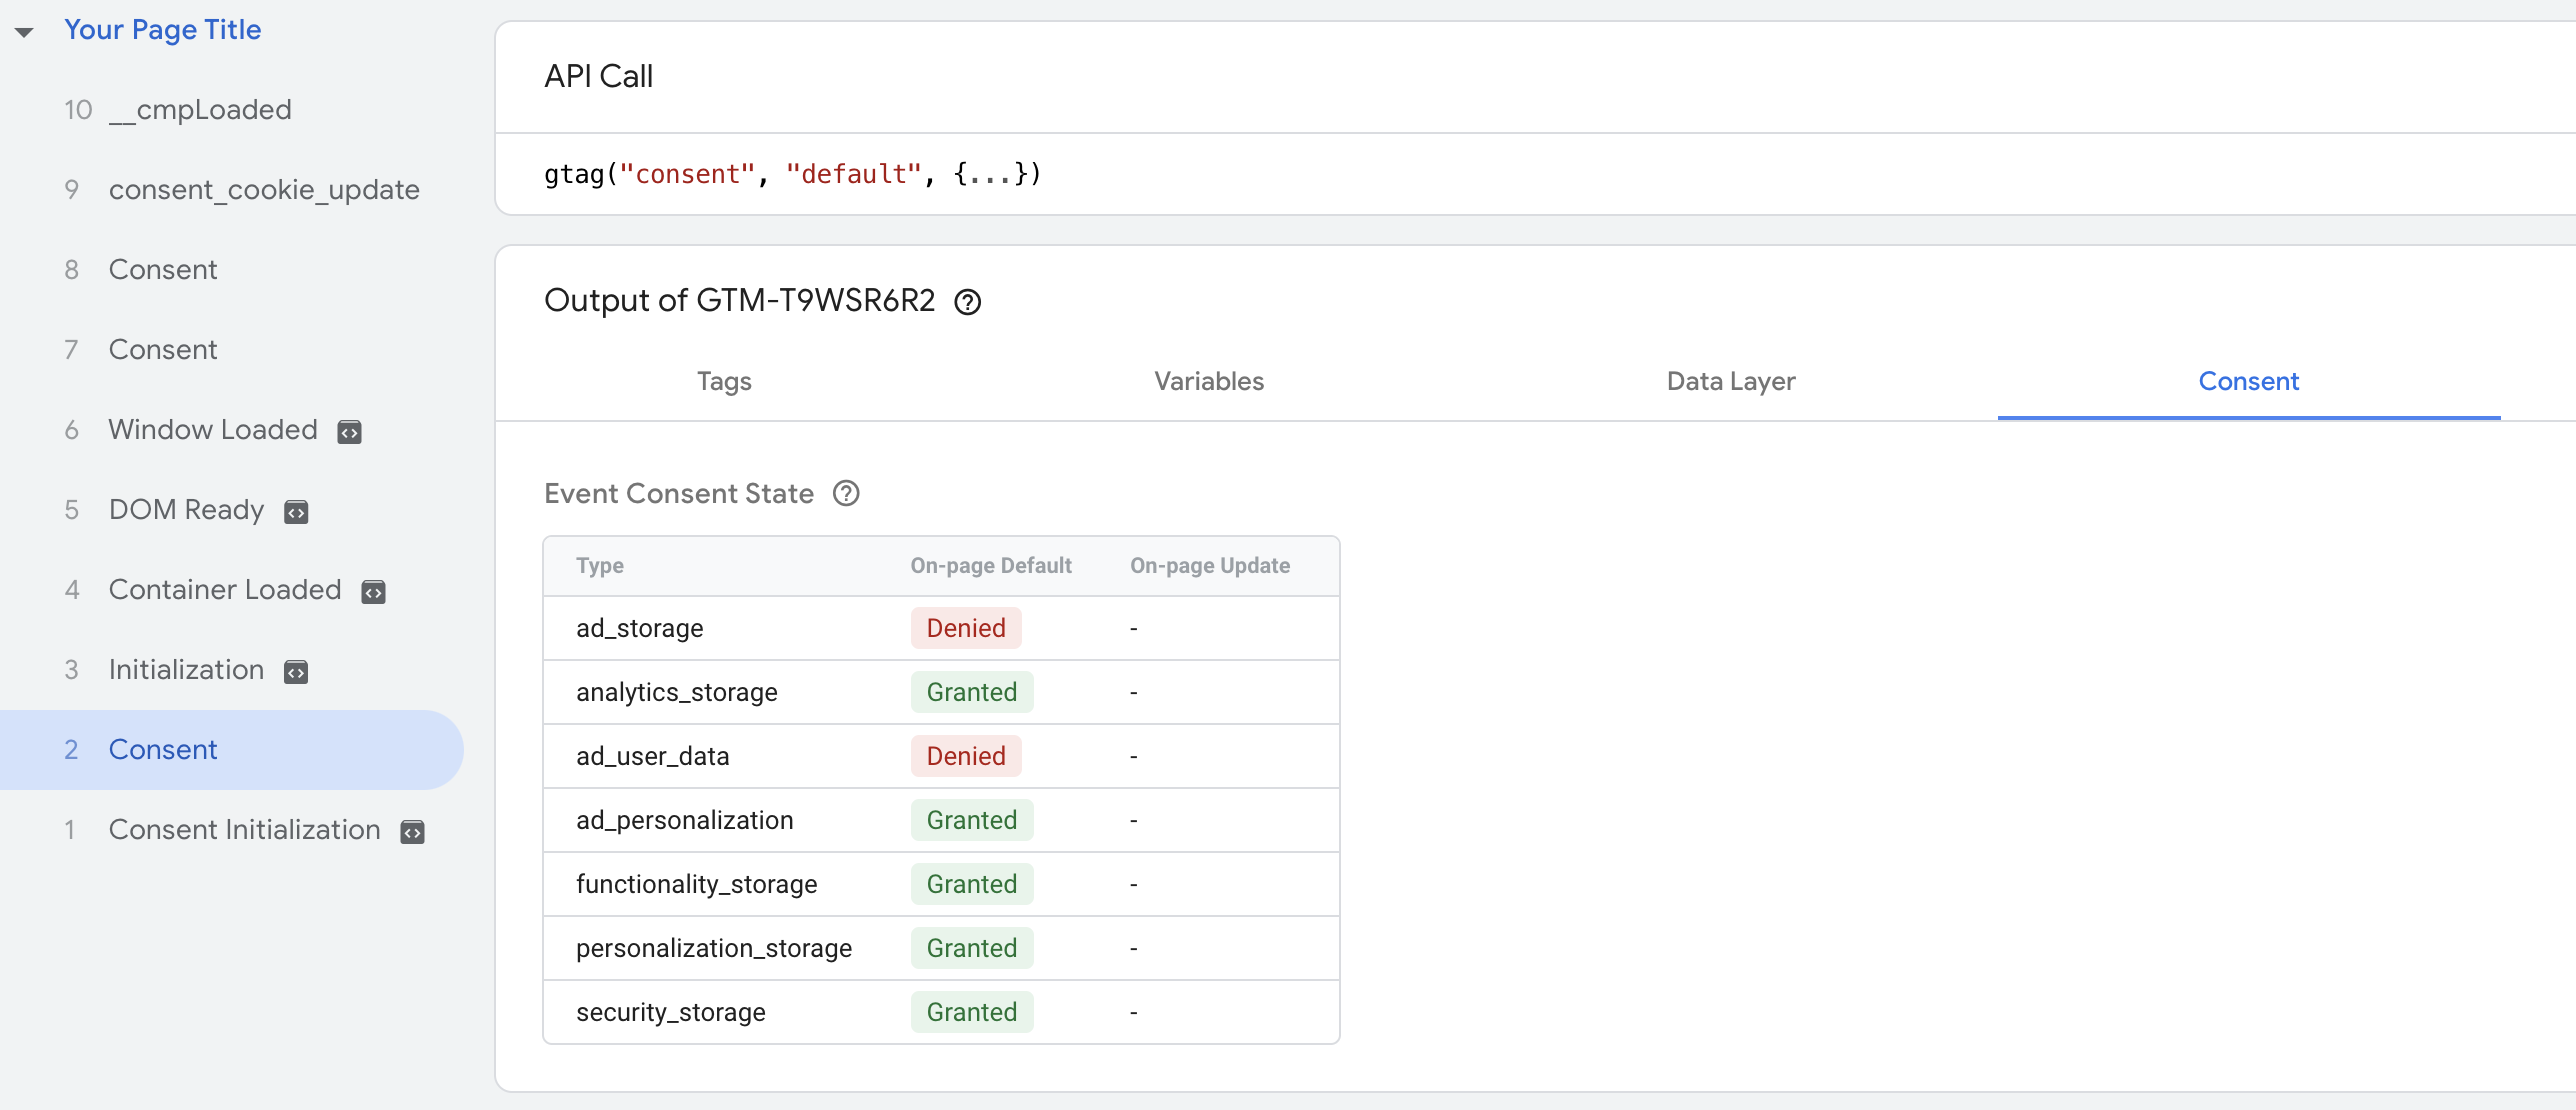
These default values are set by you separately at the GTM level. If you make changes to the default values in the UI, you need to change them here as well.
Once set, your default consents will load immediately upon consent initialisation without waiting for page load event.
This feature is available for only those sites which are using InMobi CMP’s GTM integration. For other integrations, default consents will load only after page load event.


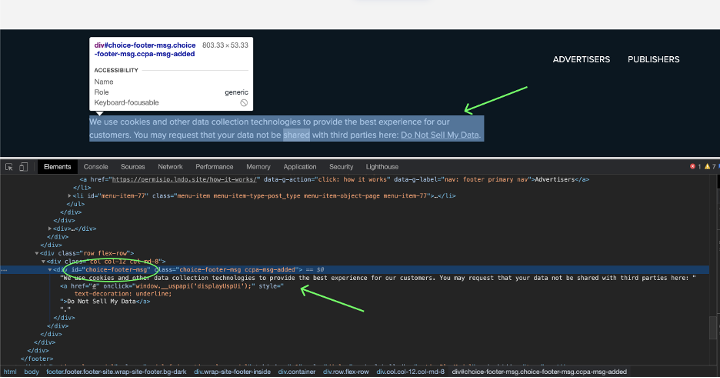

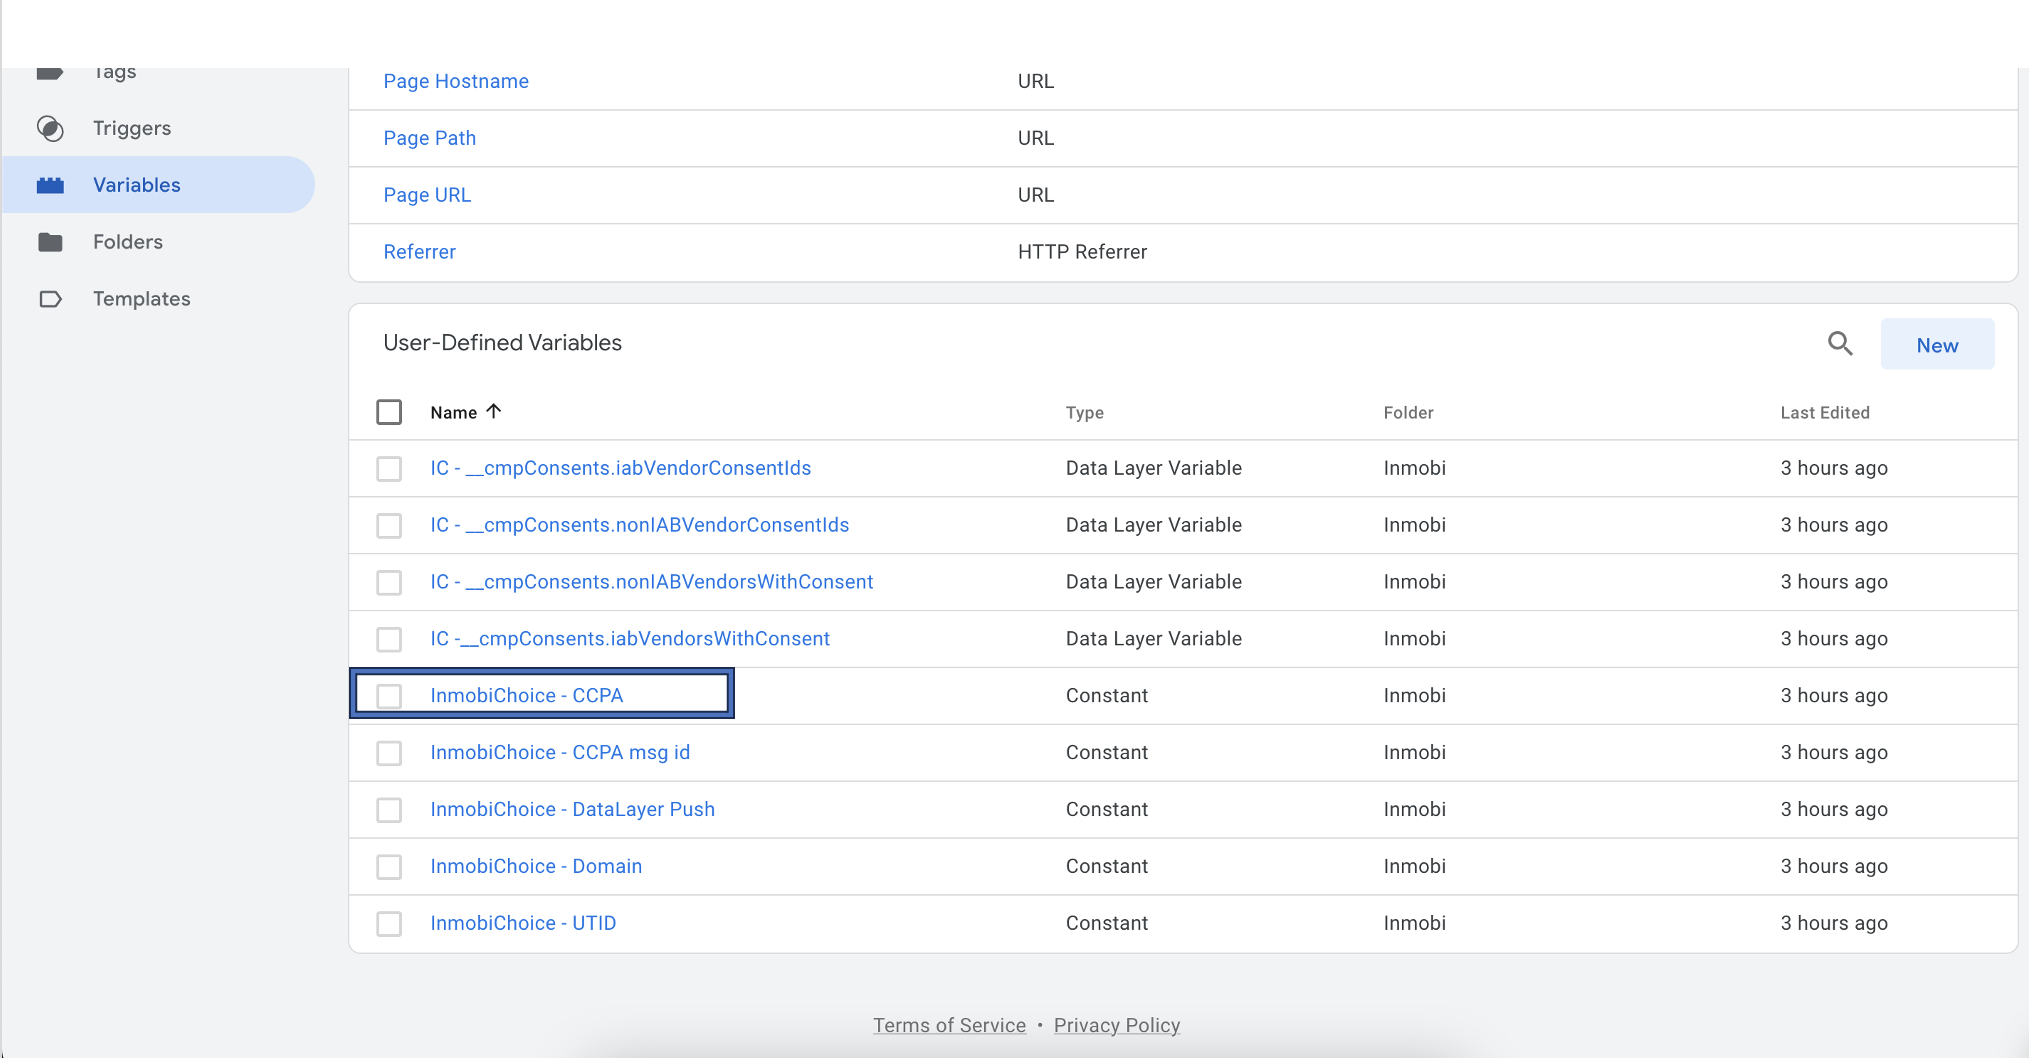
Set the InmobiChoice DataLayer Push constant to true to automatically push consent signals for IAB Vendors, Non-IAB Vendors, Legitimate Interests, and Publisher Consents.
To initialize the SDK, you must provide your account's p-code for proper identification. After you log in to the InMobi CMP portal, you can see the p-code at the top right corner of the screen. However, as shown below, you must omit the initial two characters ("p-") when copying the code for use elsewhere.
| Aspect Ratio | Size |
|---|---|
| 3:2 | 480x320 |
| 2:3 | 320x480 |
| 6:4:1 | 320x50 |
| 4:3 | 1024x768 |
| 3:4 | 768x1024 |
| 16:9 | 1920x1080 |
| 6:5 | 300x250 |
| 8.09:1 | 728x90 |


Your go-to resource center for effortlessly monetizing your apps and websites with InMobi is here. This comprehensive guide will take you through every step of the onboarding process—from creating and configuring your account to maximizing your earnings potential. You'll also find essential information on compliance initiatives and key guidelines to ensure successful and sustainable monetization as an InMobi publisher.
Here is your onboarding checklist:
For any assistance, contact us through the Chatbox or reach out to your Customer Success Manager.
Now, let's get started.
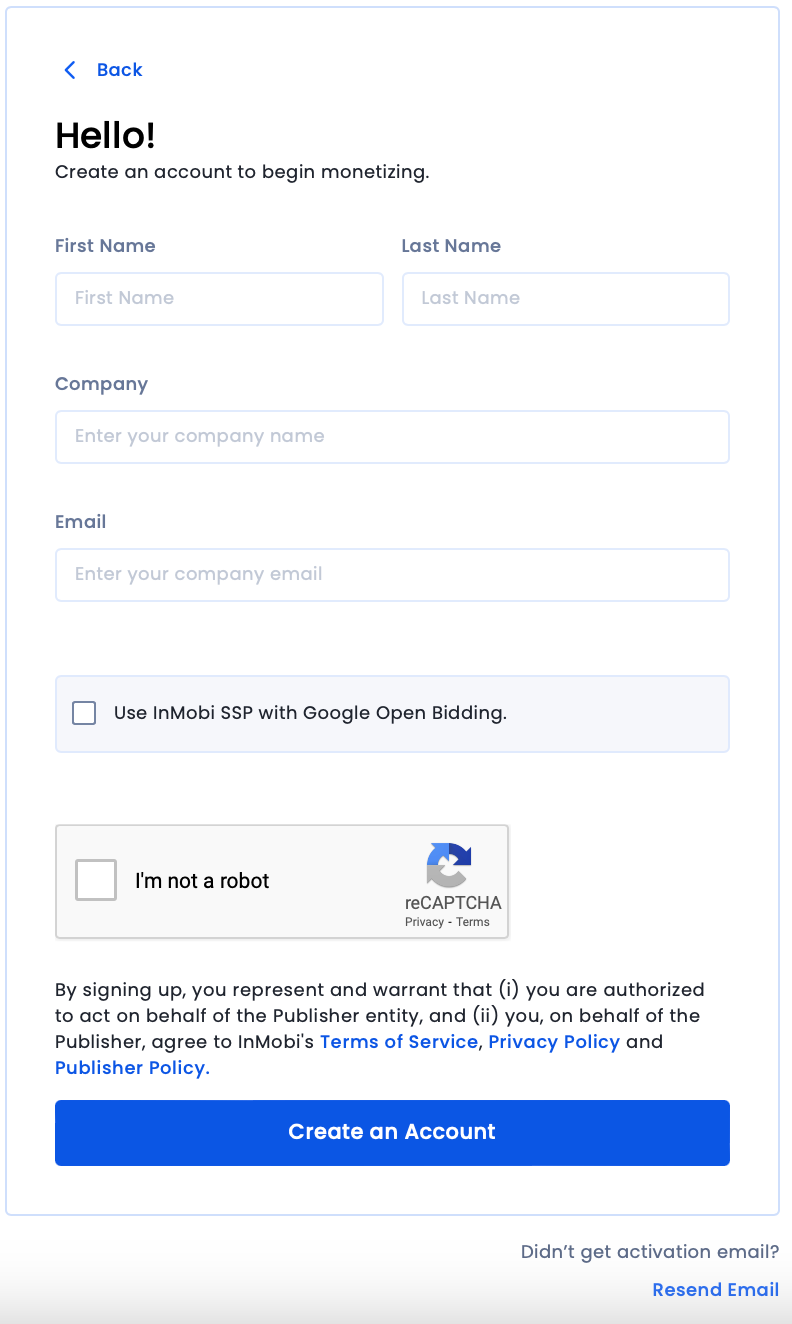
If you are unable to find the verification email in your inbox, check your Spam folder. If you haven’t received it, click Resend Email on the Sign-Up page and enter your email address.
You have successfully signed up with InMobi. You can now login to your account with your new credentials.
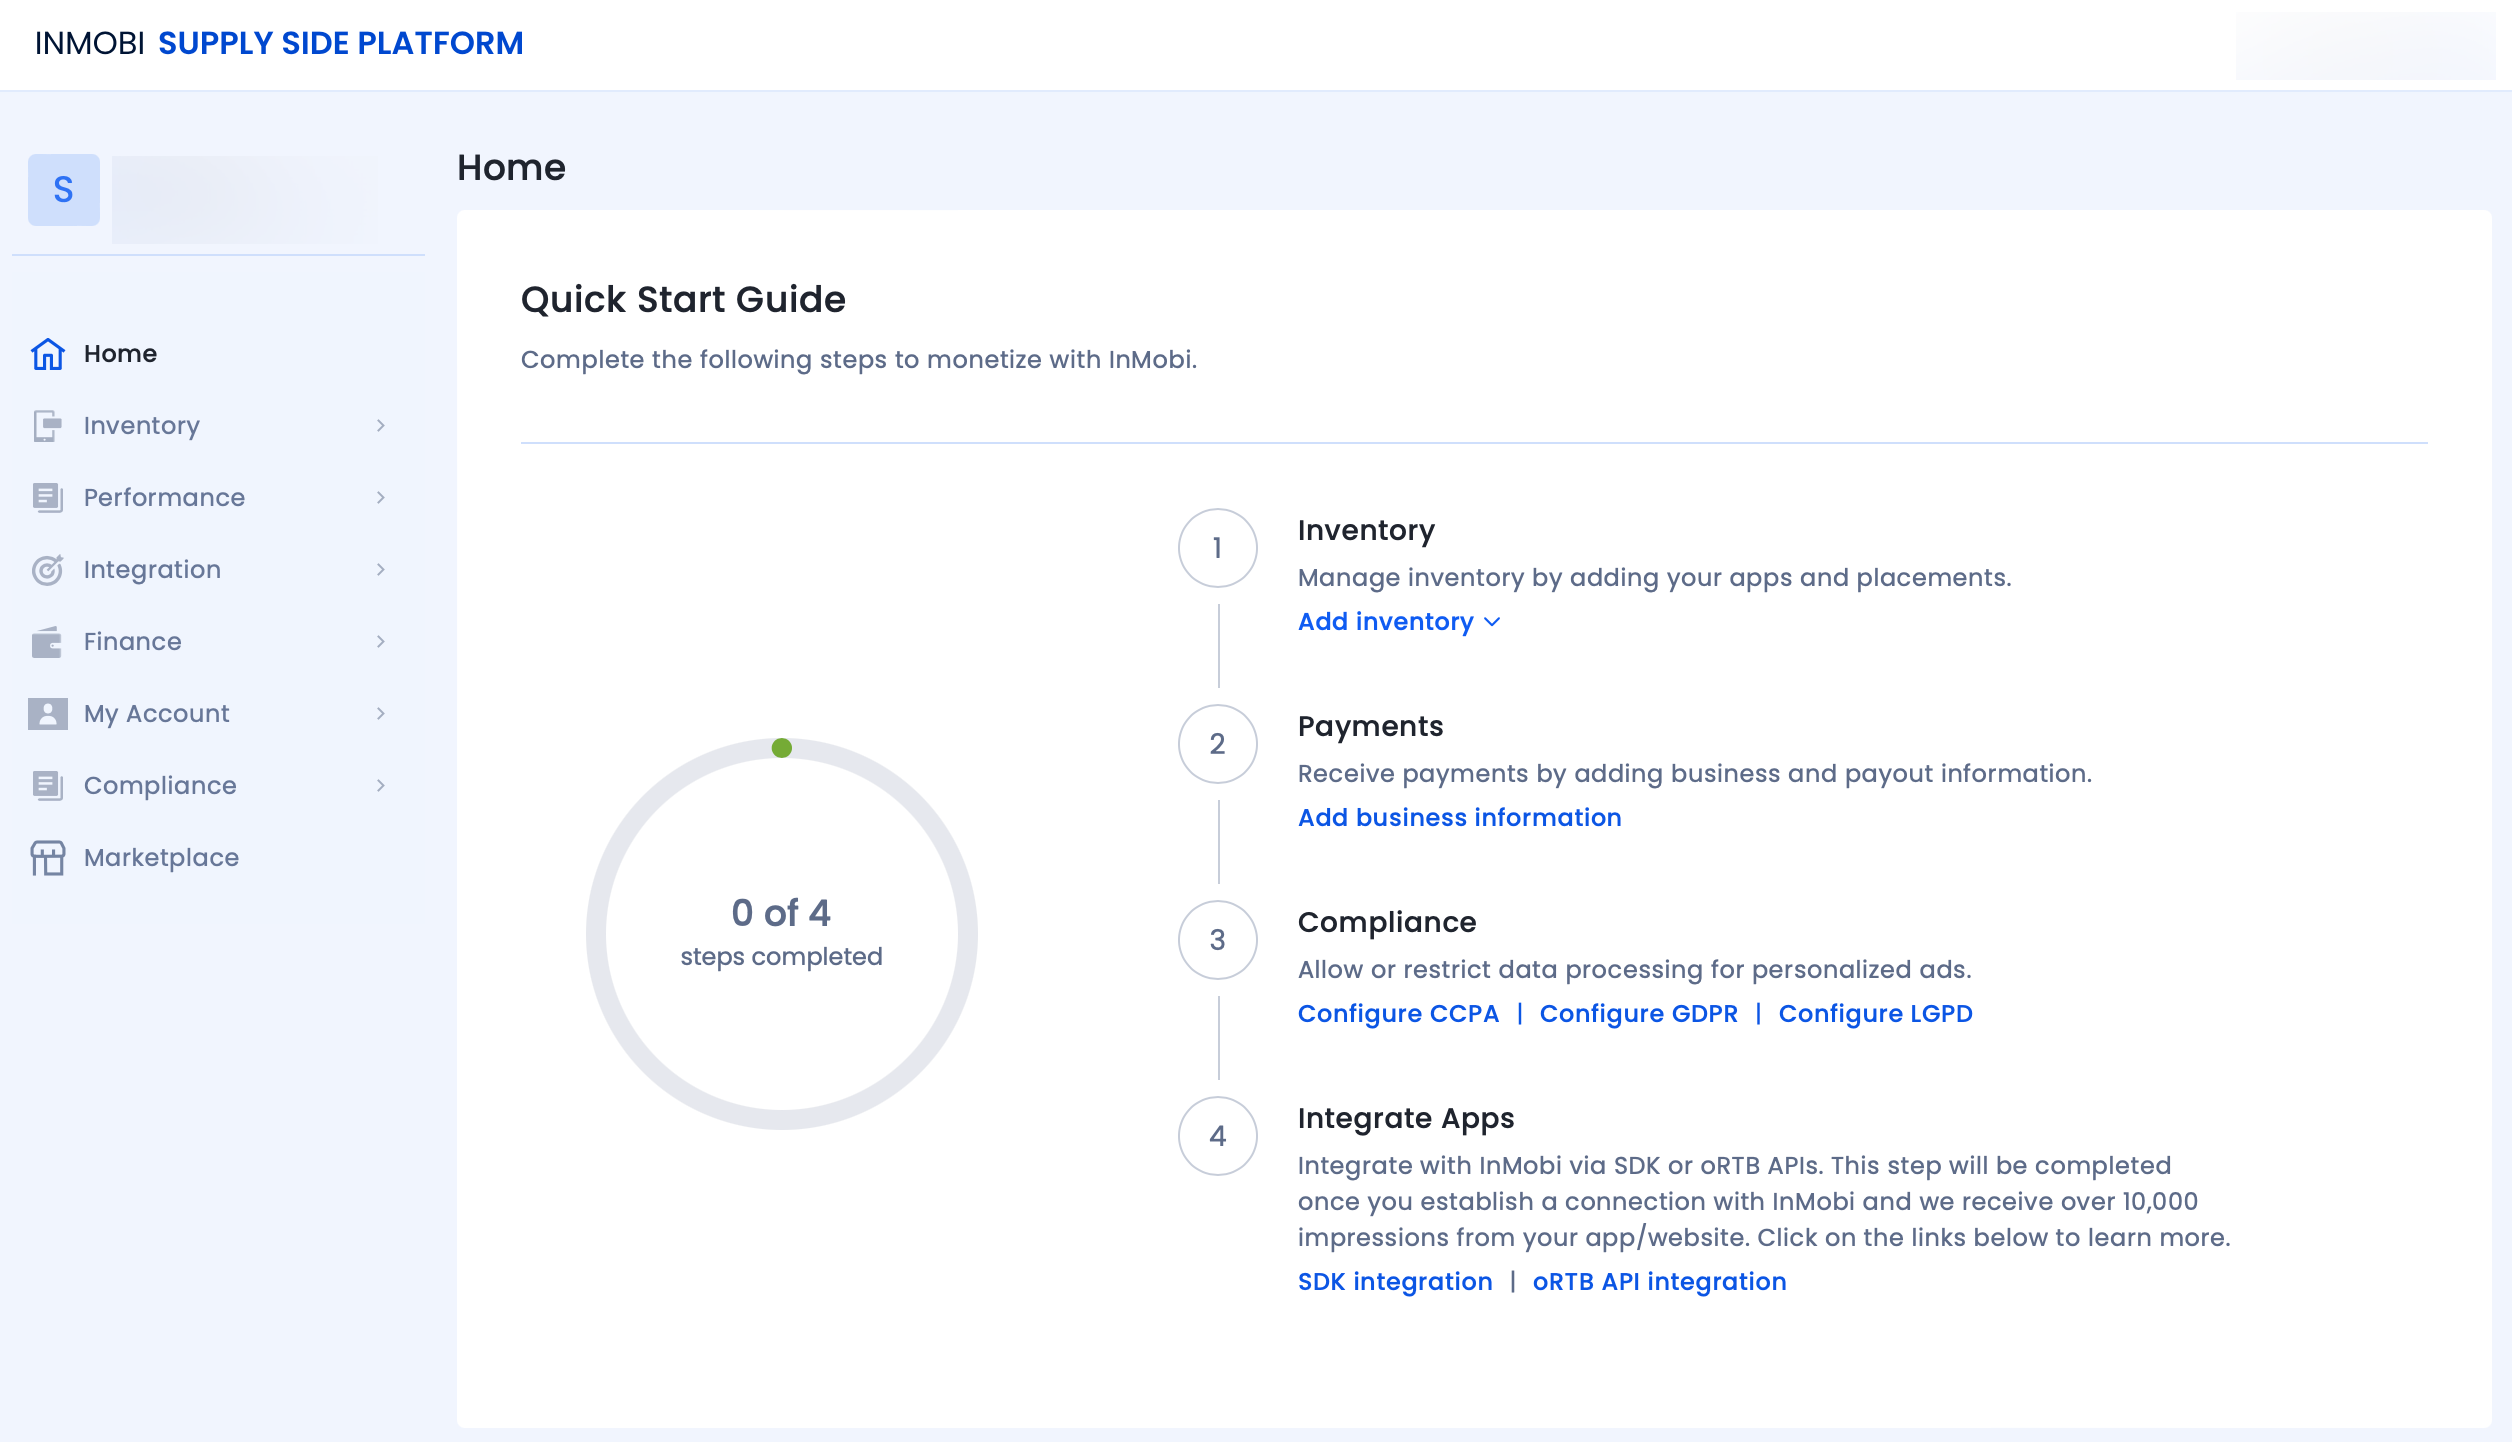
You must add at least one placement and ad unit for your apps or websites to generate ad revenue. A placement is a place and time displayed on the ad in your app, and the ad unit is the ad format. It is recommended to create multiple ad units to provide a varied user experience and sell more impressions.
To register your published app, website, or unpublished app with InMobi, follow the instructions below.
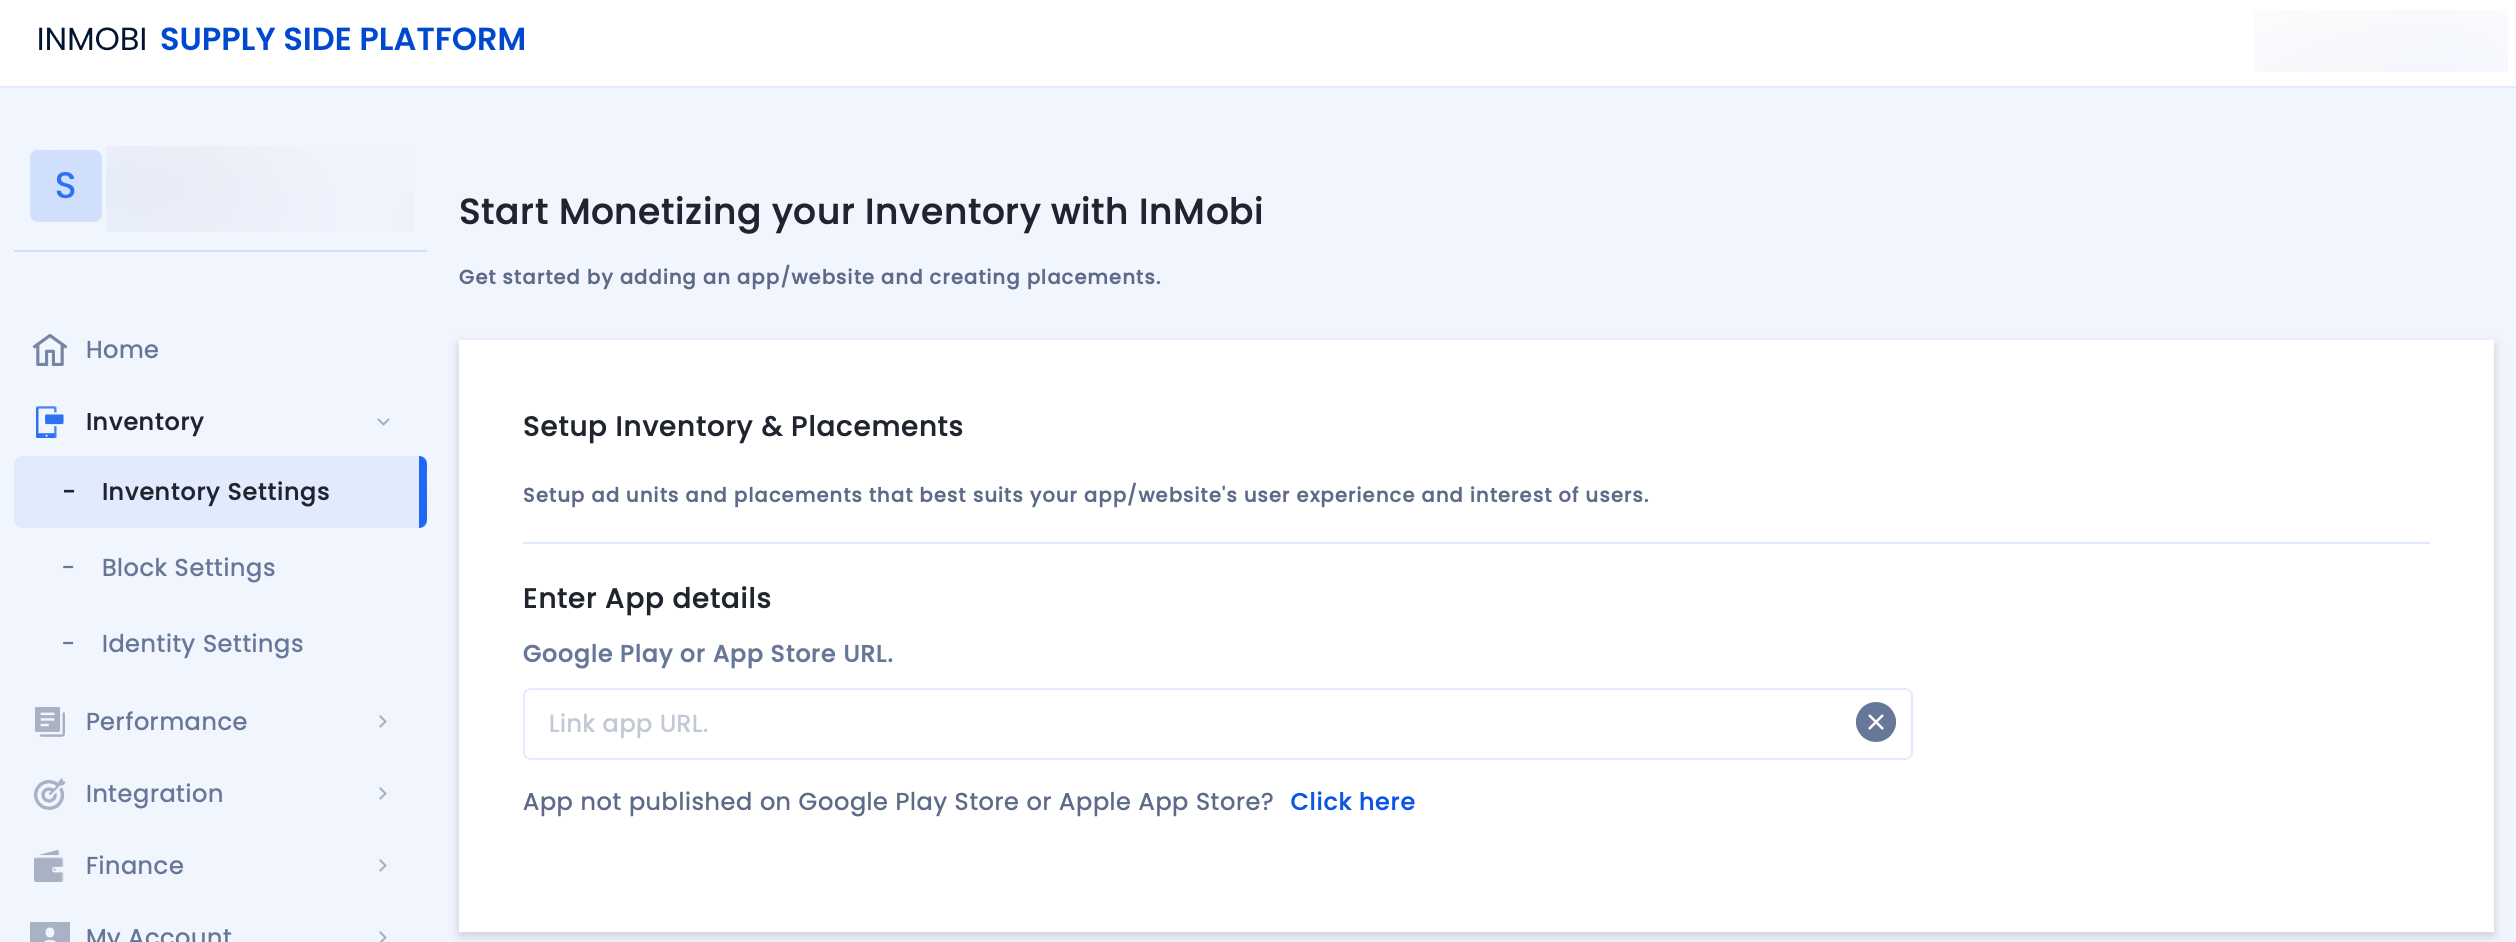
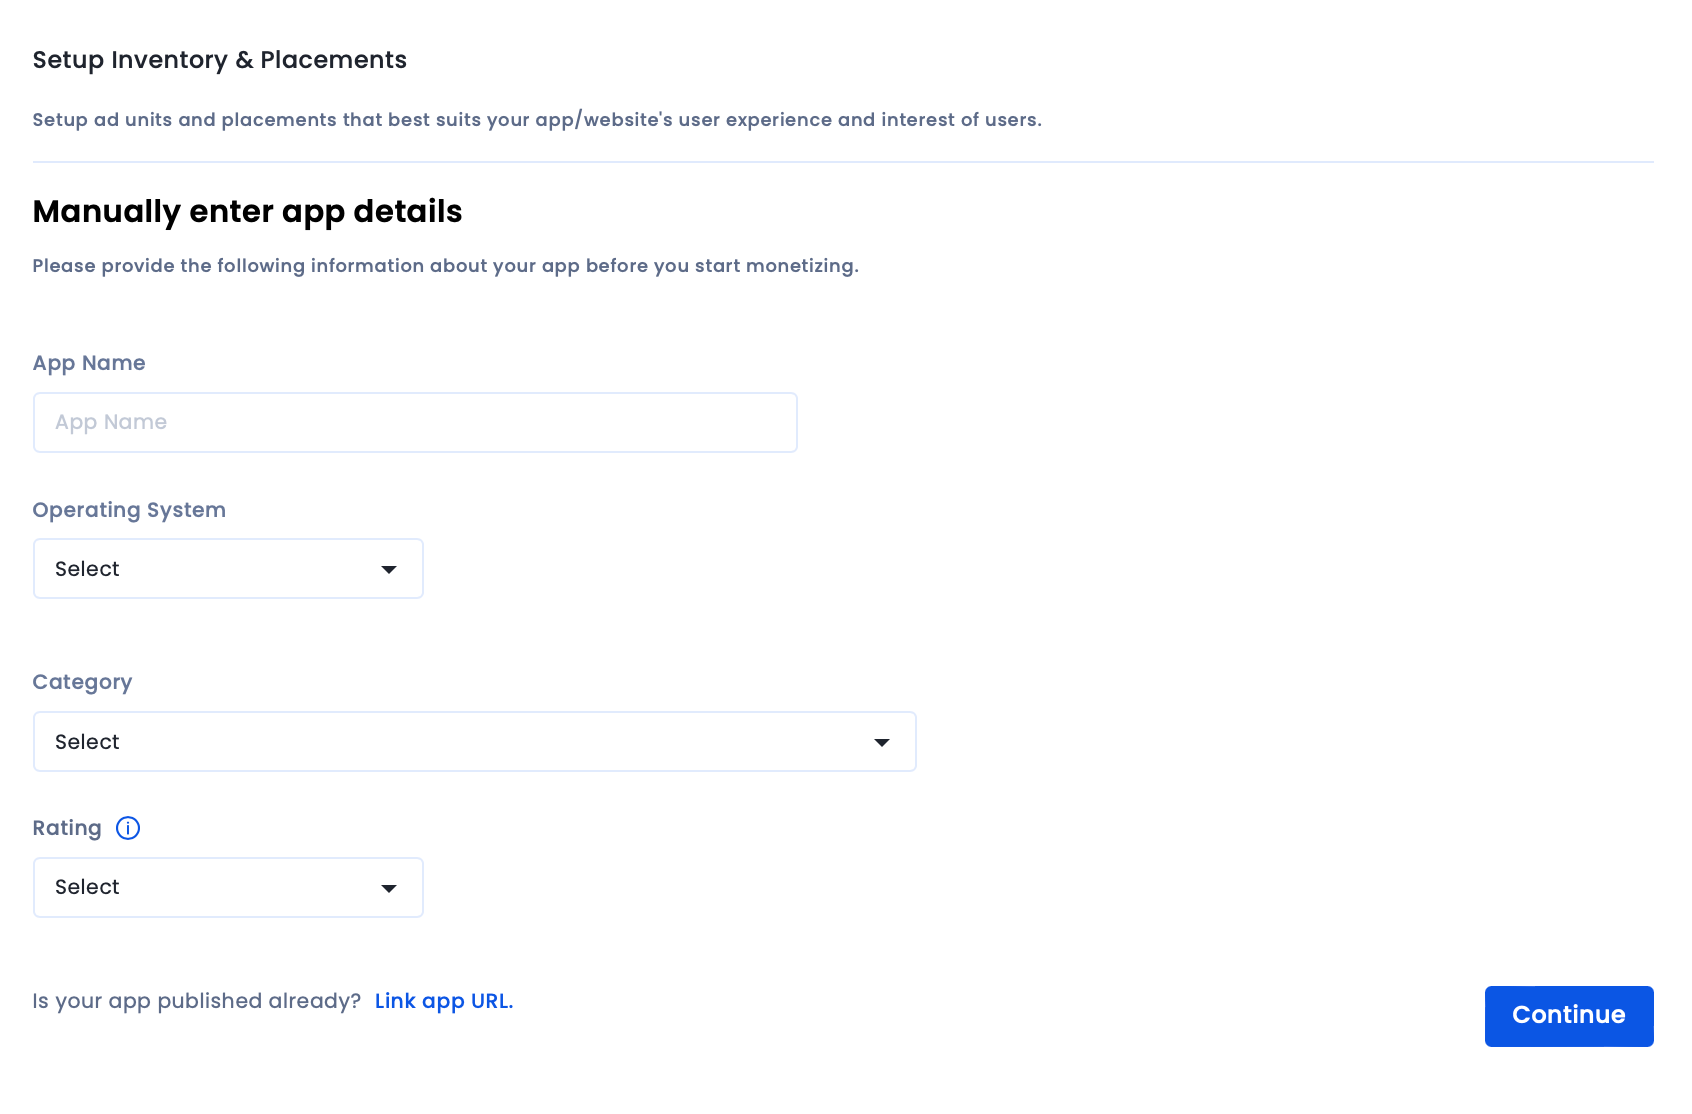
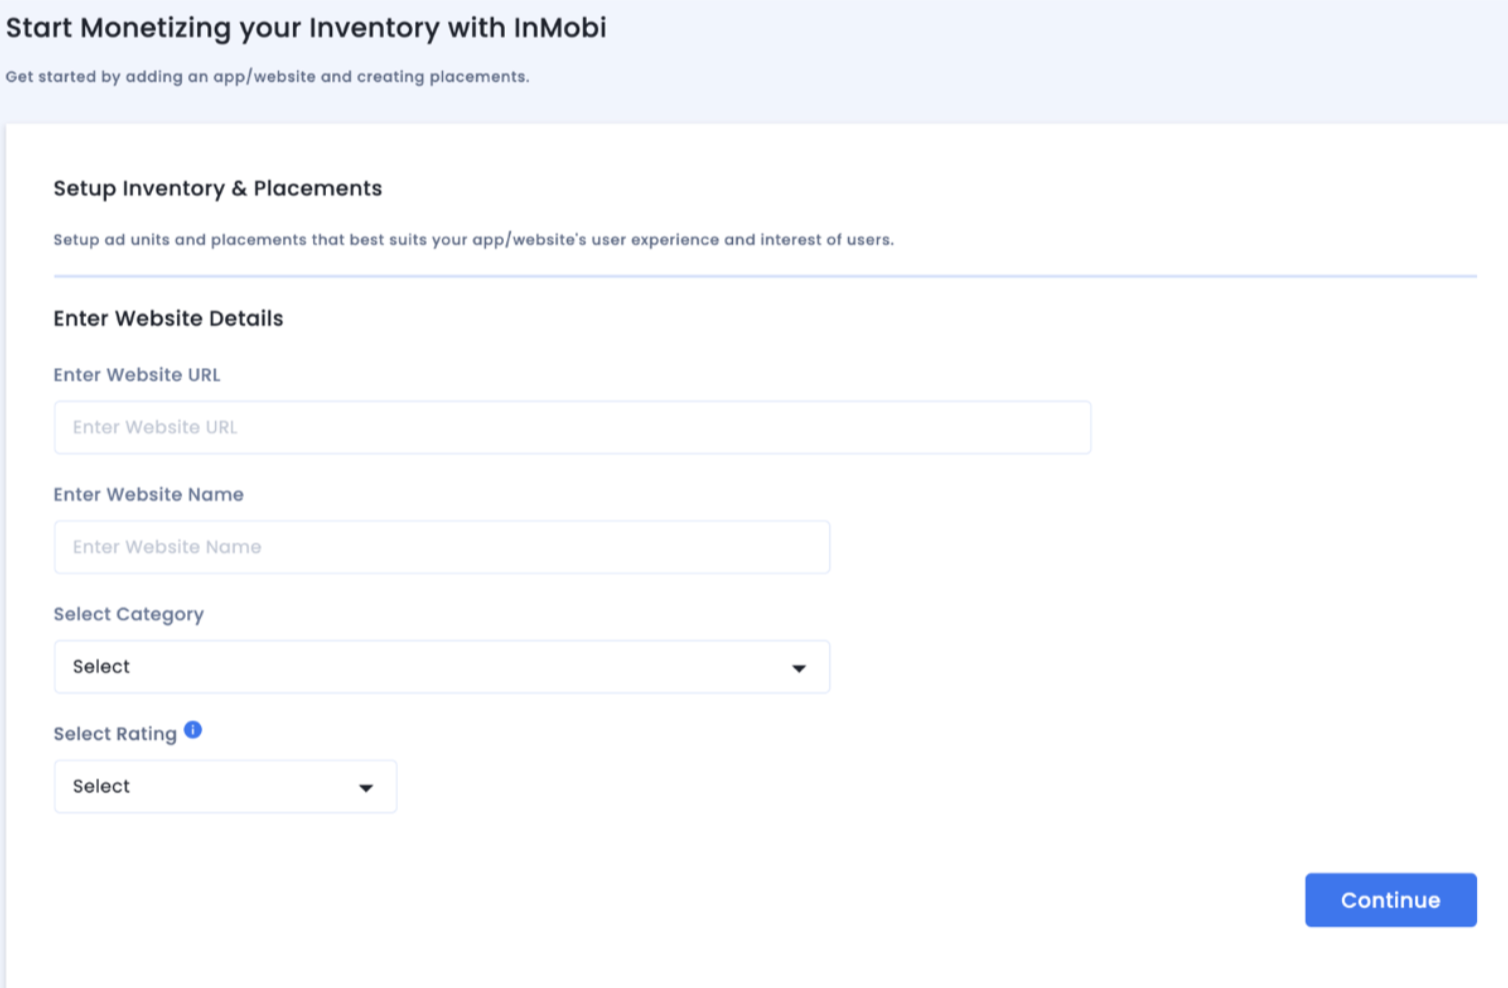
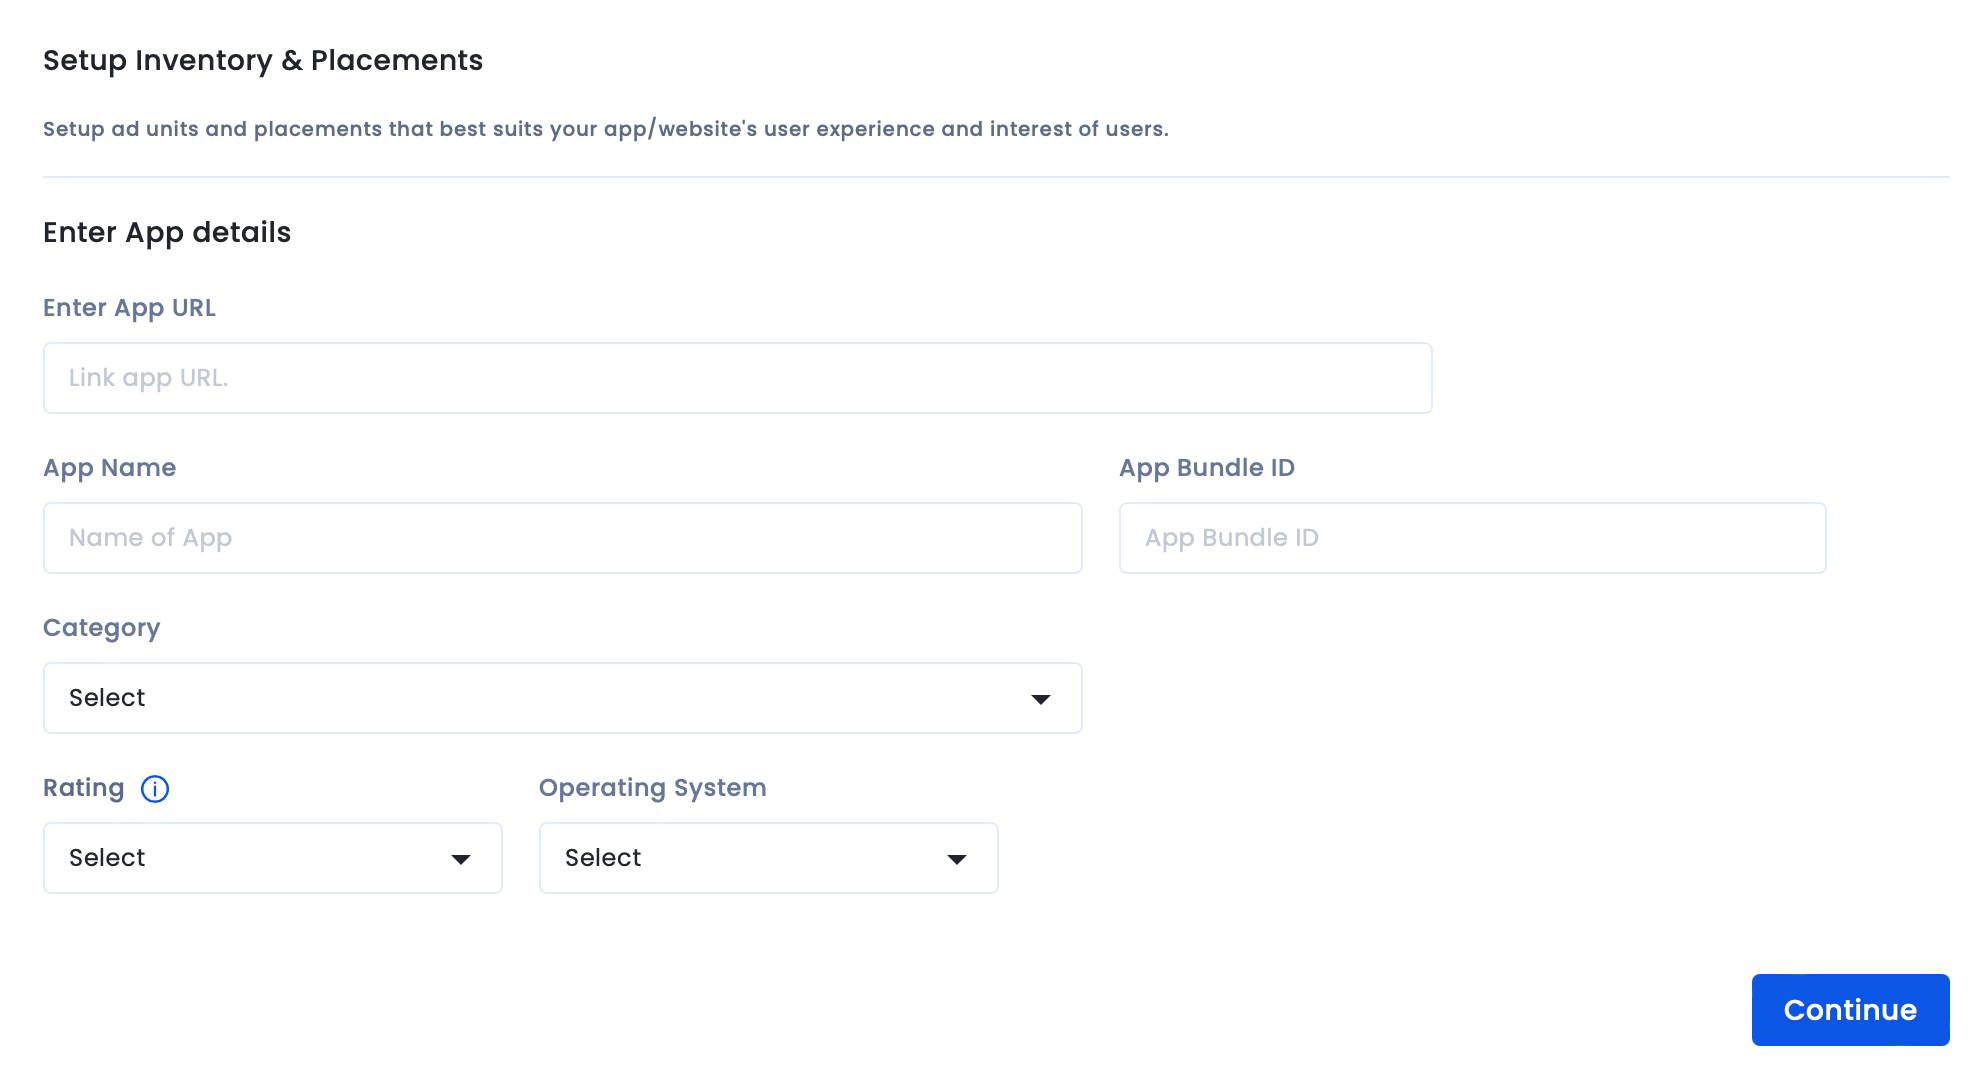

If you need help editing your compliance settings, contact support@inmobi.com.
You have successfully added your app or website.
To create a new placement, follow the instructions below.
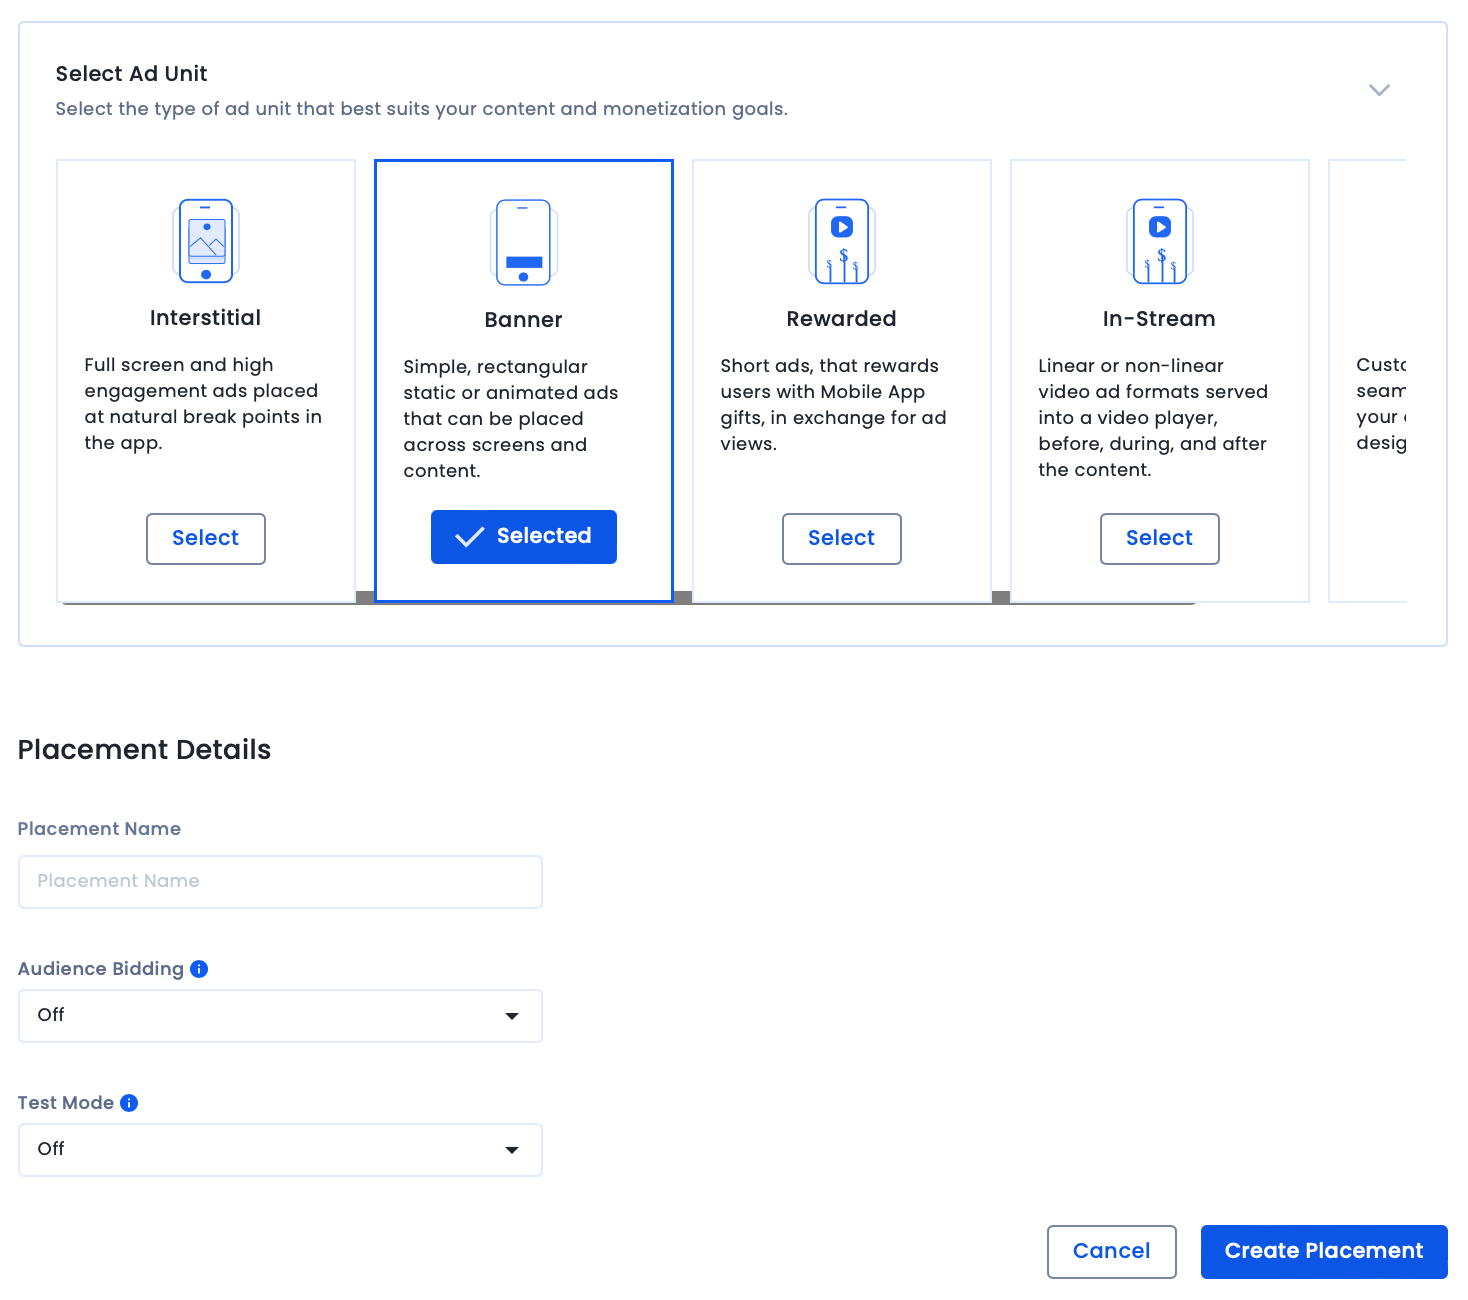
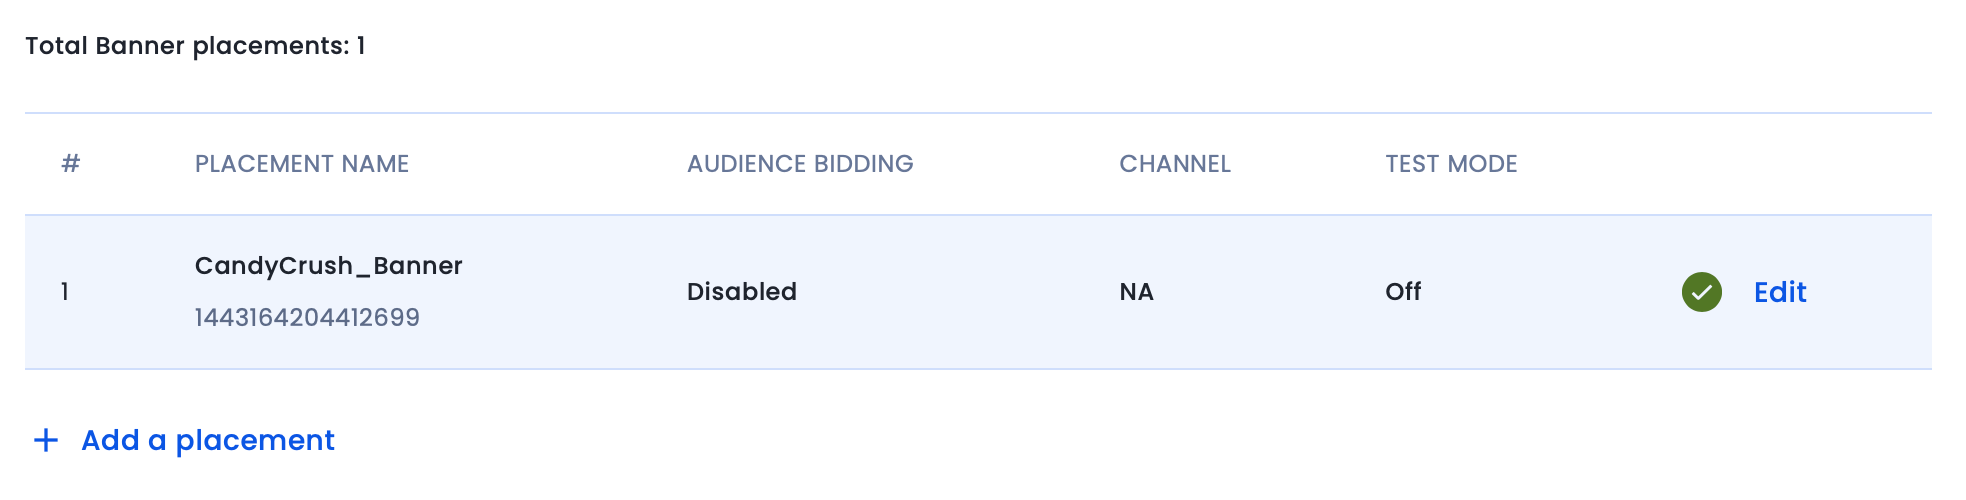
You have successfully created an ad unit and placement. Repeat the above steps to create multiple ad units.
You must update your company details and payment information to receive payments from InMobi. Follow the steps below to configure payments.
screenshot-
You have successfully updated your company and billing information.
For payments to be made to you, you must add a mode of payment. You can receive your payouts via Electronic Fund Transfer or PayPal. To add your preferred mode of payment, follow the instructions below.


InMobi follows a payout cycle of 60 days meaning your earnings for a given month will be credited to you at the end of the 60-day payout cycle.
You must upload the tax forms depending on the payment country.


To know more about the IRS tax form types, refer to the following table below:
| Form Type | Intended Use |
| W-9 | An entity or individual resident in the US for tax purposes. |
| W-8BEN | Not relevant for entities. Only for individual who is not tax resident in the US and is the beneficial owner of income. |
| w-8BEN-E | An entity that is not a resident within the US for tax purposes. |
We can process payments once your cumulative earnings exceed the minimum payment threshold set. The threshold range must be between $300 - $10000.
Since you have already set up your account, first placements, and ad units on the InMobi UI, your next step is integrating the InMobi SDK into your app. It gives you access to InMobi’s exchange and ad network technology to serve in-app ads.
It is recommended that you always update to the latest version of our SDK to take advantage of newly launched features or performance fixes we might introduce.
Click here to download the latest InMobi SDKs (iOS and Android). You can review our integration guidelines for iOS and Android.
Mediation is a monetization solution that allows app developers to manage and optimize multiple advertising partners with just one SDK integration. Mediation gives publishers access to demand through multiple ad networks, creating an arena where the networks compete to serve their ads.
To integrate InMobi as a demand source on third-party mediation platforms, you must integrate the InMobi SDK adapter. You can integrate InMobi with:
For more information about our integrations and the available formats, see Third-party Mediation Platform.
If you wish to use InMobi as your primary mediation platform, we recommend you to see Getting Started.
Header bidding goes by many names. At InMobi, we call it Audience Bidding. Essentially, Audience Bidding is in-app header bidding. It allows publishers to sell their inventory in a unified auction where ad sources bid for each impression in real time.
Publishers can enable Audience Bidding with InMobi as a demand source using all major header bidding solutions in the market, including:
For more information, see our Audience Bidding integrations.
For more information on the Open RTB integrations, see oRTB integrations.
Testing your integration is an important step for successful onboarding. We recommend testing your integration to ensure that placements and ad units are correctly displaying across your app without affecting the live traffic. To start testing using our Sandbox Testing tool, follow the instructions below.
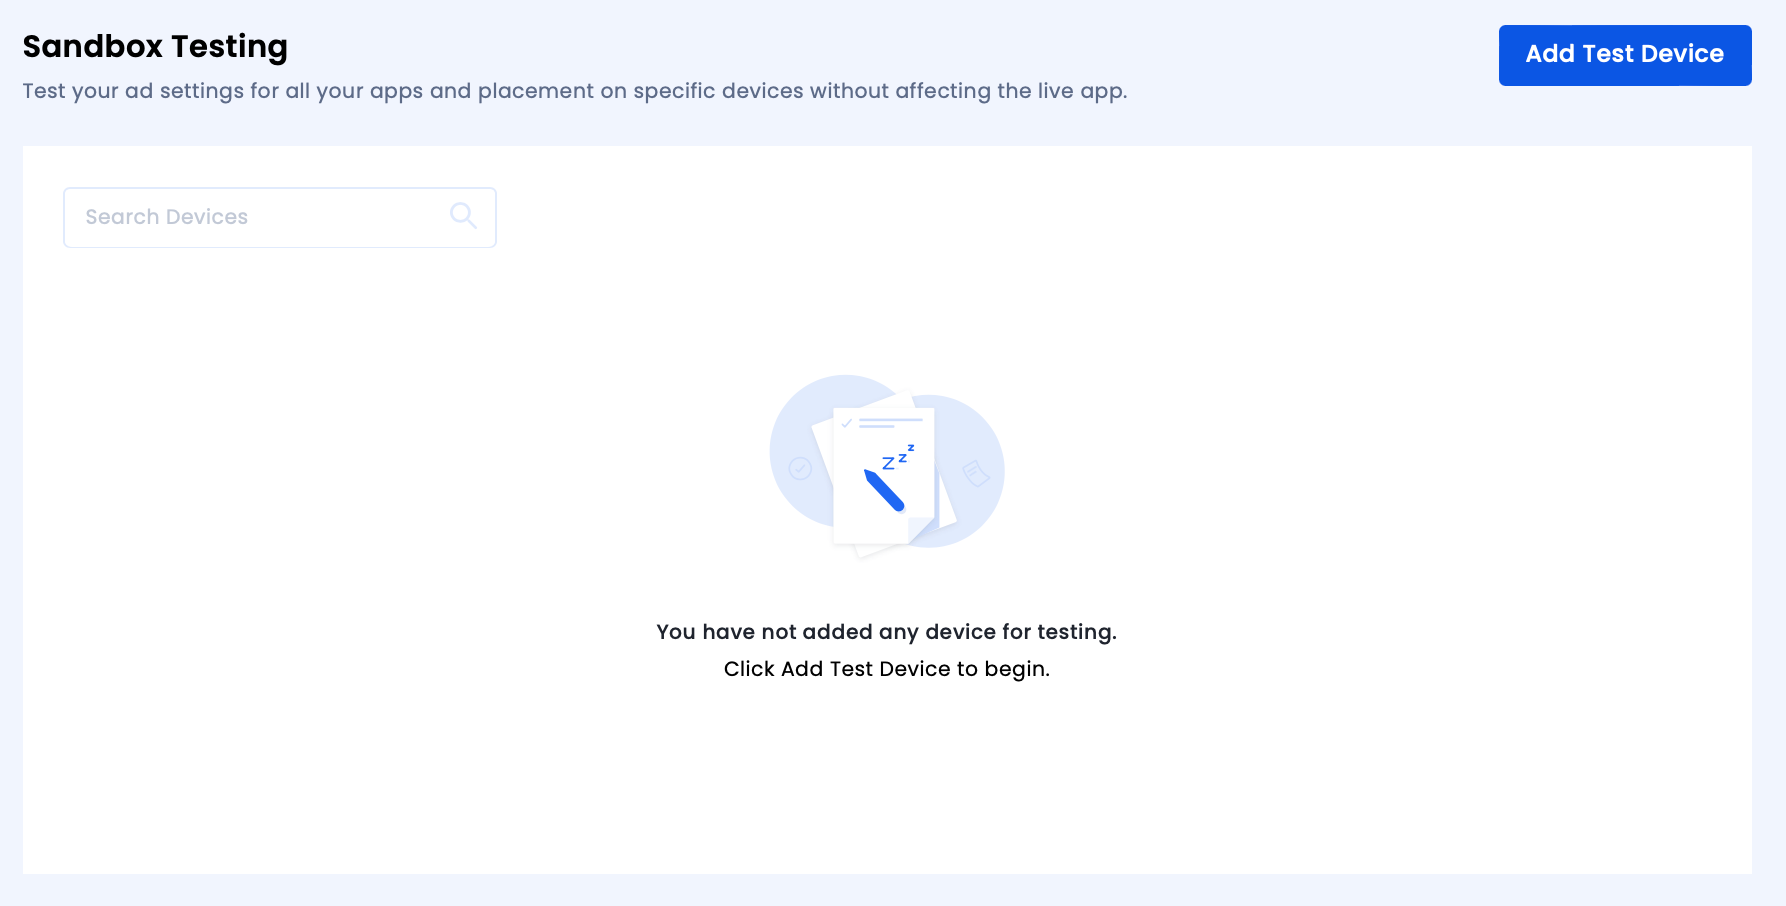
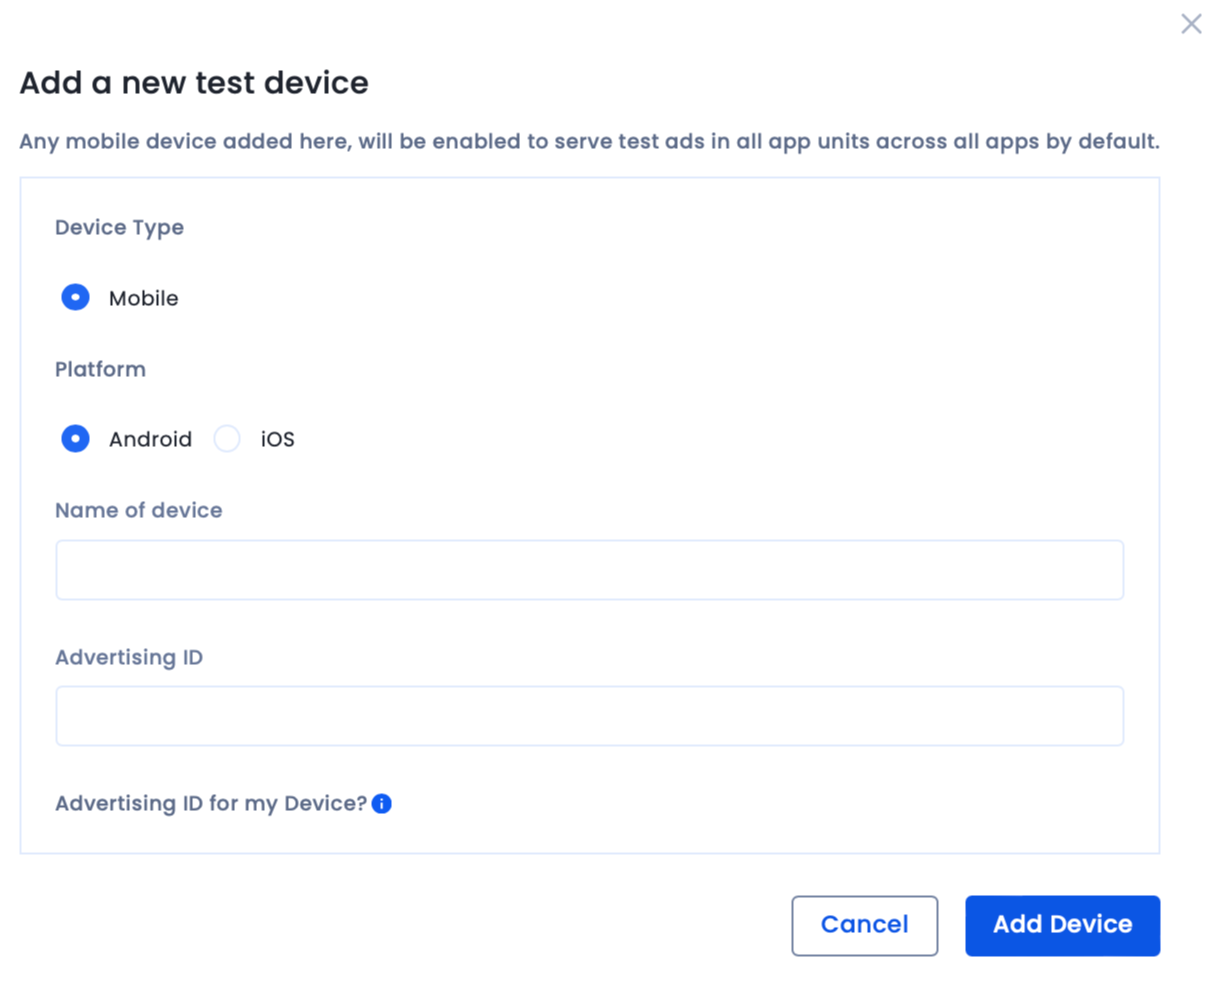
You have successfully added a device for testing your integration. If you come across any issues, contact our support team to start troubleshooting your integration.
To maximize your monetization with InMobi, it is strongly recommended that you implement our best practices listed below.
If you have already configured your block settings, select your desired settings from the Block Settings drop-down list. For more information on how to configure your block settings, see Block Settings.
InMobi CMP offers granular analytics to help you optimize and maximize your consent rate. You can view consent data for different regulations such as GDPR, CCPA and MSPA, and their opt-in rates according to countries for your apps and websites.
The Reports tab has two sections: Dashboard and Analytics.
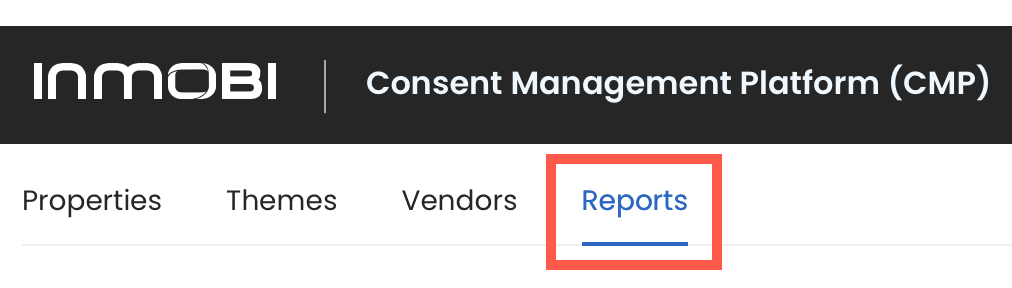
The dashboard offers a pre-built set of comprehensive trends and metrics. These are not customizable.
The Summary allows you to view and compare data between two time durations for the chosen property.
Under Detailed Insights, you can use Filters to view in-depth data for a specific Regulation, Pages, Device Type, OS, and Country during a particular time.
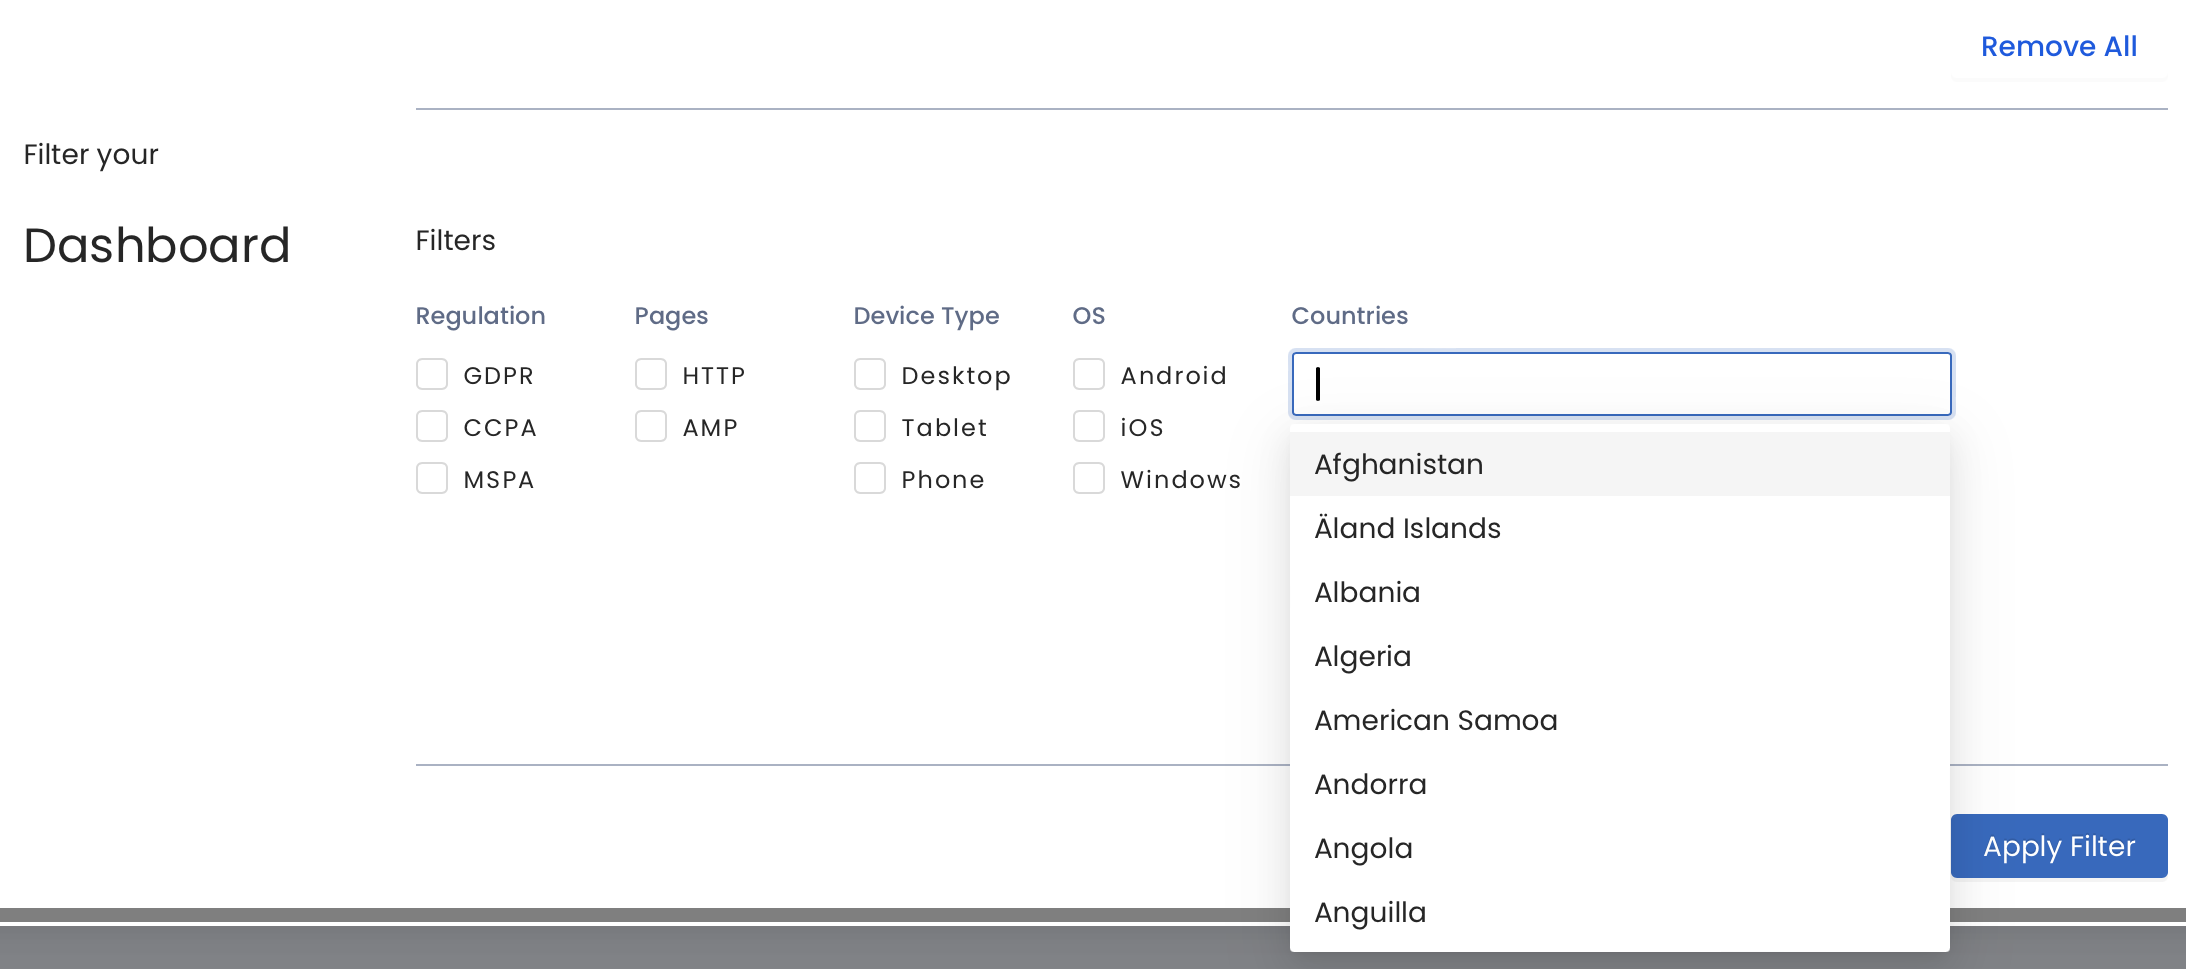
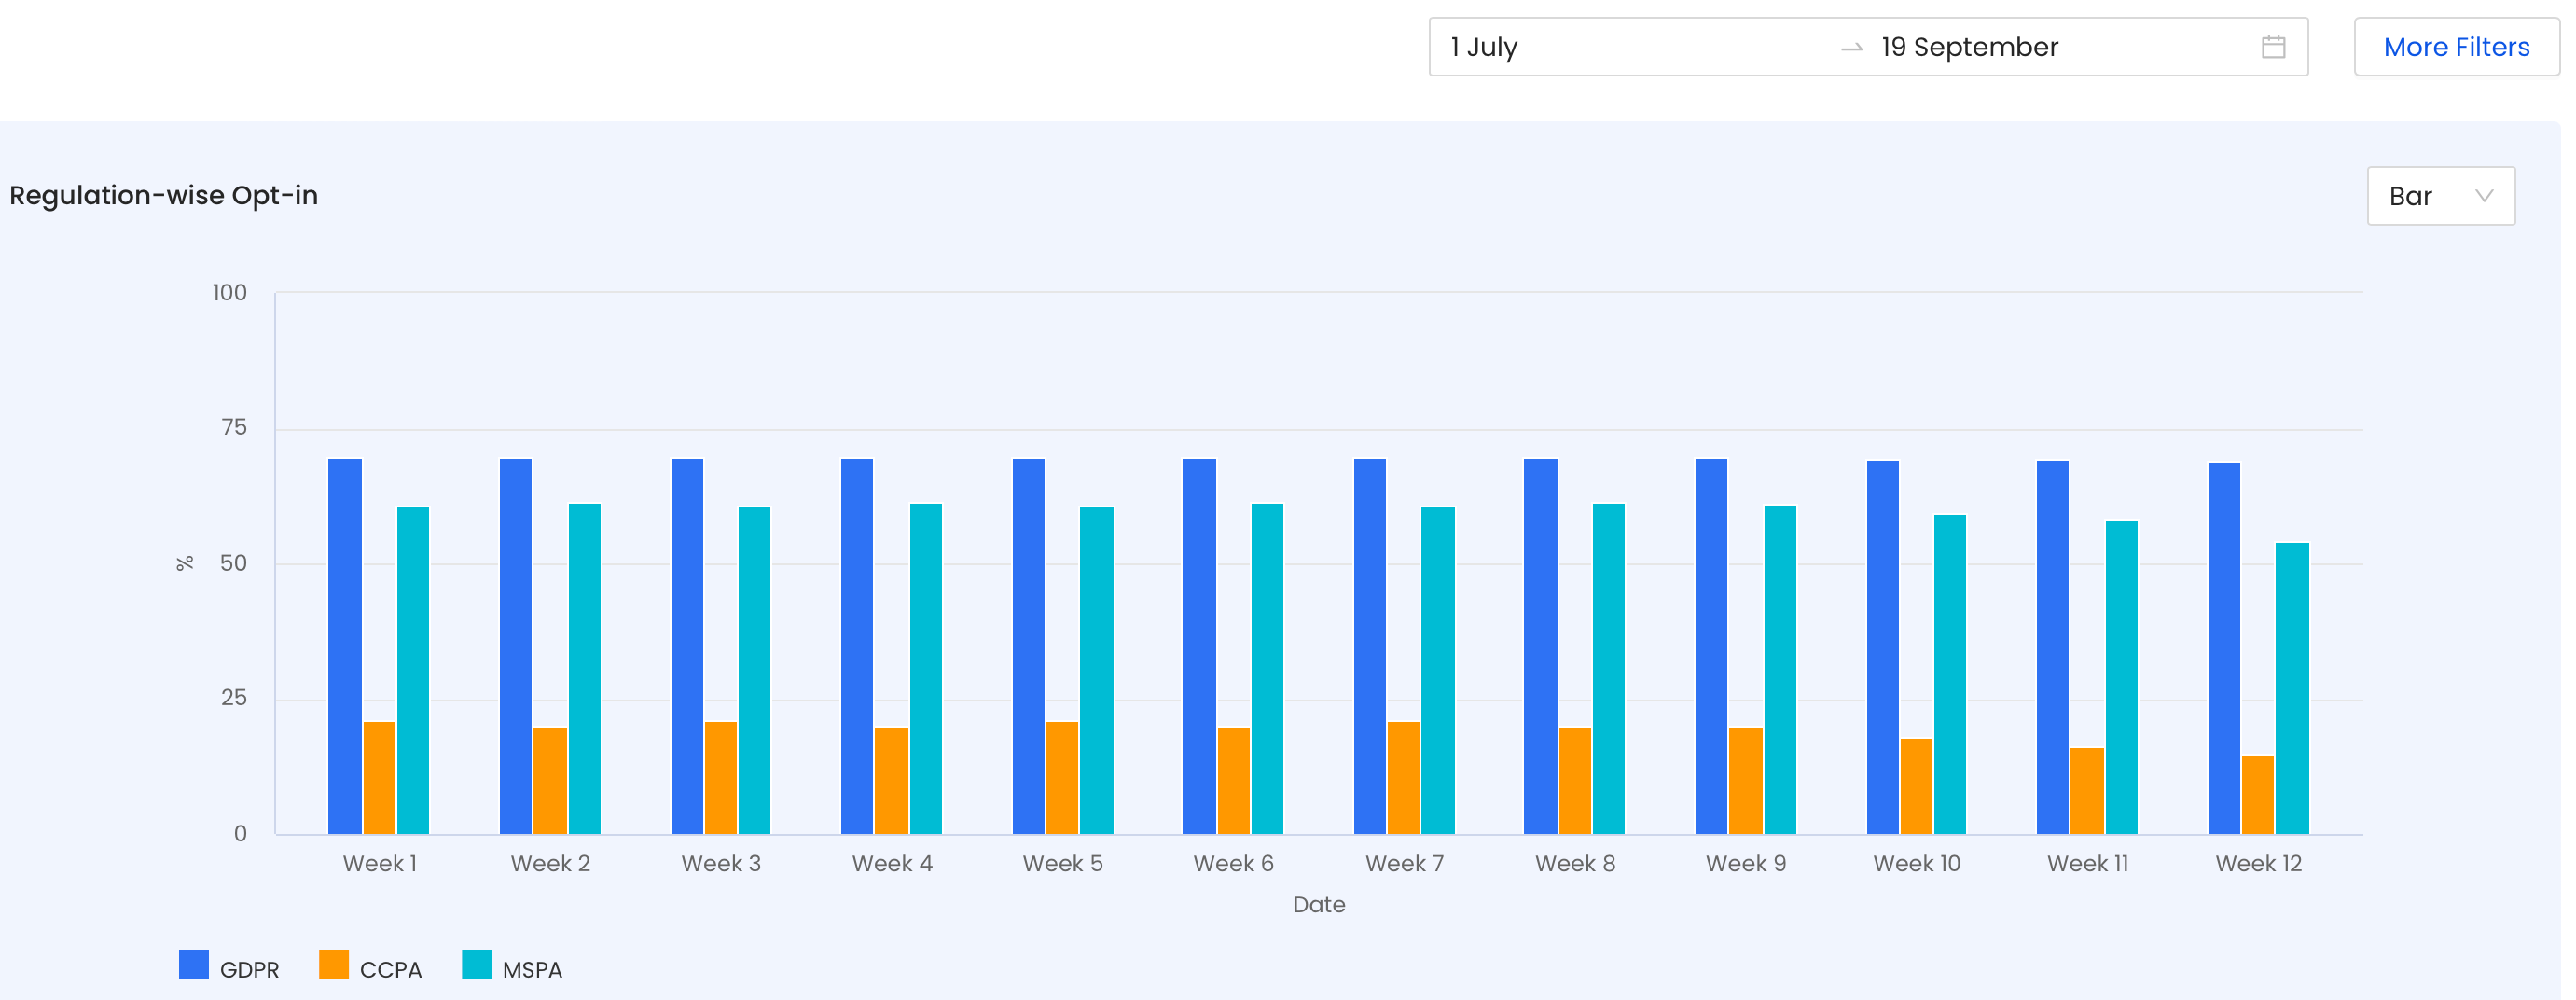
You can view country-wise traffic and consent rates during a specific time period to understand which countries generate the most traffic and opt-ins.
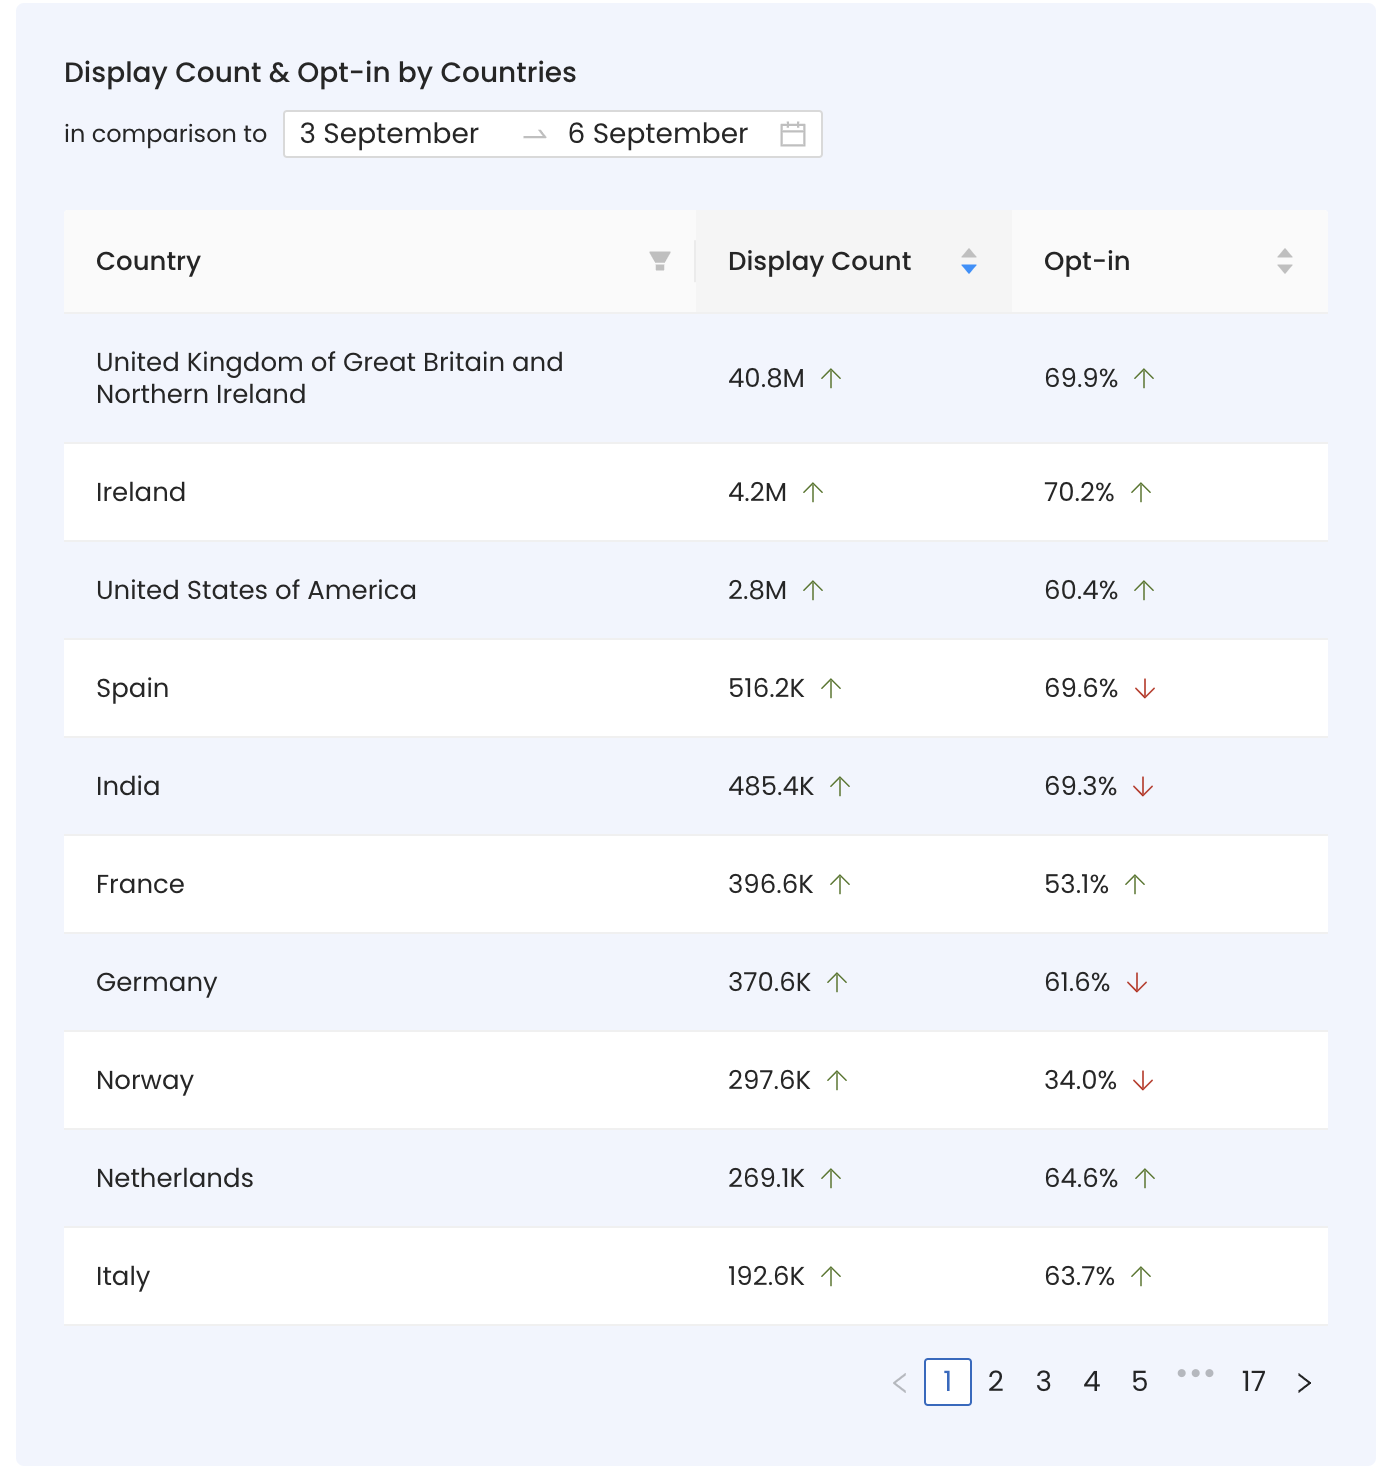
The two pie charts at the bottom of the dashboard reflect the regulation-wise consent distribution data between GDPR and CCPA.
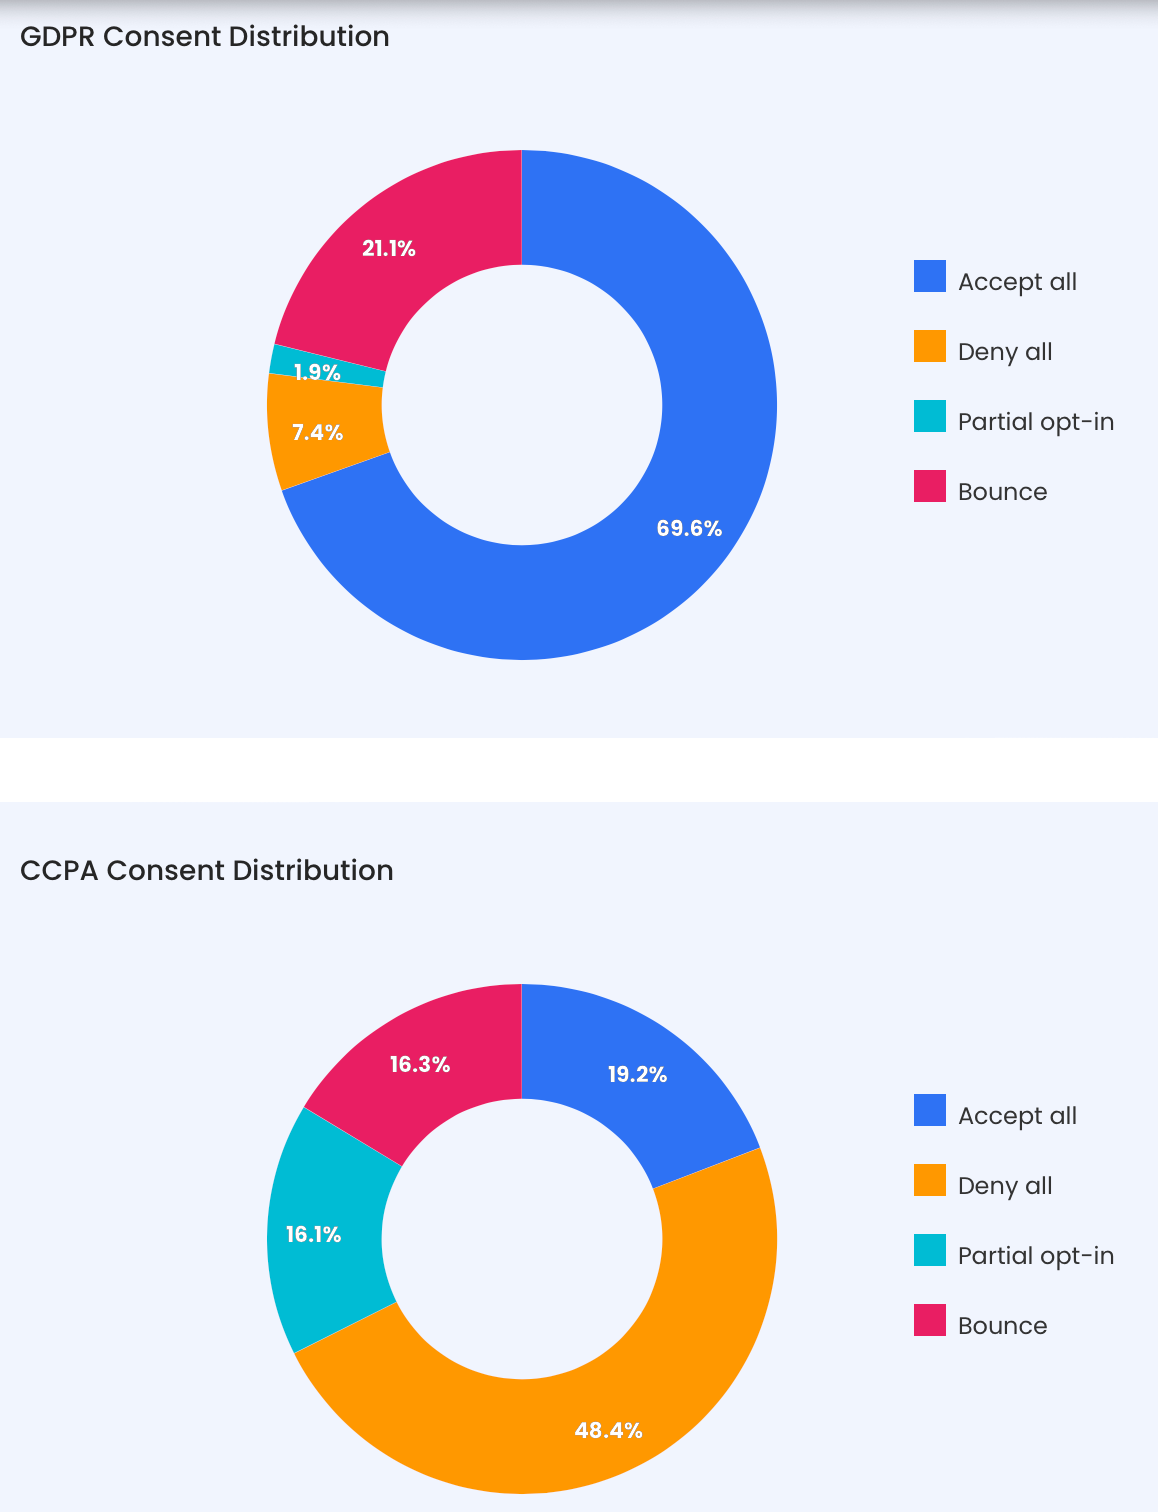
The Analytics offers a visualization of custom reports generated after selecting dimensions, filters, and metrics of your choice.
Dimensions are attributes by which you filter and group data.
InMobi CMP supports the following dimensions:
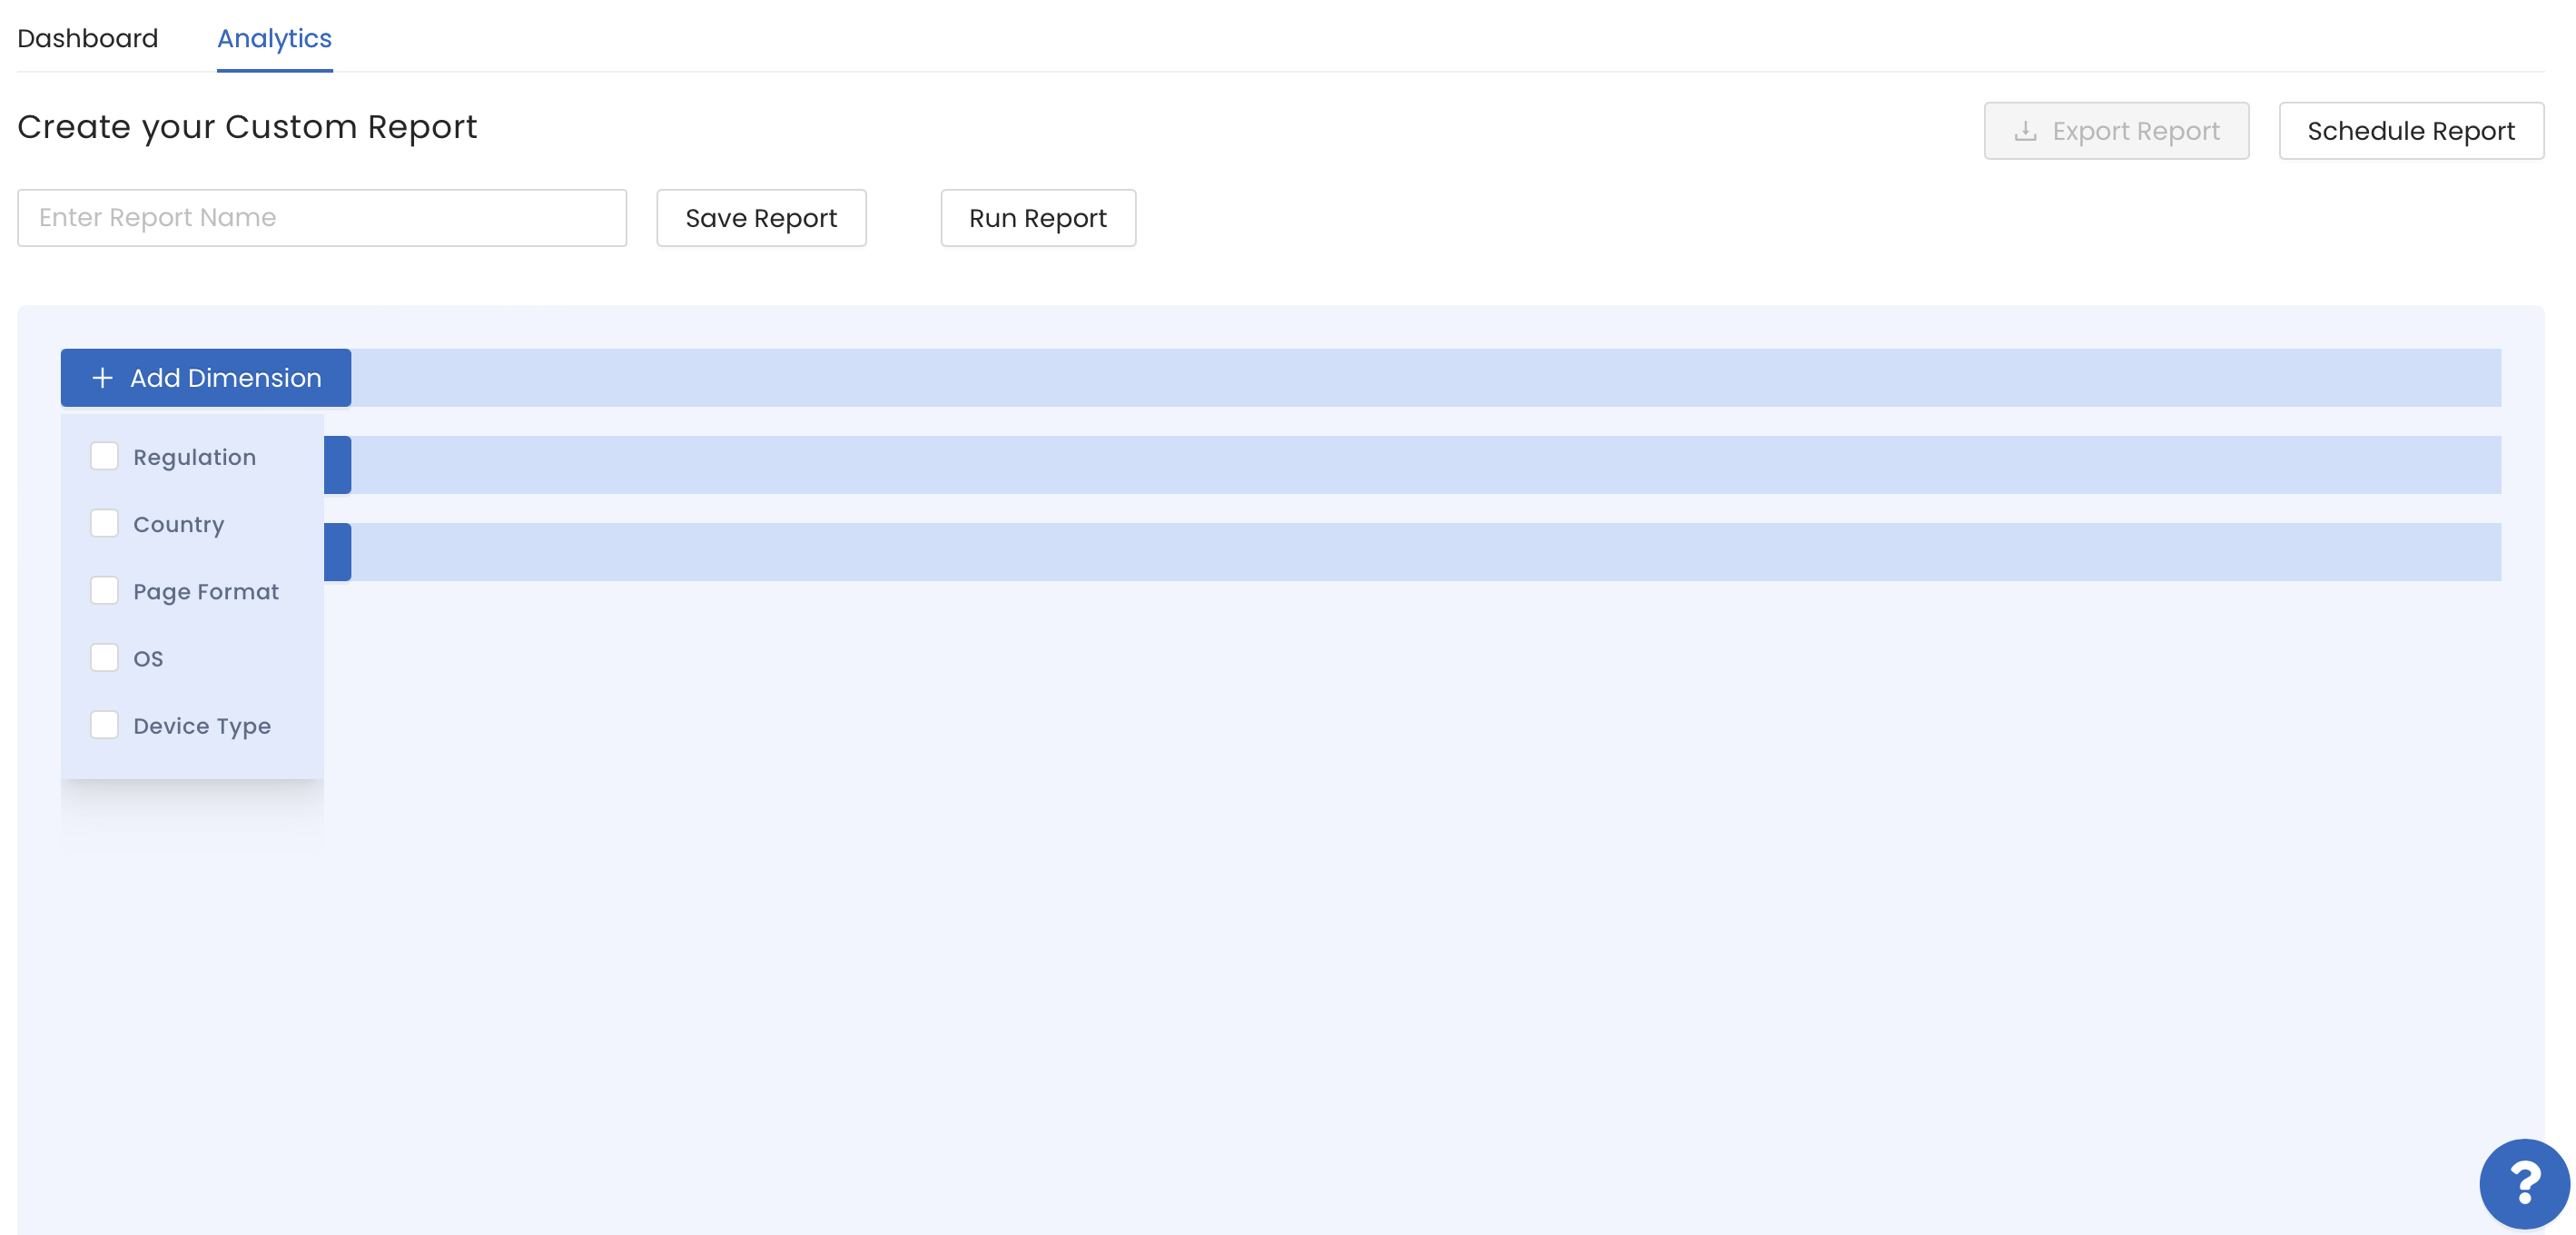
Filters allow you to query data only for specific values/attributes of the Dimensions.
You can choose from the following filters:
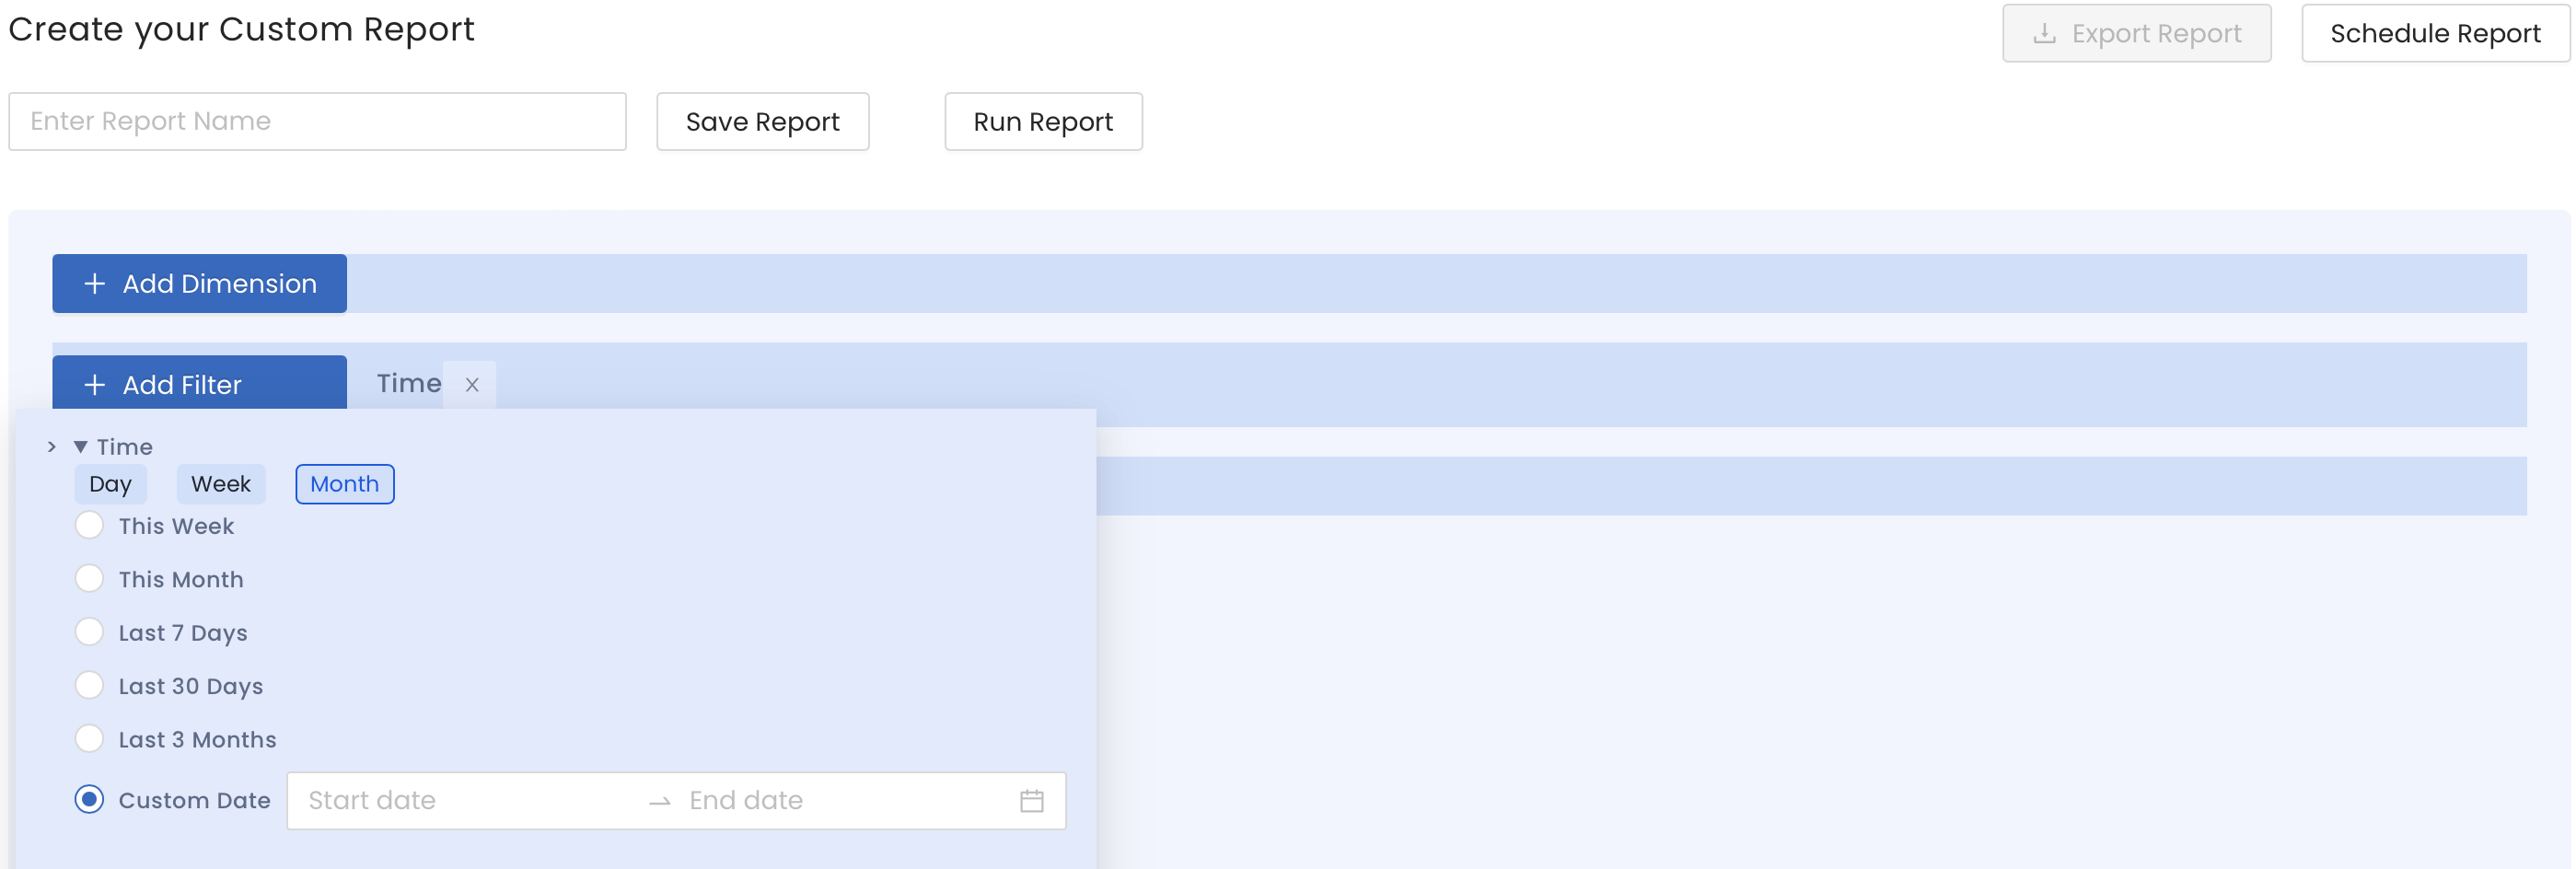
Metrics are the quantifiable measures that you wish to see. InMobi CMP offers the following metrics:
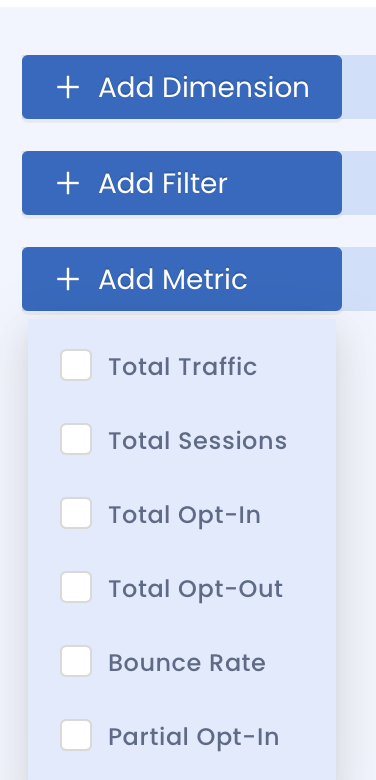
To understand better, let’s take an example. If you want to generate a report showing the opt-in rates of mobile devices in the USA in the last 30 days, it will look something like this.
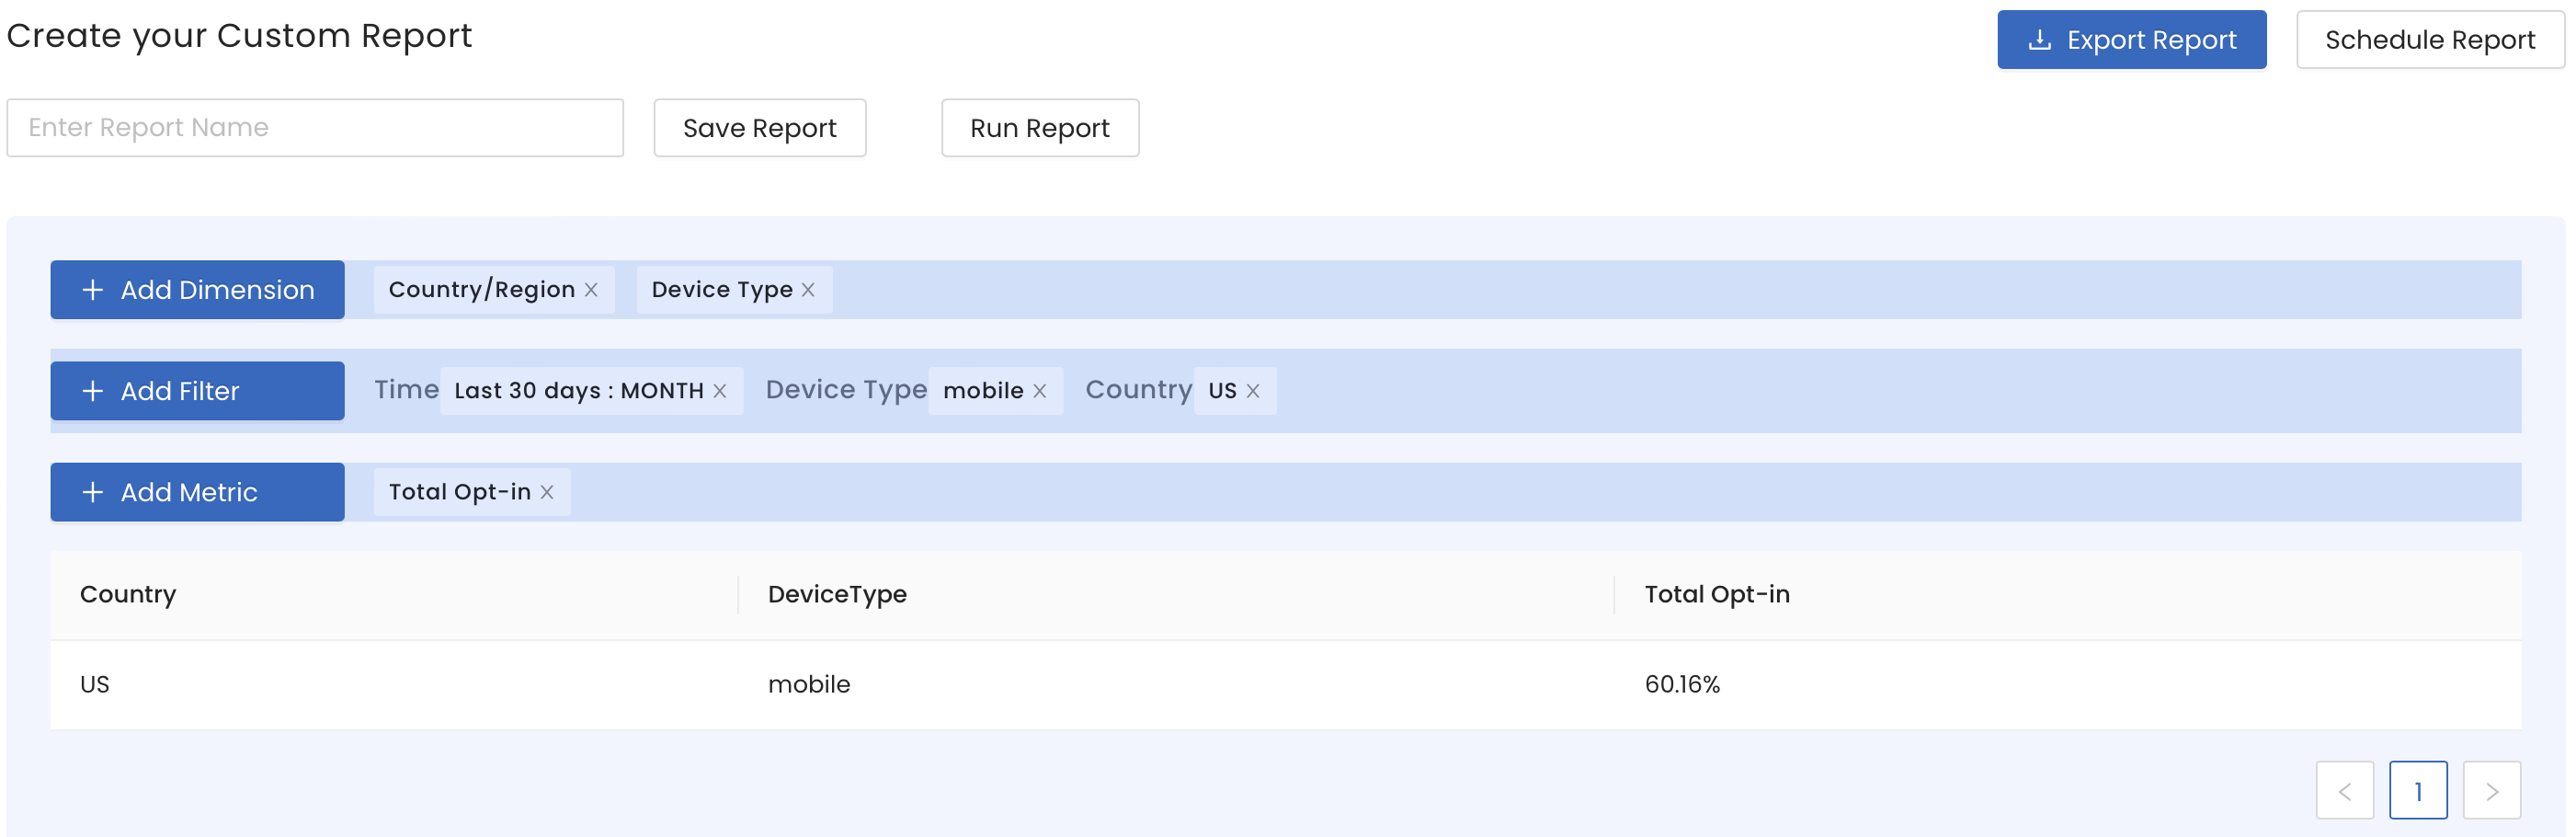
Here, Country and Device Type are the Dimensions, 30 days is the Time, Mobile is the Device Type filter, US is the Country filter, and opt-in rates is the metric.
You can view all your saved reports by clicking View All Reports.
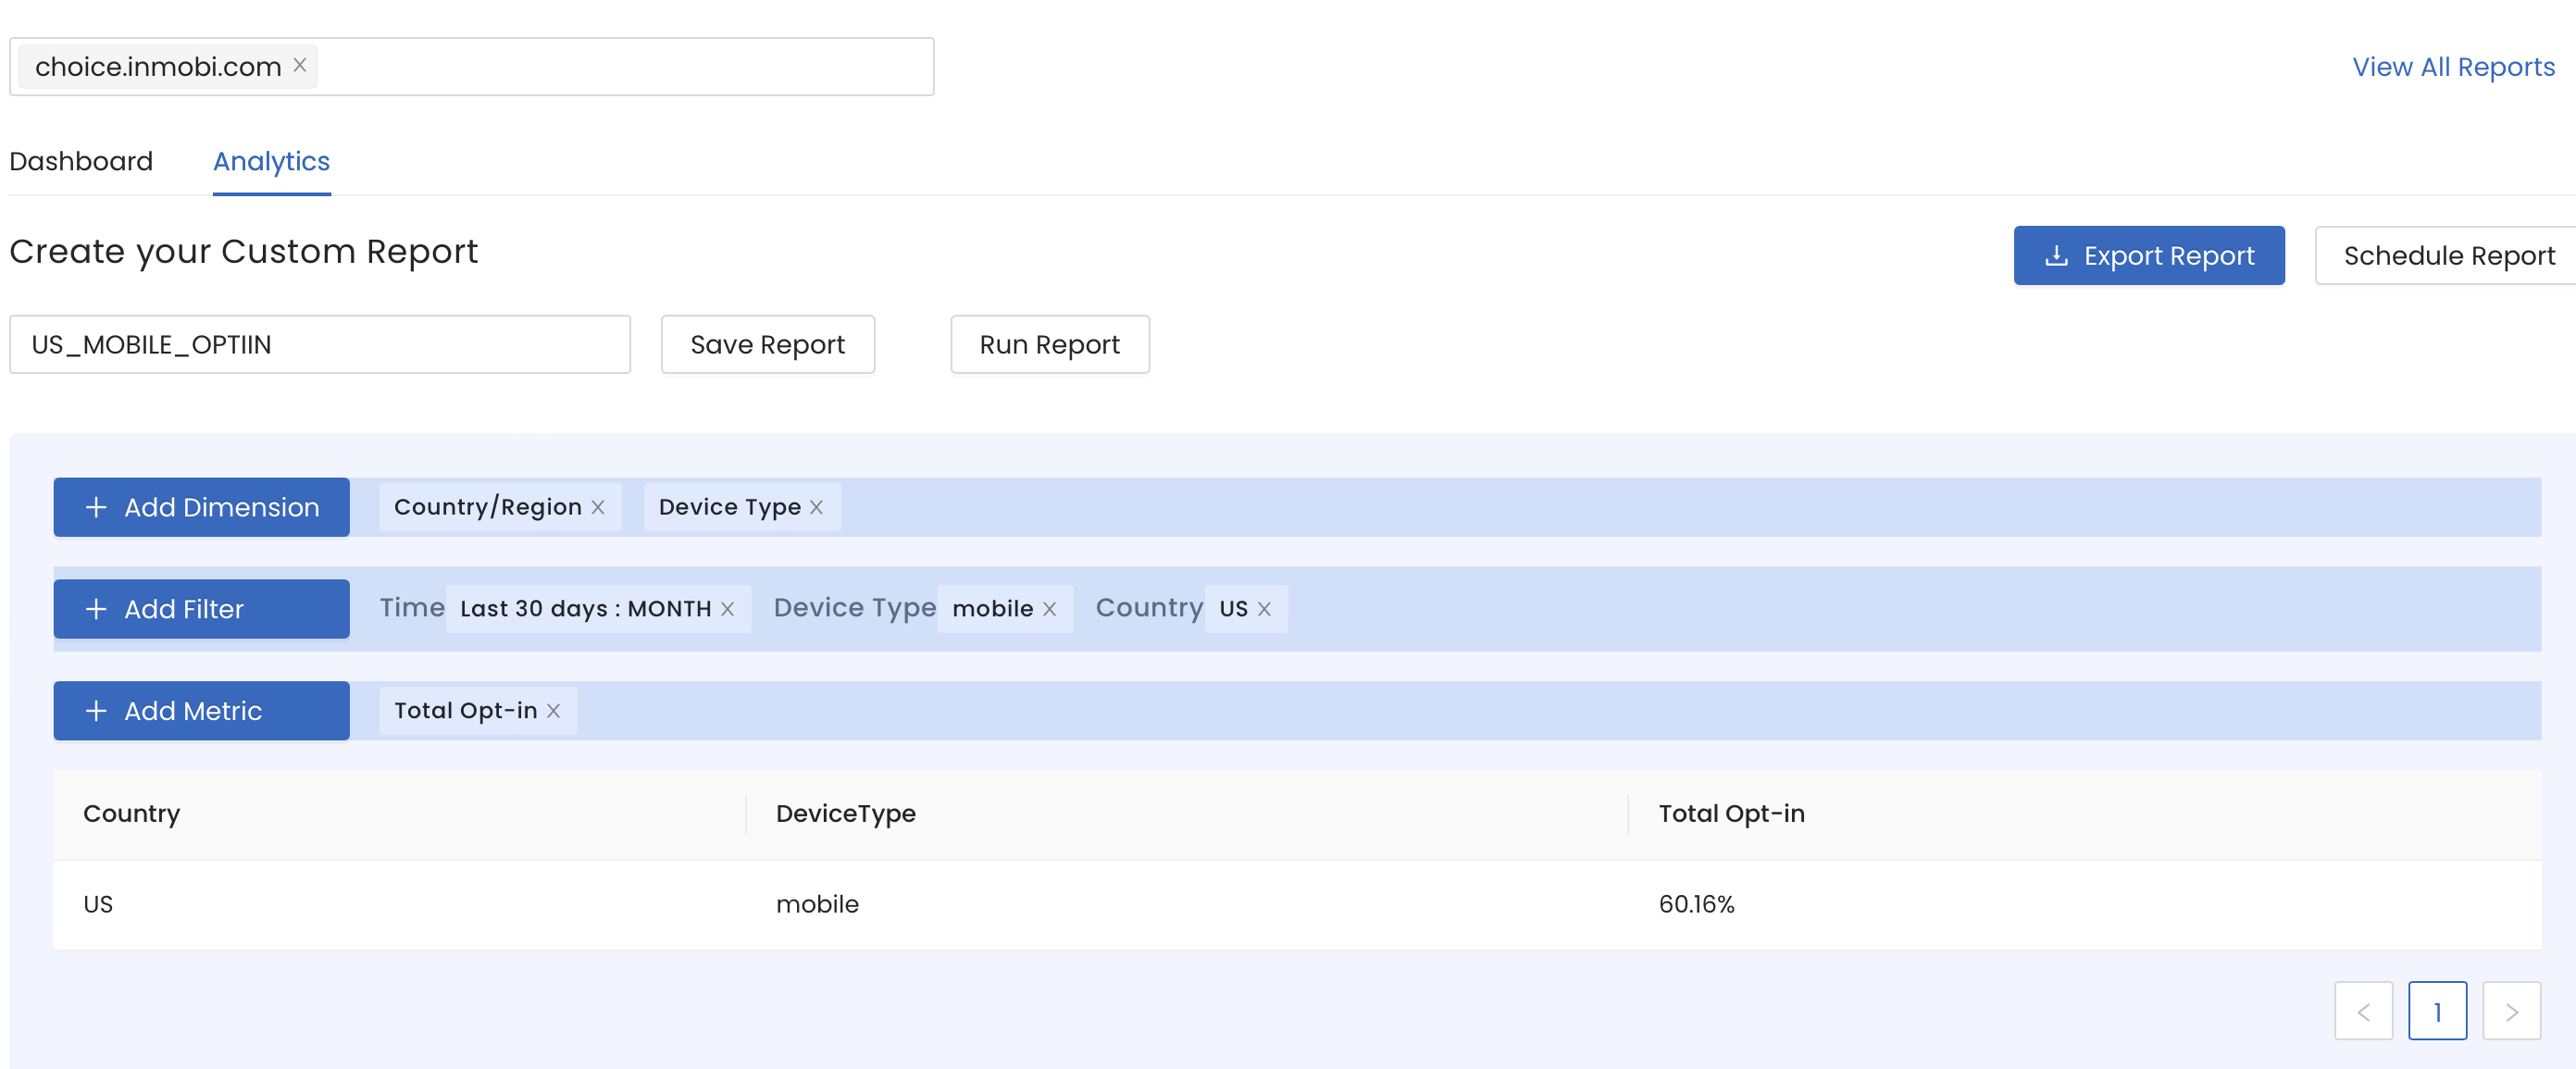
You can also schedule recurring reports. These will be automatically sent at regular intervals to specific email addresses listed by you. Currently, InMobi CMP can scheduled reports on a custom, daily, weekly, and monthly basis.
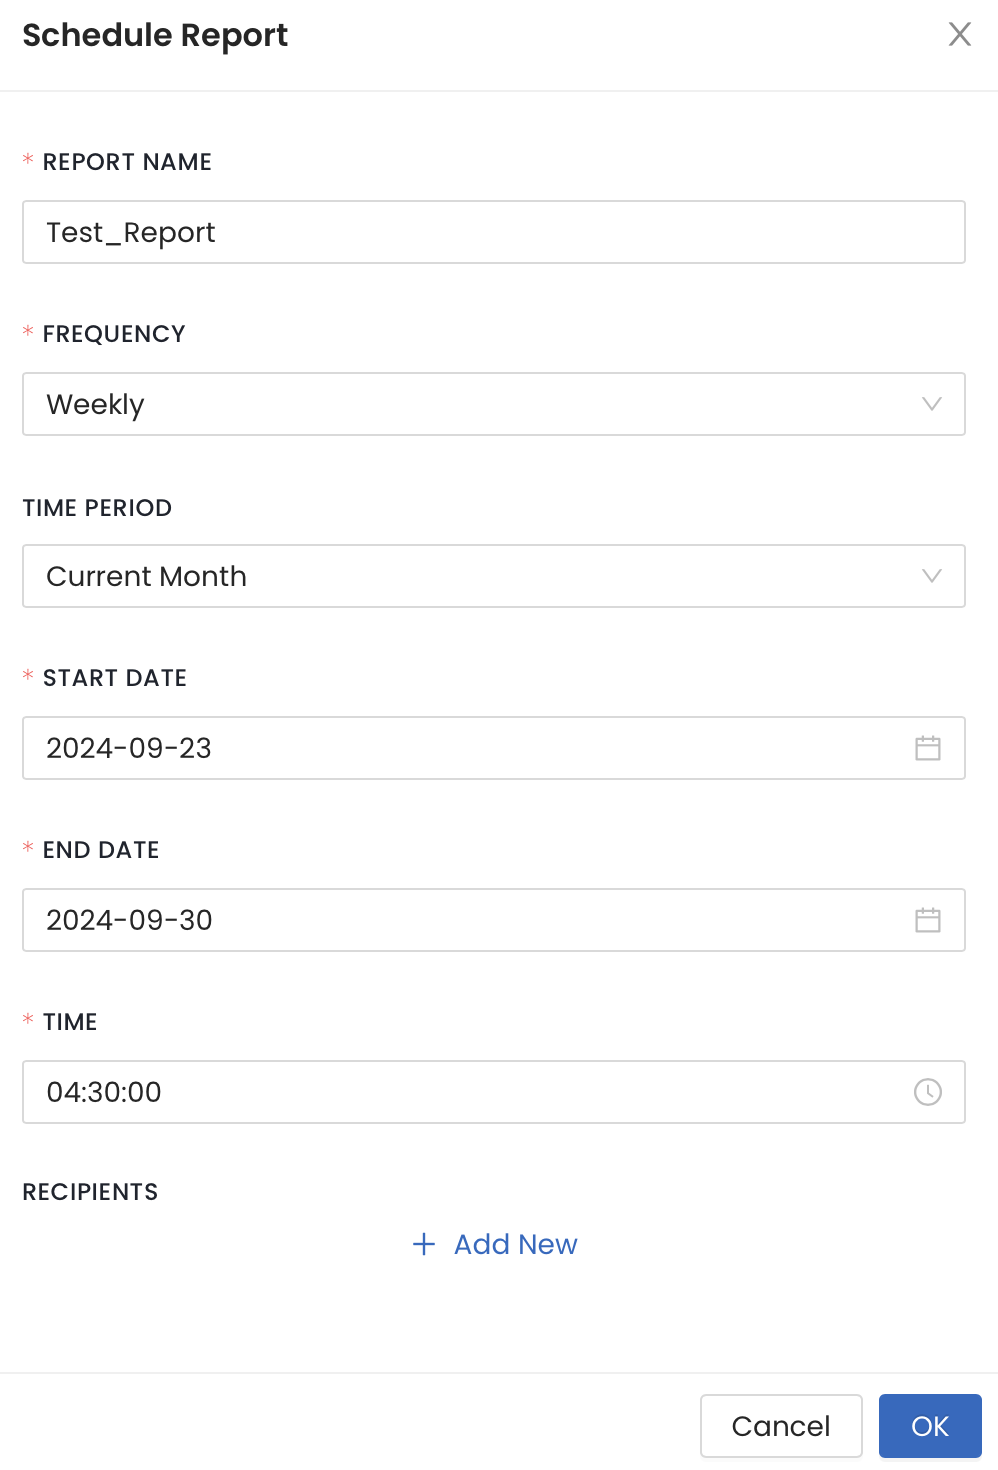
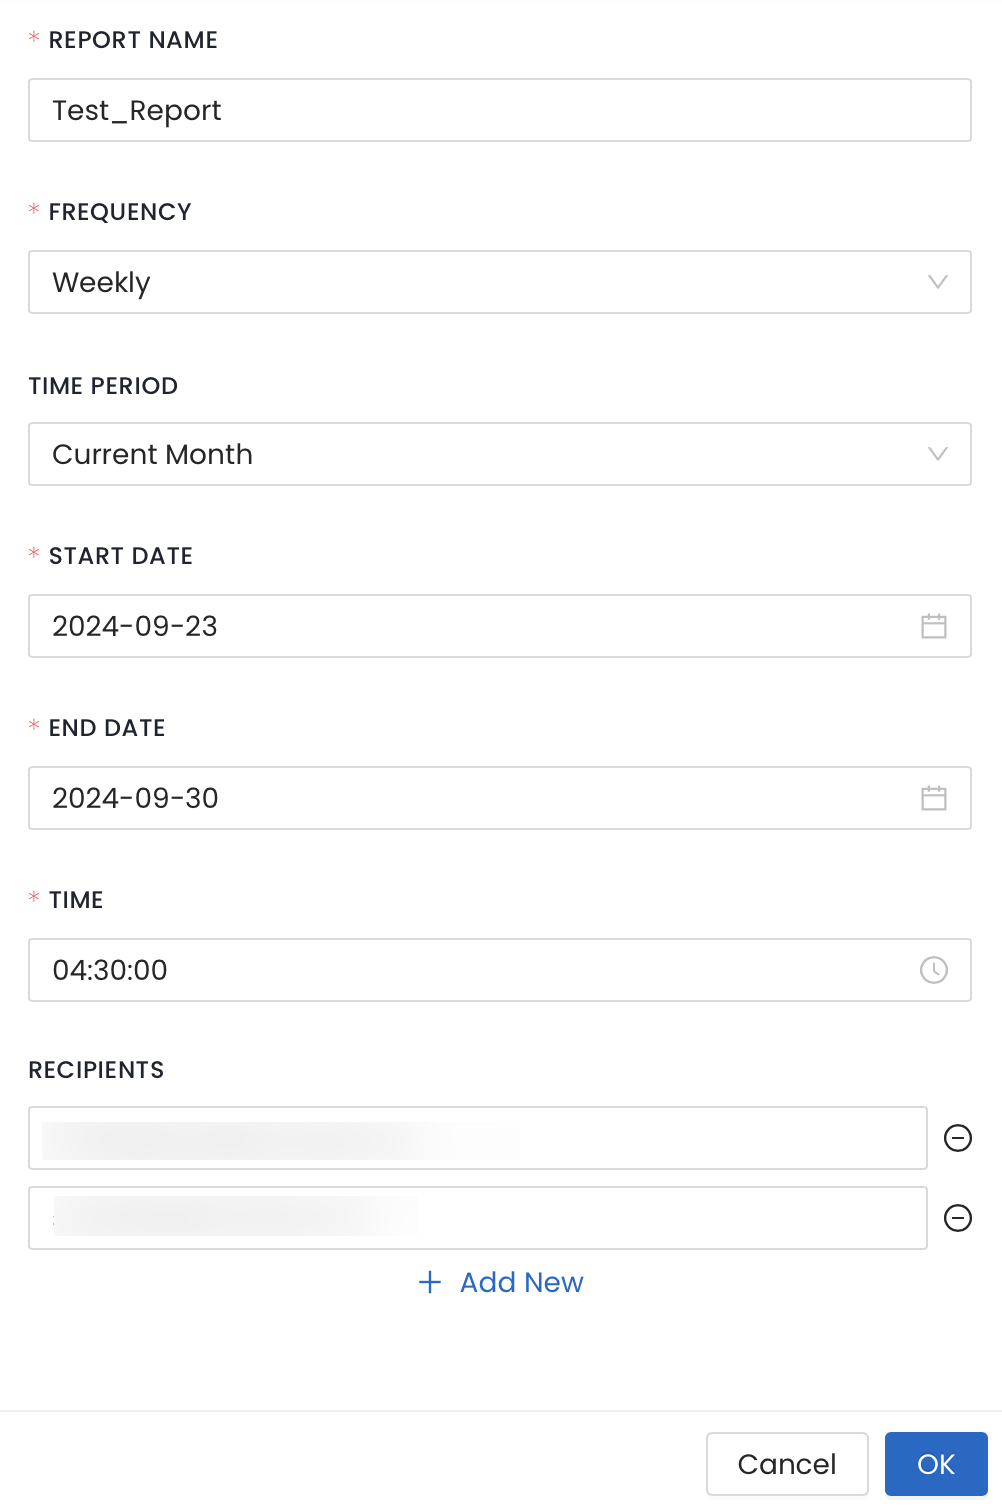
InMobi’s Ad Management APIs help you manage your inventory i.e., apps and placements you are monetizing or interested in monetizing through InMobi easily and efficiently. They reduce the manual effort of managing huge inventory individually through our platform.
For authentication, you need the following values in the header:
| Key | Value |
| x-client-secret | You need to generate an API key. To know how to generate a new API key or access an existing API key, see Reporting API. |
| x-account-id | You need to enter the Account ID. You can find the Account ID in Payment Settings under the Finance tab on InMobi platform. |
| x-client-id | You need to enter the email ID of the account. |
The APIs are available for the following functionalities:
The request protocol of all APIs is https.
| Name | Description | Required | Type | Sample/Available values |
| pageNum | page number | Optional | Integer | 1, 2, 3 etc. |
| pageLength | number of records per page | Optional | Integer |
1, 2, 3 etc. Default number of results: 10 |
| status | status of the app | Optional | String |
Available values : ACTIVE, DRAFT, ARCHIVE, FLAGGED Default value: ACTIVE |
{
  "success": true,
  "data": {
    "totalRecords": 281,
    "records": [
      {
        "storeUrl": "string",
        "appName": "string",
        "platform": "string",
        "bundleId": "string",
        "childDirected": 1,
        "appRating": "string",
        "appId": 0
      }
    ]
  }
}
| Name | Description | Type | Sample/Possible values |
| Success | Determines success of the response | Boolean |
true – request successful false – request unsuccessful with some error(s) |
| storeUrl | App store/Play store URL of the app | String (url) | URL |
| appName | Name of the app | String | Sample App |
| Platform | Platform of the app | String | Android or iPhone (iOS) |
| bundleId | Bundle of the apps as registered in the store | String | Com.org.app |
| childDirected | Determines the audience type of the app | Integer |
1 – App is not directed towards children 2 – App is directed towards children and requires parental consent 3 – App is directed partially towards children and towards adults |
| appRating | Content Rating of the app | String | |
| appId | ID of the app on InMobi dashboard | Numeric |
{
  "success": true,
  "data": {
    "storeUrl": "string",
    "appName": "string",
    "platform": "string",
    "bundleId": "string",
    "childDirected": 0,
    "appRating": "string",
    "appId": 0
  },
  "status": "string",
  "createdOn": "string"
}
| Name | Description | Type | Sample/Possible values |
| Success | Determines success of the response | Boolean |
true – request successful
false – request unsuccessful with some error(s) |
| storeUrl | App store/Play store URL of the app | String (url) | URL |
| appName | Name of the app | String | Sample App |
| Platform | Platform of the app | String | Android or iOS |
| bundleId | Bundle of the apps as registered in the store | String | Com.org.app |
| childDirected | Determines the audience type of the app | Integer |
1 – App is not directed towards children 2 – App is directed towards children and requires parental consent 3 – App is directed partially towards children and towards adults |
| appRating | Content Rating of the app | String | |
| appId | ID of the app on InMobi dashboard | Numeric | |
| status | Current status of the app on platform | String | PENDING REVIEW, ACTIVE, FLAGGED, REJECTED, ARCHIVED |
| createdOn | Date of app creation on platform | String |
{
  "storeUrl": "string",
  "childDirected": 0,
  "locationAccess": true,
  "appName": "string"
}
| Name | Description | Required | Type | Sample/Possible values |
| storeUrl | App store/Play store URL of the app | Required | String (url) | URL |
| locationAccess | Specify if InMobi can access the location details | Required | Boolean |
true – InMobi will be able to use the location data collected by this app. false – InMobi will not be able to access the location data collected by this app. |
| childDirected | Specify the audience type of the app | Required | Integer |
1 – App is not directed towards children 2 – App is directed towards children and requires parental consent 3 – App is directed partially towards children and towards adults |
| appName | Name of the app | Optional | String | Sample App |
{
  "success": true,
  "data": {
    "storeUrl": "string",
    "appName": "string",
    "platform": "string",
    "bundleId": "string",
    "childDirected": 0,
    "appRating": "string",
    "appId": 0
  },
  "status": "string",
  "createdOn": "string"
}
| Name | Description | Type | Sample/Possible values |
| Success | Determines success of the response | Boolean | true – request successful |
| storeUrl | App store/Play store URL of the app | String (url) | URL |
| appName | Name of the app | String | Sample App |
| Platform | Platform of the app | String | Android or iOS |
| bundleId | Bundle of the apps as registered in the store | String | Com.bundle.app |
| childDirected | Determines the audience type of the app | Integer |
1 – App is not directed towards children 2 – App is directed towards children and requires parental consent 3 – App is directed partially towards children and towards adults |
| appRating | Content Rating of the app | String | |
| appId | ID of the app on InMobi dashboard | Numeric | |
| status | Current status of the app on platform | String | PENDING REVIEW, ACTIVE, FLAGGED, REJECTED, ARCHIVED |
| createdOn | Date of app creation on platform | String |
{

  "childDirected": 0,

  "locationAccess": true,

  "appName": "string"

}
| Name | Description | Required | Type | Sample/Possible values |
| locationAccess | Specify if InMobi can access the location details | Required | Boolean |
true – InMobi will be able to use the location data collected by this app. false – InMobi will not be able to access the location data collected by this app. |
| childDirected | Specify the audience type of the app | Required | Integer |
1 – App is not directed towards children 2 – App is directed towards children and requires parental consent 3 – App is directed partially towards children and towards adults |
| appName | Name of the app | Optional | String | Sample App |
{
  "success": true,
  "data": {
    "storeUrl": "string",
    "appName": "string",
    "platform": "string",
    "bundleId": "string",
    "childDirected": 0,
    "appRating": "string",
    "appId": 0
  },
  "status": "string",
  "createdOn": "string"
}
| Name | Description | Type | Sample/Possible values |
| Success | Determines success of the response | Boolean | true – request successful |
| storeUrl | App store/Play store URL of the app | String (url) | URL |
| appName | Name of the app | String | Sample App |
| Platform | Platform of the app | String | Android or iOS |
| bundleId | Bundle of the apps as registered in the store | String | Com.bundle.app |
| childDirected | Determines the audience type of the app | Integer |
1 – App is not directed towards children 2 – App is directed towards children and requires parental consent 3 – App is directed partially towards children and towards adults |
| appRating | Content Rating of the app | String | |
| appId | ID of the app on InMobi dashboard | Numeric | |
| status | Current status of the app on platform | String | PENDING REVIEW, ACTIVE, FLAGGED, REJECTED, ARCHIVED |
| createdOn | Date of app creation on platform | Optional |
| Name | Description | Required | Type | Sample/Available values |
| pageNum | page number | Optional | Integer | 1, 2, 3 etc. |
| pageLength | number of records per page | Optional | Integer |
1, 2, 3 etc. Default number of results: 10 |
| appId | The ID of an app | Required | Integer |
|
| placementType | The type of placement | Optional | String | Available values : INTERSTITIAL, BANNER, REWARDED_VIDEO, NATIVE |
{
  "success": true,
  "data": {
    "totalRecords": 281,
    "records": [
      {
        "storeUrl": "string",
        "appName": "string",
        "platform": "string",
        "bundleId": "string",
        "childDirected": true,
        "appRating": "string",
        "appId": 0
      },
      {
        "placementId": 0,
        "placementName": "string",
        "placementType": "string",
        "testMode": "string",
        "status": "string",
        "appId": 0,
        "cpmFloor": 0,
        "isAudienceBiddingEnabled": true,
        "audienceBiddingPartner": "string",
        "a9TagId": "string",
        "a9AppId": "string",
        "isFallbackPlacement": true,
        "createdOn": "string"
      }
    ]
  }
}
| Name | Description | Type | Sample/Possible values |
| Success | Determines success of the response | Boolean |
true – request successful false – request unsuccessful with some error(s) |
| storeUrl | App store/Play store URL of the app | String (url) | URL |
| appName | Name of the app | String | |
| Platform | Platform of the app | String | Android or iPhone (iOS) |
| bundleId | Bundle of the apps as registered in the store | String | Com.org.app |
| childDirected | Determines the audience type of the app | Integer |
1 – App is not directed towards children 2 – App is directed towards children and requires parental consent 3 – App is directed partially towards children and towards adults |
| appRating | Content Rating of the app | String | |
| appId | App key on InMobi platform | Integer | |
| placementId | ID of the placement as on InMobi platform | Integer | |
| placementName | Placement name as on InMobi platform | String | |
| placementType | Type of placement | String | Available values : INTERSTITIAL, BANNER, REWARDED_VIDEO, NATIVE |
| testMode | Test mode of the placement | String |
On – Test mode is on for specific devices as mentioned in the integration testing in InMobi platform Global – Test mode is on for all devices with this app Off – Test mode is off for all devices with this app |
| status | Current status of the placement | String | Available values : ACTIVE, DRAFT, ARCHIVE, FLAGGED |
| cpmFloor | eCPM floor set on the InMobi platform | Number | |
| isAudienceBiddingEnabled | Determines if Audience Bidding is enabled for this placement | Boolean |
true – Audience Bidding is on false – Audience Bidding is off |
|
audienceBiddingPartner |
Audience Bidding Partner (applicable only if Audience Bidding is enabled) | String | Available values: MAX, AMAZON_TAM, GOOGLE_OPEN_BIDDING, CUSTOM_MEDIATION, IRONSOURCE, SPRINGSERVE, PREBID, FYBER, ADMOST, AEQUUS, GAMEANALYTICS_HYPERBID, CHARTBOOST, GOOGLE_SDK_BIDDING |
| a9TagId | Tag ID (applicable only in case of Amazon TAM as Audience Bidding partner) | String | |
| A9AppId | App ID (applicable only in case of Amazon TAM as Audience Bidding partner) | String | |
| createdOn | Creation date of the placement | String |
{

  "success": true,

  "data": {

    "placementId": 0,

    "placementName": "string",

    "placementType": "string",

    "testMode": "string",

    "status": "string",

    "appId": 0,

    "cpmFloor": 0,

    "isAudienceBiddingEnabled": true,

    "audienceBiddingPartner": "string",

    "a9TagId": "string",

    "a9AppId": "string",

    "isFallbackPlacement": true,

    "createdOn": "string"

  }

}
| Name | Description | Type | Sample/Possible values |
| Success | Determines success of the response | Boolean |
true – request successful false – request unsuccessful with some error(s) |
| appId | App key on InMobi platform | Integer | |
| placementId | ID of the placement as on InMobi platform | Integer | |
| placementName | Placement name as on InMobi platform | String | |
| placementType | Type of placement | String | Available values : INTERSTITIAL, BANNER, REWARDED_VIDEO, NATIVE |
| testMode | Test mode of the placement | String |
On – Test mode is on for specific devices as mentioned in the integration testing in InMobi platform Global – Test mode is on for all devices with this app Off – Test mode is off for all devices with this app |
| status | Current status of the placement | String | Available values : ACTIVE, DRAFT, ARCHIVE, FLAGGED |
| cpmFloor | eCPM floor set on the InMobi platform | Number | |
| isAudienceBiddingEnabled | Determines if Audience Bidding is enabled for this placement | Boolean |
true – Audience Bidding is on false – Audience Bidding is off |
|
audienceBiddingPartner |
Audience Bidding Partner (applicable only if Audience Bidding is enabled) | String | Available values: MAX, AMAZON_TAM, GOOGLE_OPEN_BIDDING, CUSTOM_MEDIATION, IRONSOURCE, SPRINGSERVE, PREBID, FYBER, ADMOST, AEQUUS, GAMEANALYTICS_HYPERBID, CHARTBOOST, GOOGLE_SDK_BIDDING |
| a9TagId | Tag ID (applicable only in case of Amazon TAM as Audience Bidding partner) | String | |
| A9AppId | App ID (applicable only in case of Amazon TAM as Audience Bidding partner) | String | |
| createdOn | Creation date of the placement | String |
{

  "appId": 0,

  "placementName": "string",

  "placementType": "INTERSTITIAL",

  "cpmFloor": 0,

  "isAudienceBiddingEnabled": true,

  "audienceBiddingPartner": "string",

  "a9TagId": "string",

  "a9AppId": "string",

  "isFallbackPlacement": true

}
| Name | Description | Required | Type | Sample/Possible values |
| appId | App key on InMobi platform | Required | Integer | |
| placementName | Placement name as on InMobi platform | Required | String | |
| placementType | Type of placement | Required | String | Available values : INTERSTITIAL, BANNER, REWARDED_VIDEO, NATIVE |
| cpmFloor | eCPM floor set on the InMobi platform | Optional (not appicable in case isAudienceBiddingEnabled is "true") | Number | |
| isAudienceBiddingEnabled | Determines if Audience Bidding is enabled for this placement | Required | Boolean | true – Audience Bidding is on false – Audience Bidding is off |
| audienceBiddingPartner | Audience Bidding Partner (applicable only if Audience Bidding is enabled) | Required (only if isAudienceBiddingEnabled is “true”) | String | Available values: MAX, AMAZON_TAM, GOOGLE_OPEN_BIDDING, CUSTOM_MEDIATION, IRONSOURCE, SPRINGSERVE, PREBID, FYBER, ADMOST, AEQUUS, GAMEANALYTICS_HYPERBID, CHARTBOOST, GOOGLE_SDK_BIDDING |
| a9TagId | Tag ID of Amazon TAM placement | Required (only in case of Amazon TAM as Audience Bidding partner) | String | |
| A9AppId | App ID of Amazon TAM placement | Required (only in case of Amazon TAM as Audience Bidding partner) | String |
{
  "success": true,
  "data": {
    "placementId": 0,
    "placementName": "string",
    "placementType": "string",
    "testMode": "string",
    "status": "string",
    "appId": 0,
    "cpmFloor": 0,
    "isAudienceBiddingEnabled": true,
    "audienceBiddingPartner": "string",
    "a9TagId": "string",
    "a9AppId": "string",
    "isFallbackPlacement": true,
    "createdOn": "string"
  }
}
| Name | Description | Type | Sample/Possible values |
| Success | Determines success of the response | Boolean |
true – request successful false – request unsuccessful with some error(s) |
| placementId | ID of the placement as on InMobi platform | Integer | |
| placementName | Placement name as on InMobi platform | String | |
| placementType | Type of placement | String | Available values : INTERSTITIAL, BANNER, REWARDED_VIDEO, NATIVE |
| testMode | Test mode of the placement | String | ON – Test mode is on for specific devices as mentioned in the integration testing in InMobi platform
GLOBAL – Test mode is on for all devices with this app OFF – Test mode is off for all devices with this app |
| cpmFloor | eCPM floor set on the InMobi platform | Number |
|
| isAudienceBiddingEnabled | Determines if Audience Bidding is enabled for this placement | Boolean |
true – Audience Bidding is on false – Audience Bidding is off |
| audienceBiddingPartner | Audience Bidding Partner (applicable only if Audience Bidding is enabled) | String |
Available values: MAX, AMAZON_TAM, GOOGLE_OPEN_BIDDING, CUSTOM_MEDIATION, IRONSOURCE, SPRINGSERVE, PREBID, FYBER, ADMOST, AEQUUS, GAMEANALYTICS_HYPERBID, CHARTBOOST, GOOGLE_SDK_BIDDING |
| appId | App key on InMobi platform | Integer | |
| a9TagId | Tag ID (applicable only in case of Amazon TAM as Audience Bidding partner) | String | |
| A9AppId | App ID (applicable only in case of Amazon TAM as Audience Bidding partner) | String | |
| status | Current status of the placement | String | Available values : ACTIVE, DRAFT, ARCHIVE, FLAGGED |
| createdOn | Creation date of the placement | String |
{

  "placementName": "string",

  "cpmFloor": 0,

  "isAudienceBiddingEnabled": true,

  "audienceBiddingPartner": "string",

  "a9TagId": "string",

  "a9AppId": "string",

}
| Name | Description | Required | Type | Sample/Possible values |
| placementName | Placement name as on InMobi platform | Required | String | |
| cpmFloor | eCPM floor set on the InMobi platform | Optional (not appicable in case isAudienceBiddingEnabled is "true") | Number | |
| isAudienceBiddingEnabled | Determines if Audience Bidding is enabled for this placement | Optional | Boolean | true – Audience Bidding is on false – Audience Bidding is off |
| audienceBiddingPartner | Audience Bidding Partner (applicable only if Audience Bidding is enabled) | Required (only if isAudienceBiddingEnabled is “true”) | String | Available values: MAX, AMAZON_TAM, GOOGLE_OPEN_BIDDING, CUSTOM_MEDIATION, IRONSOURCE, SPRINGSERVE, PREBID, FYBER, ADMOST, AEQUUS, GAMEANALYTICS_HYPERBID, CHARTBOOST, GOOGLE_SDK_BIDDING |
| a9TagId | Tag ID of Amazon TAM placement | Required (only in case of Amazon TAM as Audience Bidding partner) | String | |
| A9AppId | App ID of Amazon TAM placement | Required (only in case of Amazon TAM as Audience Bidding partner) | String |
{
  "success": true,
  "data": {
    "placementId": 0,
    "placementName": "string",
    "placementType": "string",
    "testMode": "string",
    "status": "string",
    "appId": 0,
    "cpmFloor": 0,
    "isAudienceBiddingEnabled": true,
    "audienceBiddingPartner": "string",
    "a9TagId": "string",
    "a9AppId": "string",
    "isFallbackPlacement": true,
    "createdOn": "string"
  }
}
| Name | Description | Type | Sample/Possible values |
| Success | Determines success of the response | Boolean |
true – request successful false – request unsuccessful with some error(s) |
| placementId | ID of the placement as on InMobi platform | Integer | |
| placementName | Placement name as on InMobi platform | String | |
| placementType | Type of placement | String | Available values : INTERSTITIAL, BANNER, REWARDED_VIDEO, NATIVE |
| testMode | Test mode of the placement | String | ON – Test mode is on for specific devices as mentioned in the integration testing in InMobi platform
GLOBAL – Test mode is on for all devices with this app OFF – Test mode is off for all devices with this app |
| cpmFloor | eCPM floor set on the InMobi platform | Number |
|
| isAudienceBiddingEnabled | Determines if Audience Bidding is enabled for this placement | Boolean |
true – Audience Bidding is on false – Audience Bidding is off |
| audienceBiddingPartner | Audience Bidding Partner (applicable only if Audience Bidding is enabled) | String |
Available values: MAX, AMAZON_TAM, GOOGLE_OPEN_BIDDING, CUSTOM_MEDIATION, IRONSOURCE, SPRINGSERVE, PREBID, FYBER, ADMOST, AEQUUS, GAMEANALYTICS_HYPERBID, CHARTBOOST, GOOGLE_SDK_BIDDING |
| appId | App key on InMobi platform | Integer | |
| a9TagId | Tag ID (applicable only in case of Amazon TAM as Audience Bidding partner) | String | |
| A9AppId | App ID (applicable only in case of Amazon TAM as Audience Bidding partner) | String | |
| status | Current status of the placement | String | Available values : ACTIVE, DRAFT, ARCHIVE, FLAGGED |
| createdOn | Creation date of the placement | String |
Following are the possible error scenarios that might arise while using these APIs:
| Error code | Type | Description |
| 400 | Bad request response | Please check the values passed in the request body for correct values in correct formats |
| 401 | Unauthorized request response | Please check the values passed in the header and auth for correct values |
| 500 | Internal server error response | There is an internal issue. Please try again after some time or contact InMobi CSM or support (email us at support@inmobi.com) |
The rate of requests for each publisher is capped to 500 requests in an interval of 15 minutes.
In case of any unresolved queries, please reach out to your CSM or reach out to us at support@inmobi.com. You can also raise a ticket here: https://support.inmobi.com/mytickets.
Even though Glance Smart Lock Screen is a managed-serve platform for buying ads on ad exchanges, you also need to follow some best practices to ensure you get the best possible Return on Ad Spent (RoAS).
Read Glance Creative best practices.
For accurate measurement and attribution, it’s essential to fulfill the onboarding requirements.
Mobile Measurement Partners (MMPs) are third-party attribution platforms that capture campaign data and attribute every user action. Advertisers use MMPs to track and analyze campaign performance across multiple ad partners.
To enable this tracking, advertisers need to embed the MMP’s software development kit (SDK) in their app. This SDK captures and receives user events (e.g., clicks, installs) using tracking links provided by Glance.
Because Glance is an appless content consumption platform on phone lock screens, the user journey differs from that of standard Android apps. To accommodate this unique flow, Glance has collaborated with leading MMPs to develop custom integrations. Follow all the specified steps to integrate your preferred MMP with Glance effectively.
Glance and MMP integrations help advertisers validate the campaign attribution numbers on their MMP dashboards.
1. Sign a campaign contract with Glance Sales after providing all the required onboarding information.
2. Configure your preferred MMPs for Glance.
3. Share the tracking URL with the Glance team.
4. The Glance team adds those URLs to their campaign management tool and publishes the campaign.
5. Find the campaign performance reports on your MMP dashboard.
Glance supports integration with the following MMPs:
If AppsFlyer is your preferred MMP, you need to integrate it with Glance before the campaign starts.
Glance and AppsFlyer are exclusive Pre-load Referrer Attribution partners and offer seamless integration.
The integration starts with activating Glance as your partner on your AppsFlyer account, followed by changing the required configuration and enabling the pre-load attribution option. You can generate and share the attribution links with the Glance team.
Before the integration, make sure you have:
Follow the steps to integrate Glance and AppsFlyer to enable attribution for Android app campaigns:
The integration starts with the activation of the Glance on your AppsFlyer dashboard using the following steps:
Go to Collaborate > Partner Marketplace in the left menu bar.
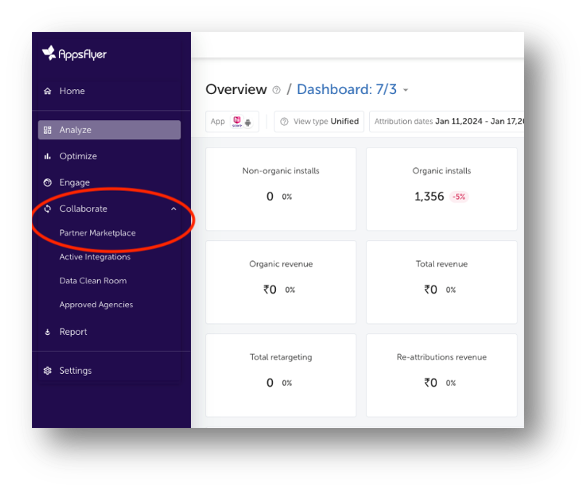
In the search bar, search for Glance and select it. You move to the Integration setup page.
After you activate Glance, you need to configure the integration setting for InMobi DSP as follows:
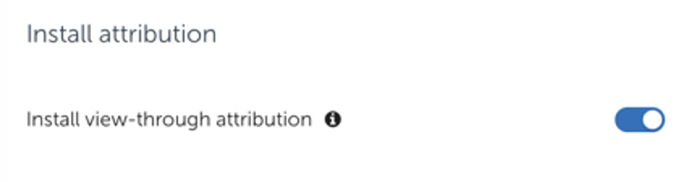
Enable the Preload attribution toggle and keep the Preload lookback window to 90 days.<Add screenshot>
In the Default postbacks section, select All media sources, including organic against Install (Event Name) in the for users from drop-down.
Organic refers to the advertiser’s unattributed data.
Under the In-app event settings section, enter the Advertiser ID value provided by the Glance team, which is the same as in General settings.
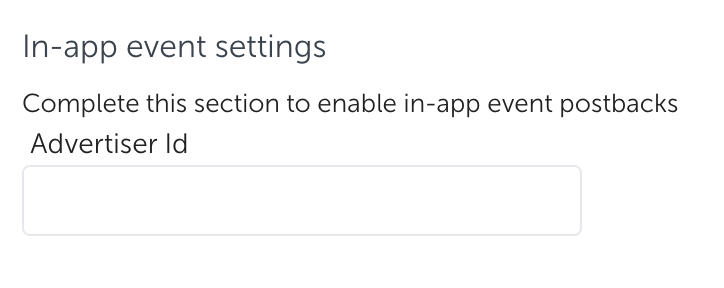
Enable the In-app event postbacks toggle. Glance recommends the value to be Lifetime. The minimum value is 6 months.
Click Add event to add postbacks for in-app events. Add all the funnel events and their details.

You can generate the attribution link for UA campaigns, which the Glance team uses while creating the campaign, as follows:
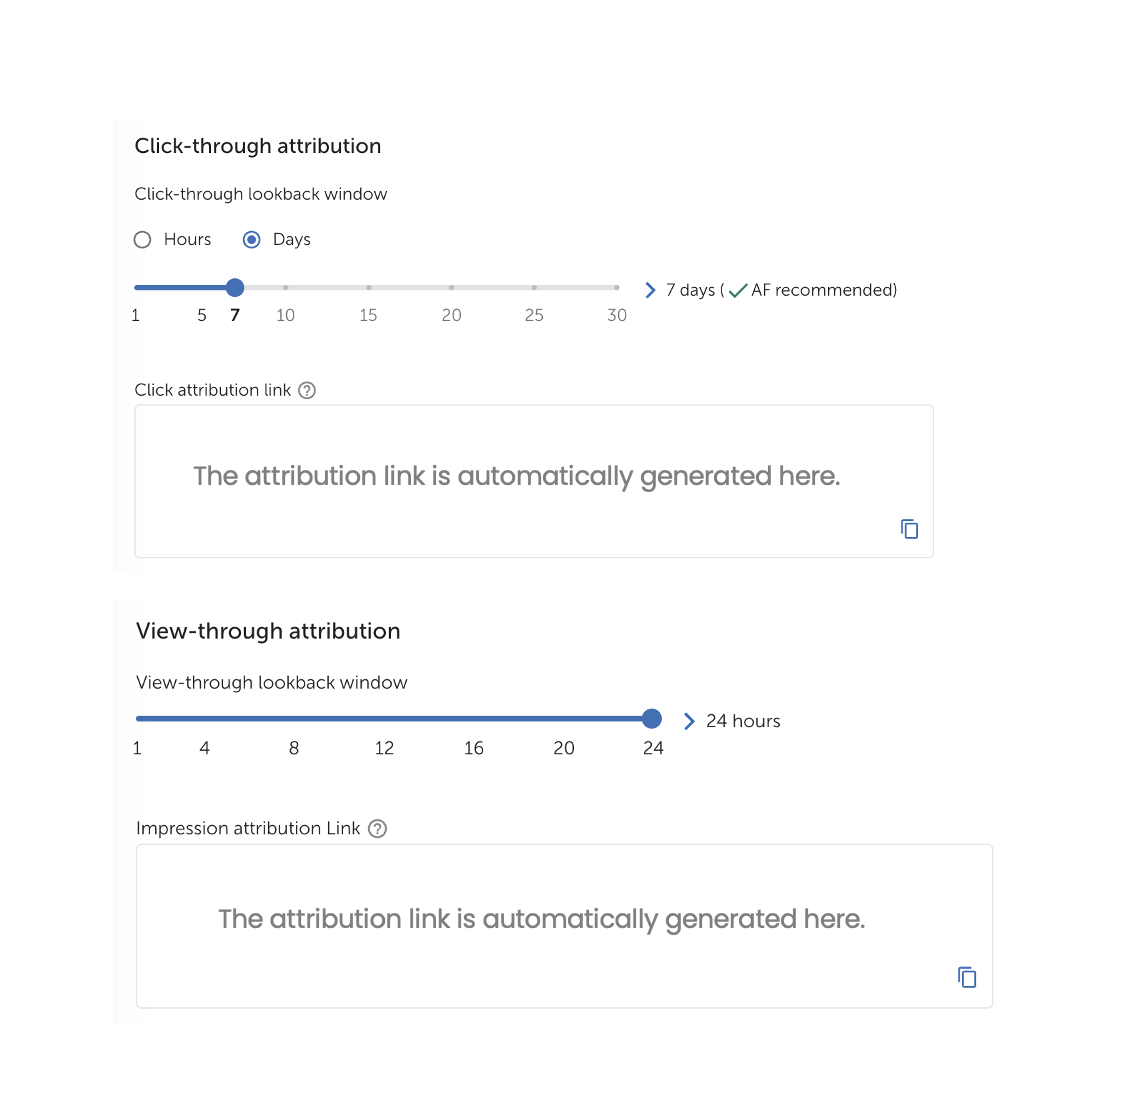
You can generate the attribution link for REM campaigns, which the Glance team uses while creating the campaign, as follows:
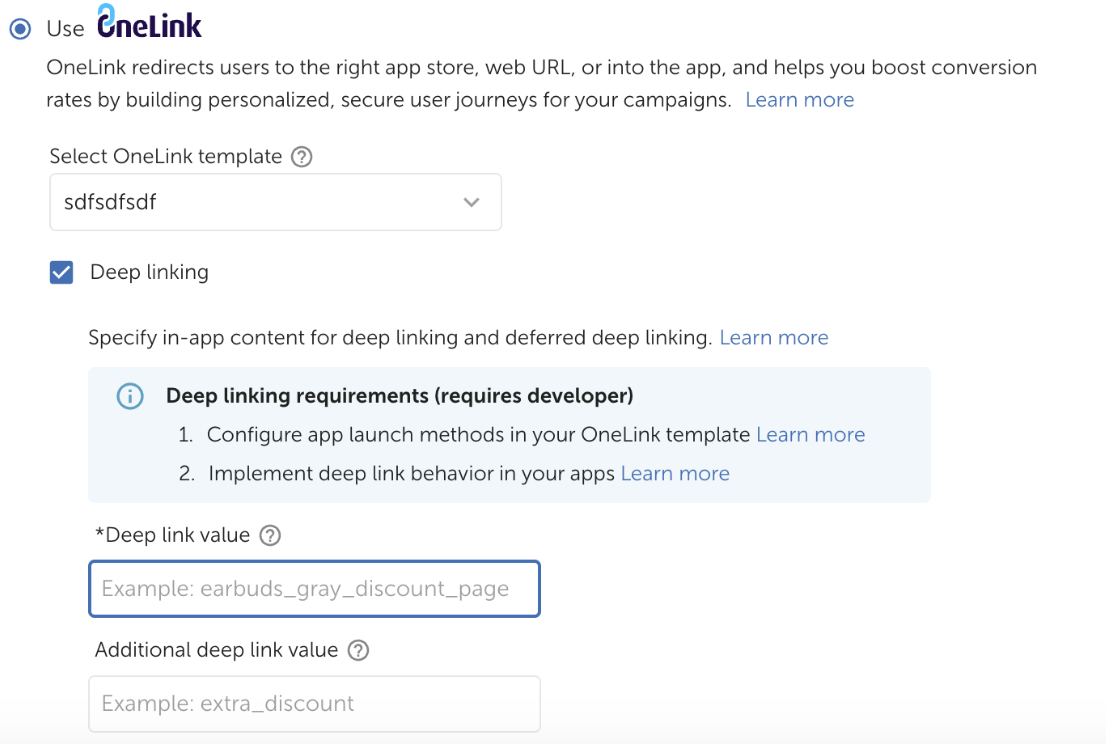
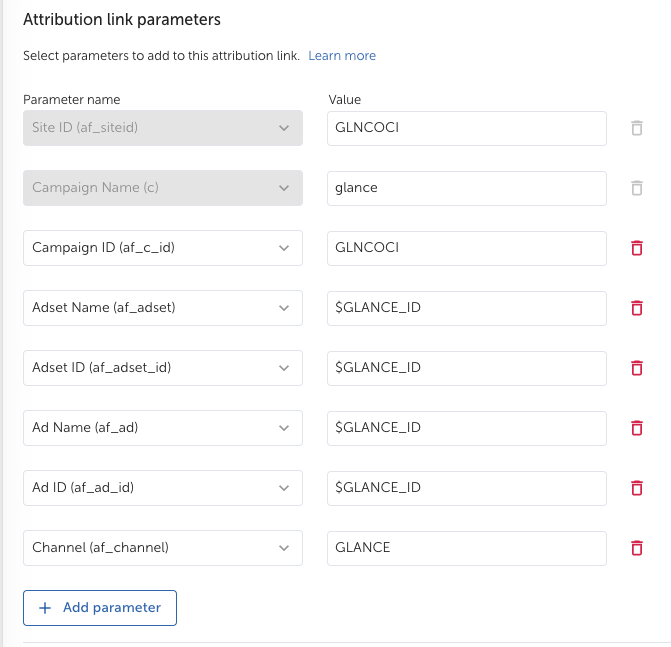
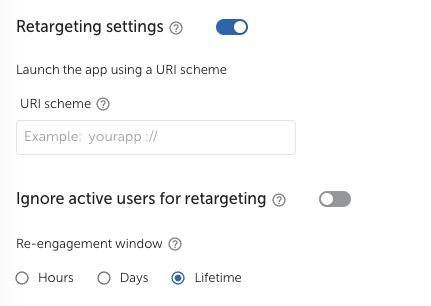
You need to provide the following permissions to Glance on the AppsFlyer dashboard:
Switch on the Ad network permissions toggle.
Enable the following permission toggles:

Check the settings done in the previous steps and click Save.
If you use Adjust as MMP, you need to integrate it with Glance before the campaign starts.
Before the integration starts, make sure you have
Integrating Adjust and Glance is a one-time process applicable to all further campaigns.
Enable Glance on your Adjust account as follows:
Select the app you want to run the campaign for as follows:
Enable data sharing between Glance and your Adjust account as follows:
You need to generate an Adjust Ad tracking URL, which the Glance team uses while configuring the campaign on Glance. Generate the URL as follows:
Share the Adjust tracking URL with the Glance team.
If you use Branch as MMP for your campaigns, you need to integrate it with Glance before your first campaign.
Before you can start the integration, make sure you have:
Integrating Branch and Glance is a one-time process applicable to all the further campaigns. The integration steps are:
You need to enable Glance as a partner as the first step in the integration.
In the Ad Partners drop-down, search for Glance and select it.
Do not select InMobi or InMobi DSP.
Click Save & Enable.
Enabling Glance automatically enables the following postbacks:
Select ALL EVENTS for every pre-configured and configured event.
You can add new postbacks using the following steps:
Select the event you want to create the postback for and click Save. The Branch app automatically generates the POSTBACK URL.
Refer to the Custom Postback topic in Branch Help if you want to add a custom postback.
An Attribution window is a period for capturing the valid attribution for an event. Branch has industry-standard attribution window values pre-set in the Attribution Windows tab.
Do not change the pre-set attribution window values to avoid any discrepancies in the data.
Enable the attribution window as follows:
The Glance team uses the Branch Ad Link you generate. The link allows you to receive the attribution data from Glance, which you can use to validate the campaign performance. Share the link with them after you generate it.
Read the Generate Branch Ad Link topic on the Branch Help to know the steps of generating the link.
When the campaign launches, the data exchange starts between Glance and your Branch account. Enable Glance data on your Branch Dashboard as follows:
If you use Singular as your preferred MMP, you need to integrate it with Glance before your first campaign starts.
Before starting the integration, make sure you have
Integrating Singular and Glance is a one-time process applicable to all further campaigns.
Select Glance as the partner of Singular for your campaigns as follows:

Add the app and site (app version) you want to run the campaign for as follows:

Stay on the same page and configure the postbacks on Singular as follows:
Share the URL with the Glance team only after completing all the configuration.

Share the Postback URLs you get while configuring Install & Re-engagement Postbacks and Event Postbacks with the Glance team.
If Kochava is your preferred MMP, you need to integrate Kochava with Glance before the campaign starts.
Before starting the integration, make sure you have:
The integration of Kochava and Glance is a one-time process and applicable to all the further campaigns. The integration steps are:
On the right side of the header, select your required account. Then, select the app for which you want to run the campaign.
You need to create a tracker link and share it with the Glance team. The team uses the Kochava tracker in your campaigns, which allows data postback from Glance to your Kochava account.
Under the Tracker & Network Set Up section, enter a tracker name.
The Tracker Name field fills up with a system-generated name when you click Add a Tracker. It’s suggested you change the name to your preferred name.
Select Acquisition in the TRACKER TYPE drop-down. For the Re-engagement campaign, select Reengagement.
Under the Destination URL section, select Landing Page.
Refer to Kochava’s Landing Page Creation and Maintenance Support documentation for more information on creating and using Landing Pages.
A postback—also called a callback—is data communication between two servers (Kochava and Glance in the current scenario) following an in-app event, such as an app installation or user activity. This system enables the Glance team to get real-time updates on user interactions, drops, or any issues regarding the campaign. Configure the postbacks for Glance as follows:
Go to Apps & Assets > Partner Configuration in the left menu bar.
Click Go.
Click Install > Postback Tools ( •
•
• ) > Edit. The Edit Postback Install page opens.
Enter or select the Glance-recommended values in the following fields:
| Field | Glance recommended value | Description |
|---|---|---|
| PROPERTY NAME | advertiser_id | Identifier for the Glance campaigns. |
| IMPRESSION CONVERSION DELIVERY | - | Determines if impression-matched install postbacks are limited. |
| PACKAGE NAME/BUNDLE ID | - | |
| DELIVERY DELAY | Realtime Delivery | Enables real-time postback delivery to Glance. |
| RETRY ATTEMPTS | 3 | Configures the number of attempts for redelivery in case of a failure. |
| DELIVERY METHOD | Deliver All | Provides unattributed data access to the Glance. |
Glance is a user-first content discovery platform developed in partnership with leading Android OEMs. It delivers an app-less experience on the Lock Screen, reaching over 400 million users globally. Glance offers full-screen ad inventory on the Lock Screen and Feed Screen, enhancing engagement with seamless content discovery.
Glance Smart Lock Screen does not allow user-generated content and only features Glance curated or moderated content and ads.
Unlike traditional app inventories, Glance delivers non-intrusive, native, fresh, high-quality, serendipitous, and contextual ad experiences. This approach creates lasting impressions and improves users’ Lifetime Value (LTV).
Read more about Glance ad inventories.
Glance creatives follow strict guidelines and specifications defined by the Glance team and integrated OEMs. These guidelines ensure a consistent, accessible user experience while promoting app discovery, user safety, and brand safety. They also enhance user interaction and simplify development, maintenance, and updates, leading to improved quality control and more efficient rollouts of new features and fixes.
Glance offers user acquisition and re-marketing campaign capabilities backed by first-party data from Glance and other InMobi platforms. You can also leverage the Glance's machine learning models effectively by sharing your unattributed data with the Glance team.
Once you have signed the campaign contract with the Glance team, you need to fulfill the onboarding requirements for Glance. These requirements are necessary to run the campaign efficiently and achieve the campaign goals.
Before the campaign starts, you need to integrate your preferred Mobile Measurement Partner (MMP) with Glance to enable third-party measurement and validation. During and after the campaign, you can find campaign performance reports on your preferred MMP dashboard.
Glance Smart Lock Screen performance campaigns can be of two types based on the user flow:
Users can initiate app installation with one click on the CTA, without unlocking the phone and getting redirected to the Google Play Store or other OEM app marketplaces. The OCI flow has the following user flow
For Xiaomi and Realme (Indonesia) devices, advertisers must host the latest app on the GetApps store. For Samsung devices, advertisers need to provide the latest universal SDK.
The CTA of the ad leads the user to unlock their device and redirects them to Google Play Store or any other app source.
Glance OCI provides several key advantages compared to the traditional Play Store flow:
Install rejection: Glance ensures a privacy-safe, on-device attribution system. It is a deterministic attribution partner to AppsFlyer and Adjust, thus driving precise and fraud-free attributions.
 Support Center


