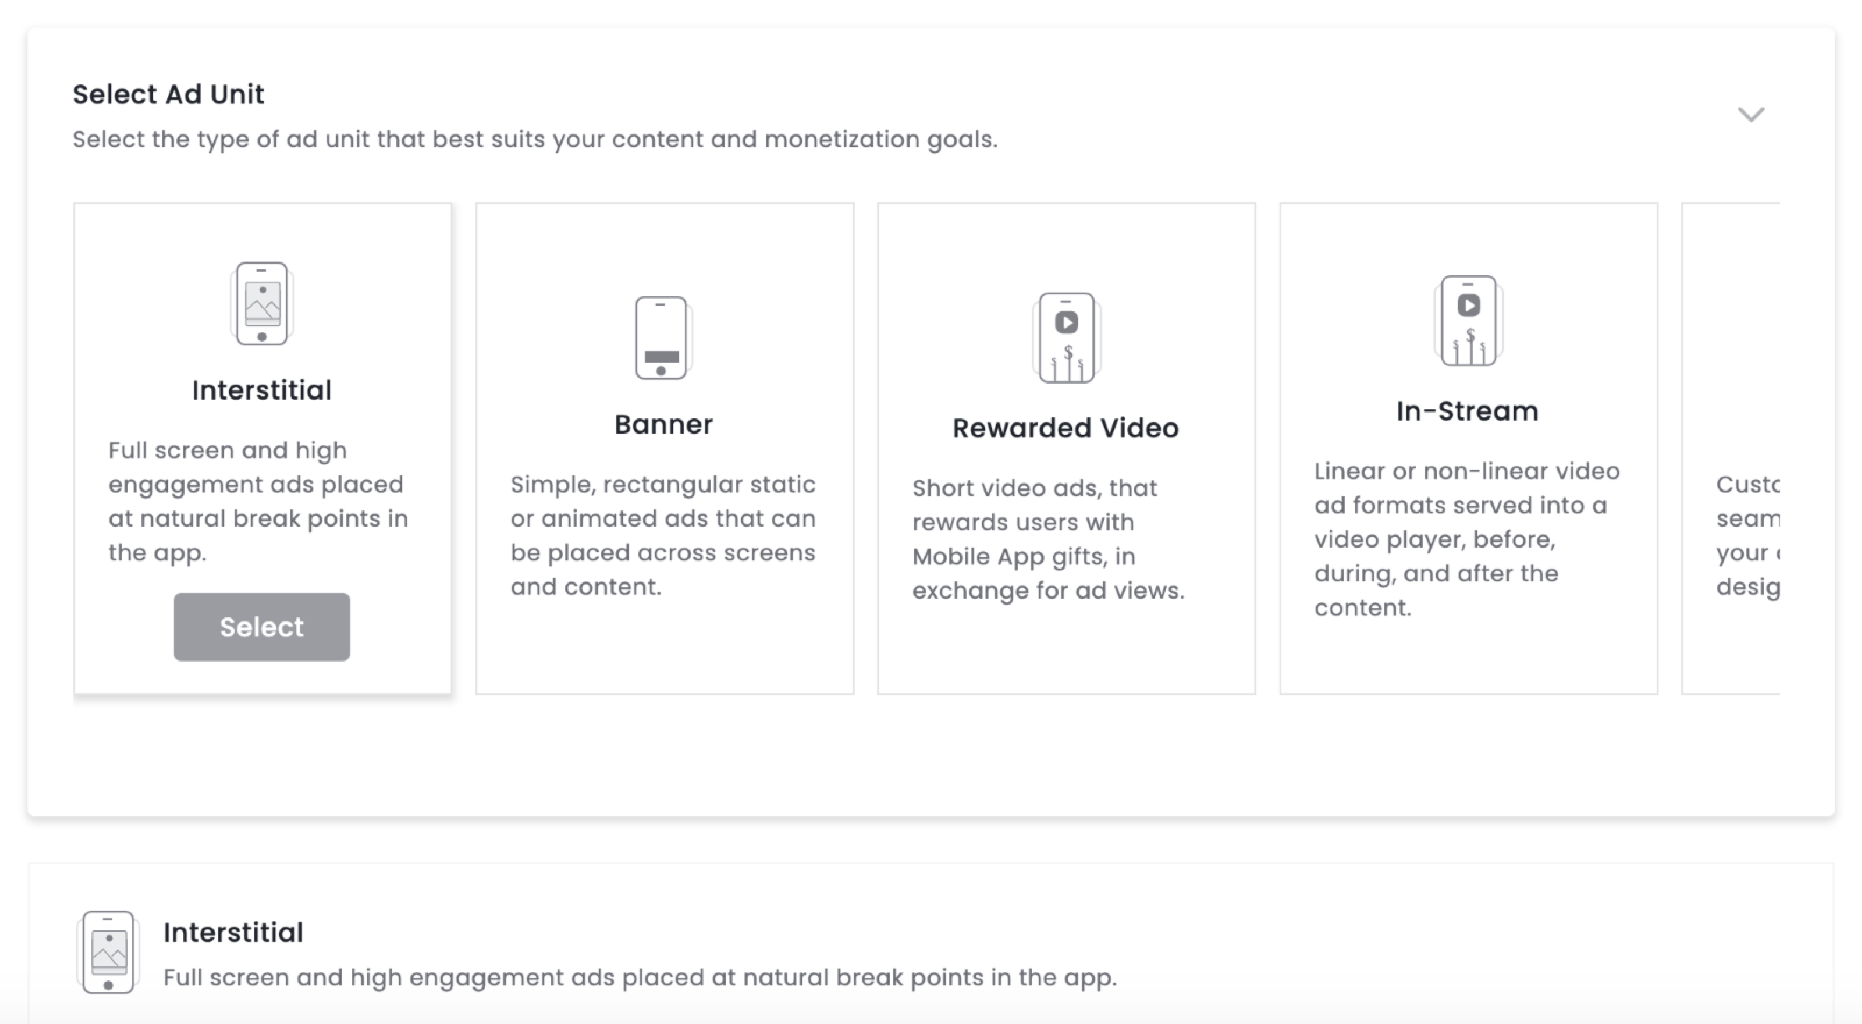
Welcome to the Monetization and Integration Guides, your central resource for setting up and scaling monetization with InMobi across environments. Whether you’re using InMobi as a demand source on a mediation platform or integrating it directly as a mediation layer, these guides are designed to help you go live with confidence.
These guides cover integrations across:
They also walk you through key steps for real-time bidding setup, SDK integration, and yield partner configuration — ensuring a seamless monetization experience on the platform of your choice.
Depending on the platform and inventory type, InMobi supports two modes of integration:
Depending on the platform and environment, InMobi supports:
InMobi is now integrated with all the leading header bidding and mediation platforms, including:
| Partner | Integration type | Inventory Supported | Ad Formats Supported |
| Amazon Publisher Services (APS) | OpenRTB | In-App, Web |
Mobile (In-App): Banner, Interstitial, Video (all formats), and Native. Web: Banner, In-stream Video, and Native. |
| AppLovin MAX | SDK | In-App | Banner, Interstitial, Rewarded Video, and Native. |
| DT FairBid | SDK | In-App | Banner, Interstitial, and Rewarded Video |
| Google Ad Manager | SDK | In-App | Banner, Interstitial, Native, and Rewarded Video |
| Google AdMob | SDK | In-App | Banner, Interstitial, Rewarded Video, and Native |
| Google Open Bidding | OpenRTB | In-App, Web, CTV |
Mobile App: Banner, Interstitial, Video (any format), and Native Web: Banner, Instream and Outstream Video, and Native |
| Nimbus | SDK | In-App | Banner, Interstitial, and Video (any format). |
| Prebid Plugin Renderer | SDK | In-App | Banner, Native, and Video |
| Prebid Server | OpenRTB | In-App, Web |
Banner, Native, Video (all formats) |
| Prebid.js | OpenRTB | In-App, Web | Banner, Instream and Outstream Video, and Native |
| Publica | OpenRTB | CTV | Video (VAST) |
| SpringServe | OpenRTB | CTV | Video (VAST) |
| Unity | SDK | In-App | Banner, Interstitial, and Rewarded Video |
| Unity LevelPlay | SDK | In-App | Banner, Interstitial, and Rewarded Video |
InMobi is available as a bidder on Amazon Publisher Services (APS) through Transparent Ad Marketplace (TAM) and Unified Ad Marketplace (UAM). This server-side integration uses the OpenRTB protocol and does not require SDK implementation. This setup enables seamless access to InMobi’s demand, offering an efficient, API-based monetization path for both mobile web and in-app inventory.
To successfully integrate InMobi with APS, ensure you meet the following prerequisites:
Use the toggle below to view the differences in dashboard configuration across platforms.
Use the toggles below to view platform-specific integration instructions.
For Mobile only:
Use fallback placements only for apps that have multiple placements.
For further assistance, Contact Us.
This guide covers integrating InMobi as a real-time bidder on MAX, AppLovin’s in-app header bidding platform. InMobi uses the oRTB protocol and renders ads via its SDK for Banner, Interstitial, Video, and Native formats. Ideal for gaming publishers, this SDK-based integration supports in-app environments only.
Ensure the following before you get started with this integration:
To get your account and inventory up and running on the InMobi Publisher Platform, follow the instructions below:
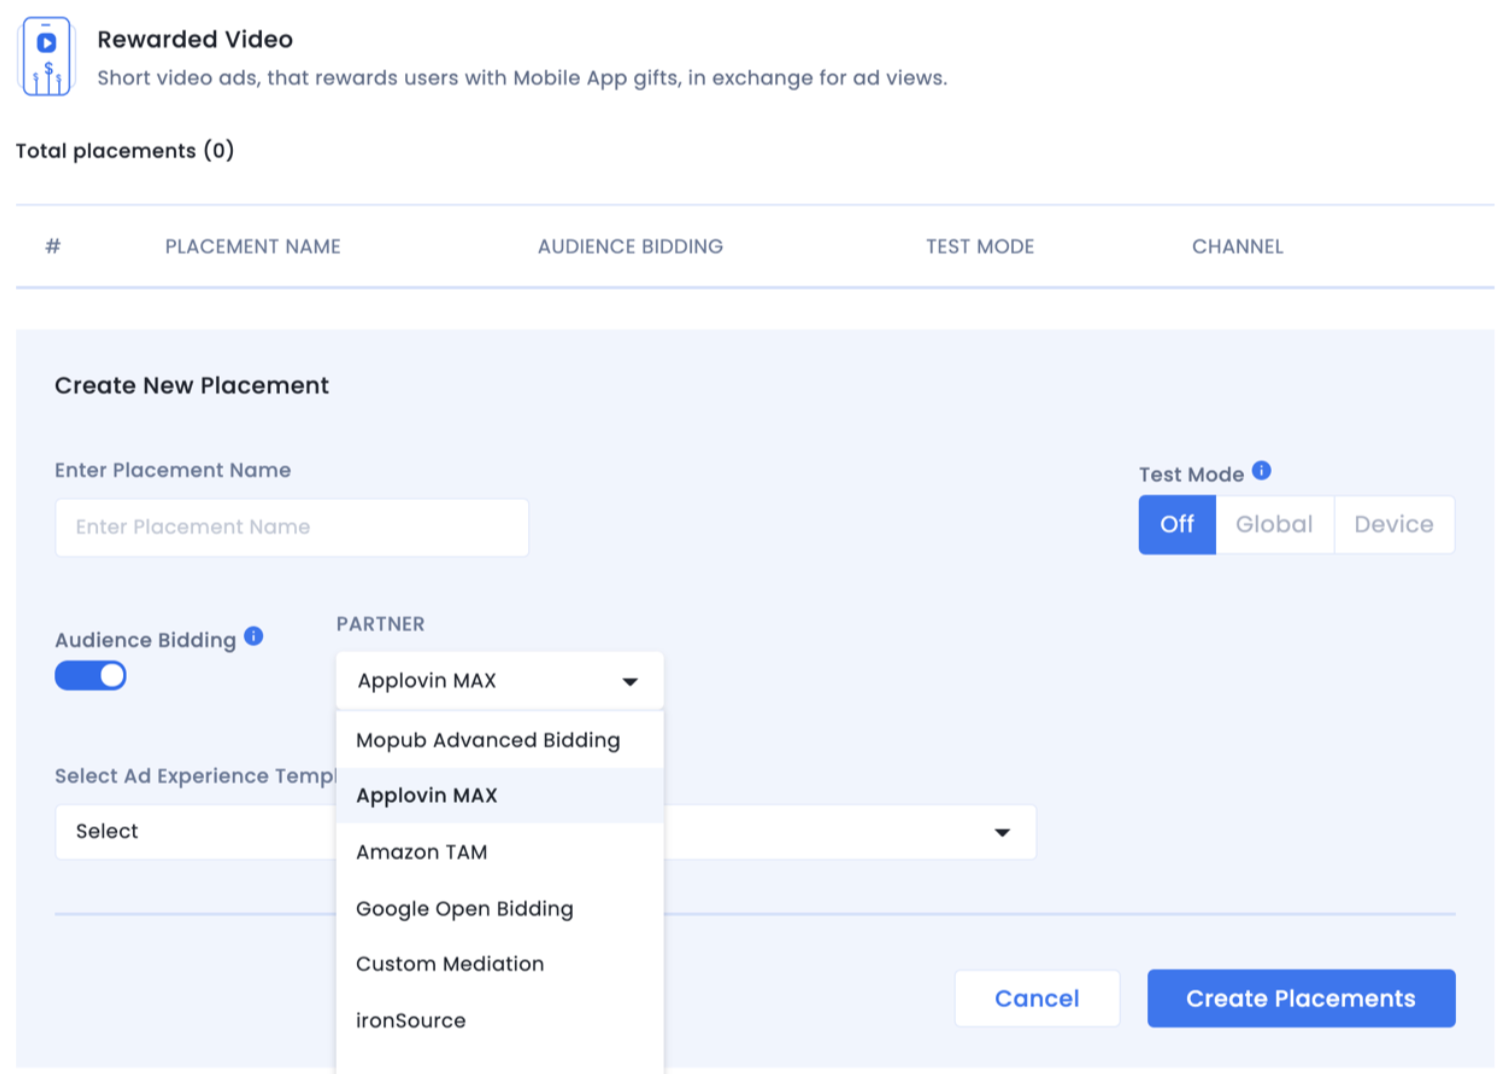
To create placements for MAX:


For more details, see InMobi Integration Guide on MAX's documentation.
For more information, see the following links:
iOS: Integration Guide | Enabling Manual Native Ads | Enabling Small/Medium Template
Android: Integration Guide | Enabling Manual Native Ads | Enabling Small/Medium Template
For further assistance, Contact Us.
CloudX is an in-app mediation platform that enables publishers to monetize their inventory through real-time bidding and SDK-based integrations. This guide explains how to integrate InMobi with CloudX for Android and iOS applications using the InMobi SDK.
This integration supports global in-app inventory and key ad formats, including Banner, Interstitial, Native(upcoming), and Rewarded ads.
Before starting the integration, ensure you have the following:

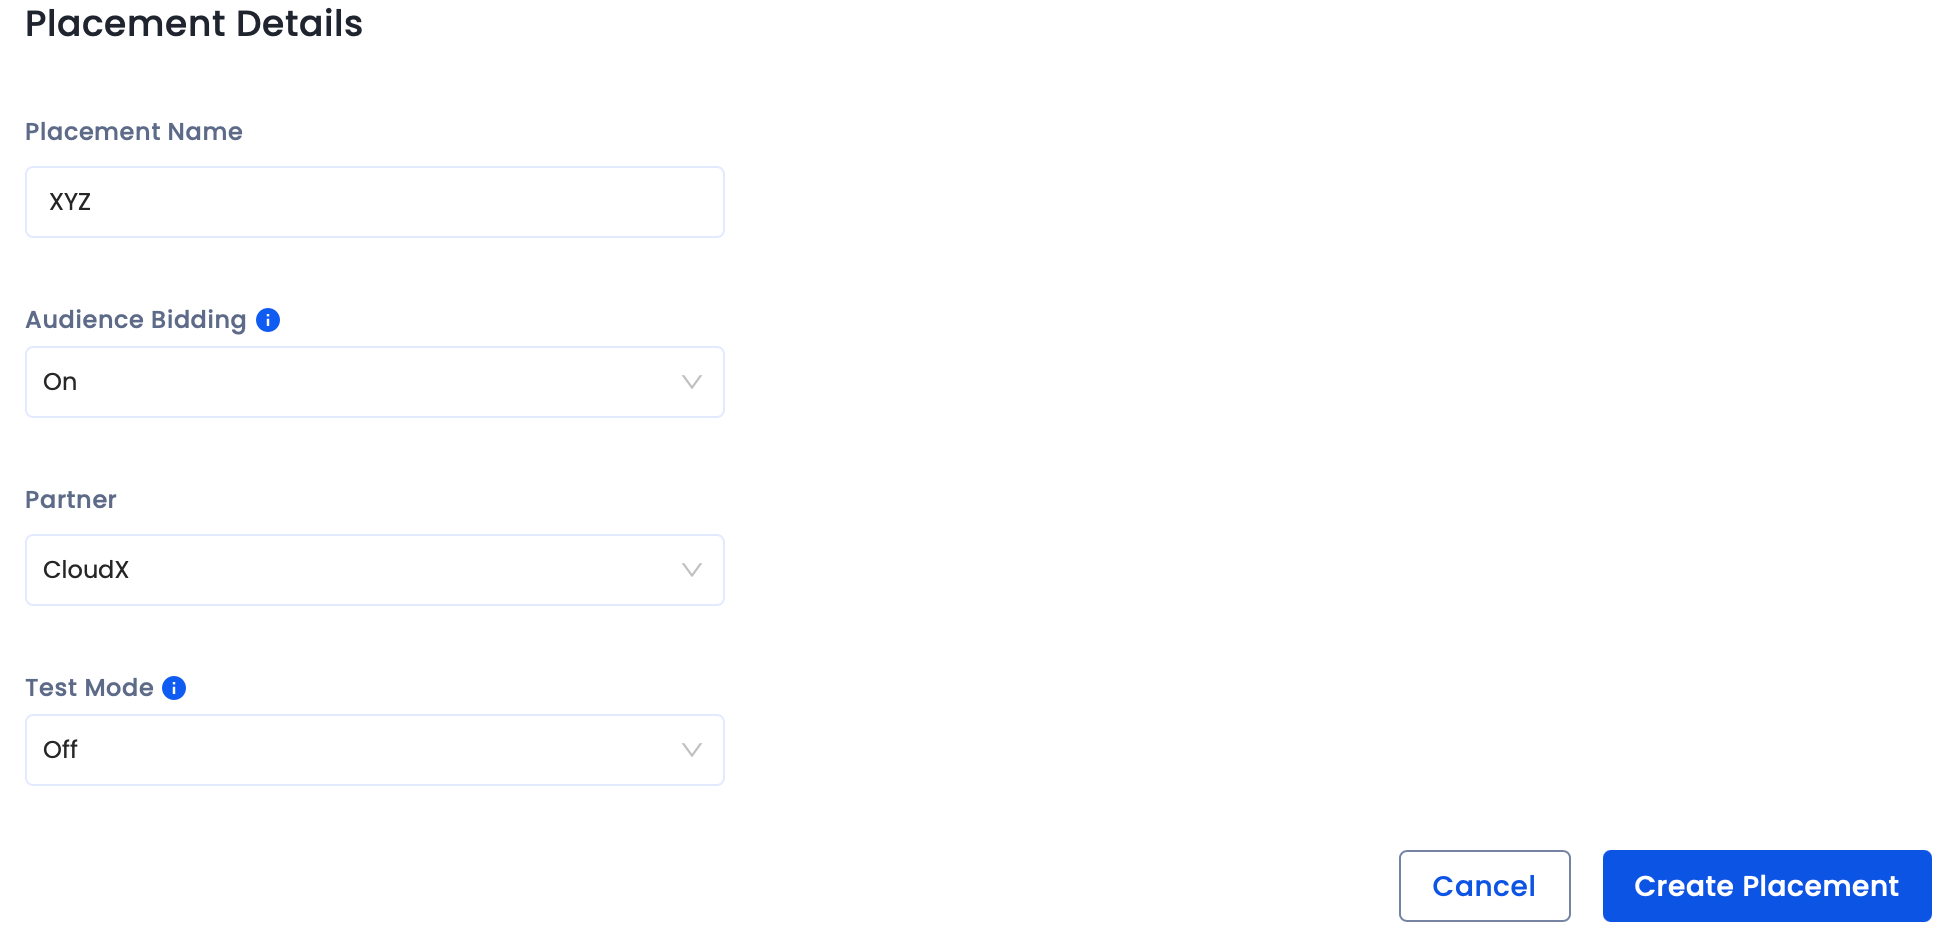
Before you add InMobi to the CloudX dashboard, ensure you have the following:
For further assistance, Contact Us.
This guide outlines how to integrate InMobi as a real-time bidder on DT FairBid, Digital Turbine’s mediation platform. InMobi connects via the oRTB protocol and renders Banner, Interstitial, and Video ads using its SDK. Ideal for global in-app publishers across gaming and non-gaming verticals.
Ensure the following before you get started with this integration:
To get your account and inventory up and running on the InMobi Publisher Dashboard, follow the instructions below:
To create placements for DT FairBid:
The InMobi Placement ID is present under the placement name. You will need it while configuring InMobi placements on the DT Console.
Before adding InMobi as a mediated network to DT Fairbid, ensure you:
Once done, follow the steps below:
For further assistance, Contact Us.
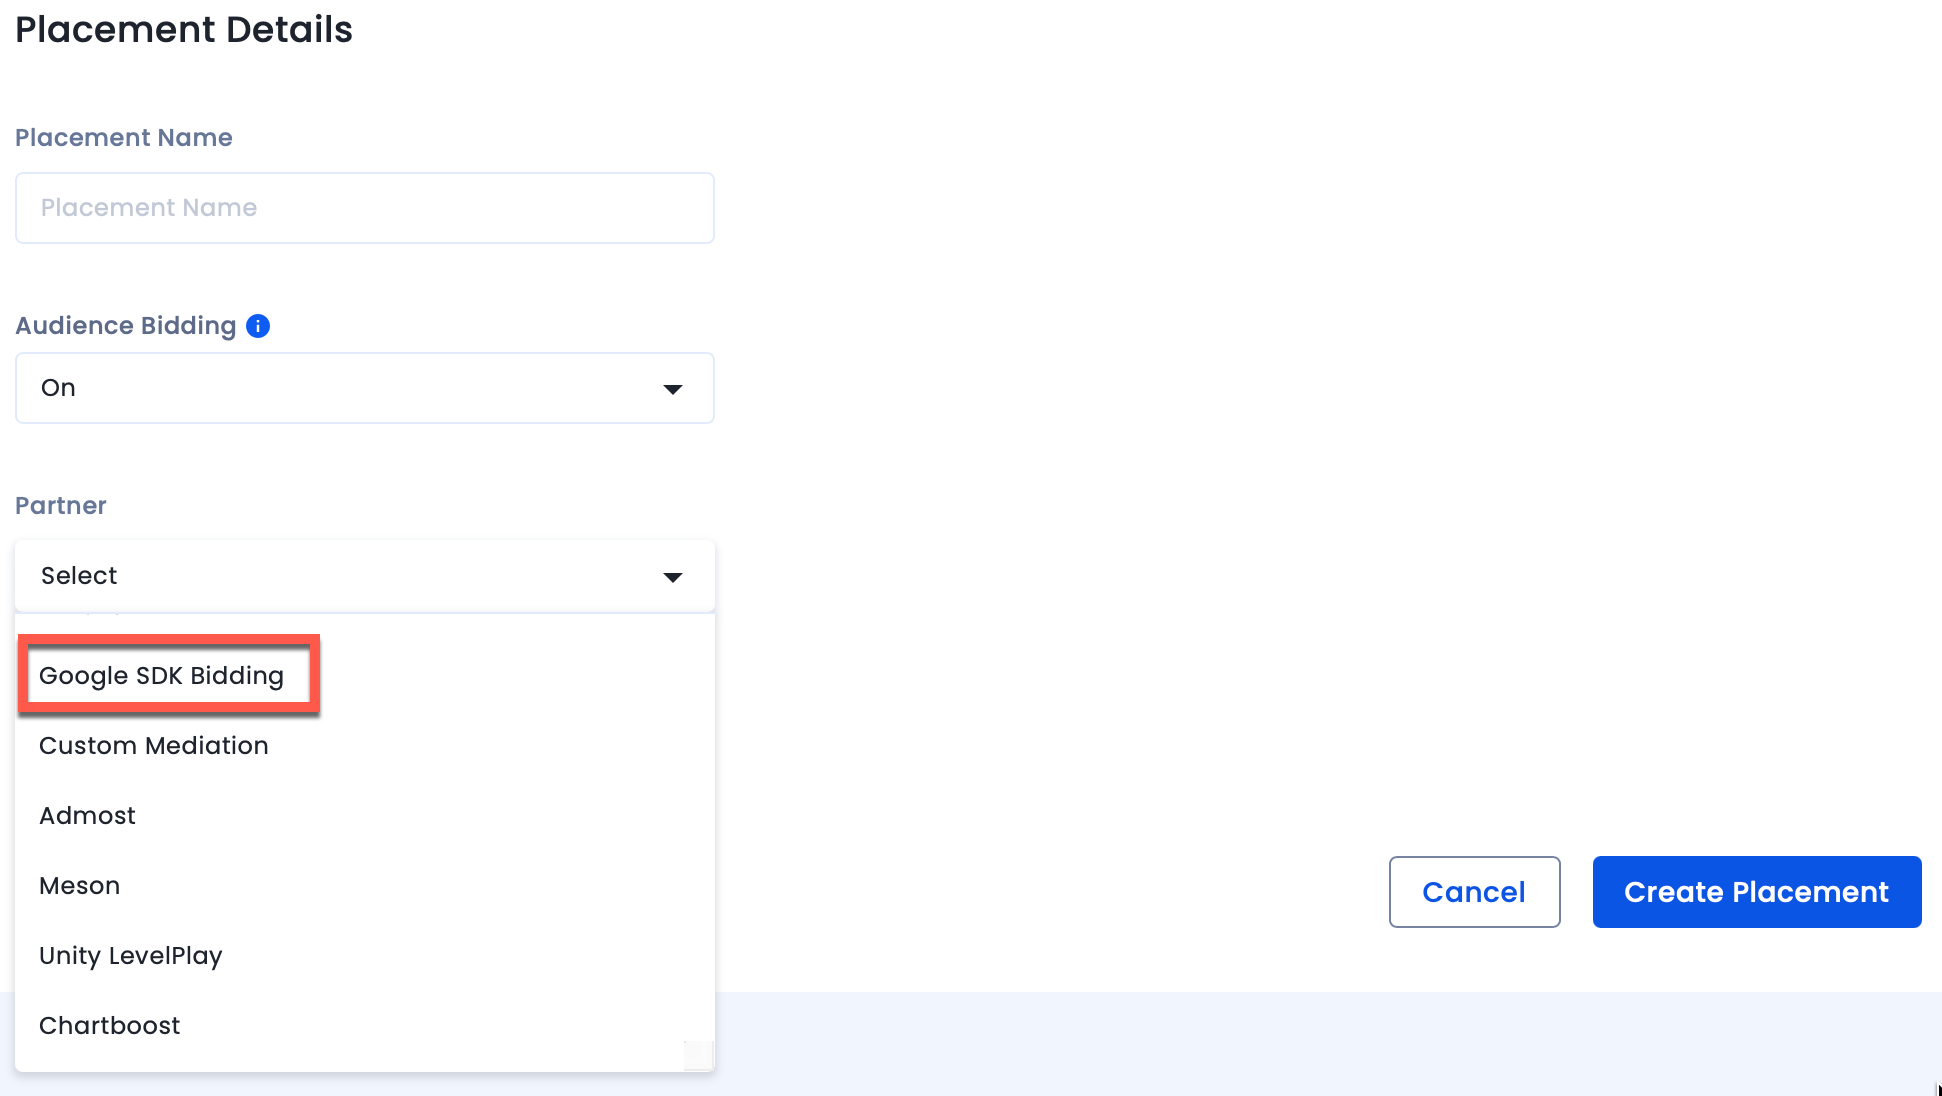
Integrate InMobi with Google SDK Bidding on Google Ad Manager using a direct supply path for better signal collection and ad rendering. This setup supports Banner, Interstitial, Native, and Rewarded Video formats across gaming and non-gaming apps. It enables hybrid monetization without custom adapters or changes to your existing waterfall.
Ensure you have the following before you begin the integration:
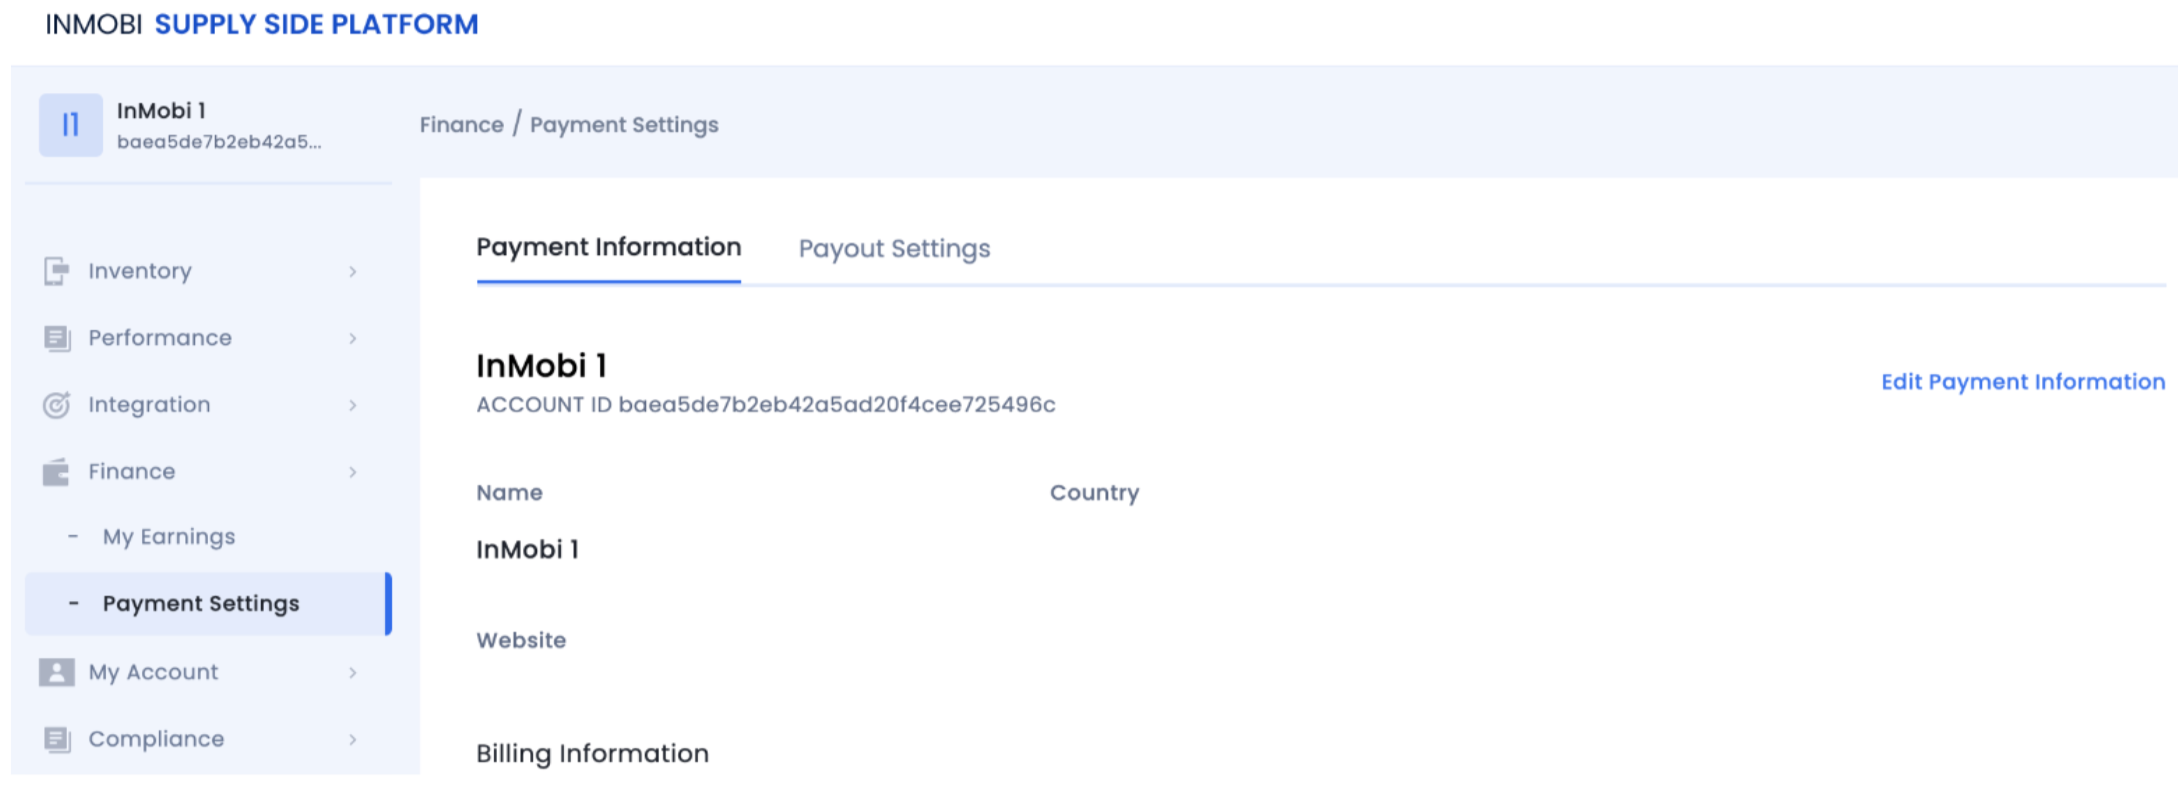
Google manages payment and billing for SDK Bidding on Ad Manager. For payment, billing, or reporting information, please refer to the Google dashboard.
To set up your account and inventory on the InMobi Publisher Dashboard, follow these steps.
To set up your account and inventory on the InMobi Publisher Dashboard, follow these steps.

Once you have completed your setup on Google Ad Manager, we recommend you test your integration to ensure seamless functioning.
To test your integration, see Verify your SDK Bidding setup.
To verify your SDK bidding setup, see Verify your SDK Bidding setup.
For Google Ad Manager docs, see Integrate InMobi with mediation for iOS and Android.
After setting up InMobi on the SSP and adding it as a bidder in GAM, import the InMobi SDK and adapter.
Follow the additional instructions below about GDPR settings on your Google dashboard for higher monetization results. The following configuration applies to traffic from European Economic Area and publishers using AdMob/GAM CMP for GDPR consent purposes. Google CMP provides two ways of adding ad partners on their AdMob/GAM platform:
InMobi is not part of ‘Commonly used ad partners’ by default, and you must add it manually by selecting Custom ad partners.
Follow the instructions below to enable InMobi under Custom ad partners on your Google dashboard.

For further assistance, Contact Us.
This guide explains how to integrate InMobi with Google SDK Bidding on AdMob. It uses a direct supply path for better signal collection and ad rendering, supporting Banner, Interstitial, Native, and Rewarded Video formats.
Ensure you have the following before you begin the integration:
Google manages payment and billing for SDK Bidding on AdMob. For payment, billing, or reporting information, refer to the Google dashboard.
Follow these steps to set up your account and inventory on the InMobi Publisher Dashboard.
For troubleshooting, see Get started & troubleshoot partner bidding.
For Google AdMob docs, see Integrate InMobi with mediation for iOS and Android.
To ensure AdMob SDK relays the ad request to InMobi for testing, you can do the following on your AdMob dashboard.
After setting up InMobi on the SSP and adding it as an ad source in AdMob, import the InMobi SDK and adapter.
Follow the additional instructions below about GDPR settings on your Google dashboard for higher monetization results. The following configuration applies to traffic from European Economic Area and publishers using AdMob/GAM CMP for GDPR consent purposes. Google CMP provides two ways of adding ad partners on their AdMob/GAM platform:
InMobi is not part of ‘Commonly used ad partners’ by default, and you must add it manually by selecting Custom ad partners.
Follow the instructions below to enable InMobi under Custom ad partners on your Google dashboard.
For further assistance, Contact Us.
InMobi is a certified bidder on Google Open Bidding (GOB), supporting integration via both Google Ad Manager (GAM) and AdMob across in-app, web, and CTV inventory. This server-side integration uses the OpenRTB protocol and does not require an SDK.
To successfully integrate InMobi with Google Open Bidding, ensure you meet the following prerequisites:
After setting up your InMobi account, you must enable InMobi on your Google dashboard and start sending us traffic. Use the toggles below to view platform-specific integration instructions.
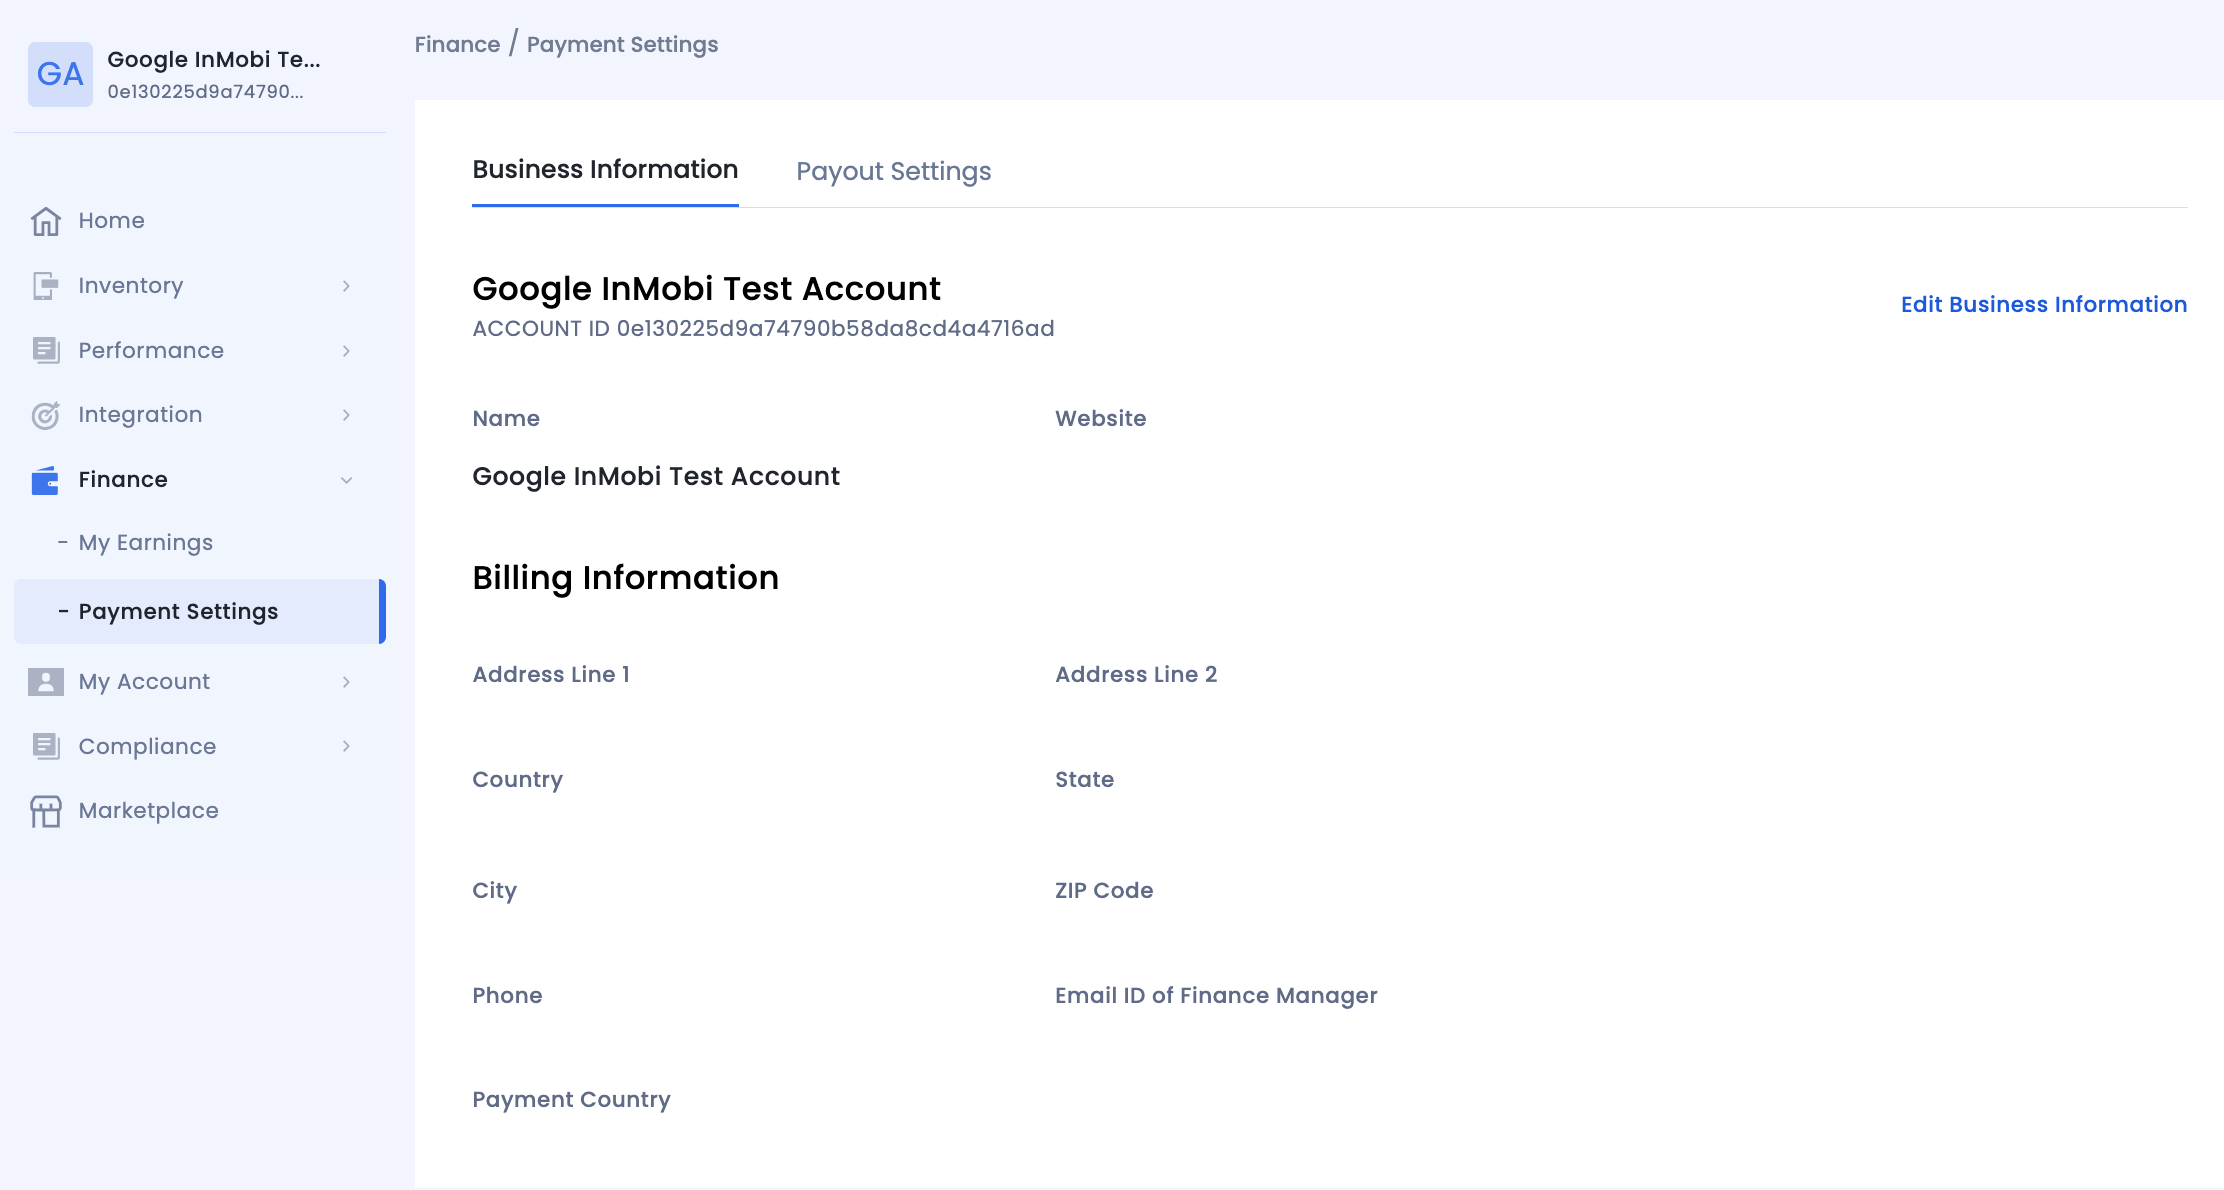
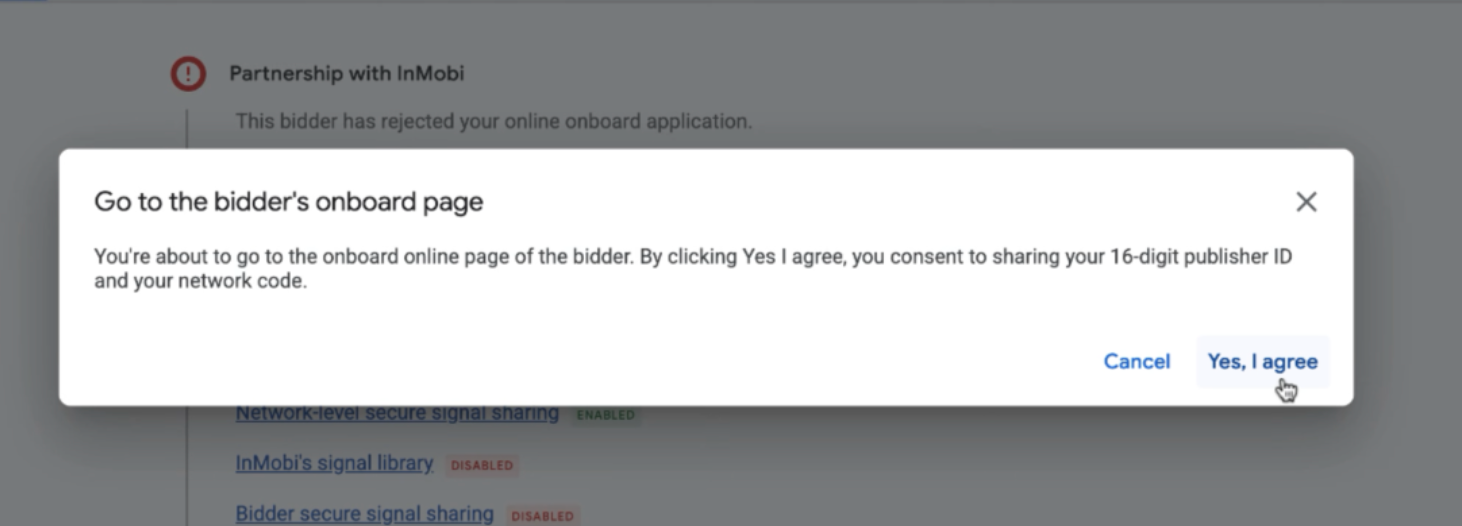
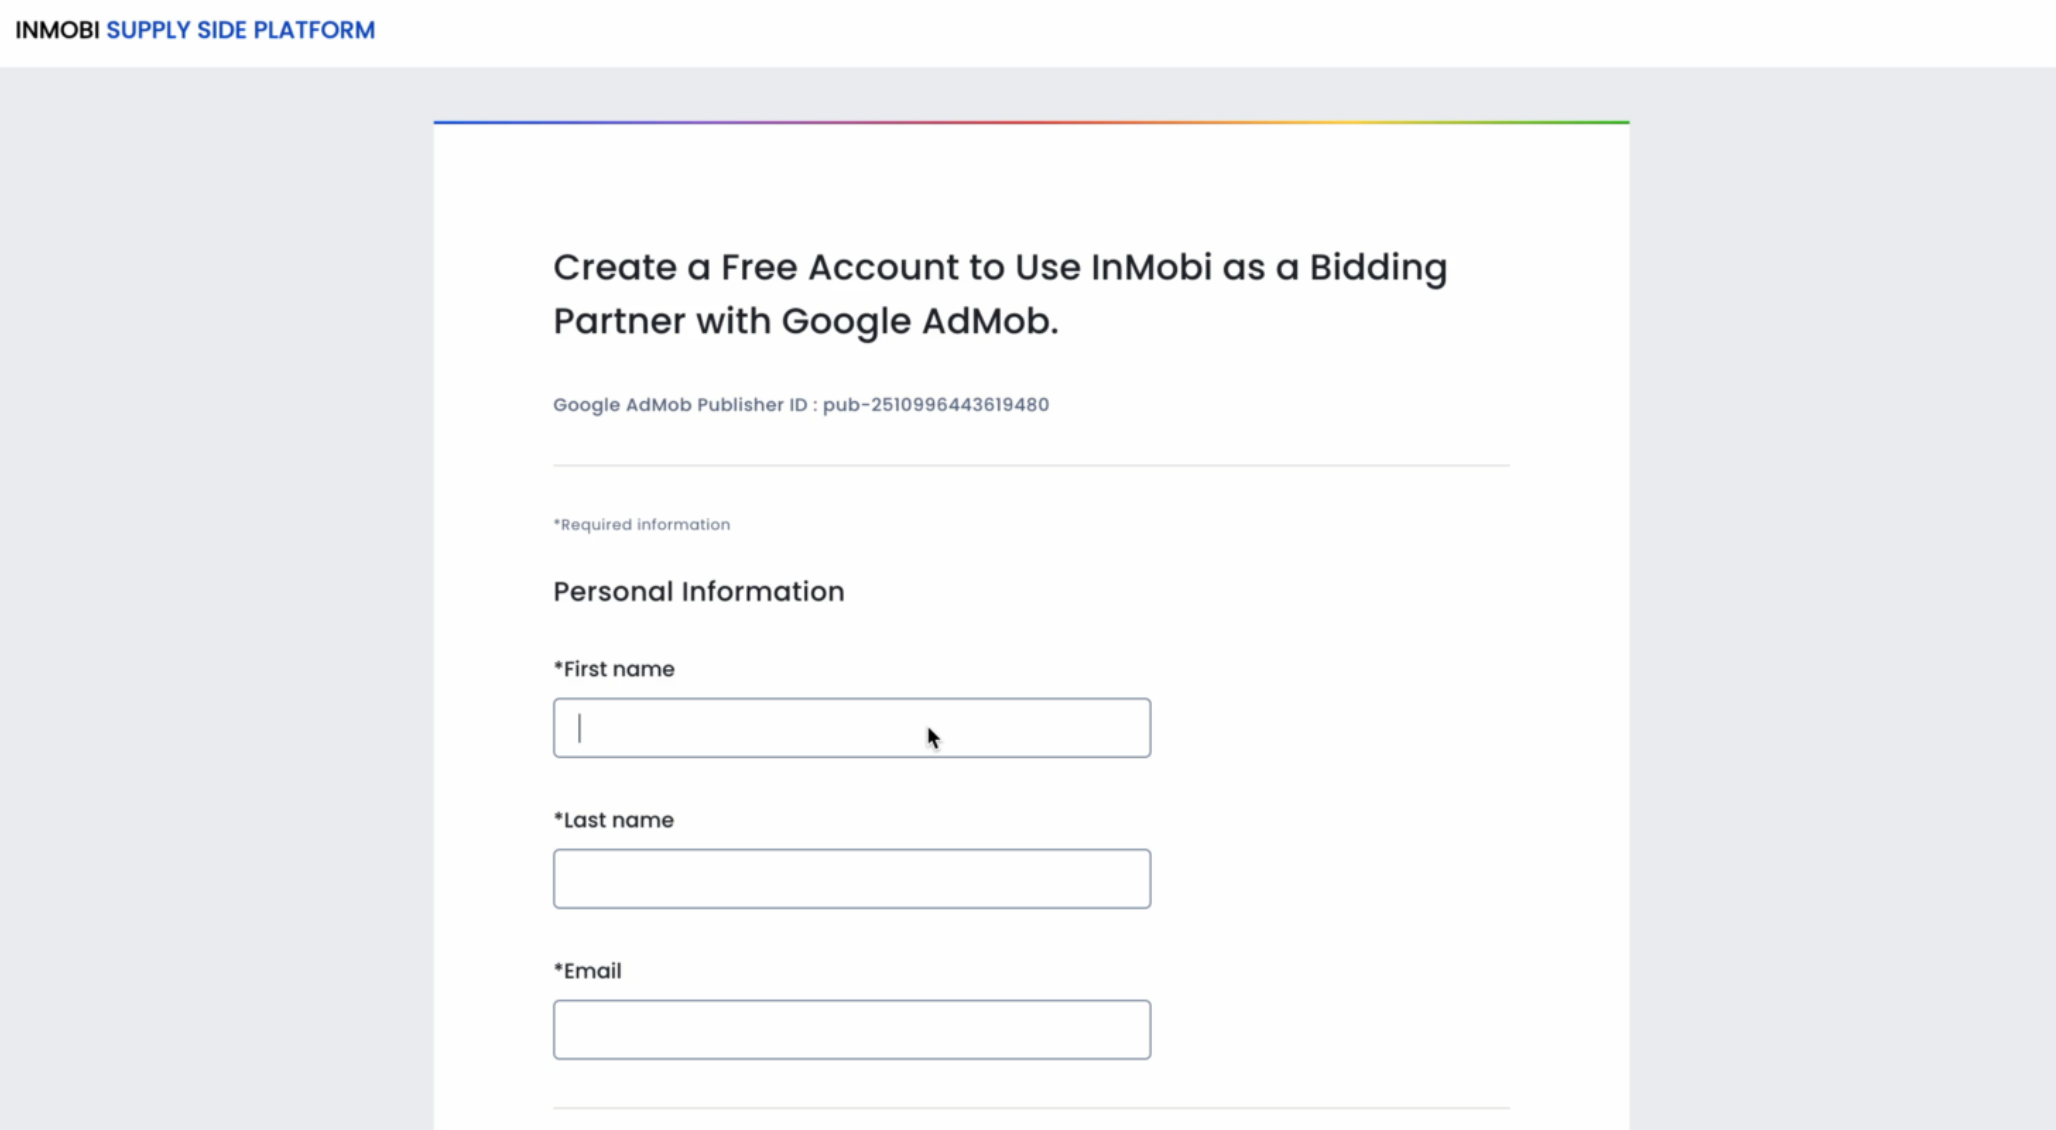
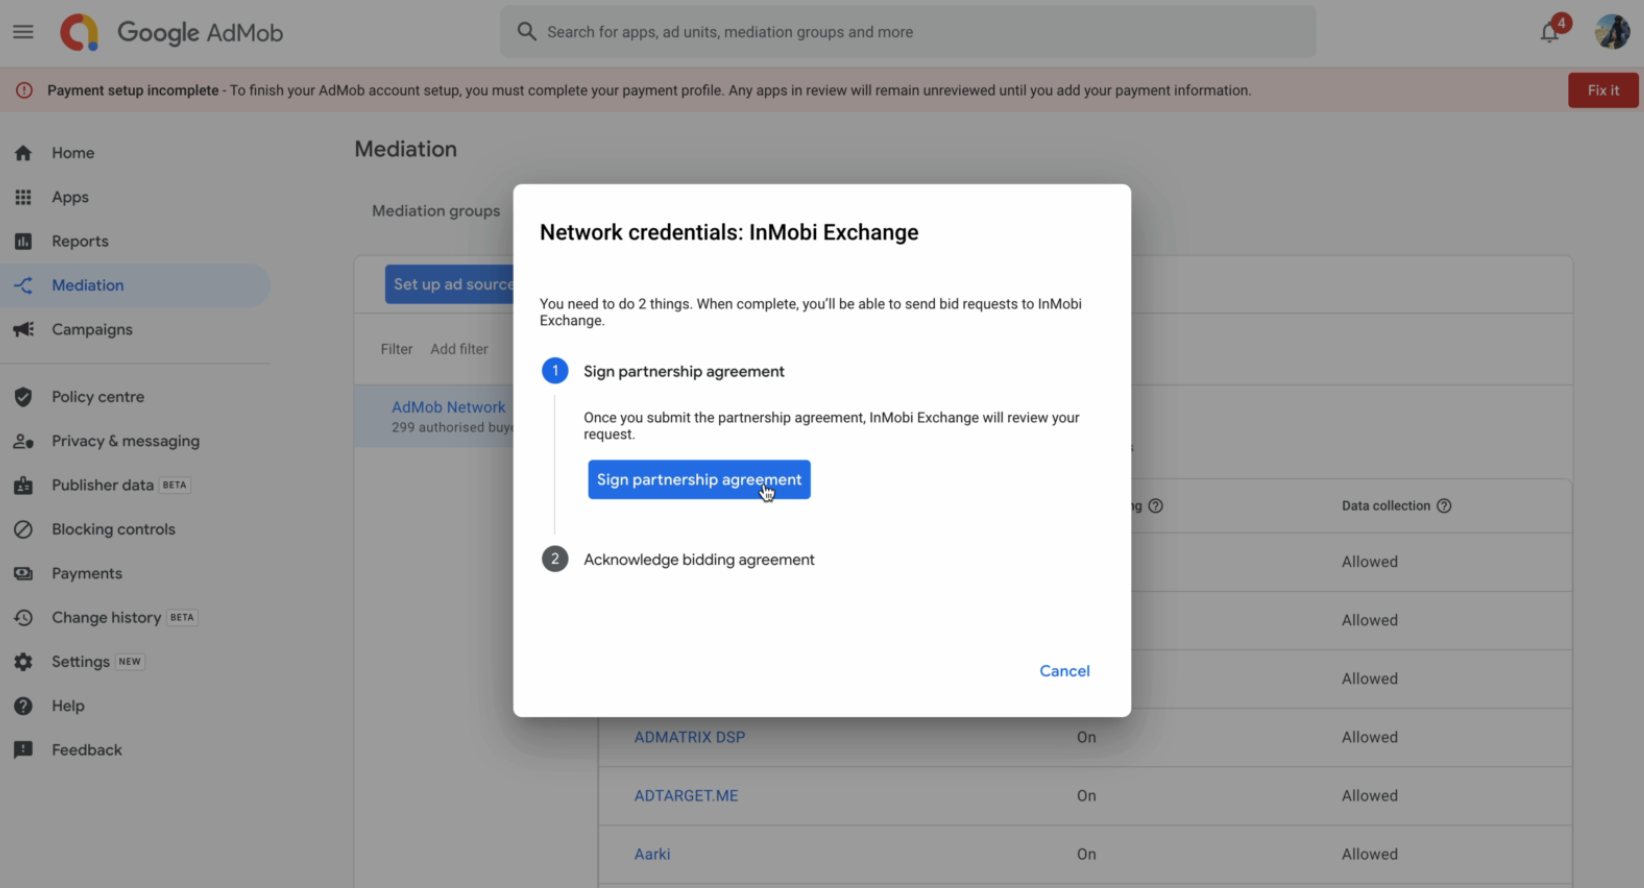
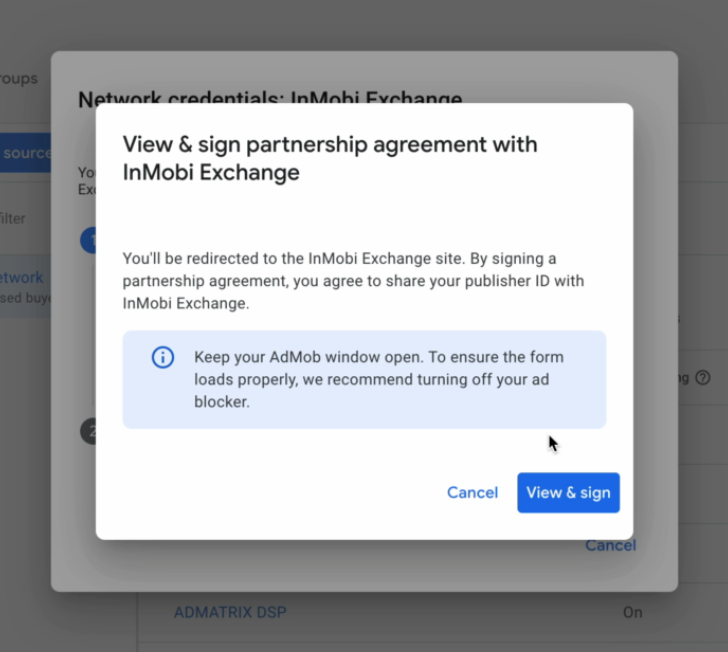
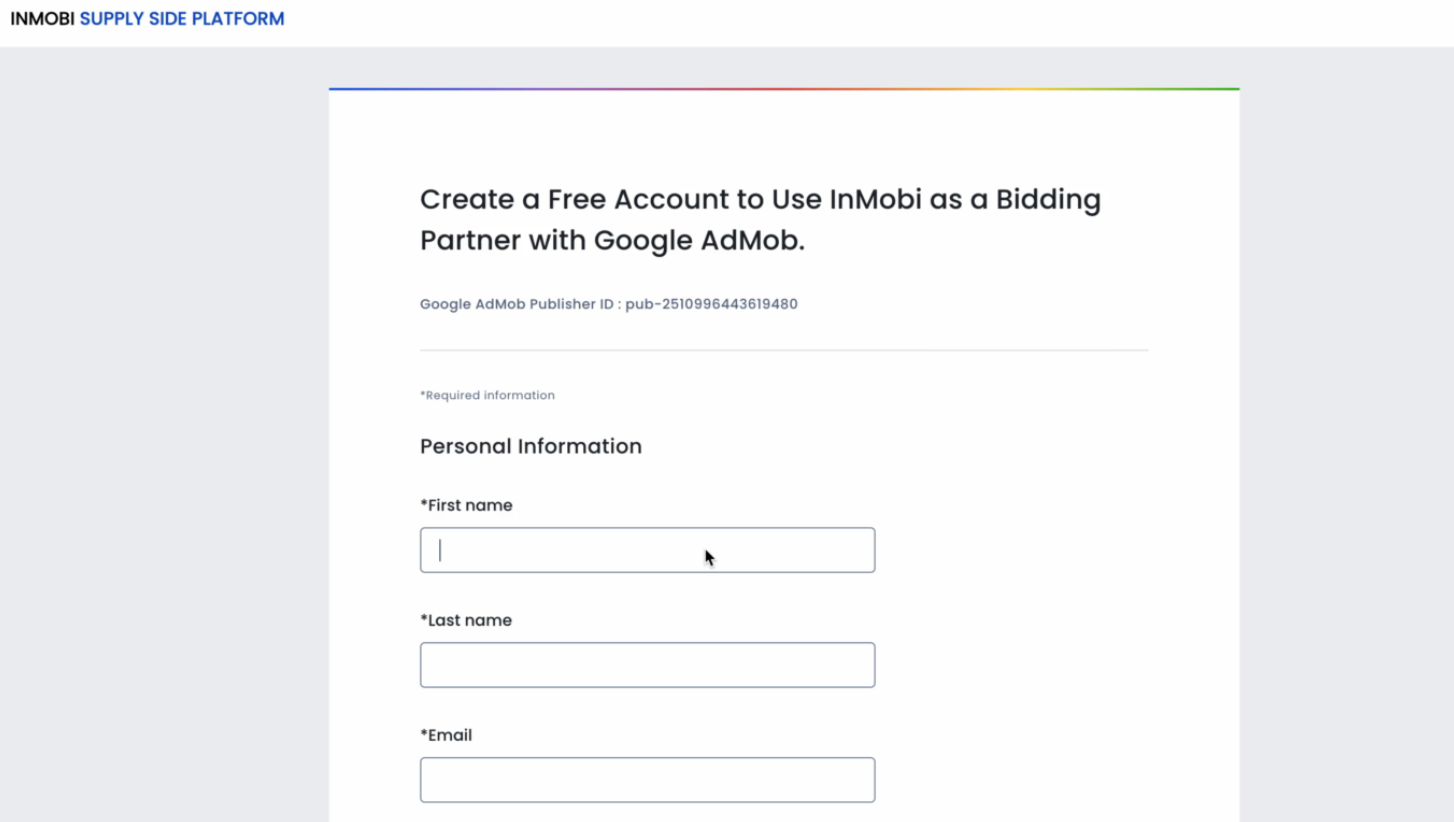
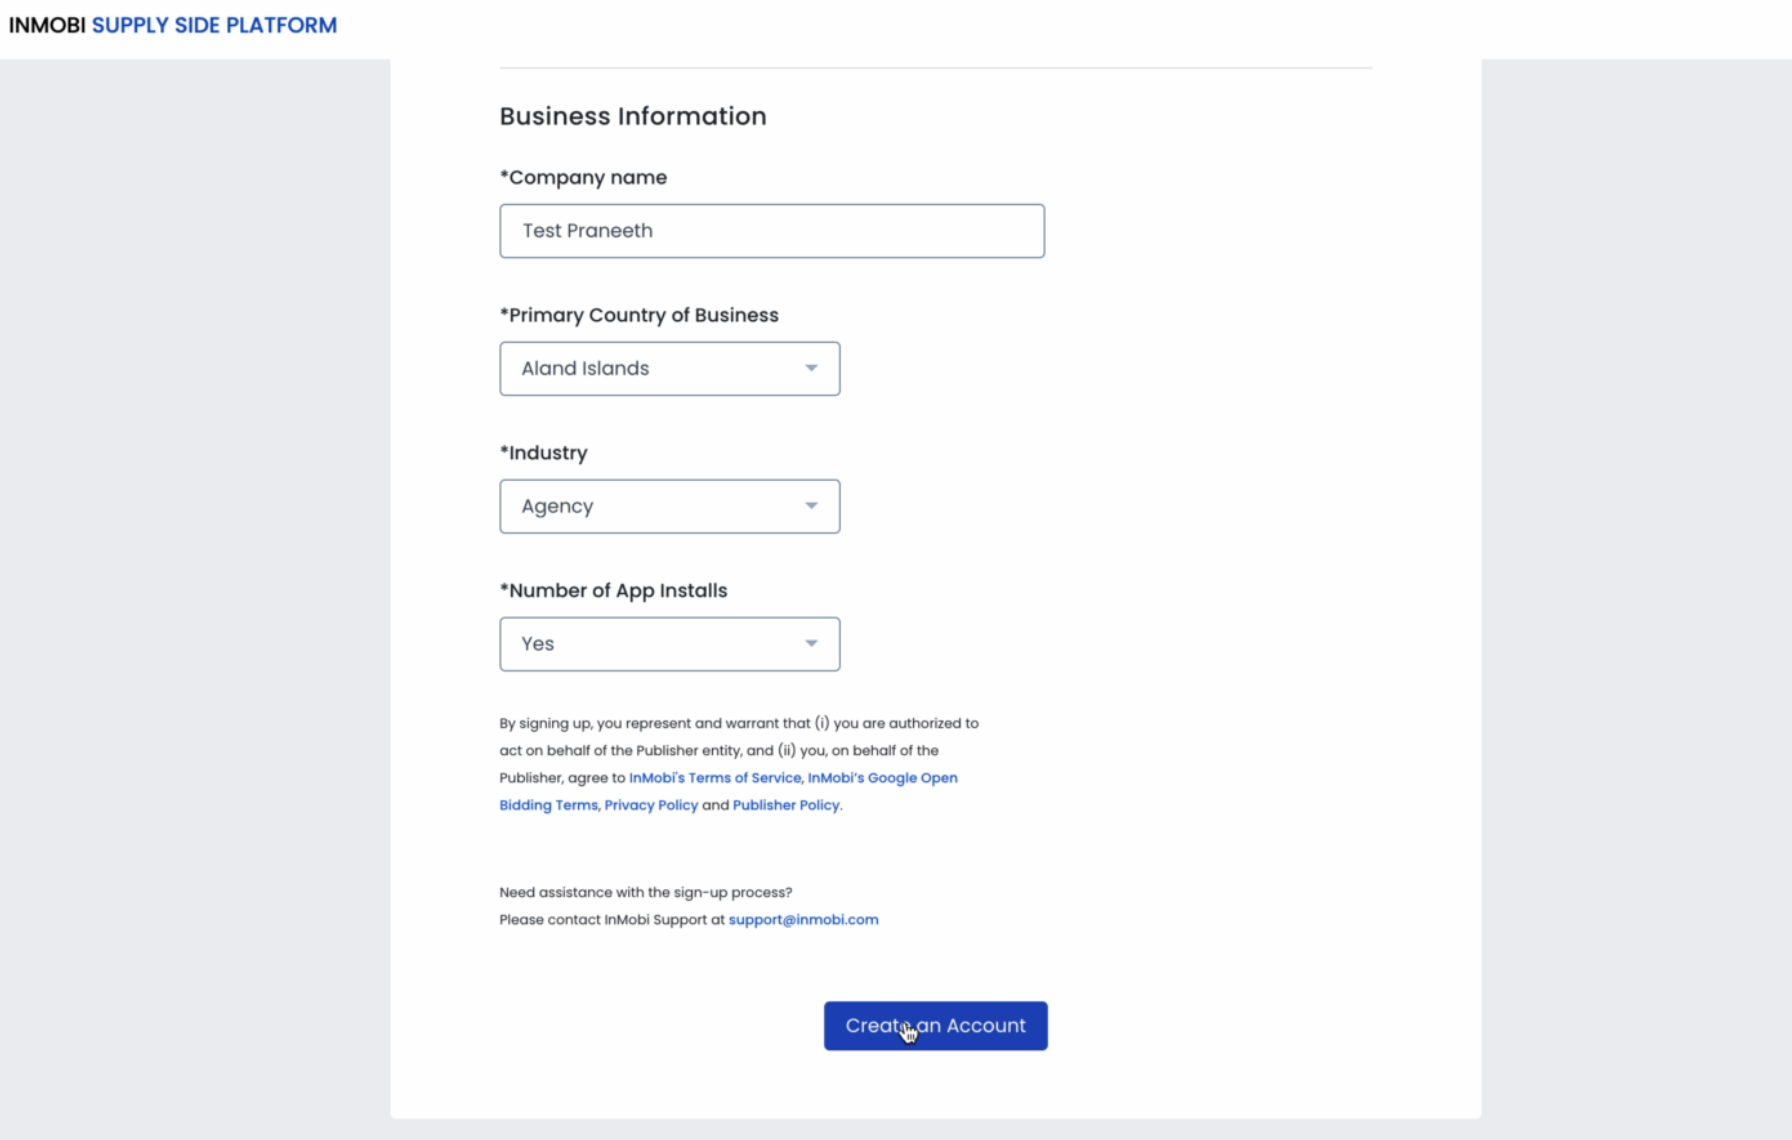
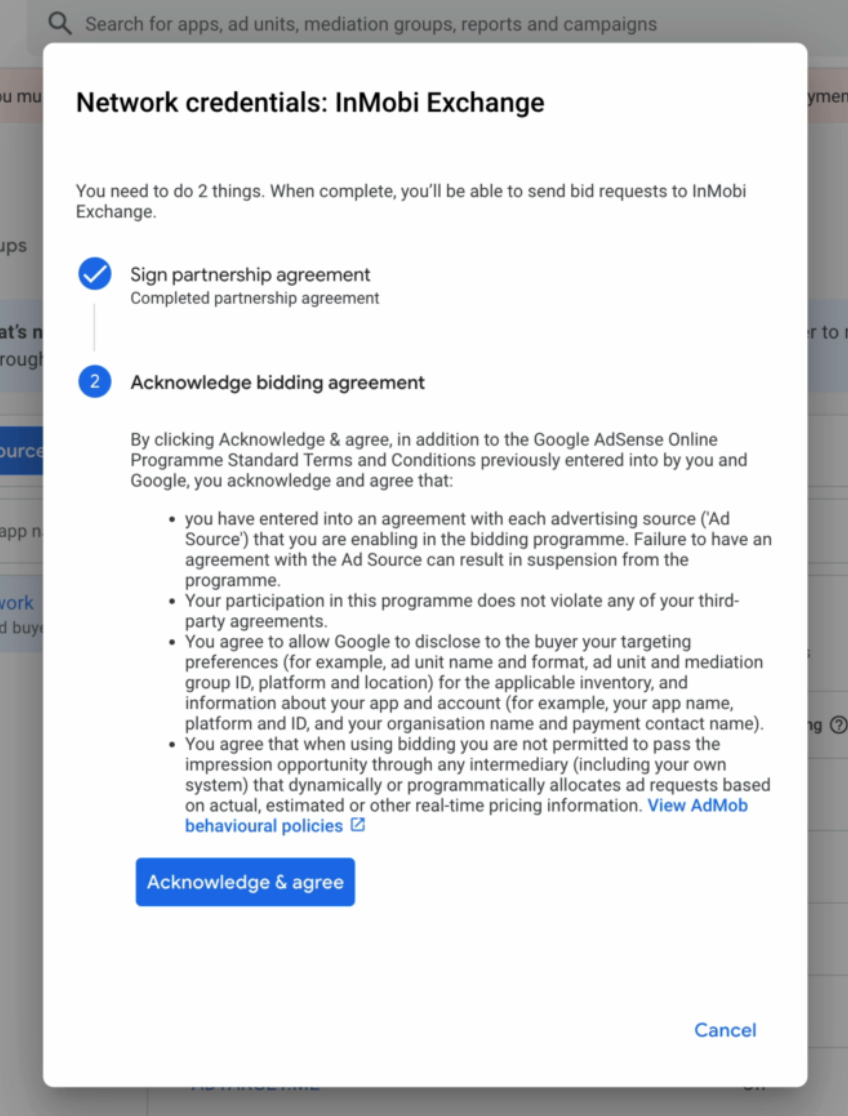
To complete the Google Open Bidding setup, you must view and sign the partnership agreement, fill out the onboarding form, and acknowledge the bidding agreement.
If you already have an InMobi account, you won’t need to fill out the onboarding form again. Instead, you will see a message indicating that an account already exists. This is based on the Google Publisher ID passed by Google, which InMobi uses to identify existing accounts.
All payments and billing-related communication will be made to the intermediary - Google Open Bidding. Contact your intermediary for all billing/payment-related queries.
The following steps are common for both Mobile App and CTV inventory.

For more information, see Create and manage yield partners.
For more information, see Create and manage yield groups.
In AdMob
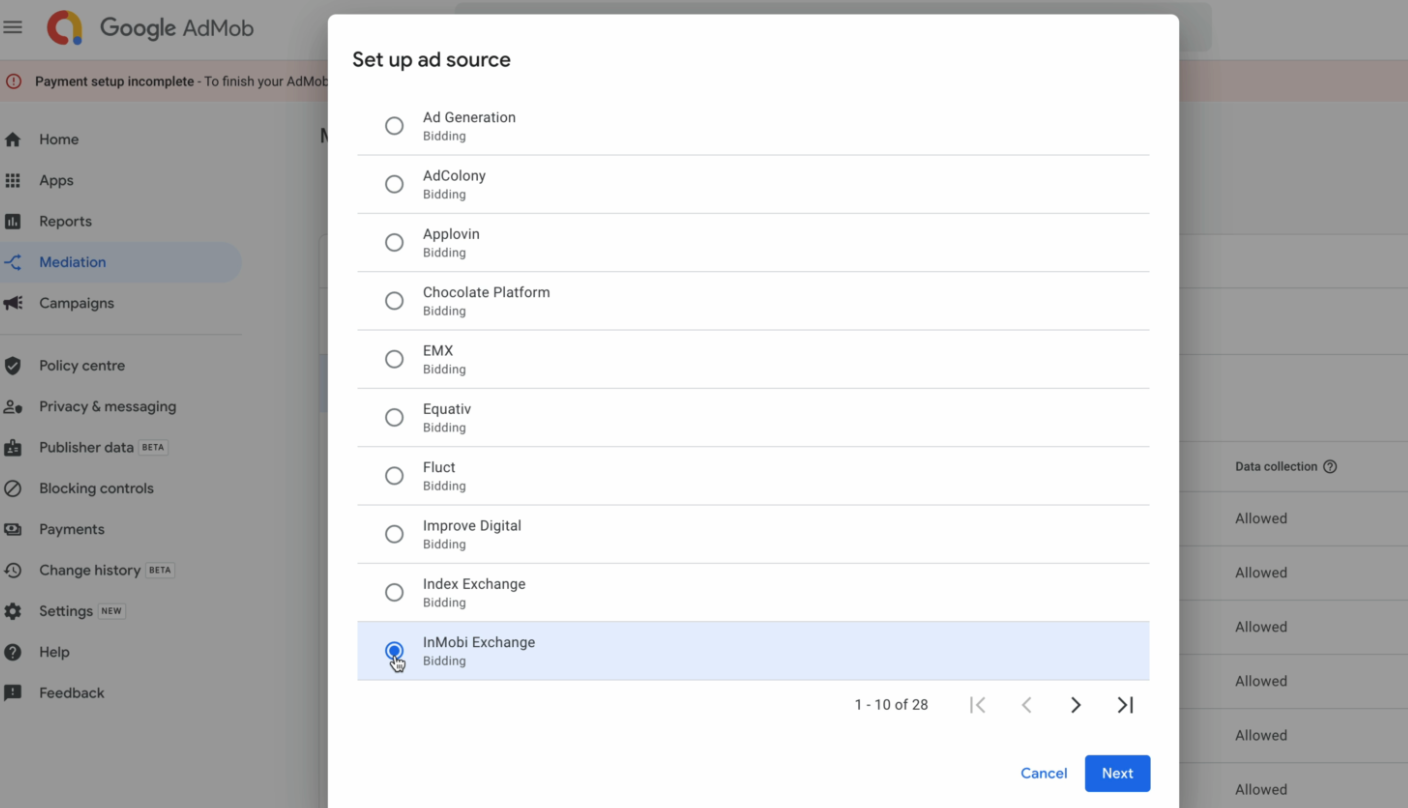
For more information, see Set up a bidding ad source.

For more information, see Create and manage yield partners.
For more information, see Introduction to Open Bidding.
Since Open Bidding does not require an SDK integration, InMobi must approve your request before going live. Once your setup is complete, share your Google Publisher ID with your InMobi Customer Success Manager or email googlebidding@inmobi.com.
Contact InMobi for approval only after completing your setup. Approval activates ad requests, and incomplete setups will result in failed ad responses. If your status shows as Rejected, it can be reversed. This is not permanent and may be due to previous manual clean-ups of pending requests.
Use the toggle below to view the differences in dashboard configuration across platforms.
All payments and billing-related communication will be made to the intermediary - Google Open Bidding. Please contact your intermediary for all billing/payment-related queries.
The following steps are common for both Mobile App and CTV inventory.


Follow the additional instructions below about GDPR settings on your Google dashboard for higher monetization results. This configuration applies to traffic from European Economic Area (EEA) and publishers using AdMob/GAM CMP for GDPR consent purposes. Google CMP provides two ways of adding ad partners on their AdMob/GAM platform:
InMobi is not part of ‘Commonly used ad partners’ by default, and you must add it manually by selecting Custom ad partners.
Follow the instructions below to enable InMobi under Custom ad partners on your Google dashboard.

For further assistance, Contact Us.
This topic explains how to integrate InMobi as a real-time bidder on Nimbus. InMobi connects via the OpenRTB (oRTB) protocol and uses the InMobi SDK to render ads when it wins an auction.
Before you begin, ensure that you have the following:
If the InMobi SDK is already integrated in your app, ensure that you link the same InMobi account ID with Nimbus. InMobi does not allow using multiple account IDs within the same app.
To set up your account and inventory on the InMobi Publisher Dashboard, follow these steps:
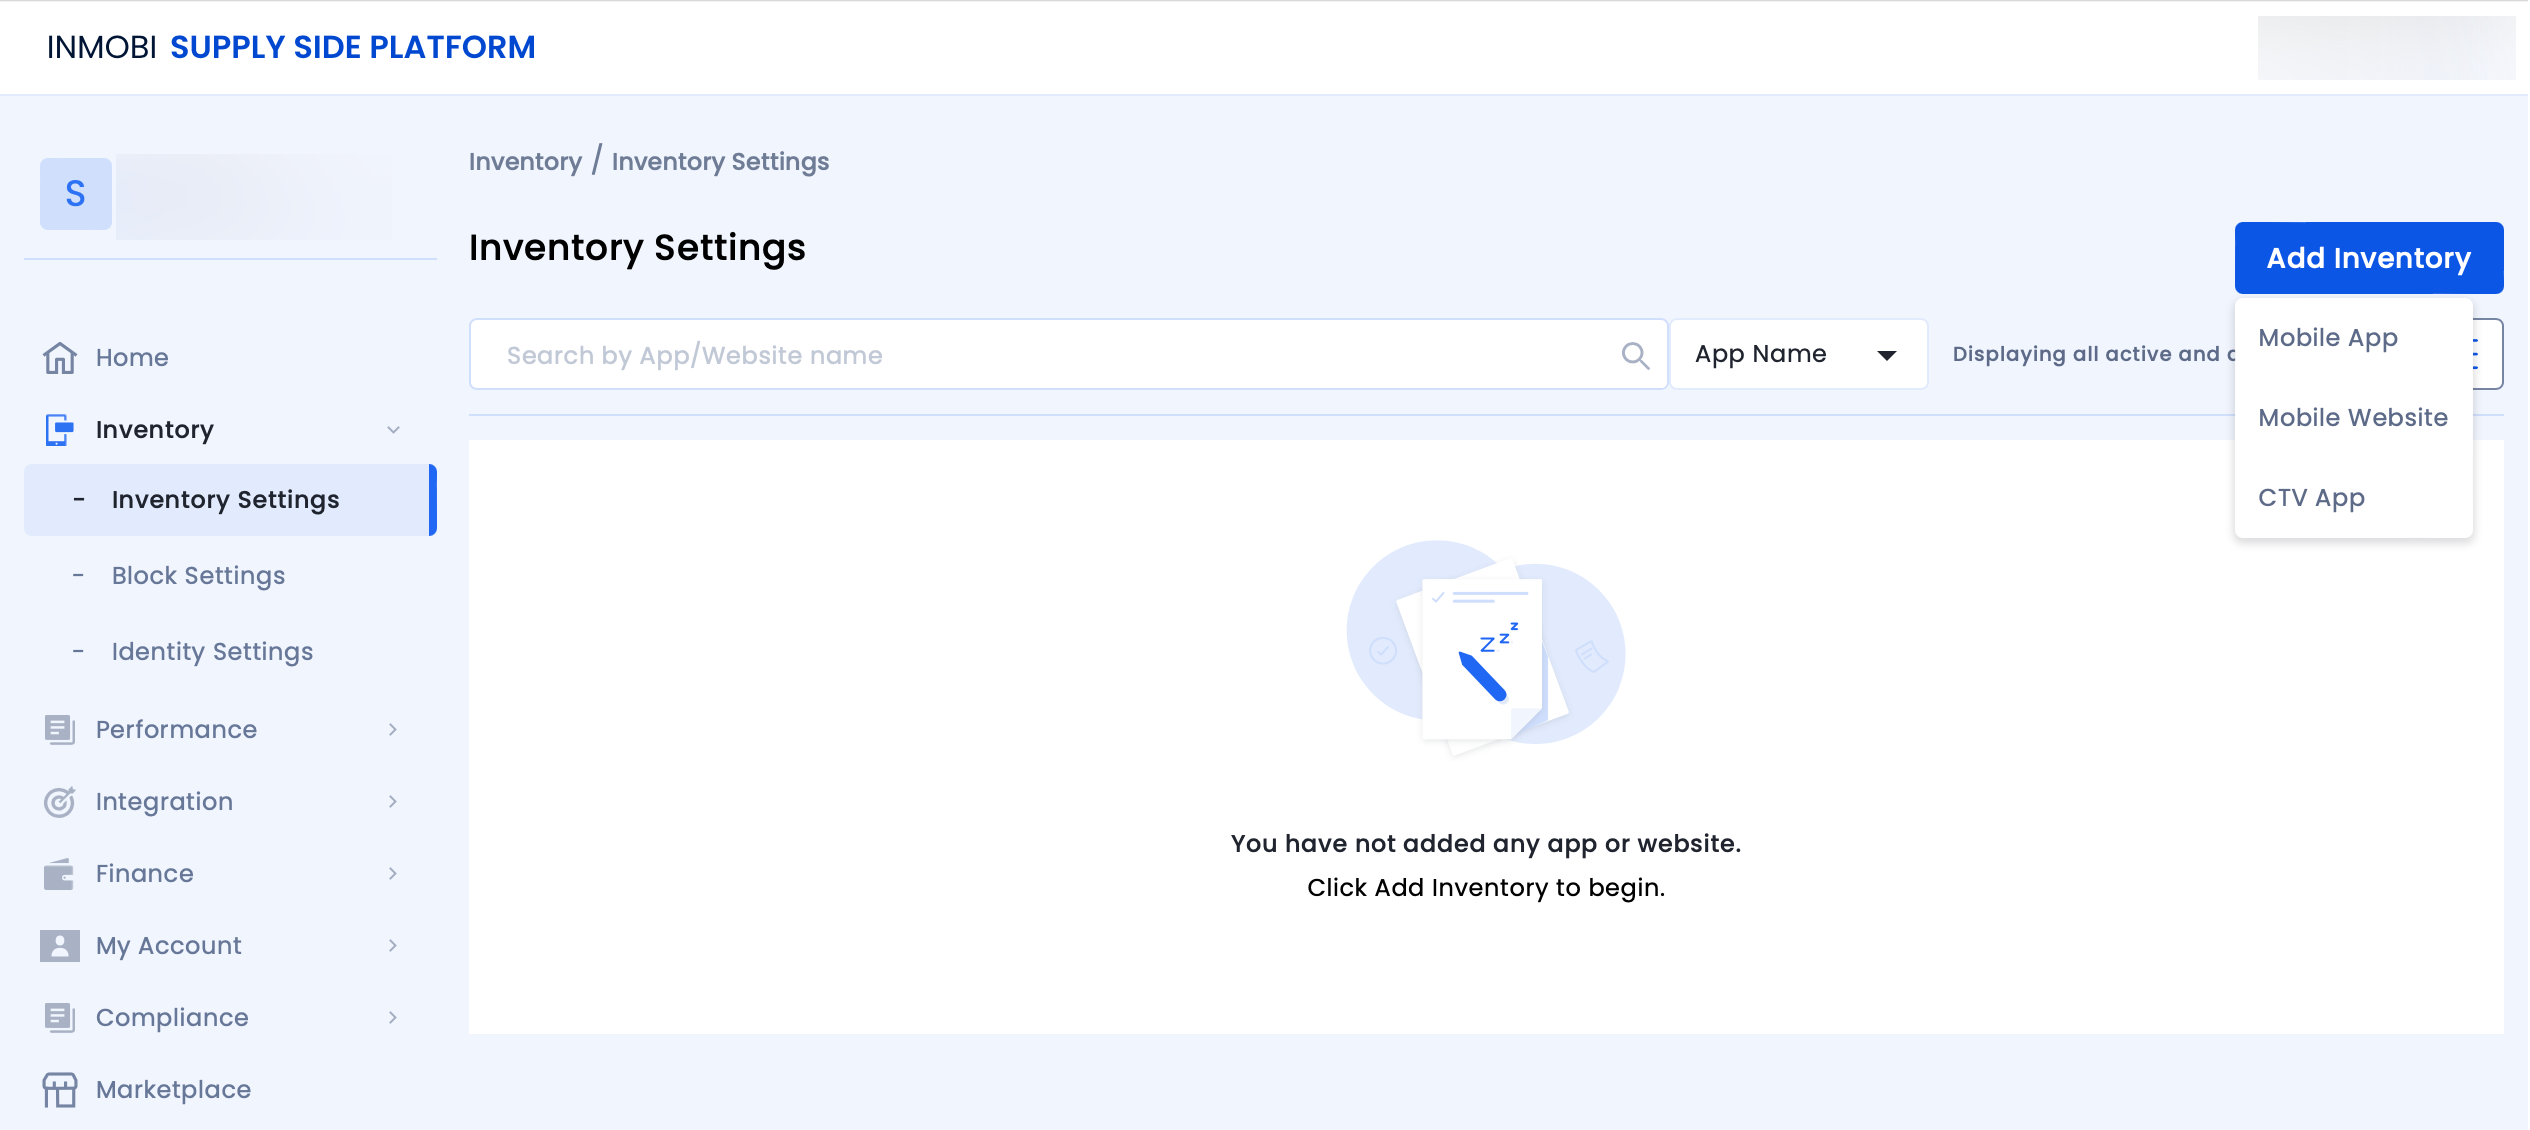
If you are adding apps and placements for the first time, see Add Your App or Website.
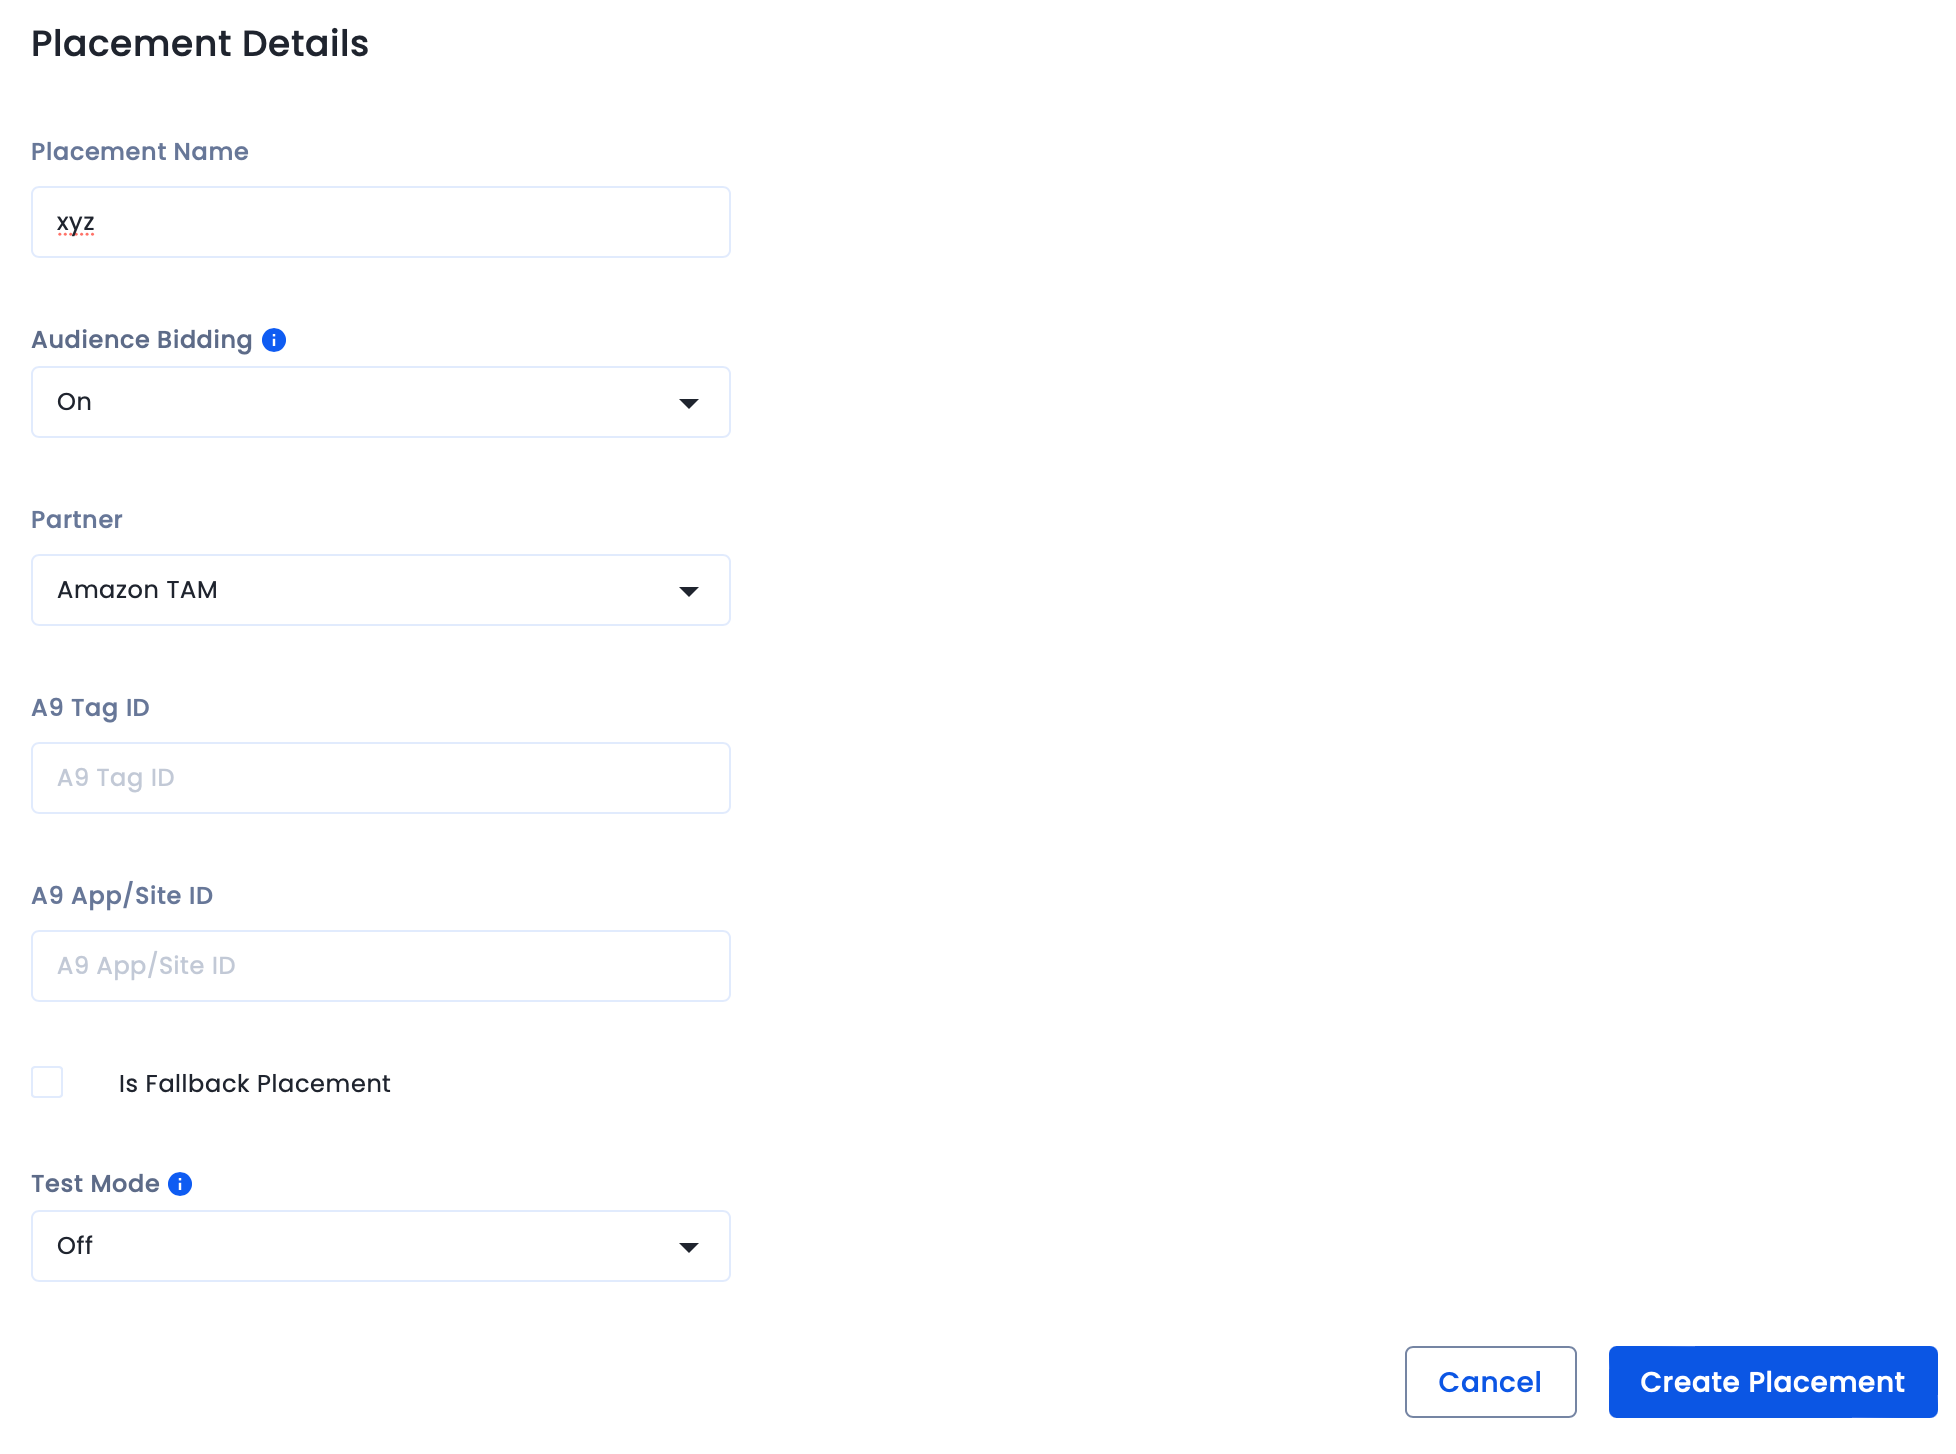
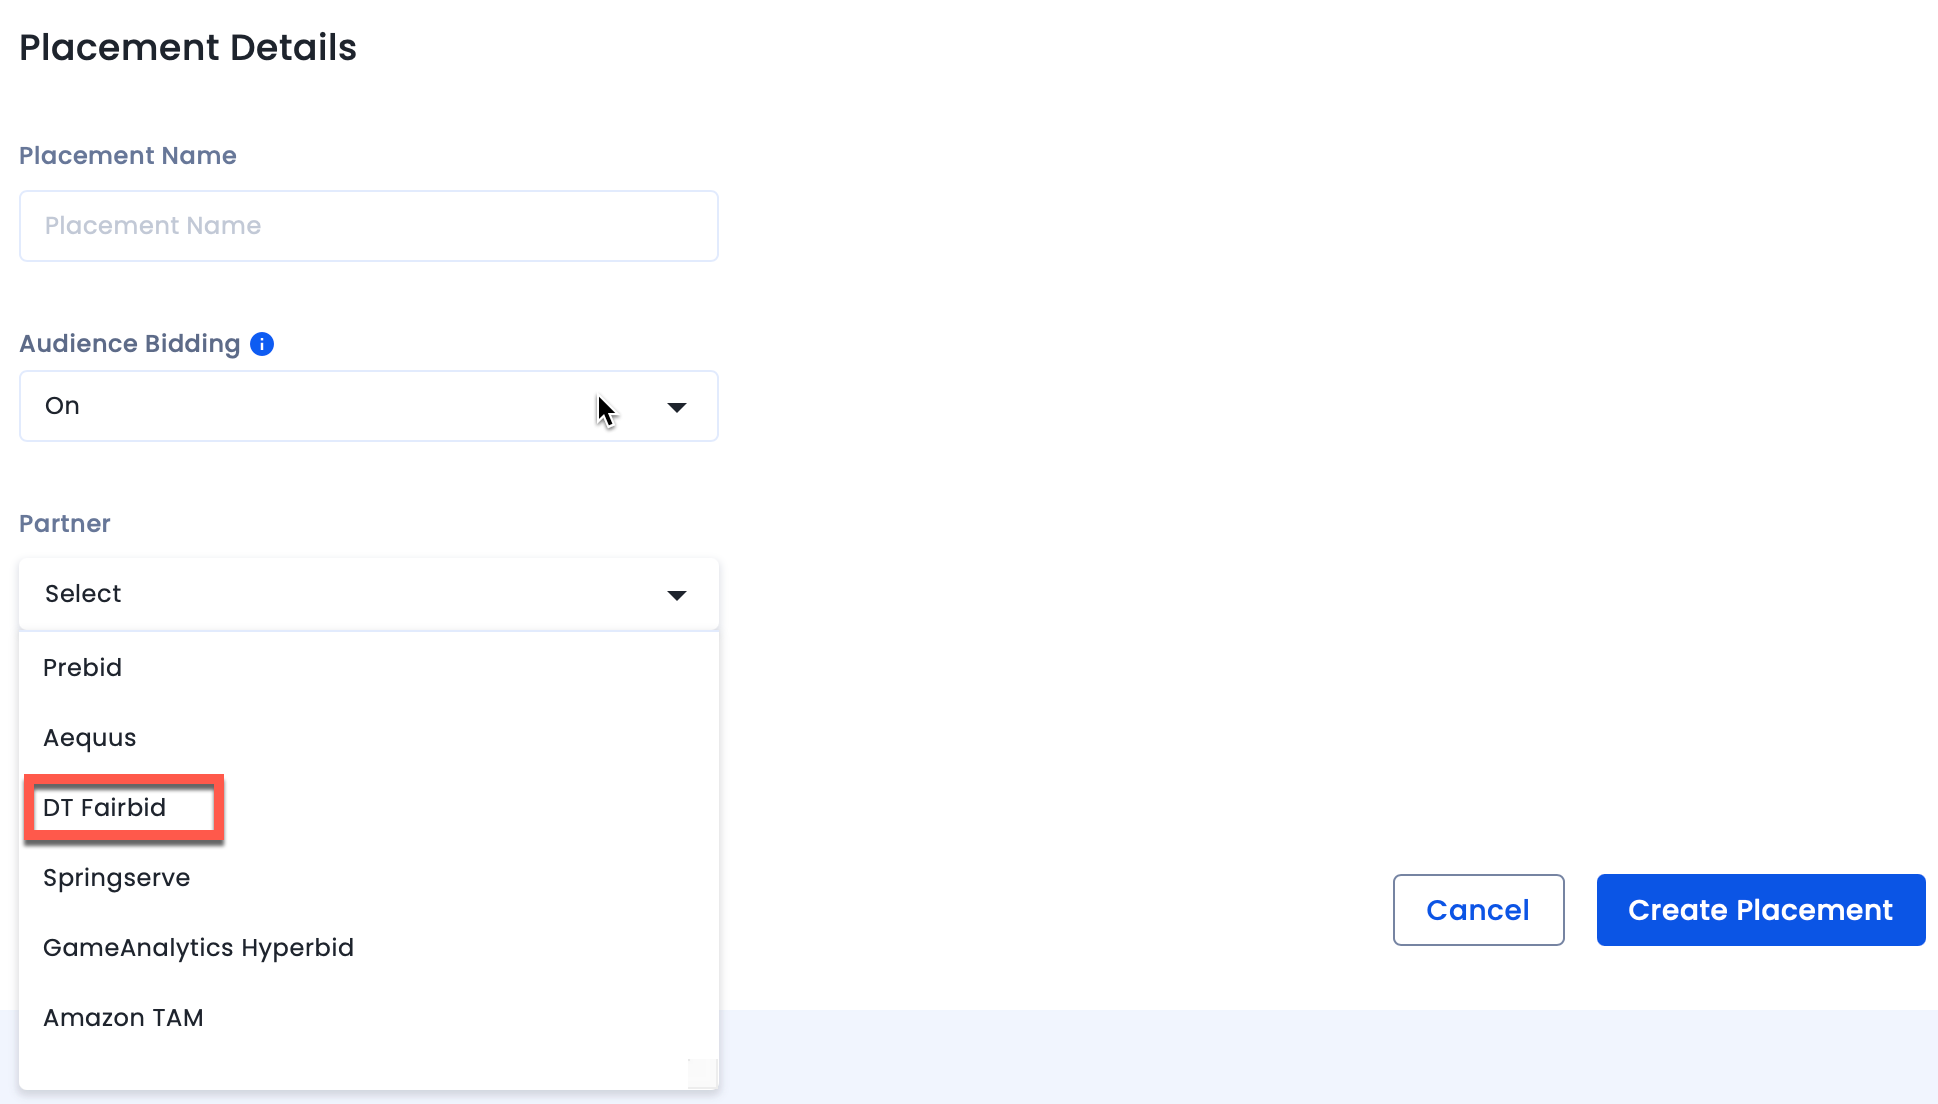
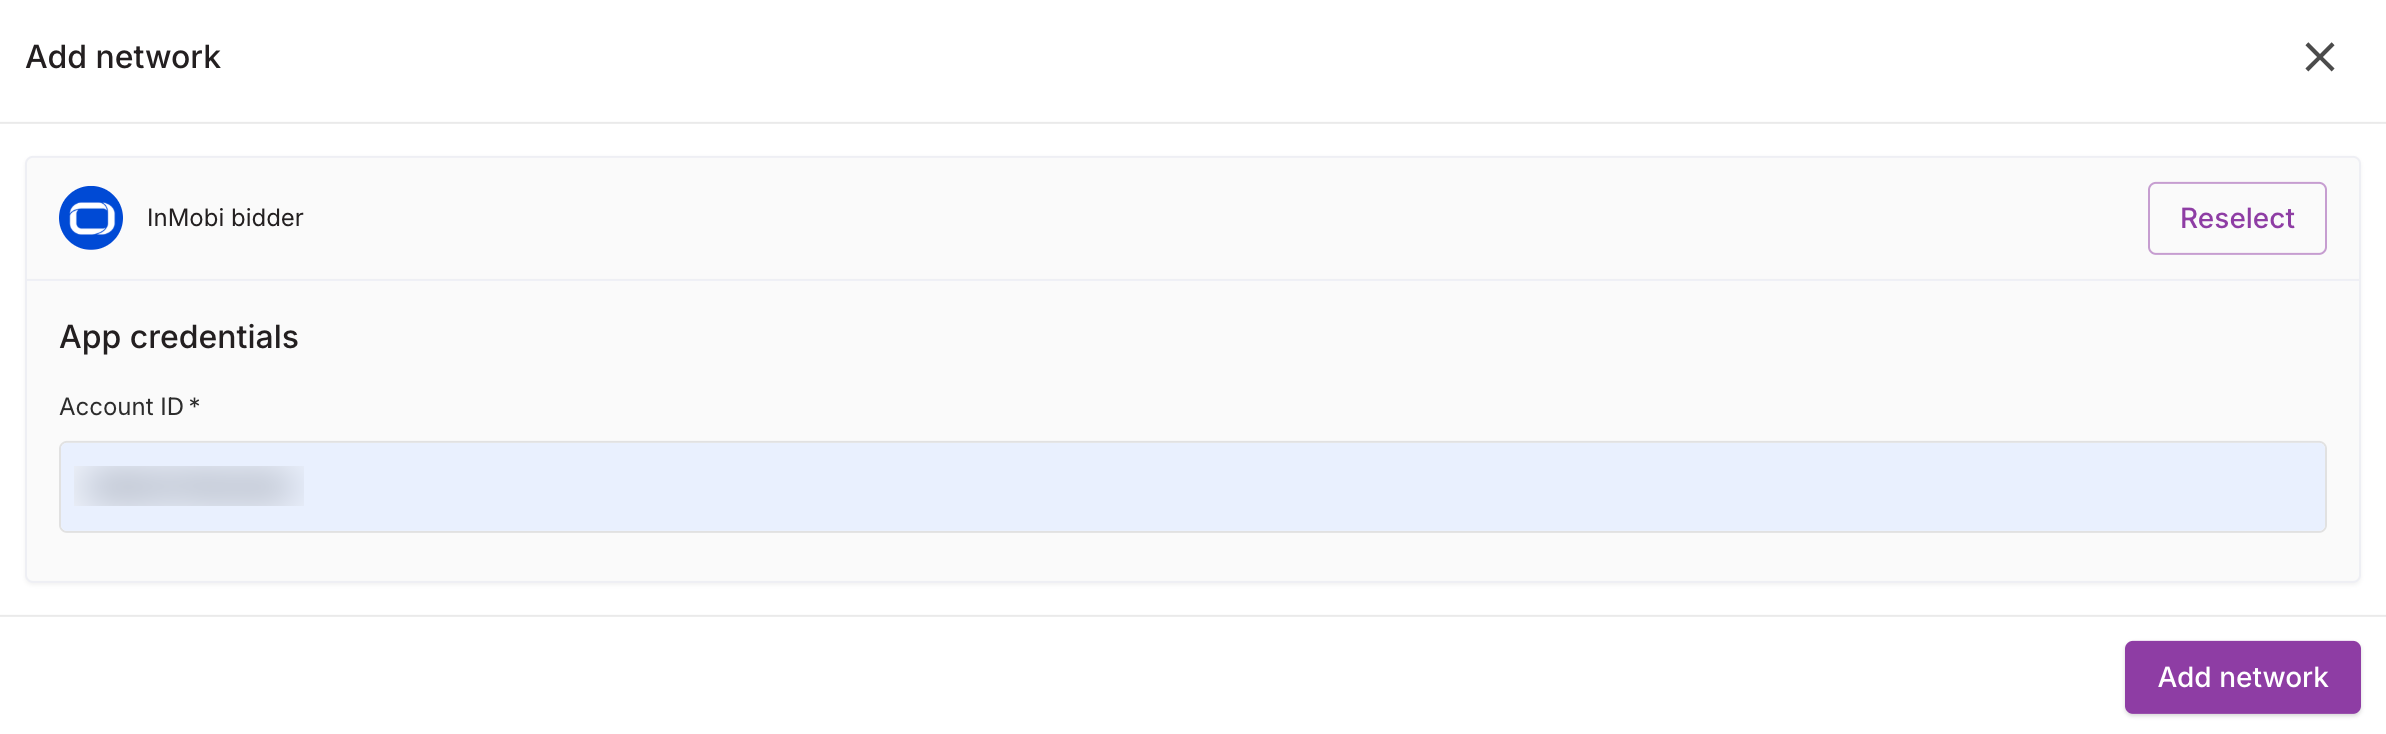
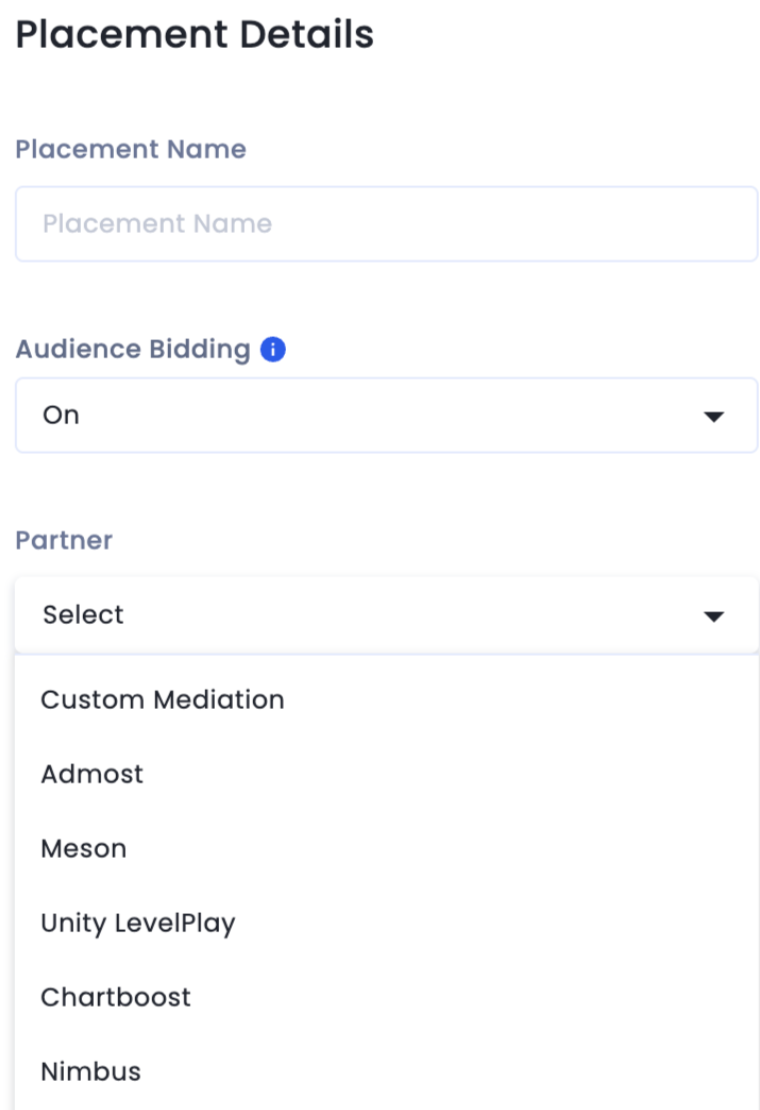
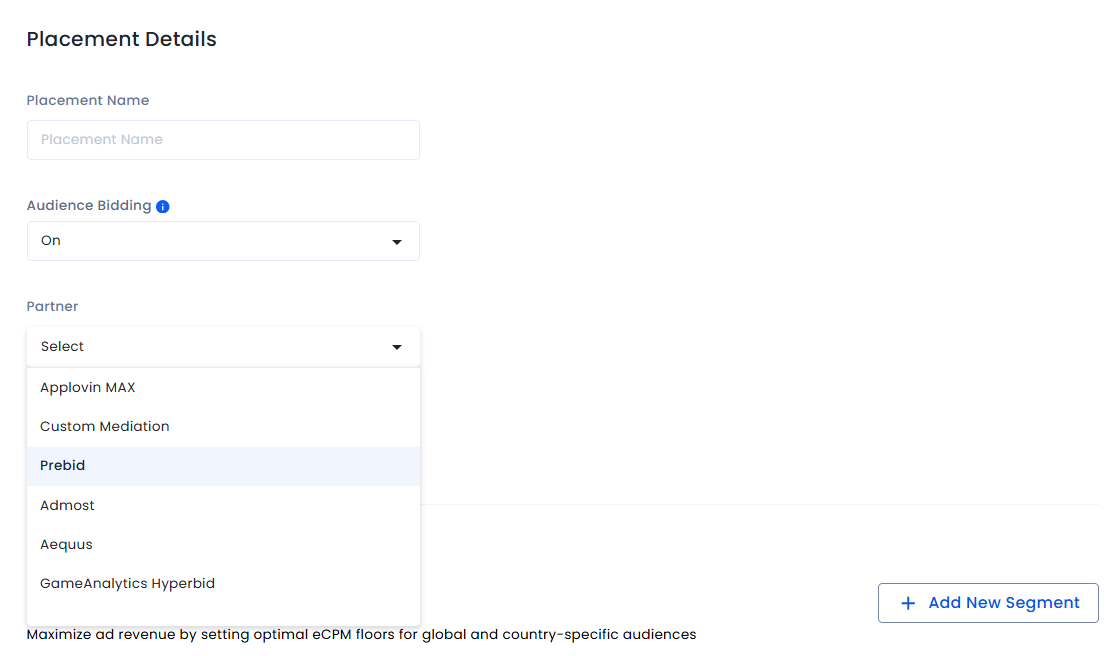
Enable Audience Bidding and select Nimbus from the Partner dropdown.
Use the following Nimbus documentation links to complete the integration:
This topic describes how to integrate the InMobi SDK rendering plugin with Prebid SDK and Prebid Server. For more information about Prebid Plugin Renderers and how this setup works, see Prebid Plugin Renderer (Header Bidding).
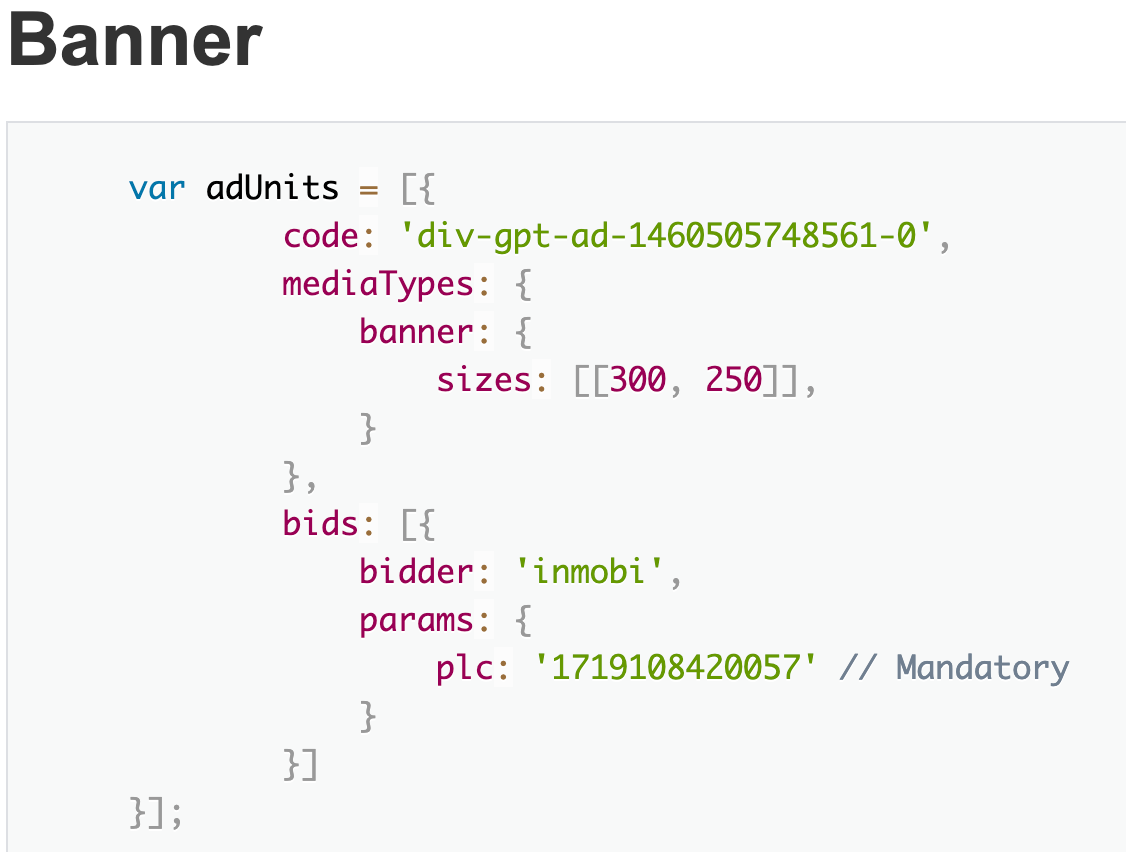
plc key. For more information, see InMobi for Header Bidding.In your app’s build.gradle file, add the following:
implementation "com.inmobi.monetization:inmobi-prebid-adapter:10.8.2.0"
implementation "com.inmobi.monetization:inmobi-ads-kotlin:10.8.2"
Before initializing Prebid SDK, register the InMobi renderer:
PrebidMobile.registerPluginRenderer(
    InMobiRenderer.getInstance(
        this,
        new InMobiMediationConfiguration("<<account_id>>",
            new InMobiRendererInitListener() {
                @Override
                public void onInitCompleted(@Nullable Error error) {
                    System.out.println("InMobi SDK initialized");
                }
            }
        )
    )
);
If your app already uses InMobi SDK through another mediation, you must provide the same account ID.
This topic provides a unified approach to integrating InMobi with Prebid Server across both mobile (in-app) and web platforms. It outlines the requirements, integration steps, and partner dashboard configurations necessary to enable header bidding through Prebid Server with InMobi demand. Whether you're working with a mobile app, mobile web, or desktop web environment, this guide will walk you through the complete integration process.
To successfully integrate InMobi with Prebid Server, ensure you meet the following prerequisites:
Use the toggles below to view platform-specific integration instructions.
appId and placement ID in the request payload.bidder: 'inmobi' with the required parameters:
{
  code: 'ad-slot-1',
  mediaTypes: { banner: { sizes: [[300, 250]] }},
  bids: [{
    bidder: 'inmobi',
    params: {
      placementId: '<PLACEMENT_ID>',
      publisherId: '<PUBLISHER_ID>',
      tagId: '<TAG_ID>',
    }
  }]
}
Use the toggle below to view the differences in dashboard configuration across platforms.
For further assistance, Contact Us.
InMobi provides a transparent bidding adapter for Prebid.js (client-side integration) and Prebid Server (server-to-server integration). As a Prebid-approved bidder, InMobi continuously updates its adapter with new features and enhancements.

For each website, create at least one placement per ad unit (Banner, Video, and Native).
To configure InMobi in your Prebid.js setup:

Publica integration is the process of connecting your CTV inventory with the Publica platform, which is a CTV ad server designed to help publishers manage and monetize their video ad inventory. This guide provides step-by-step instructions for connecting your CTV inventory with InMobi via Publica. It lets publishers streamline their CTV ad operations and maximize yield by connecting with demand partners and managing ad decision-making in a flexible and transparent way.
Before starting the integration, ensure you have:
To set up your account and inventory on the InMobi Publisher Dashboard, follow these steps:
To map the InMobi placements,
For further assistance, Contact Us.
SpringServe integration is the process of connecting your CTV inventory with the SpringServe platform, which is a CTV ad server designed to help publishers manage and monetize their video ad inventory.
Before starting the integration, ensure you have:
To set up your account and inventory on the InMobi Publisher Dashboard, follow these steps:
To map the InMobi placements,
Ensure the ad type (e.g., VAST video) and targeting parameters (app/channel name, duration, position) match what’s set on the InMobi dashboard.
For further assistance, Contact Us.
Integrating InMobi SDK with Unity is easy.
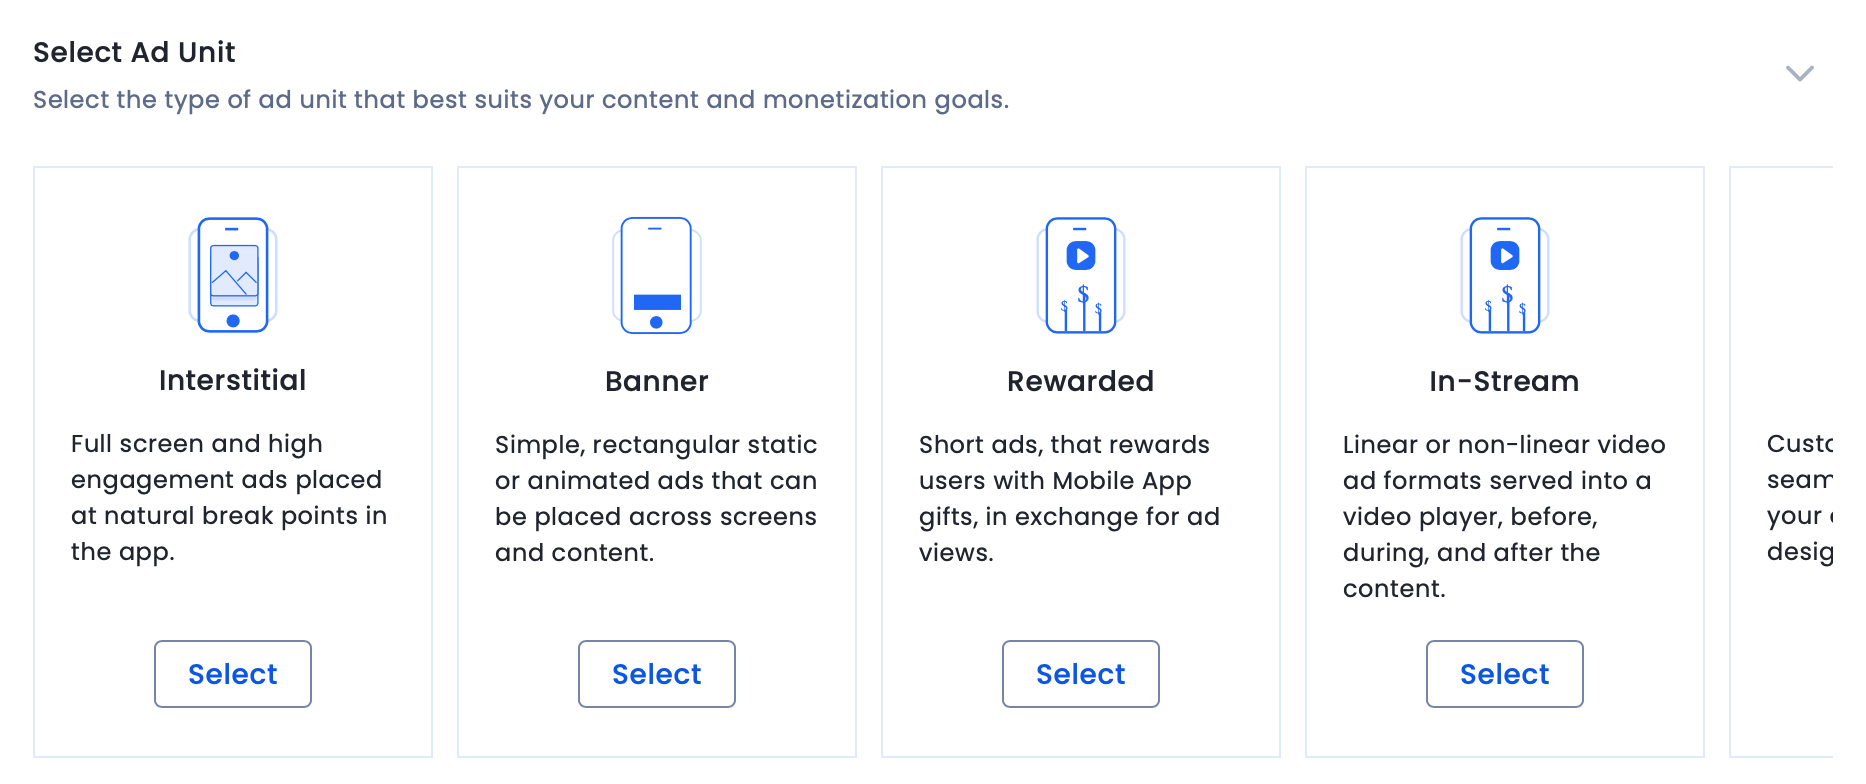
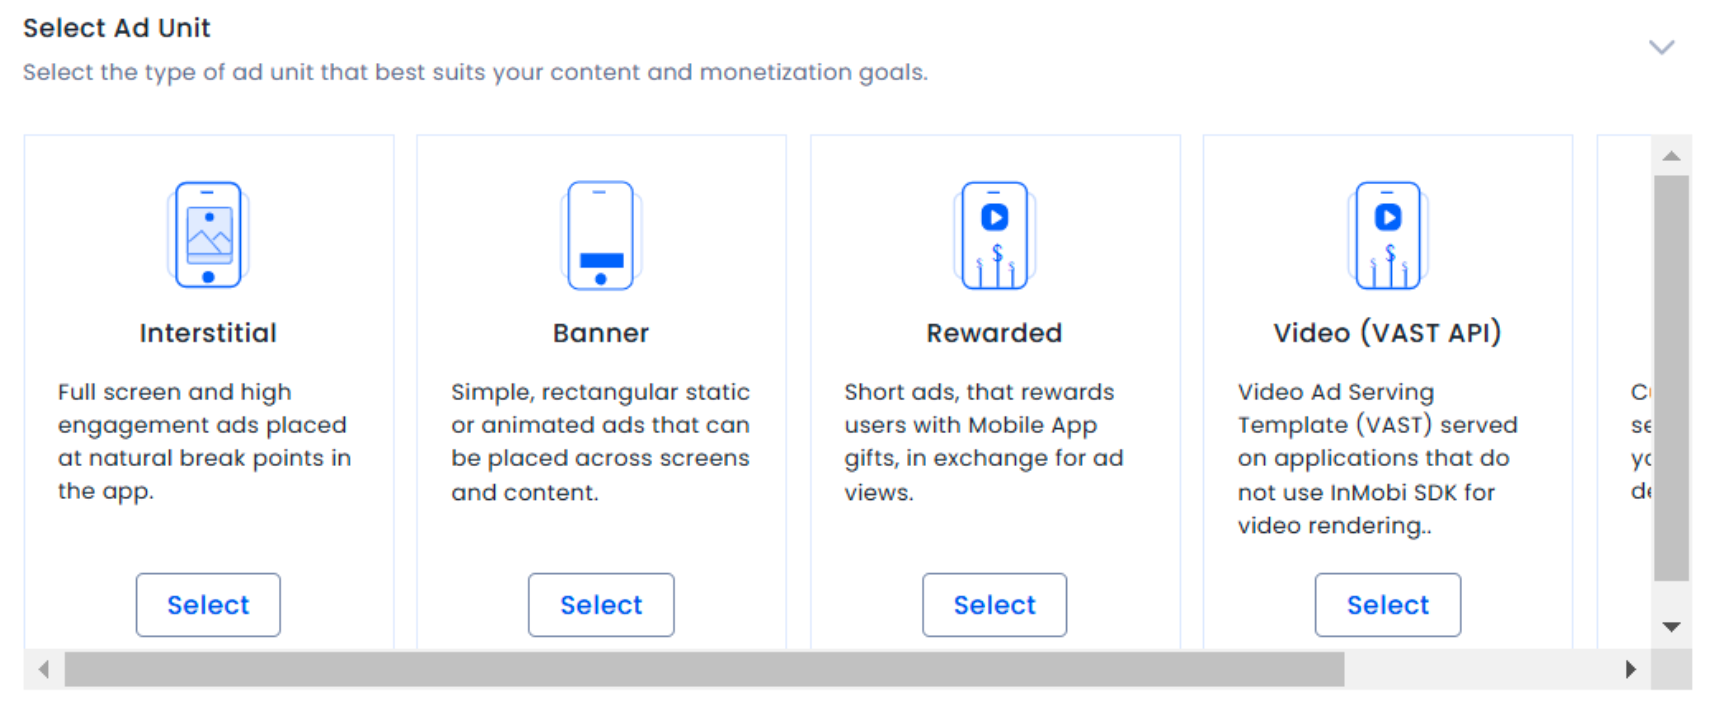
You can get the following ad types from InMobi via the Unity plugin on both Android and iOS apps:
You require the following to run the latest version of the Unity plugin:
| SDK Version | |
| Size |
iOS - 692 KB (.IPA Inflation) Android - 375.341 KB (.APK Inflation) |
| Plugins |
Follow these simple steps and start monetizing with InMobi:
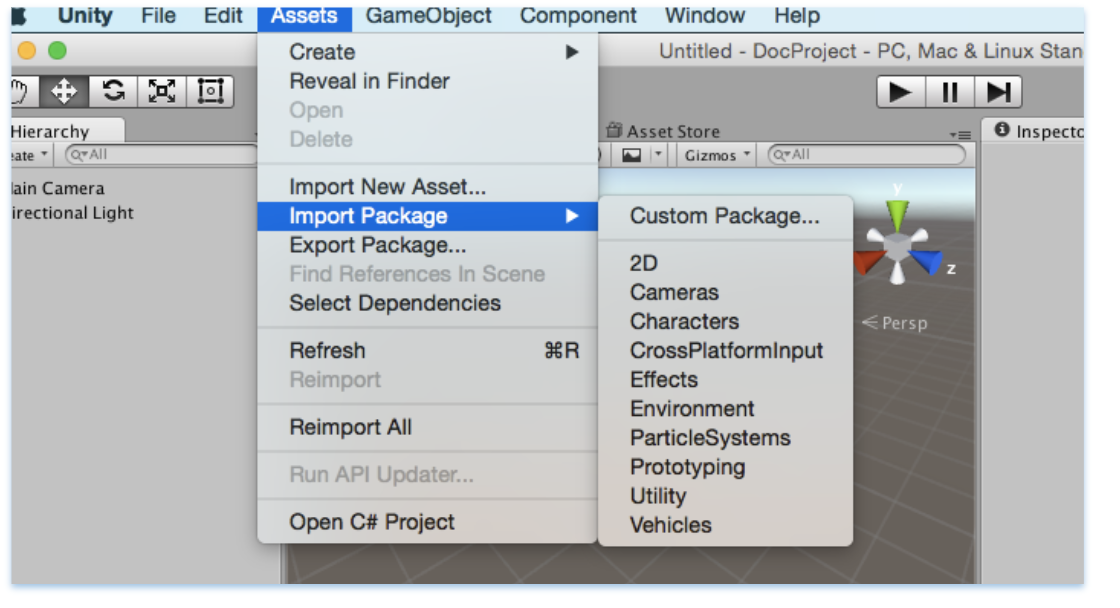
Select Assets Import Package Custom Package, and search for the InMobiAdsUnityPlugin.unitypackage file you downloaded.
Make sure all the files are selected, and then click Import.

You can use the common C# API in the InMobi Ads plugin to request banner, interstitial, and rewarded video ads. The code can be written once and deployed to both Android and iOS.
There are multiple APIs provided in InMobiPlugin Class to pass on Demographic information to InMobi SDK which helps us in better ad targeting.
Some of them are as follows:
//Set Age
public void SetAge(int age){
inmobiPluginClient.SetAge (age);
}
//Set PostalCode
public void SetPostalCode(string postalCode){
inmobiPluginClient.SetPostalCode (postalCode);
}
//Set Year of Birth
public void SetYearOfBirth(int yearOfBirth){
inmobiPluginClient.SetYearOfBirth (yearOfBirth);
}
//Set Gender GENDER_MALE or GENDER_FEMALE
public void SetGender(string gender){
inmobiPluginClient.SetGender (gender);
}
You can use the InMobiPlugin Class to initialize the InMobi SDK. Account Id is required to initialize the InMobi SDK.
Here is the sample code to initialize the InMobi SDK:
private void initializeInMobiAds () {

//Account id used here is test account id

InMobiPlugin inmobiPlugin = new InMobiPlugin();

    inmobiPlugin.OnInitializationCompleted += this.HandleInitializationStatus;

    Dictionary<string, object=""> consentObject = new Dictionary<string, object="">();

#if UNITY_ANDROID

consentObject.Add(InMobiPlugin.IM_GDPR_CONSENT_AVAILABLE, true);

#elif (UNITY_5 && UNITY_IOS) || UNITY_IPHONE

    consentObject.Add(InMobiPlugin.IM_GDPR_CONSENT_AVAILABLE, “true”);
#endif

    consentObject.Add(InMobiPlugin.IM_GDPR_CONSENT_IAB, "IAB_STRING");
    inmobiPlugin.Init("4028cb8b2c3a0b45012c406824e800ba", consentObject);
}

public void HandleInitializationStatus (object sender, SdkInitializationStatusArgs args) {

Debug.Log("SDK Initialization status code : " + args.status.Code + " and reason : " +
        args.status.Reason);
}
Let’s understand a few things here before you proceed:
What is a consentObject? - A consentObject is a dictionary representation of all kinds of consent provided by the publisher to the SDK. The key is mandatory if you wish to monetize traffic from EEA region. You can read further on GDPR regulations here.
| Key | Type | Inference |
| gdpr_consent | String | A consent string is a series of numbers, which identifies the consent status of an Adtech Vendor. The string must follow the IAB contracts as mentioned here. |
| gdpr_consent_available | String (iOS) | For iOS, the value should be passed as String: "true": User has provided consent to collect and use data. "false": User has not provided consent to collect and use data. Any value other than “true” and “false” is invalid and will be treated as value not provided by user. This key can be accessed via string constant IM_GDPR_CONSENT_IAB. |
| Bool (Android) | For Android, the value should be passed as Bool: true: User has provided consent to collect and use data. false: User has not provided consent to collect and use data. Any value other than true and false is invalid and will be treated as value not provided by user. This key can be accessed via string constant IM_GDPR_CONSENT_IAB. |
|
| gdpr | String | Whether or not the request is subjected to GDPR regulations (0 = No, 1 = Yes), omission indicates Unknown. |
As part of the General Data Protection Regulation (“GDPR”) publishers who collect data on their apps, are required to have a legal basis for collecting and processing the personal data of users in the European Economic Area (“EEA”). Please ensure that you obtain appropriate consent from the user before making ad requests to InMobi for Europe and indicate the same by following our recommended SDK implementation. Please do not pass any demographics information of a user; if you do not have user consent from such user in Europe.
It is mandatory to initialize the InMobi SDK before making any ad request to InMobi. It is advised to do it at the start of the app itself.
For COPPA compliance, you can indicate whether the user is a child. Set to true if the user is under 13 in the US, or the applicable age in other regions.
// Set age restriction for COPPA compliance
// Set to true if the user is a child (under 13 in US)
inMobiPlugin.SetAgeRestriction(true);
Publisher Signals
Publisher Signals allow you to pass contextual data to improve ad targeting and yield. You can signal information about user behavior, acquisition source, and other attributes to help generate better ad performance.
Setting Publisher Signals
Create a dictionary with signal keys and values, then pass it to the SDK. This method must be called after InMobi SDK is successfully initialized. Ensure you call this function and update the values before every ad request.
// Create a dictionary with all required signals and corresponding values
Dictionary<string, object=""> publisherSignals = new Dictionary<string, object="">();

// User monetization signals
publisherSignals.Add("iap", true);              // User has made IAP
publisherSignals.Add("ua_type", "paid");        // User is acquired via paid medium
publisherSignals.Add("iap_type", "minnow");     // User has made low purchases
publisherSignals.Add("iaa_type", "whale");      // User has seen high number of ads

// Session and impression depth signals
publisherSignals.Add("s_dep_rew", 4);           // User has seen 4 rewarded ads in current session
publisherSignals.Add("i_dep_rew", 10);          // User has seen 10 rewarded ads in lifetime

// Performance signals
publisherSignals.Add("ctr_rew", 9.25);          // Historical CTR for user is 9.25%
publisherSignals.Add("abp_5_rew", 0.01720);     // Average winning bid price for last 5 rewarded auctions was $0.01720, eCPM is $17.2

// Pass the signals to InMobi SDK
inMobiPlugin.PutPublisherSignals(publisherSignals);
</string,></string,>
Getting Publisher Signals
You can retrieve the currently set signals to verify what data is being passed.
// Check what signals are set already
Dictionary<string, object=""> currentSignals = inMobiPlugin.GetPublisherSignals();</string,>
Resetting Publisher Signals
Clear all the signals data for the user when needed.
// Clear all the signals data for the user
inMobiPlugin.ResetPublisherSignals();
You must provide a consentObject in every session. SDK does not persist consent, it only keeps the consentObject in memory. If the app is relaunched, SDK will lose the consentObject. Within a session, a consentObject can be updated as below:
Dictionary<string, object=""> consentObject = new Dictionary<string, object="">();

    #if UNITY_ANDROID

        consentObject.Add(InMobiPlugin.IM_GDPR_CONSENT_AVAILABLE, true);

    #elif (UNITY_5 && UNITY_IOS) || UNITY_IPHONE

        consentObject.Add(InMobiPlugin.IM_GDPR_CONSENT_AVAILABLE, “true”);

    #endif

    consentObject.Add(InMobiPlugin.IM_GDPR_CONSENT_IAB, "IAB_STRING");

    inmobiPlugin.UpdateGdprConsentObject(consentObject);
Following is the minimal code to create and load a banner ad:
private void RequestBanner ()
{
  // These placement Ids are configured to always serve test ads.
  #if UNITY_ANDROID
  string placementId = "1467162141987";
  #elif UNITY_IPHONE
  string placementId = "1464947431995";
  #endif
  // Create a 320x50 banner at the bottom of the screen.
  this.bannerAd = new BannerAd (placementId, 320, 50, (int)InMobiAdPosition.BottomCenter);
  // Register for ad events.
this.bannerAd.OnAdLoadSucceeded += this.HandleOnAdLoadSucceeded;    // Called when ad is loaded successfully
this.bannerAd.OnAdLoadFailed += this.HandleAdLoadFailed;            // Called when ad fails to load
this.bannerAd.OnAdFetchSuccessful += this.HandleAdFetchSuccessful;  // Called when ad content is fetched successfully
this.bannerAd.OnAdFetchFailed += this.HandleAdFetchFailed;          // Called when ad fetch fails
this.bannerAd.OnAdImpression += this.HandleAdImpression;            // Called when ad impression is recorded
this.bannerAd.OnAdDisplayed += this.HandleAdDisplayed;              // Called when ad is displayed on screen
this.bannerAd.OnAdDismissed += this.HandleAdDismissed;              // Called when ad is dismissed
this.bannerAd.OnAdInteraction += this.HandleAdInteraction;          // Called when user interacts with ad
this.bannerAd.OnUserLeftApplication += this.HandleUserLeftApplication; // Called when user leaves app via ad
// Load a banner ad.
  this.bannerAd.LoadAd ();
}
InMobiAdPosition enum specifies where to place the banner.
Each platform, iOS and Android, requires a unique placement Id. Rest of the APIs remain same for both platforms.
// Set extras for ad targeting. All values must be passed as string.
Dictionary<string, string=""> extras = new Dictionary<string, string="">();
extras.Add("tp", "admob");           // Mediation partner name
extras.Add("tp_ver", "19.0.0");      // Mediation partner SDK version
this.bannerAd.SetExtras(extras);

</string,></string,>
Please note that the integration for interstitial and full-screen video ads is same. Following is the minimal code to load an interstitial ad:
  private void RequestInterstitial ()
{
  // These placement Ids are configured to always serve test ads.
  #if UNITY_ANDROID
  string placementId = "1469137441636";
  #elif UNITY_IPHONE
  string placementId = "1467548435003";
  #endif
  // Create an interstitial.
  this.interstitialAd = new InterstitialAd (placementId);
  // Register for ad events.
  this.interstitialAd.OnAdLoadSucceeded += this.HandleOnAdLoadSucceeded;    // Called when ad is loaded successfully
this.interstitialAd.OnAdLoadFailed += this.HandleAdLoadFailed;            // Called when ad fails to load
this.interstitialAd.OnAdFetchSuccessful += this.HandleAdFetchSuccessful;  // Called when ad content is fetched successfully
this.interstitialAd.OnAdFetchFailed += this.HandleAdFetchFailed;          // Called when ad fetch fails
this.interstitialAd.OnAdImpression += this.HandleAdImpression;            // Called when ad impression is recorded
this.interstitialAd.OnAdDisplayed += this.HandleAdDisplayed;              // Called when ad is displayed on screen
this.interstitialAd.OnAdDismissed += this.HandleAdDismissed;              // Called when ad is dismissed
this.interstitialAd.OnAdInteraction += this.HandleAdInteraction;          // Called when user interacts with ad
this.interstitialAd.OnUserLeftApplication += this.HandleUserLeftApplication; // Called when user leaves app via ad
  this.interstitialAd.OnAdDisplayFailed += this.HandleAdDisplayFailed;
  this.interstitialAd.OnAdWillDisplay += this.HandleAdWillDisplay;
  // Load an interstitial ad.
  this.interstitialAd.LoadAd ();
}
Interstitial ads need to be shown explicitly, but before that check if interstitial ad is ready or not by calling isReady () as depicted below:
  if (this.interstitialAd.isReady ()) {
   this.interstitialAd.Show ();
  } else {
   MonoBehaviour.print ("Interstitial is not ready yet");
  }
A good place to show an interstitial ad is end of a level or end of session.
// Set extras for ad targeting. All values must be passed as string.
Dictionary<string, string=""> extras = new Dictionary<string, string="">();
extras.Add("tp", "admob");           // Mediation partner name
extras.Add("tp_ver", "19.0.0");      // Mediation partner SDK version
this.interstitialAd.SetExtras(extras);

</string,></string,>
Following is a minimal code to load a rewarded video ad:
  private void RequestRewardBasedVideo ()
{
  // These placement Ids are configured to always serve test ads.
  #if UNITY_ANDROID
  string placementId = "1453753057988";
  #elif UNITY_IPHONE
  string placementId = "1465883204802";
  #endif
  this.rewardedVideoAd = new RewardedVideoAd (placementId);
  // Register for ad events.
  this.rewardedVideoAd.OnAdLoadSucceeded += this.HandleOnAdLoadSucceeded;
  this.rewardedVideoAd.OnAdLoadFailed += this.HandleAdLoadFailed;
  this.rewardedVideoAd.OnAdFetchSuccessful += this.HandleAdFetchSuccessful;
  this.rewardedVideoAd.OnAdFetchFailed += this.HandleAdFetchFailed;
  this.rewardedVideoAd.OnAdDisplayed += this.HandleAdDisplayed;
  this.rewardedVideoAd.OnAdDismissed += this.HandleAdDismissed;
  this.rewardedVideoAd.OnAdImpression += this.HandleAdImpression;
  this.rewardedVideoAd.OnAdInteraction += this.HandleAdInteraction;
  this.rewardedVideoAd.OnUserLeftApplication += this.HandleUserLeftApplication;
  this.rewardedVideoAd.OnAdDisplayFailed += this.HandleAdDisplayFailed;
  this.rewardedVideoAd.OnAdWillDisplay += this.HandleAdWillDisplay;
  this.rewardedVideoAd.OnAdRewardActionCompleted += this.HandleRewardActionCompleted;
  this.rewardedVideoAd.LoadAd ();
}
Rewarded video ads work in a similar way to interstitial ads and need to be checked whether they are ready before calling show ().
  private void ShowRewardBasedVideo ()
{
  if (this.rewardedVideoAd.isReady ()) {
   this.rewardedVideoAd.Show ();
  } else {
   MonoBehaviour.print ("Rewarded video ad is not ready yet");
  }
}
You can set the following ad events on a banner, interstitial, and rewarded video ad.
 #region callback handlers
   public void HandleOnAdLoadSucceeded(object sender, AdLoadSuccessEventArgs args)
{
    MonoBehaviour.print("HandleOnAdLoadSucceeded event received");
    // Access ad metadata from the event args
    MonoBehaviour.print("Creative ID: " + args.AdMetaInfo.CreativeID);
    MonoBehaviour.print("Bid: " + args.AdMetaInfo.Bid);
    MonoBehaviour.print("Bid Keyword: " + args.AdMetaInfo.BidKeyword);
}
   public void HandleAdLoadFailed (object sender, AdLoadFailedEventArgs args)
{
  MonoBehaviour.print ("HandleAdLoadFailed event received with message: " + args.Error);
}
   public void HandleAdDisplayed (object sender, EventArgs args)
{
  MonoBehaviour.print ("HandleAdDisplayed event received");
}
  public void HandleAdDismissed (object sender, EventArgs args)
{
  MonoBehaviour.print ("HandleAdDismissed event received");
}
  public void HandleAdInteraction (object sender, AdInteractionEventArgs args)
{
  MonoBehaviour.print ("HandleAdDismissed event received " + args.Message);
}
  public void HandleUserLeftApplication (object sender, EventArgs args)
{
  MonoBehaviour.print ("HandleUserLeftApplication event received");
}
#endregion
#region Interstitial specific callback handlers
public void HandleAdReceived (object sender, EventArgs args)
{
  MonoBehaviour.print ("HandleAdReceived event received");
}
  public void HandleAdWillDisplay (object sender, EventArgs args)
{
  MonoBehaviour.print (
   "HandleAdWillDisplay event received with message: ");
}
  public void HandleAdDisplayFailed (object sender, EventArgs args)
{
  MonoBehaviour.print ("HandleAdDisplayFailed event received");
}
   #endregion
  #region RewardBasedVideo specific callback handlers
   public void HandleRewardActionCompleted (object sender, AdRewardActionCompletedEventArgs args)
{
  MonoBehaviour.print (
   "HandleRewardActionCompleted event received for " + args.Rewards);
}

public void HandleAdFetchSuccessful(object sender, AdFetchSuccessEventArgs args)
{
    // Called when ad content is successfully fetched
    // Access ad metadata from the event args
    MonoBehaviour.print("HandleAdFetchSuccessful event received");
    MonoBehaviour.print("Creative ID: " + args.AdMetaInfo.CreativeID);
    MonoBehaviour.print("Bid: " + args.AdMetaInfo.Bid);
}

public void HandleAdFetchFailed(object sender, AdFetchFailedEventArgs args)
{
    // Called when ad fetch fails
    MonoBehaviour.print("HandleAdFetchFailed event received");
    MonoBehaviour.print("Error: " + args.Error);
}

public void HandleAdImpression(object sender, EventArgs args)
{
    // Called when an ad impression is recorded
    MonoBehaviour.print("HandleAdImpression event received");
}

#endregion
The args.Rewards, specific to rewarded video ad, is in JSON String format.
| Class | Properties |
| AdFetchSuccessEventArgs | AdMetaInfo |
| AdFetchFailedEventArgs | Error (string) |
| AdLoadSuccessEventArgs | AdMetaInfo |
| Property | Type | Description |
| CreativeID | string | Unique identifier for the ad creative |
| Bid | double | Bid value for the ad |
| BidInfo | JObject | Additional bid information |
| BidKeyword | string | Keyword associated with the bid |
Unity LevelPlay Mediation is one of InMobi’s top-performing bidding platforms, especially among gaming publishers. This guide explains how to integrate InMobi as a real-time bidder via SDK-based oRTB on Unity LevelPlay Mediation.
Ensure the following before you get started with this integration:
Reach out to your Customer Success Manager to know more about enabling waterfall for InMobi via Custom Adapter on Unity LevelPlay Mediation.
To get your account and inventory up and running on the InMobi Publisher Dashboard, follow the instructions given below:
To create placements for Unity LevelPlay:
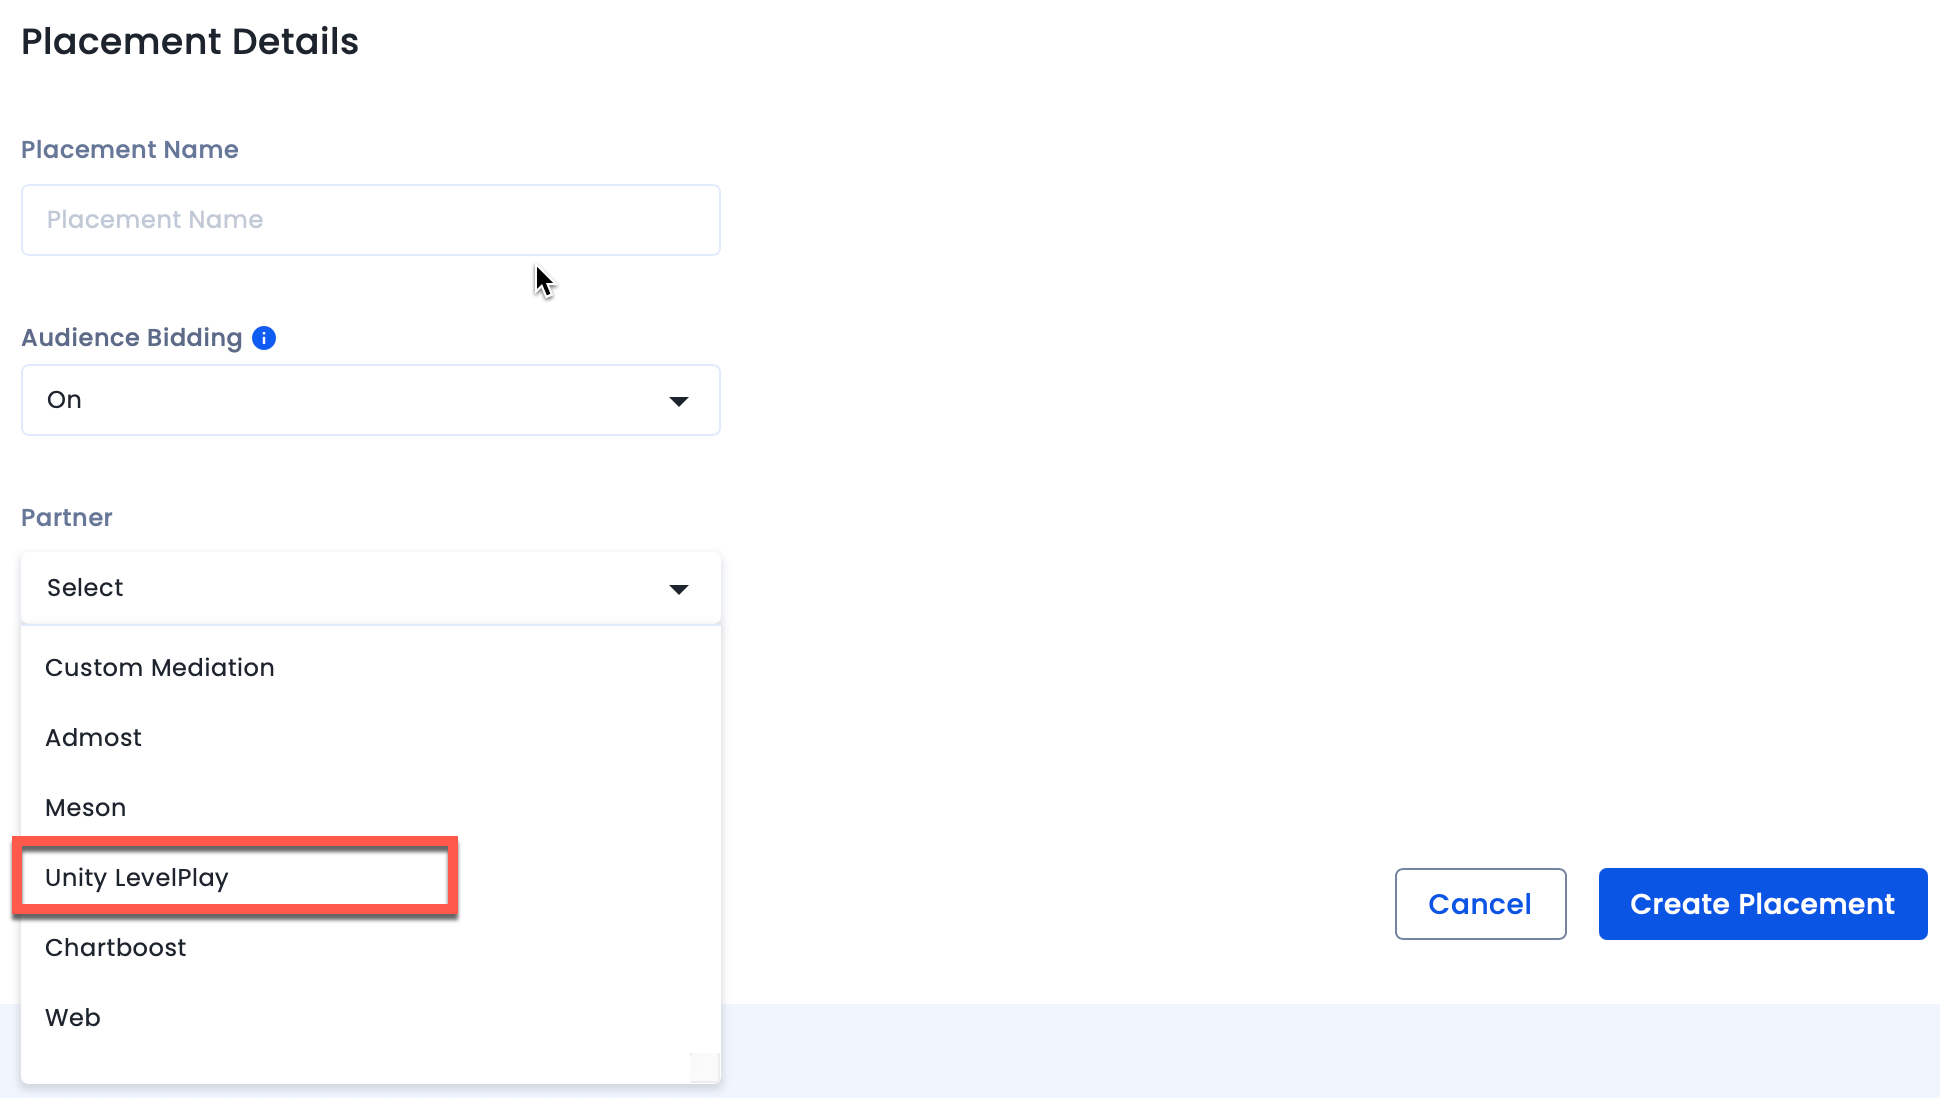
After you are done setting up your account and inventory on InMobi, the next steps would be to add InMobi as a network on the Unity LevelPlay Mediation dashboard, followed by mapping the created placements in the network on the Unity LevelPlay Mediation dashboard. Follow the instructions below:
For any further assistance, Contact Us.
By installing this SDK update, you agree that your Children Privacy Compliance setting remains accurate or that you will update that setting, whenever there is a change in your app's audience. You may update the app's Children Privacy Compliance settings at https://publisher.inmobi.com/my-inventory/app-and-placements.
 Support Center


