This page offers comprehensive instructions for implementing the InMobi CMP on a website using Google Tag Manager (GTM). This process uses a custom HTML GTM tag and additional GTM variables and triggers/trigger groups. Before finalizing your GTM setup, complete the site and consent configurations.
Assumptions
- You have an InMobi CMP account with your website added and configured.
- The website where InMobi CMP will be added has GTM installed.
- This guide assumes that you import the provided GTM container file into your GTM environment to import the custom HTML tag and necessary variables and example triggers. (For help on Variables, check out our Variables Guide.) It is recommended that you import & merge the provided container into your existing container, creating a new workspace; see the instructions below.
Things Needed
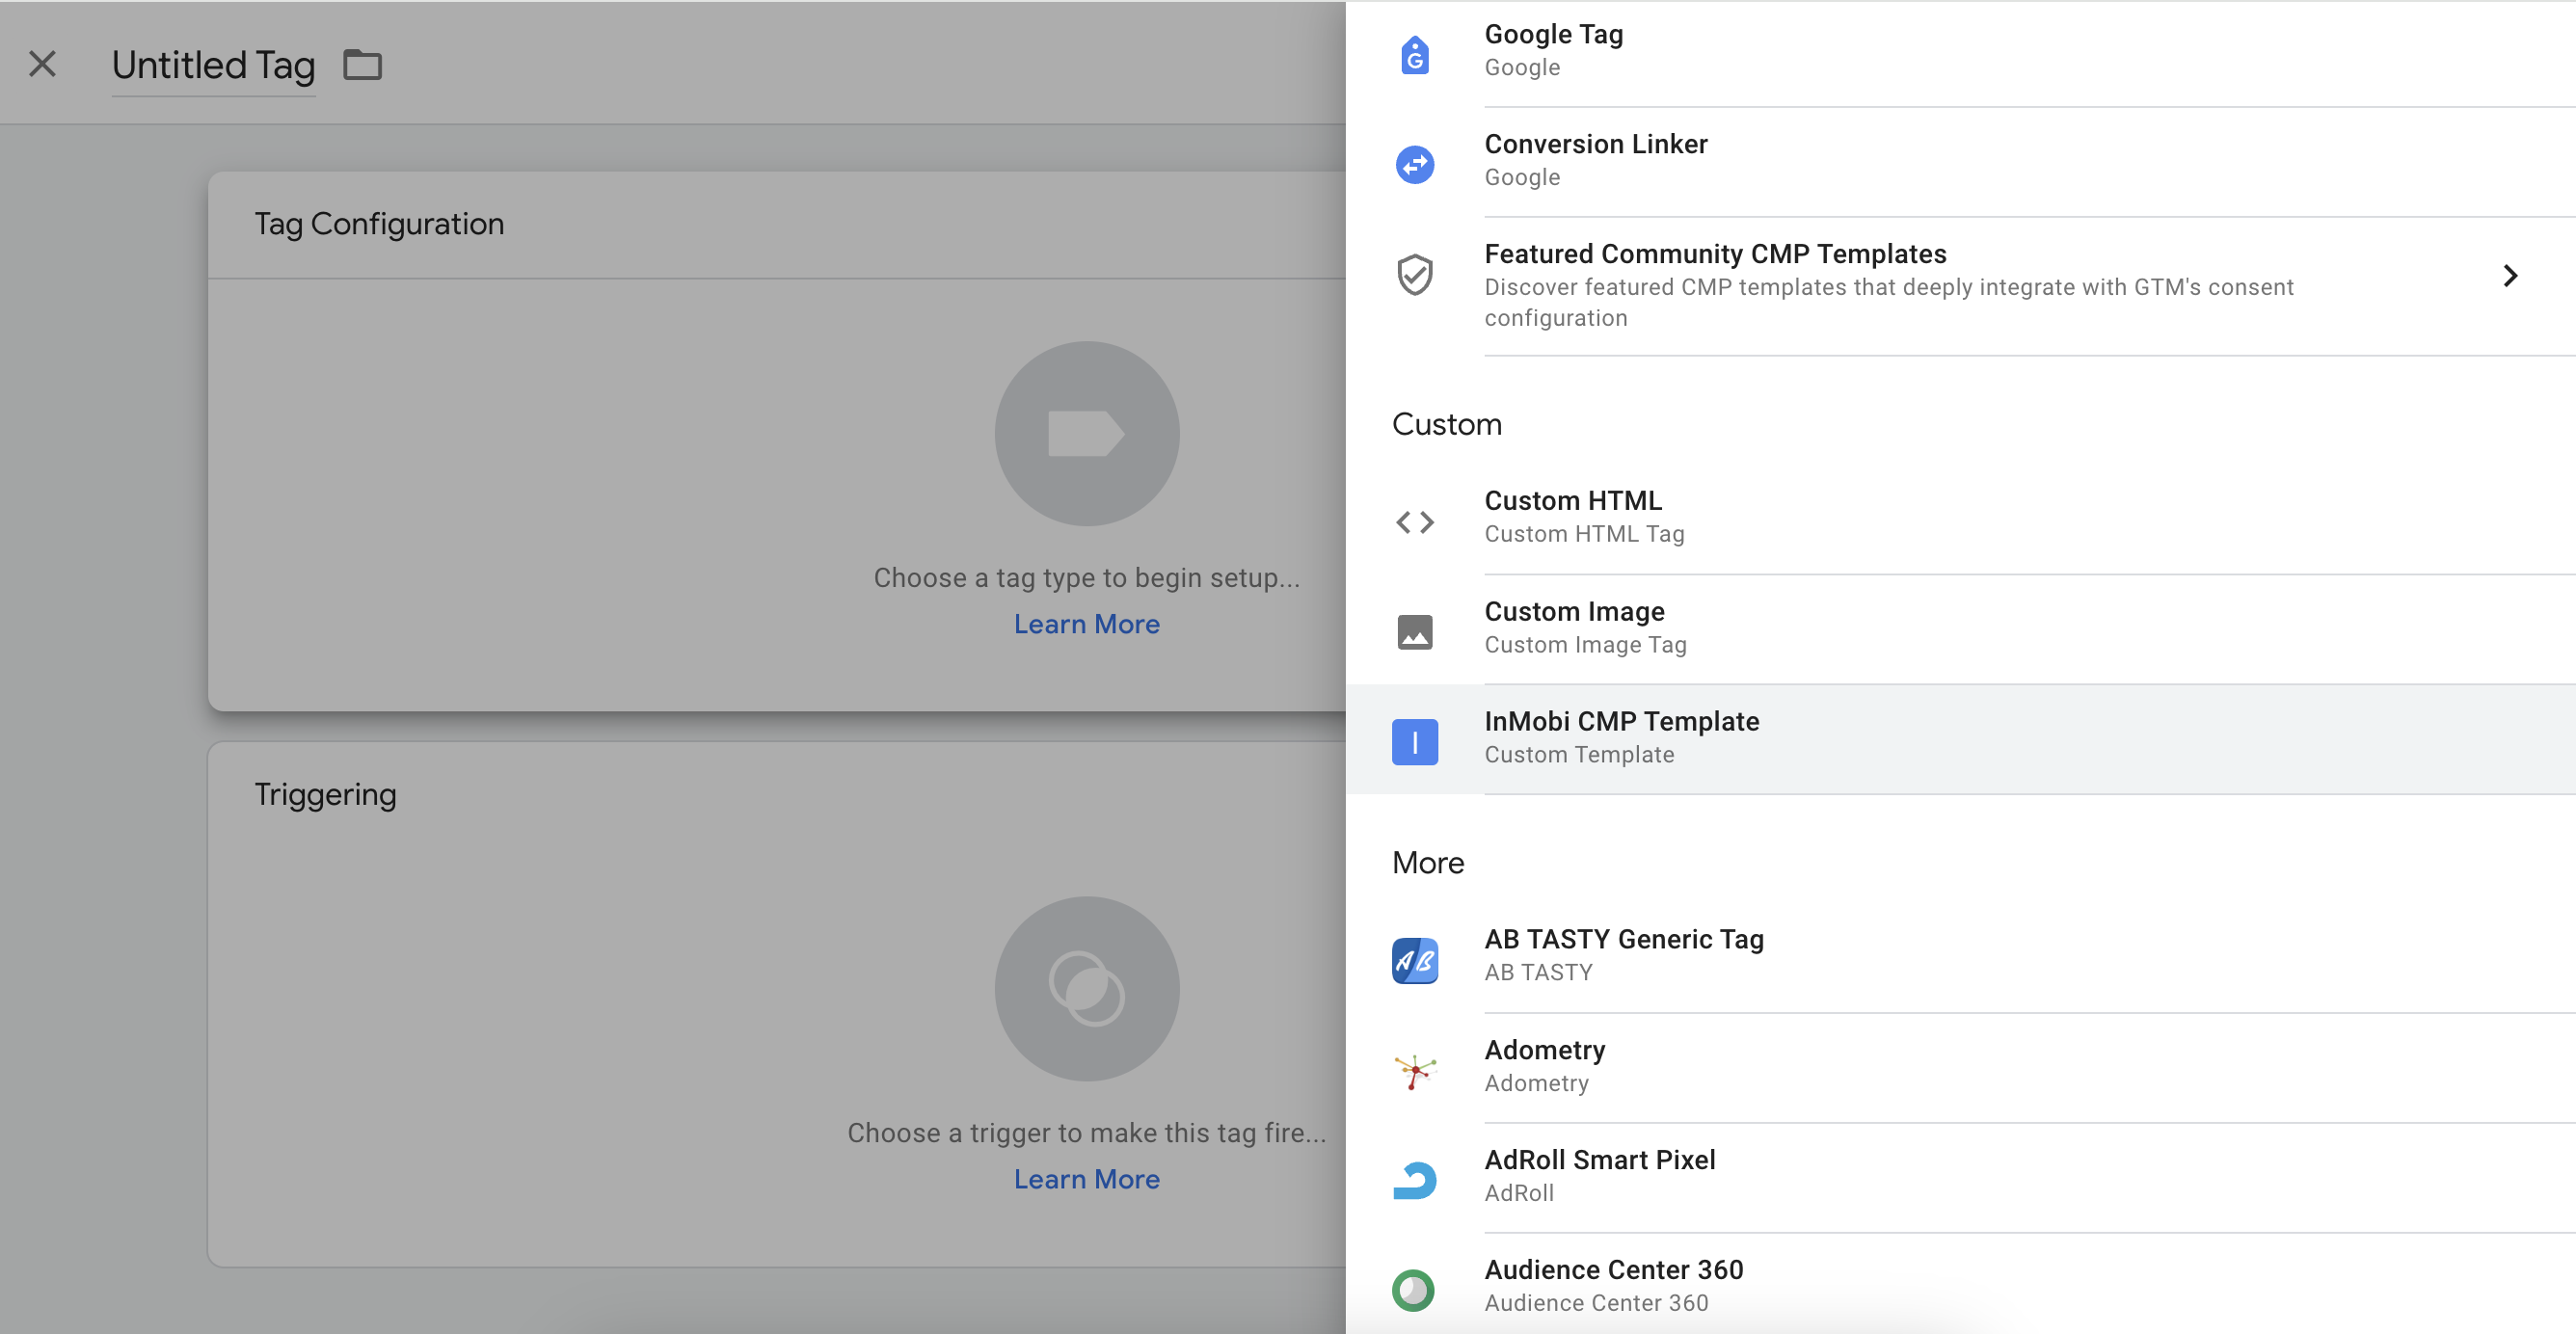
Add Choice with GTM (JSON Container Import)
Importing the GTM InMobi Choice TCFv2 container is the most reliable way to add the custom HTML tag, all of the necessary variables, and sample triggers you can use to configure your container for consent management easily.
Download the GTM Container Import - Tag and Variables. Store it in a local directory on your computer.
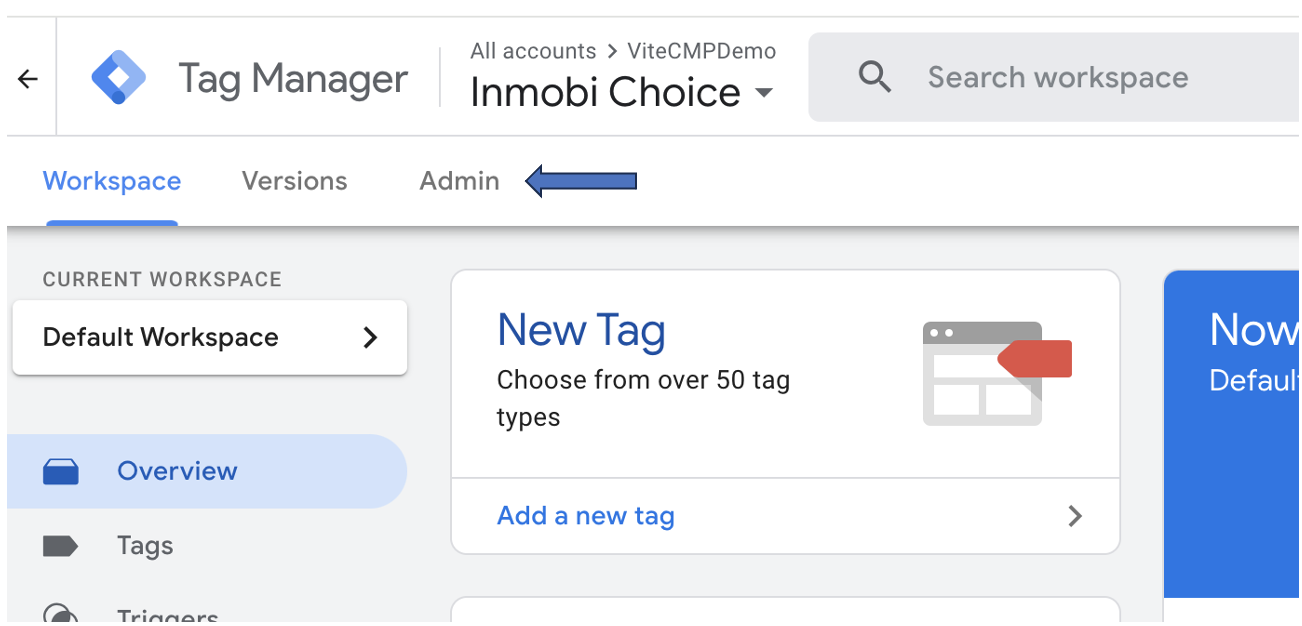
- On the Google Tag Manager user interface, click Admin in the top navigation.
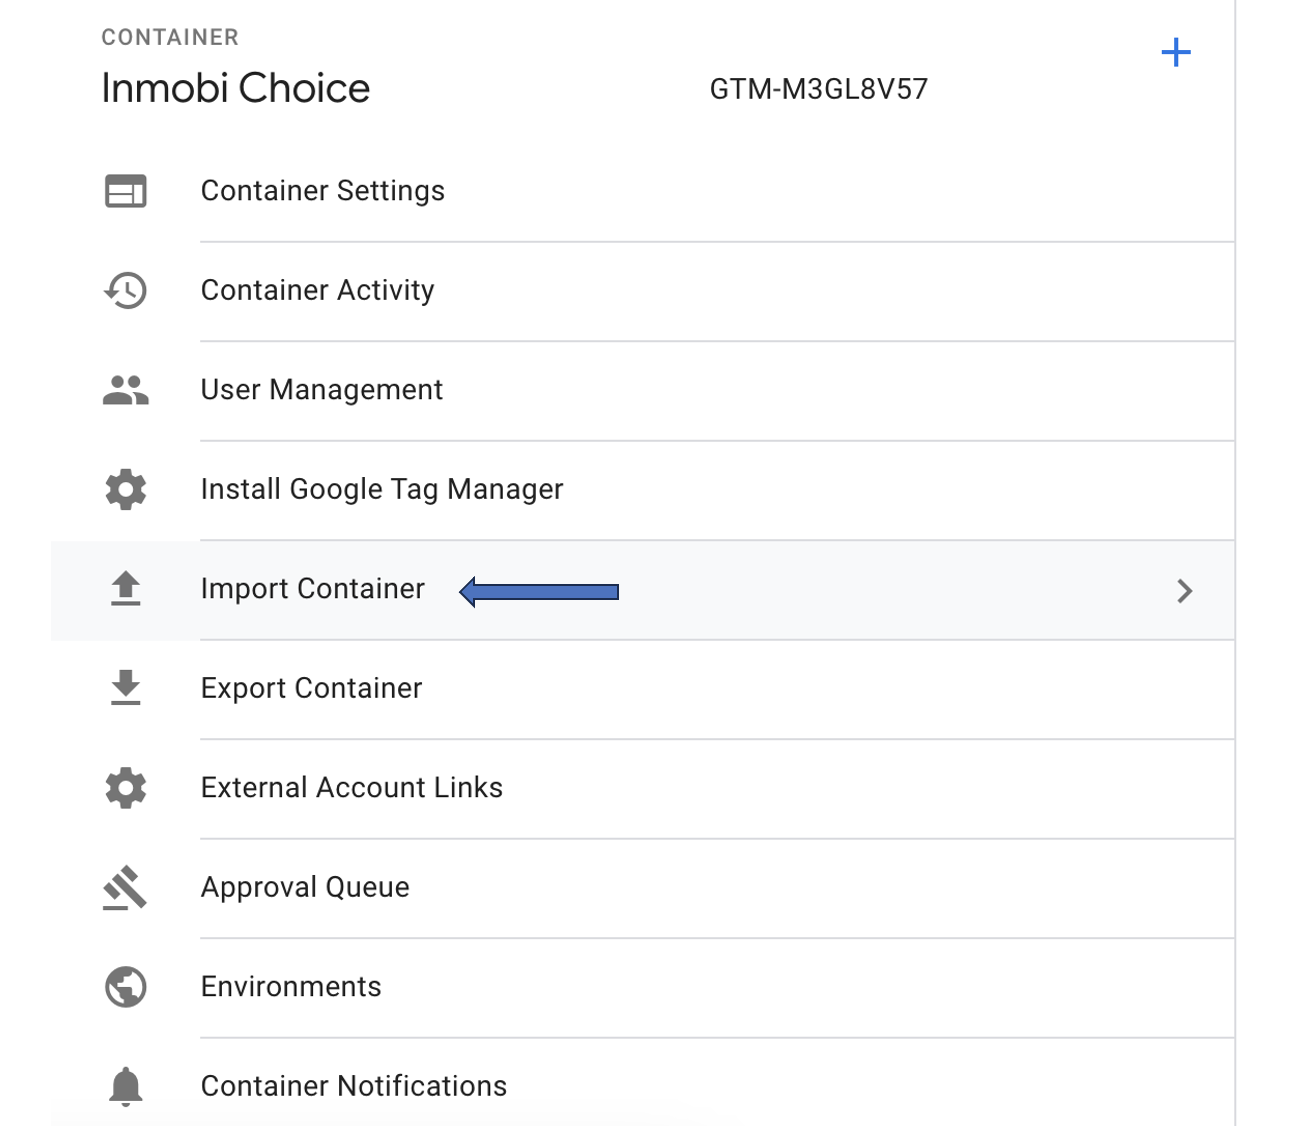
- In the Container column, click Import Container.
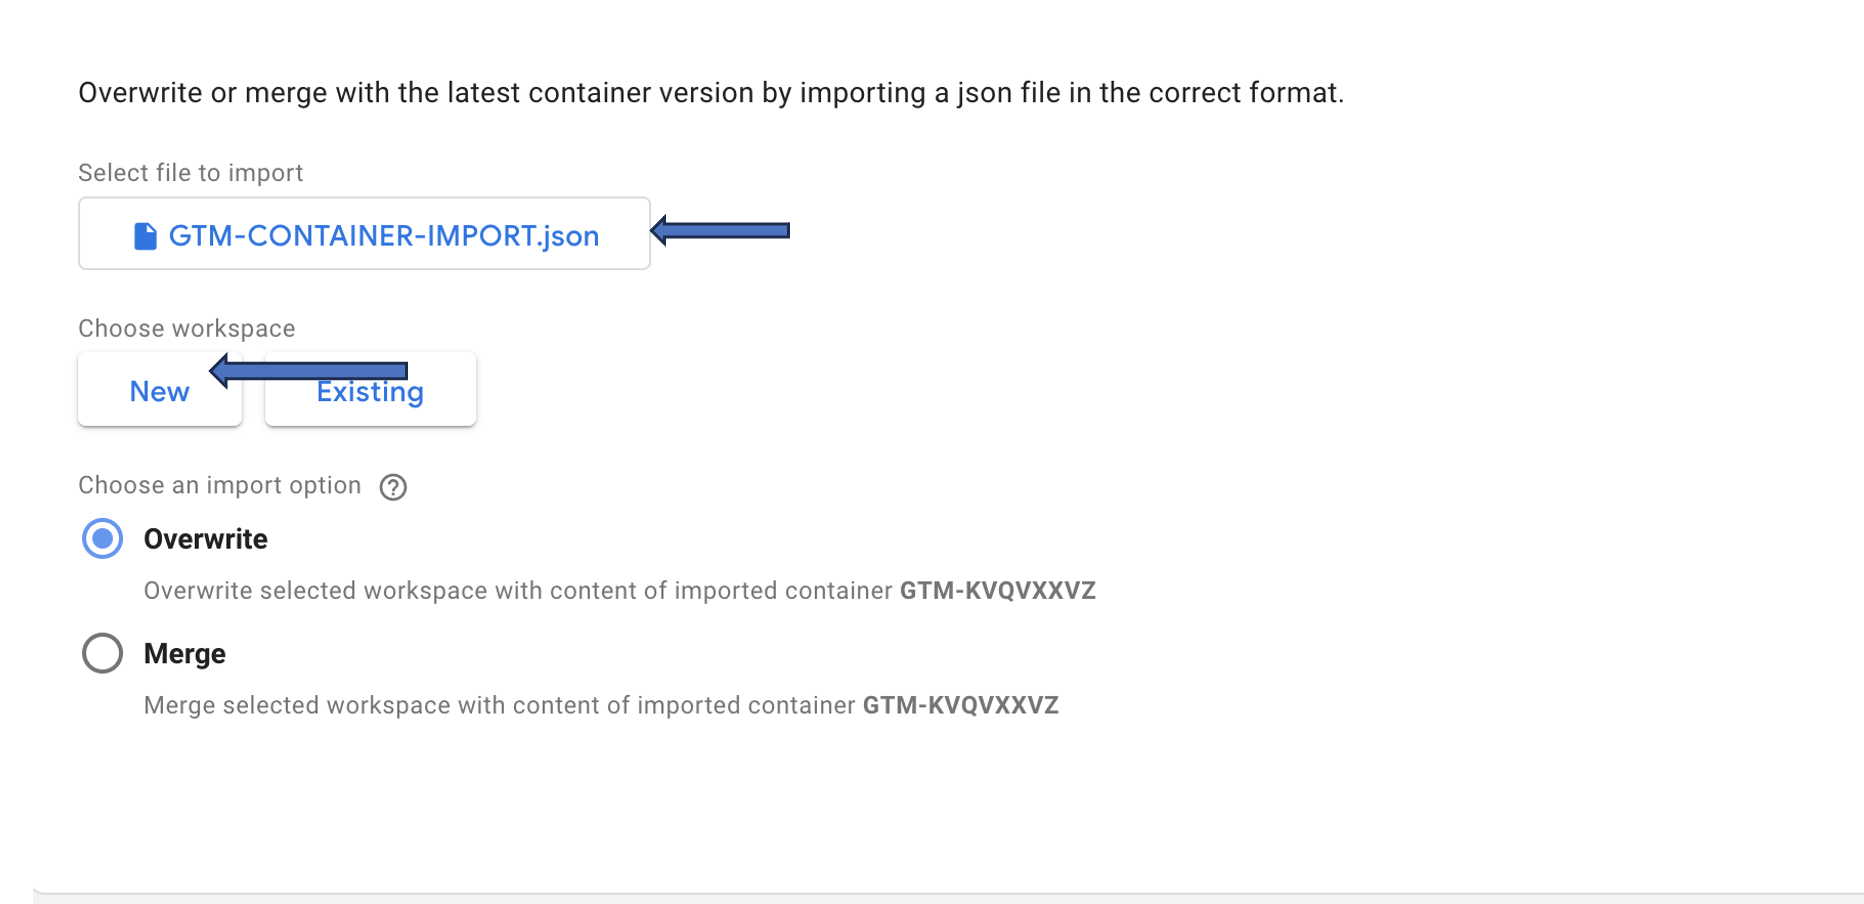
- In the view that opens, click Choose container file.
- In the file selector, browse the GTM-CONTAINER-IMPORT.json file in your local directory and select it for importing.
- Choose to create a New workspace with the import or to merge it into an existing workspace. It is recommended to create a new workspace for this import.
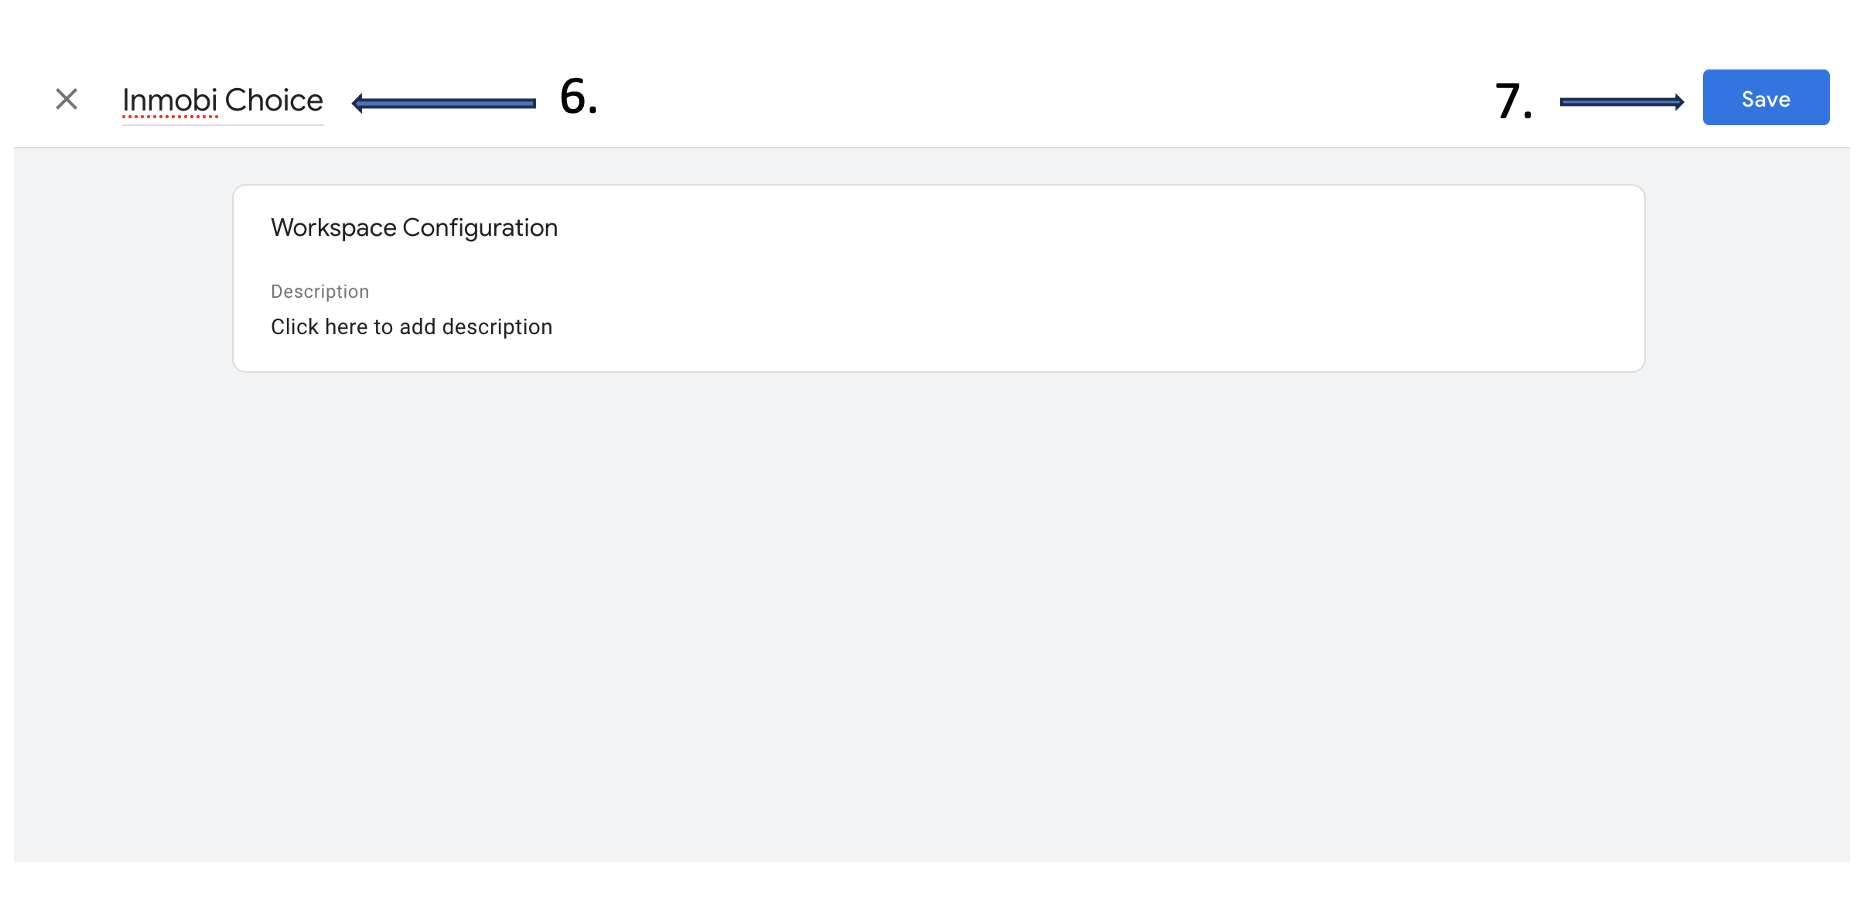
- In the overlay that opens, give the workspace a descriptive name.
- Click Save in the top right corner to save the new workspace.
- Choose Merge as the import option, and select Overwrite conflicting tags, triggers, and variables.
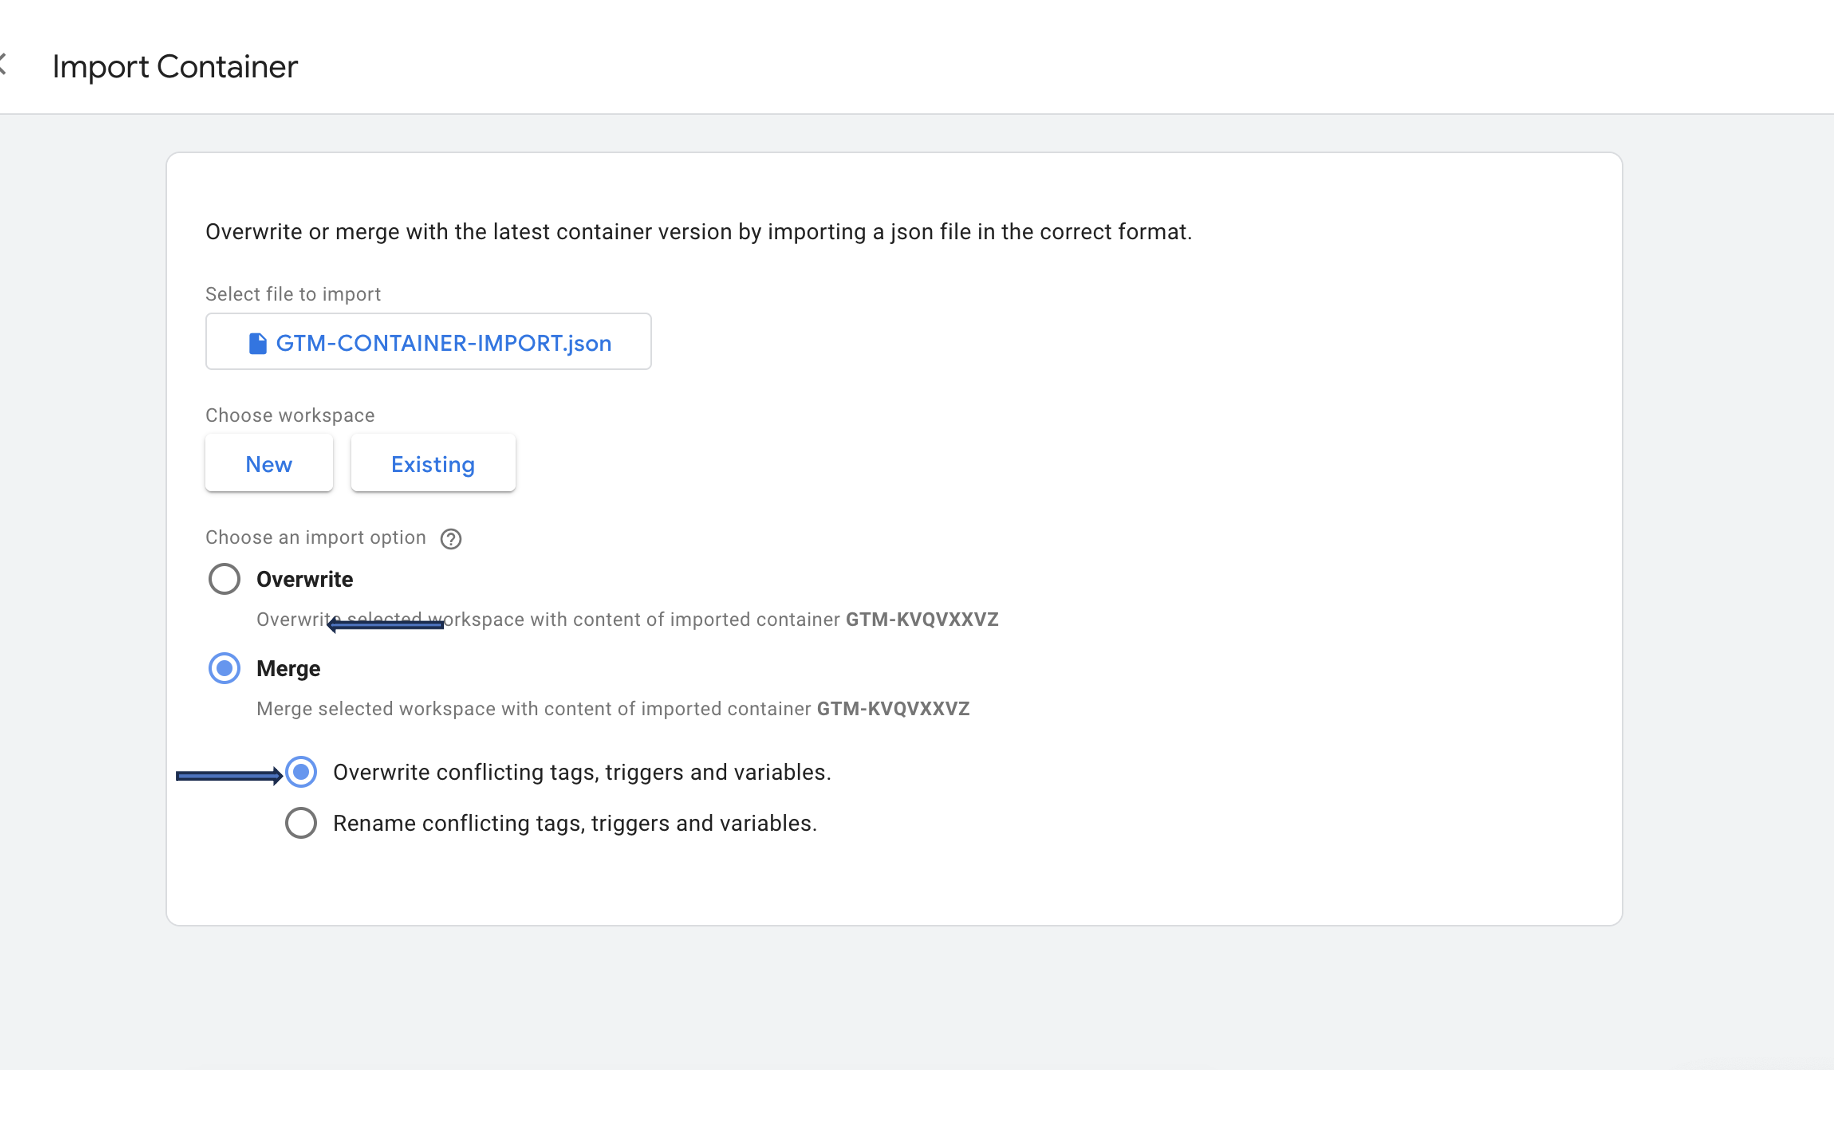
- Verify that the import options are all fine. You can click View detailed changes to see what will happen when you confirm the integration.
- Click Confirm when ready to import the container to the new workspace you created.
You have now added all the necessary tags, triggers, and variables to get you started. You will have to configure some variables, and you will have to create new triggers to enable consent management in the container. The next chapter will explain this process in more detail.
InMobi CMP GTM Configuration
Here are the steps you need to take to configure the InMobi CMP web tag, and to create and modify the triggers and variables you’ll need for the integration to work.
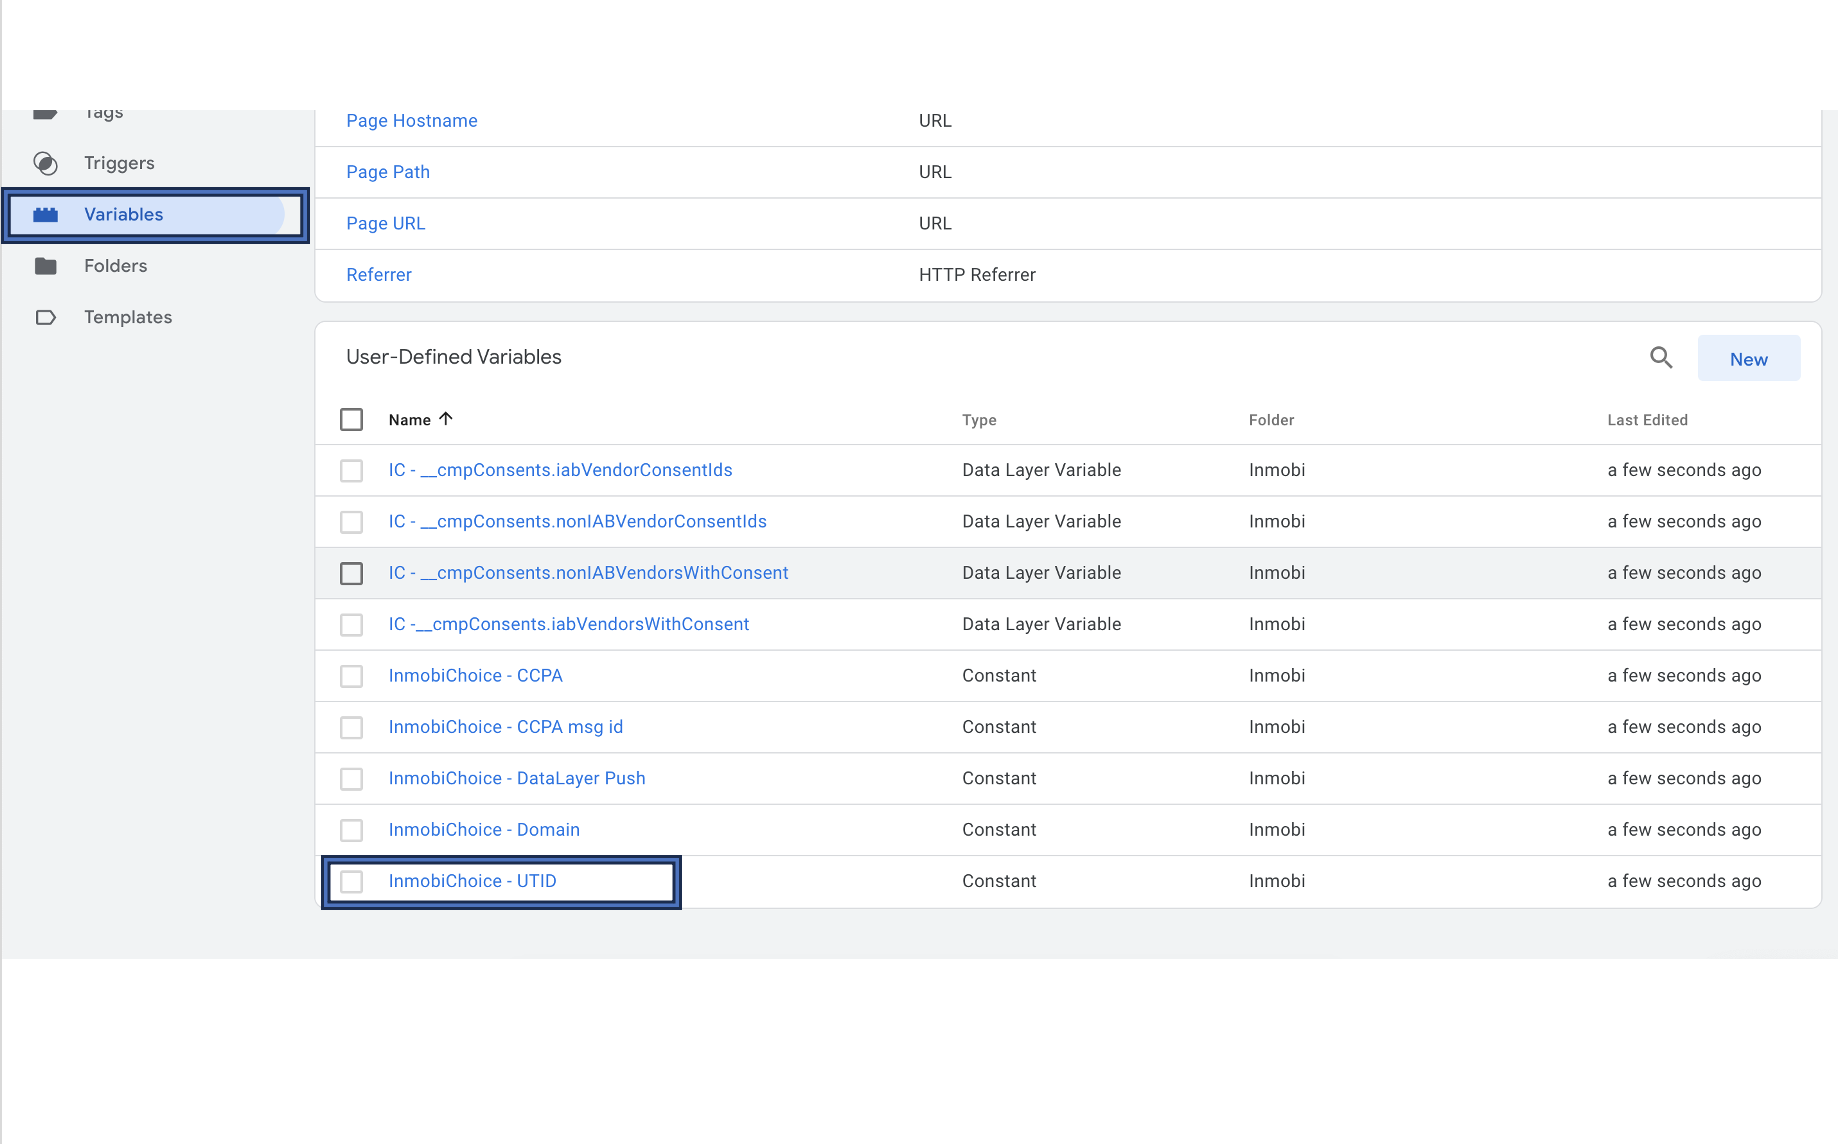
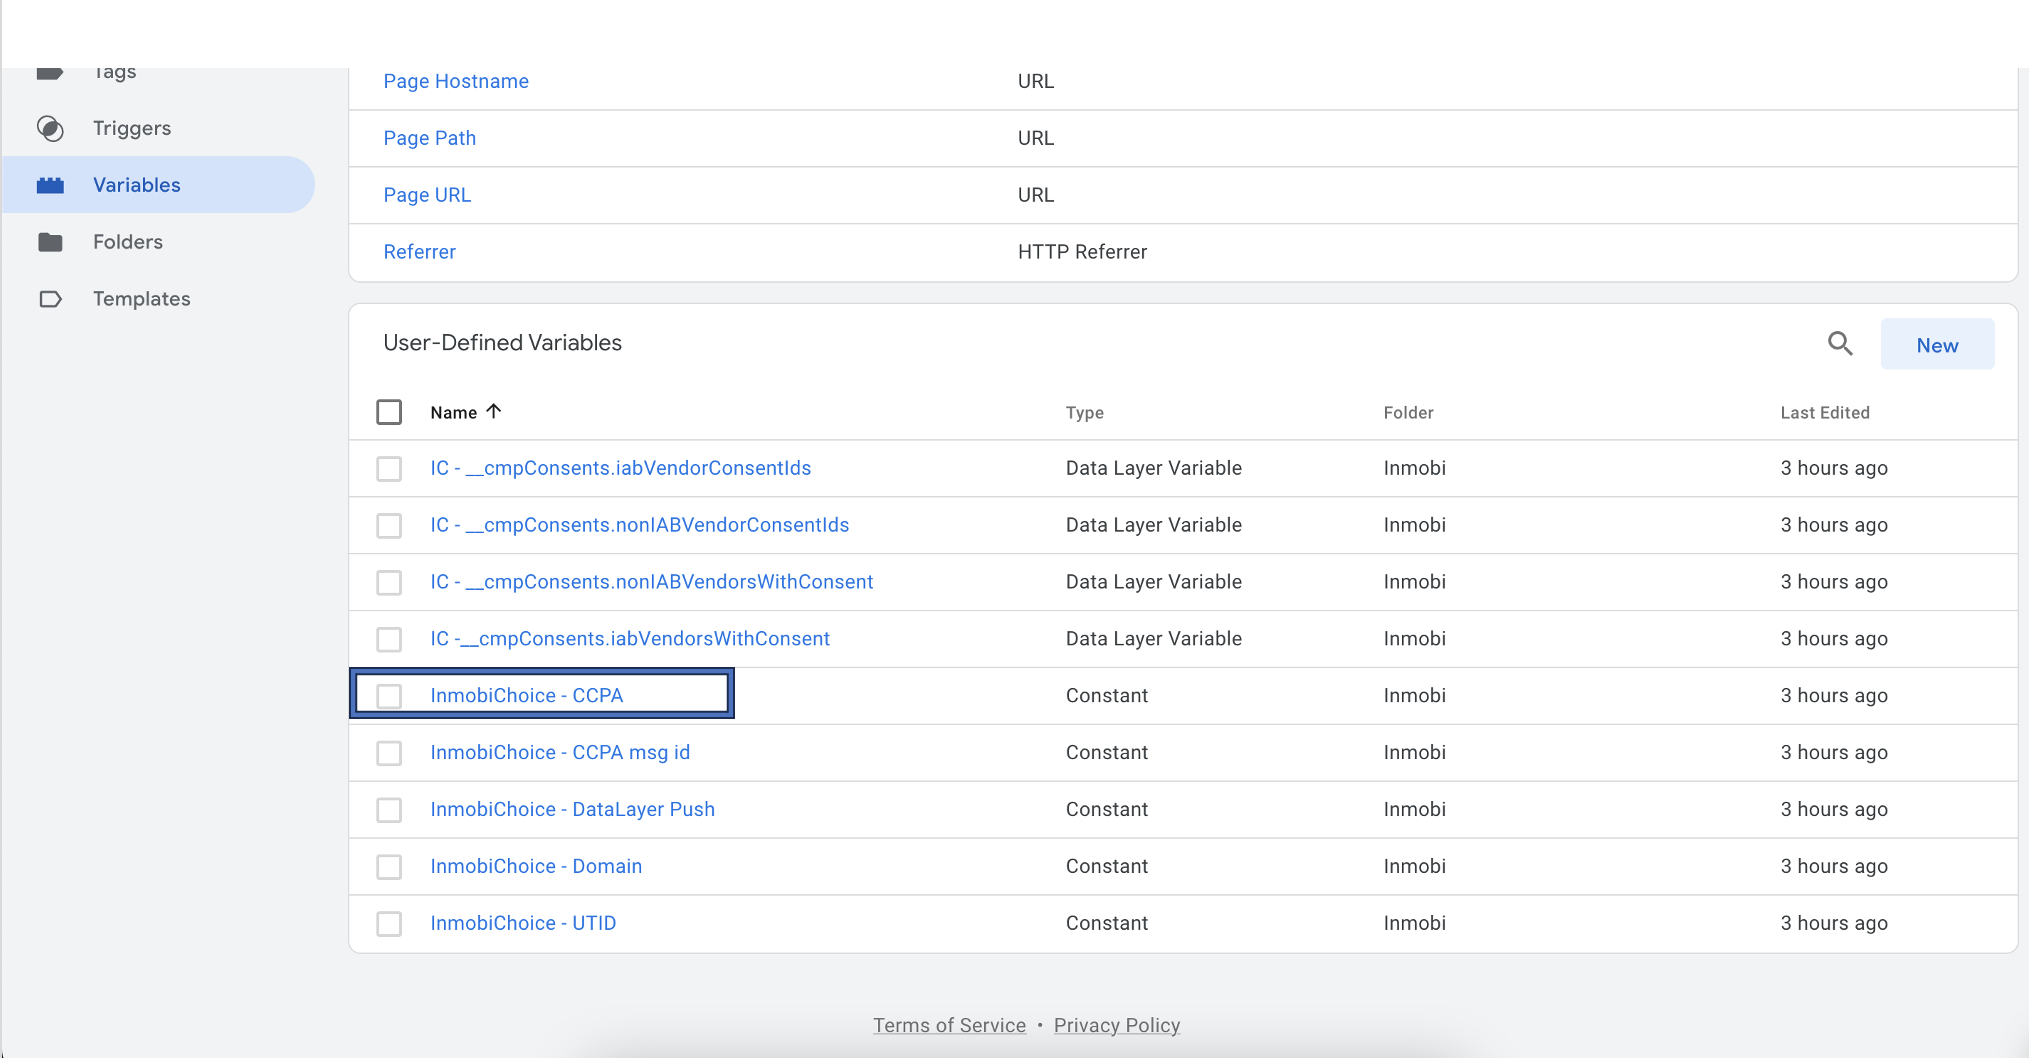
- Set the InmobiChoice - UTID constant value. Browse Variables in your container, and open up the InmobiChoice - UTID variable. Set the value to your UTID (pCode).
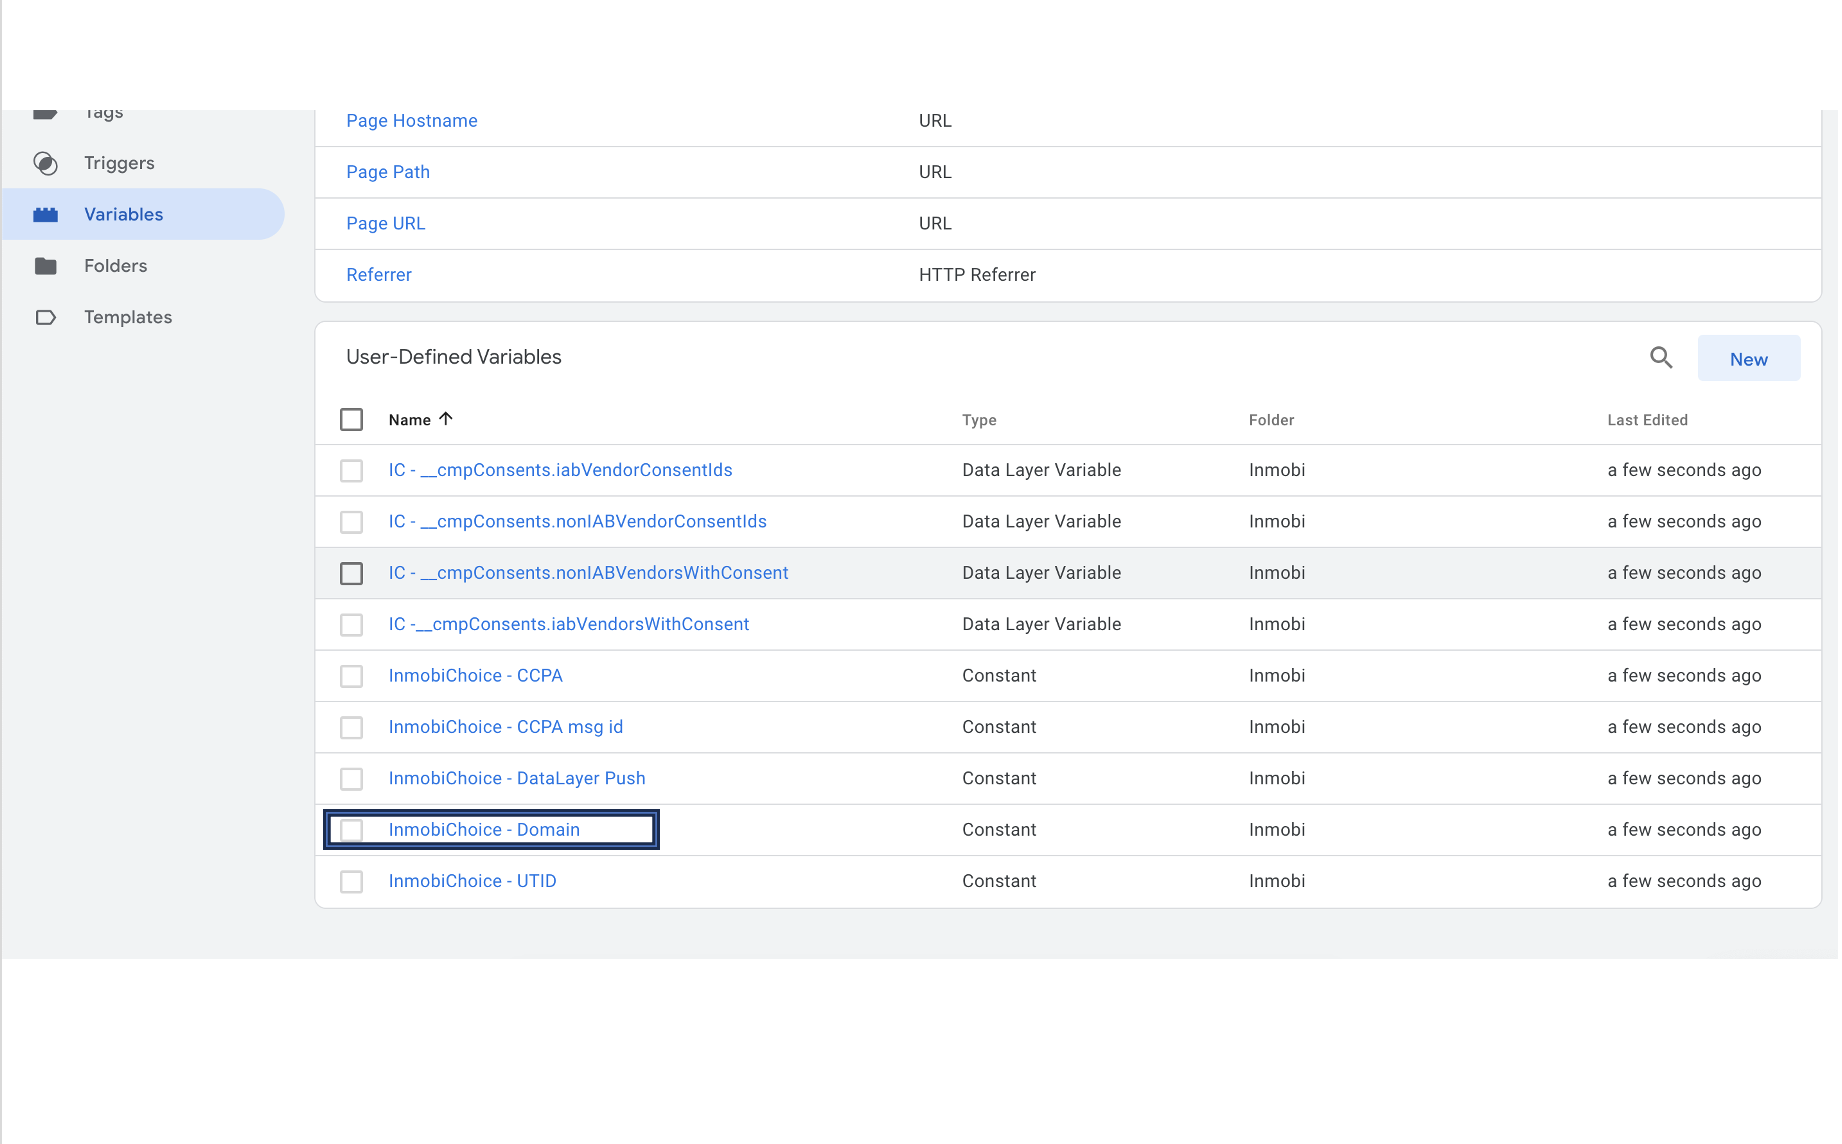
- If subdomains are not selected, this value is False by default. Otherwise, a valid domain should be entered.
Google Advanced Mode Implementation
For publishers using our GTM implementation, there is an option to load default consents immediately after consent initialisation without waiting for page load event. To enable the same, follow the steps below:
- Download the updated GTM Container Import file.
- Follow the steps to upload this updated GTM container file into your GTM (See Add Choice with GTM (JSON Container Import). If you wish to add this change to your existing InMobi CMP GTM implementation, merge it to your existing workspace as described in step 5. If you overwrite it, you must define the UTID and datalayer push variables again.
- Go to Tags Configuration. Open Inmobi Choice GBC Template tag and edit the consent values.
- Move the purposes under Granted Consent Types or Denied Consent Types as per your choice and separate them by a comma. Save these values and then the Tag.
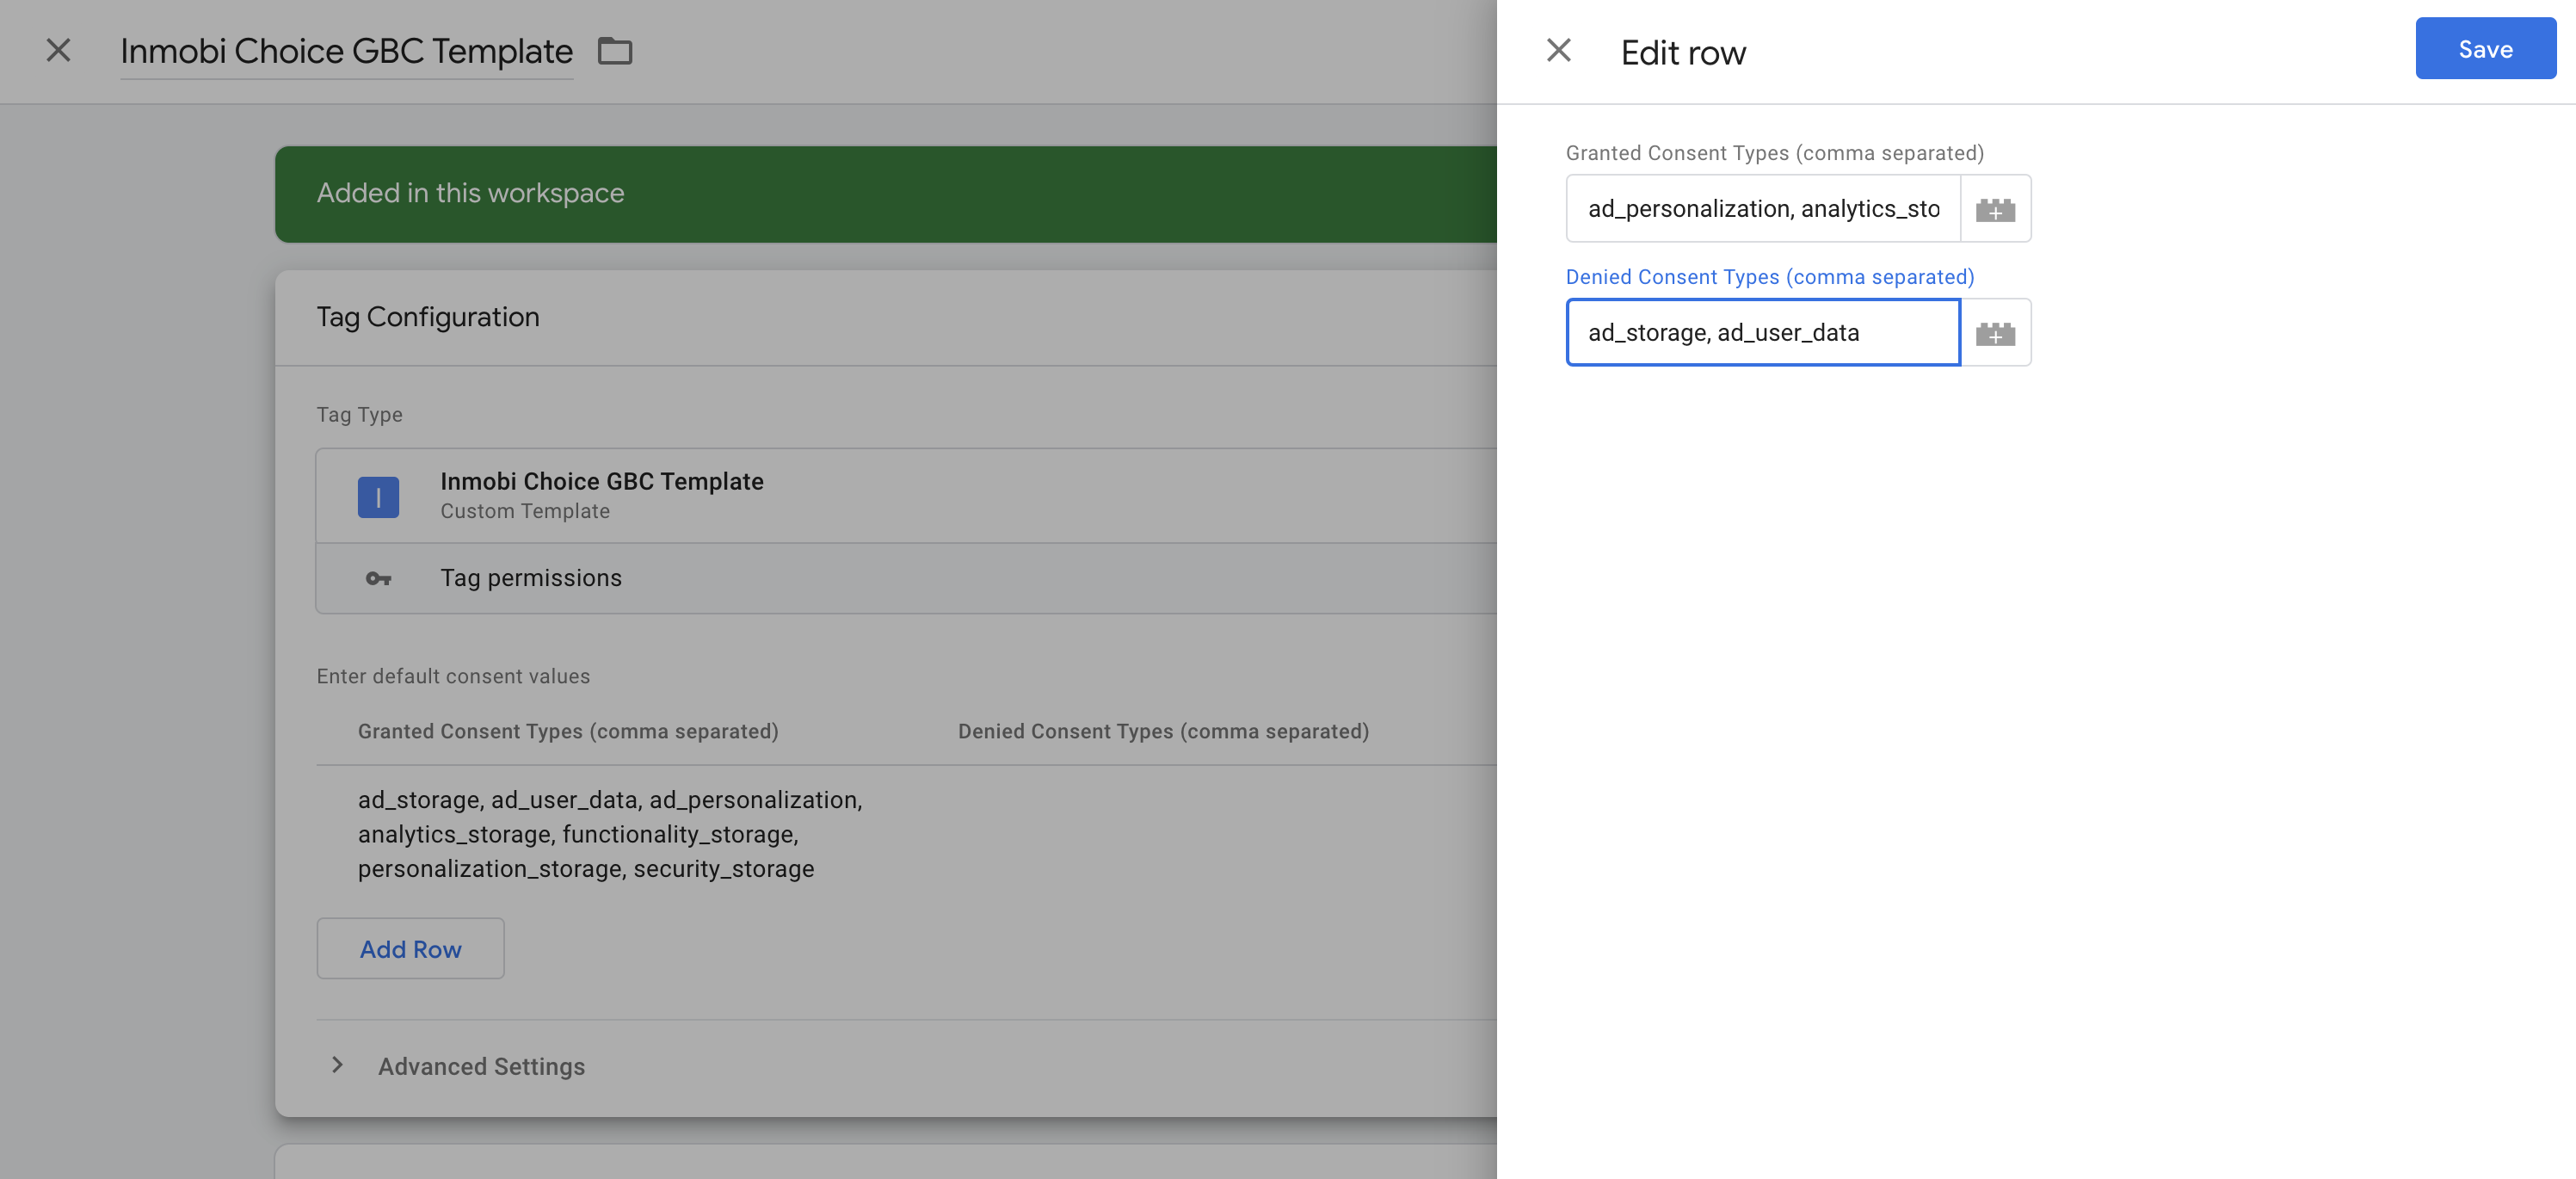
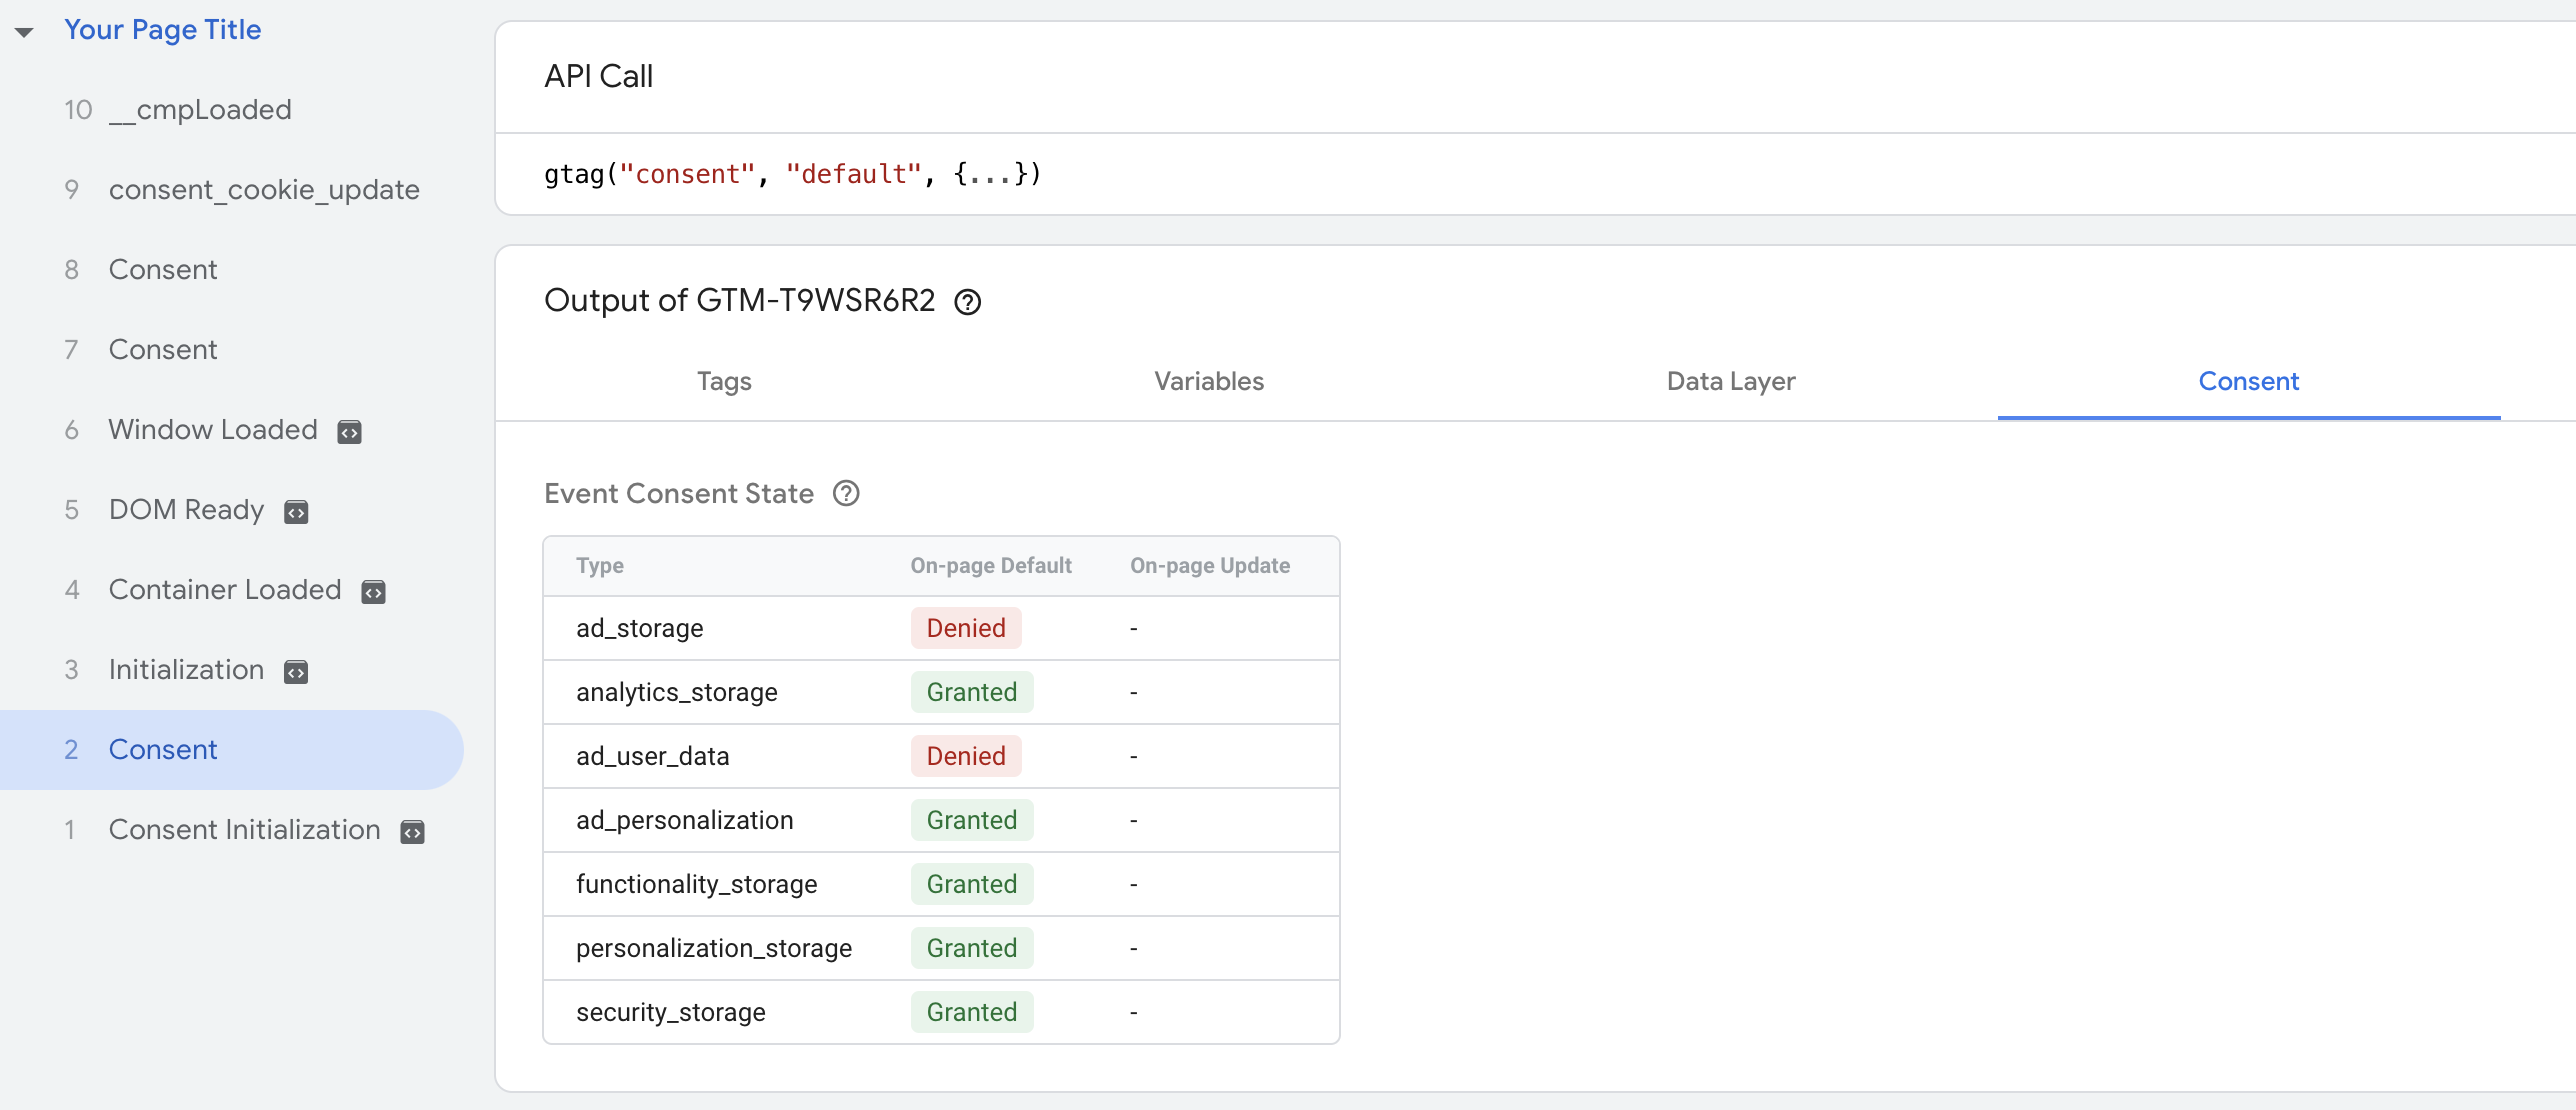
- Preview the changes and see the default consents defined as in the screenshot below:
Note
These default values are set by you separately at the GTM level. If you make changes to the default values in the UI, you need to change them here as well.
Once set, your default consents will load immediately upon consent initialisation without waiting for page load event.
Note
This feature is available for only those sites which are using InMobi CMP’s GTM integration. For other integrations, default consents will load only after page load event.
Enable CCPA Support
- You must have CCPA enabled on the website add at choice.inmobi.com/protect.
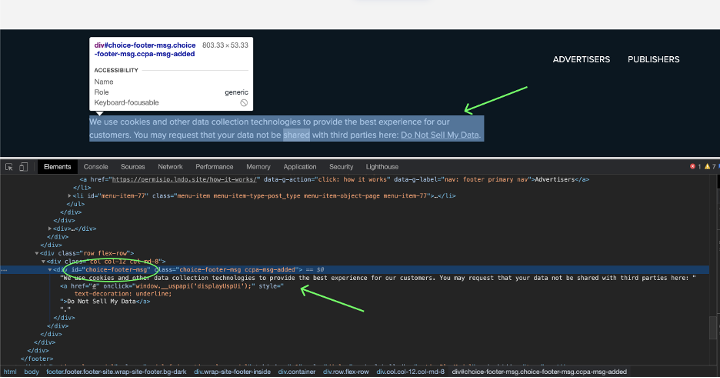
- You need an html container with a unique ‘id’ attribute set (likely in the footer) where the CCPA message will be appended to on the page.
- You can learn more about the html id attribute here.
- This html id can be anything you choose (valid html id value) as long as the container id (on the page) matches the InmobiChoice - CCPA msg id value in GTM. In the screenshot below the container in the footer of the website has the id of ‘choice-footer-msg’ and since we also set the value of InmobiChoice - CCPA msg id in GTM the CCPA footer message was appended to the container with JavaScript. You may need to have your dev team add an empty container (with a unique html id) to the footer of your website where the CCPA message can be appended.
- Add the InmobiChoice - CCPA msg id constant value. This is the html id of the footer dom element where the CCPA message/popup link will be appended. (See the explanation above about how to find/get an HTML id attribute).

- Set the InmobiChoice - CCPA constant to true to enable, false to disable.
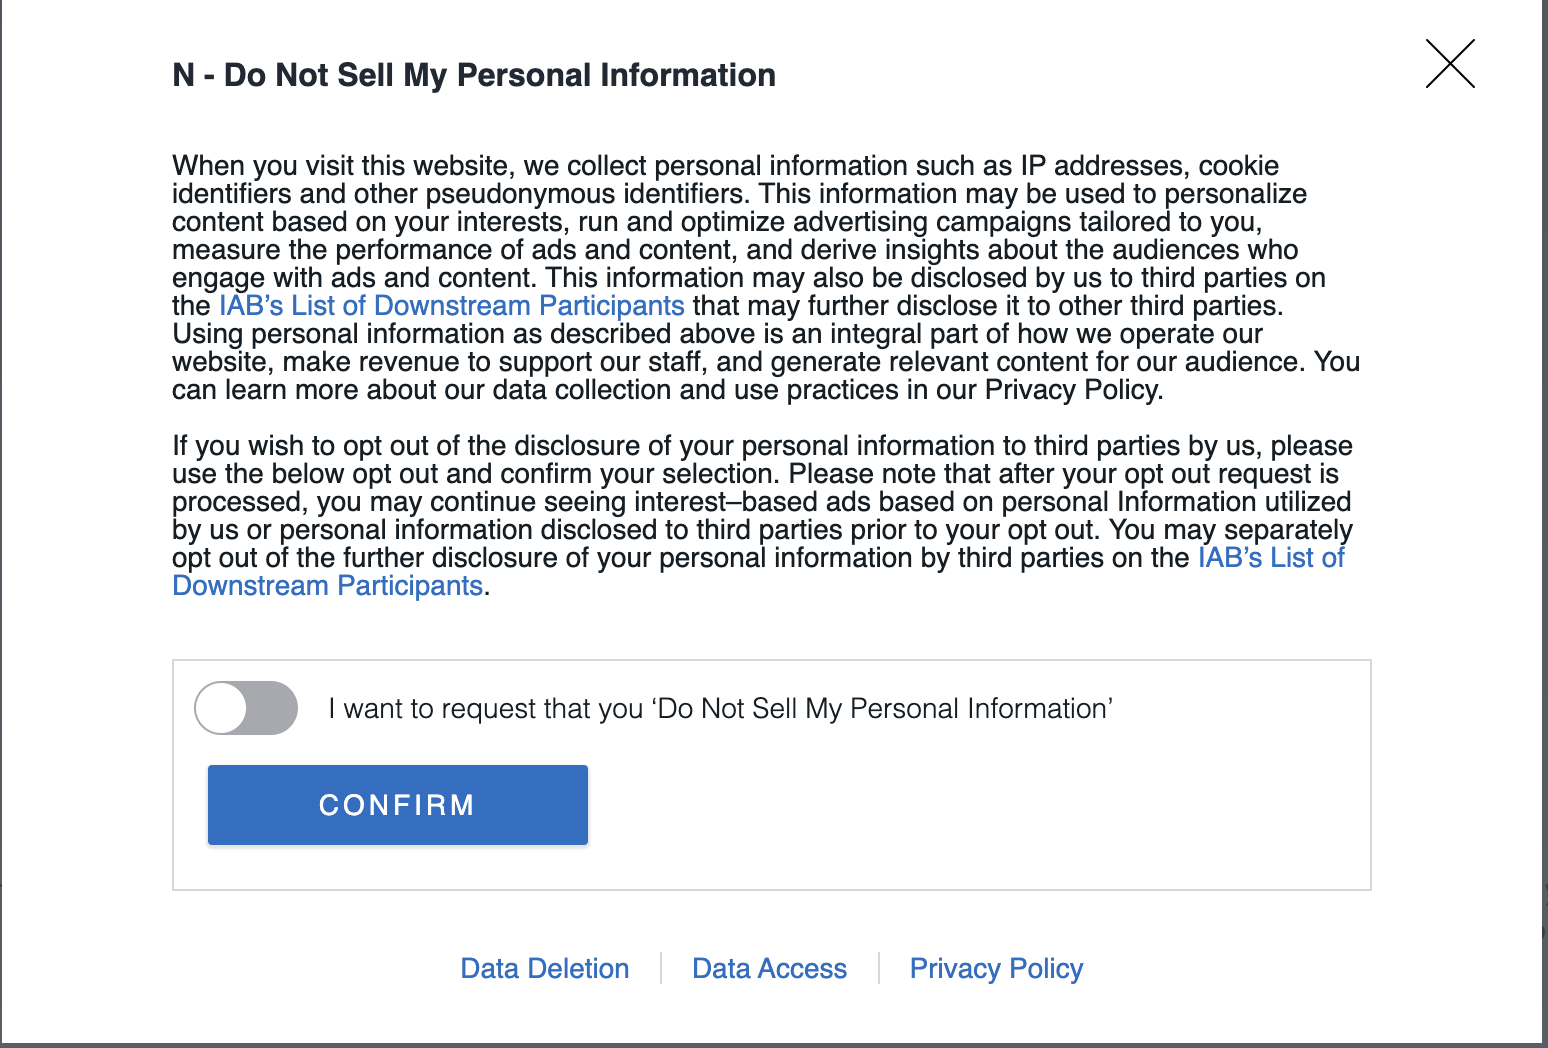
- If CCPA is successfully enabled on your website you will see the CCPA msg with a link Do Not Sell My Data link in the footer (or wherever your html id div from step 2 a is located on the page).

- When clicking on the Do Not Sell My Data link in the CCPA footer message a modal should pop up.
Push consent signals to the data layer
Set the InmobiChoice DataLayer Push constant to true to automatically push consent signals for IAB Vendors, Non-IAB Vendors, Legitimate Interests, and Publisher Consents.
Find Your P-CODE
To initialize the SDK, you must provide your account's p-code for proper identification. After you log in to the InMobi CMP portal, you can see the p-code at the top right corner of the screen. However, as shown below, you must omit the initial two characters ("p-") when copying the code for use elsewhere.
 Support Center


