InMobi CMP is compatible with Unity version 2019.4.* and later.
Before integrating InMobi CMP into your mobile app, it must be configured on the dashboard. First, follow the Protect an App process. After completion, click the Download SDK button.
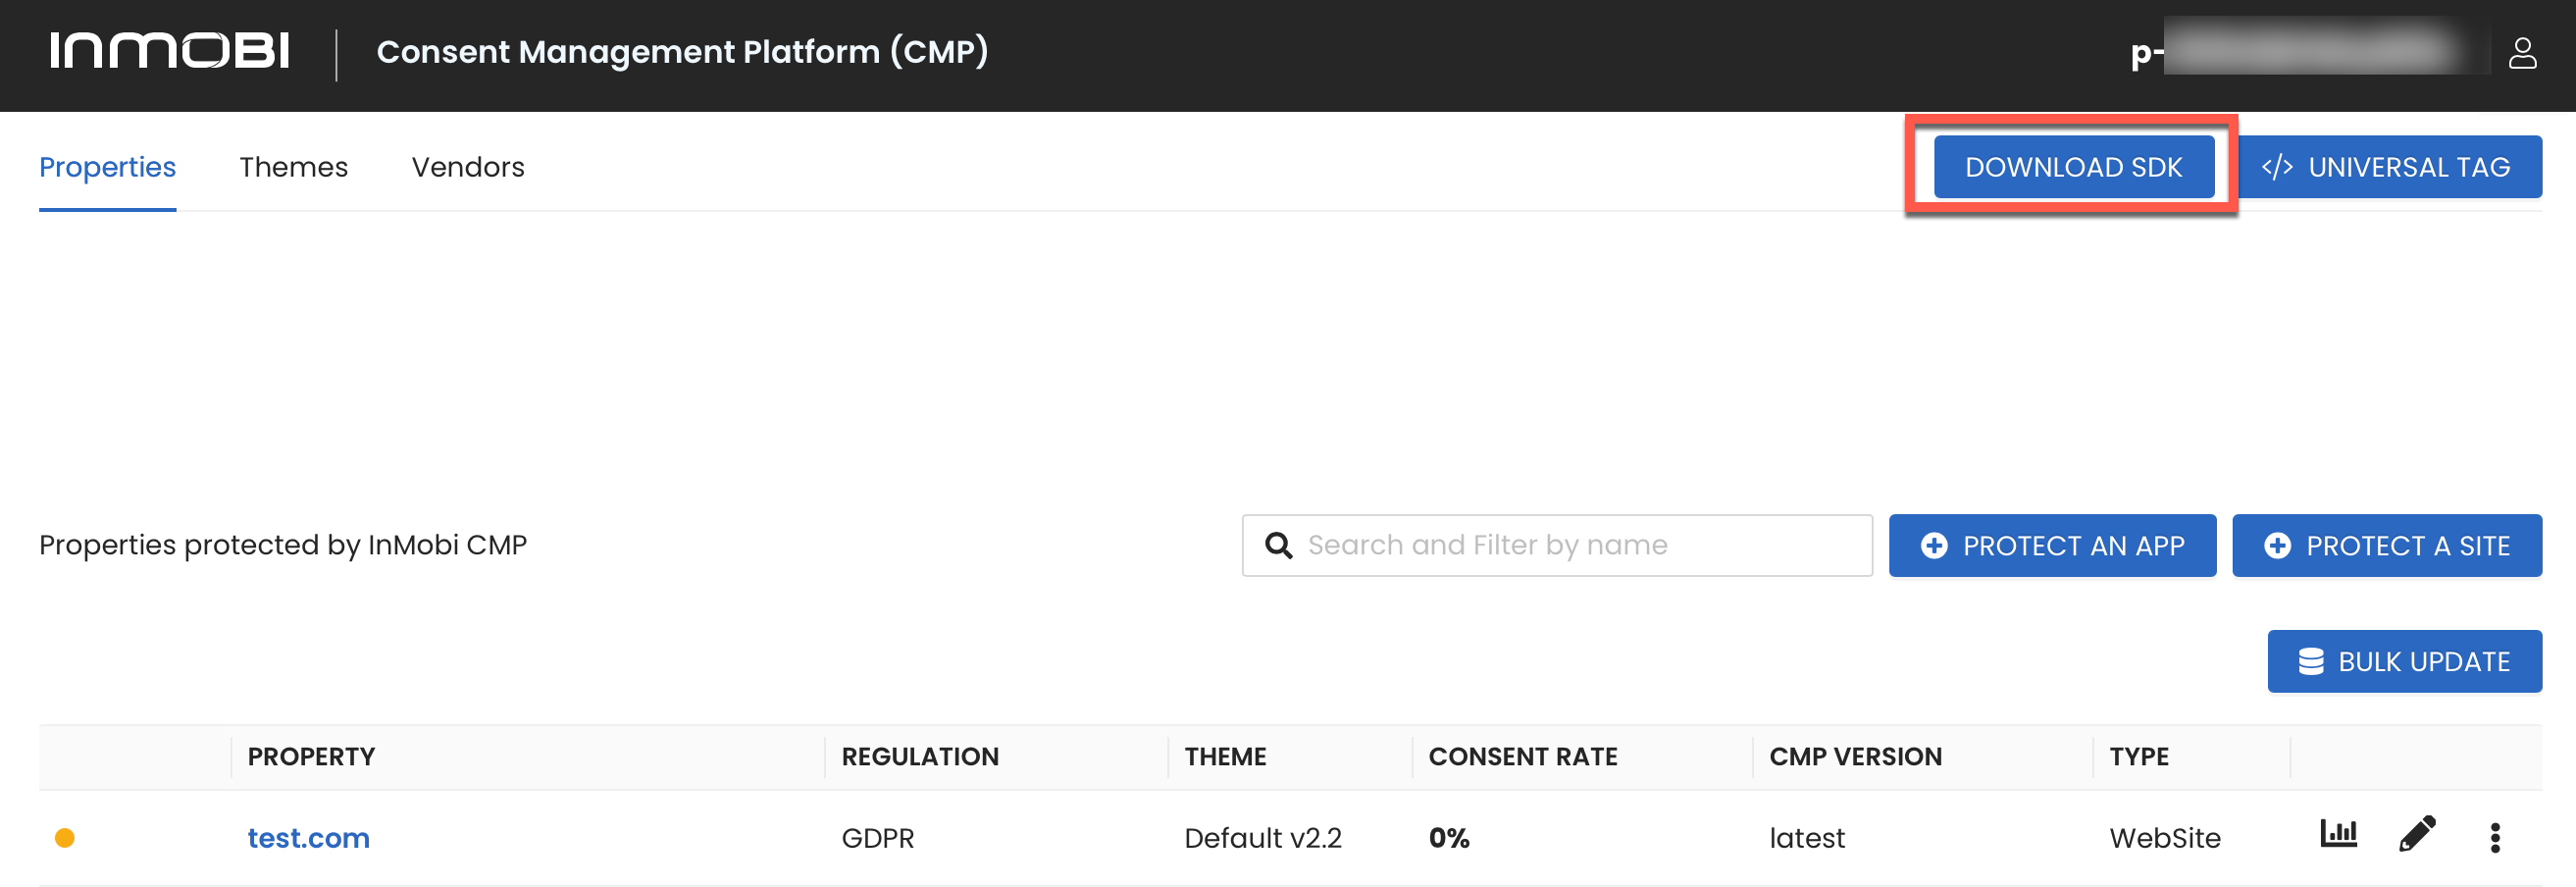
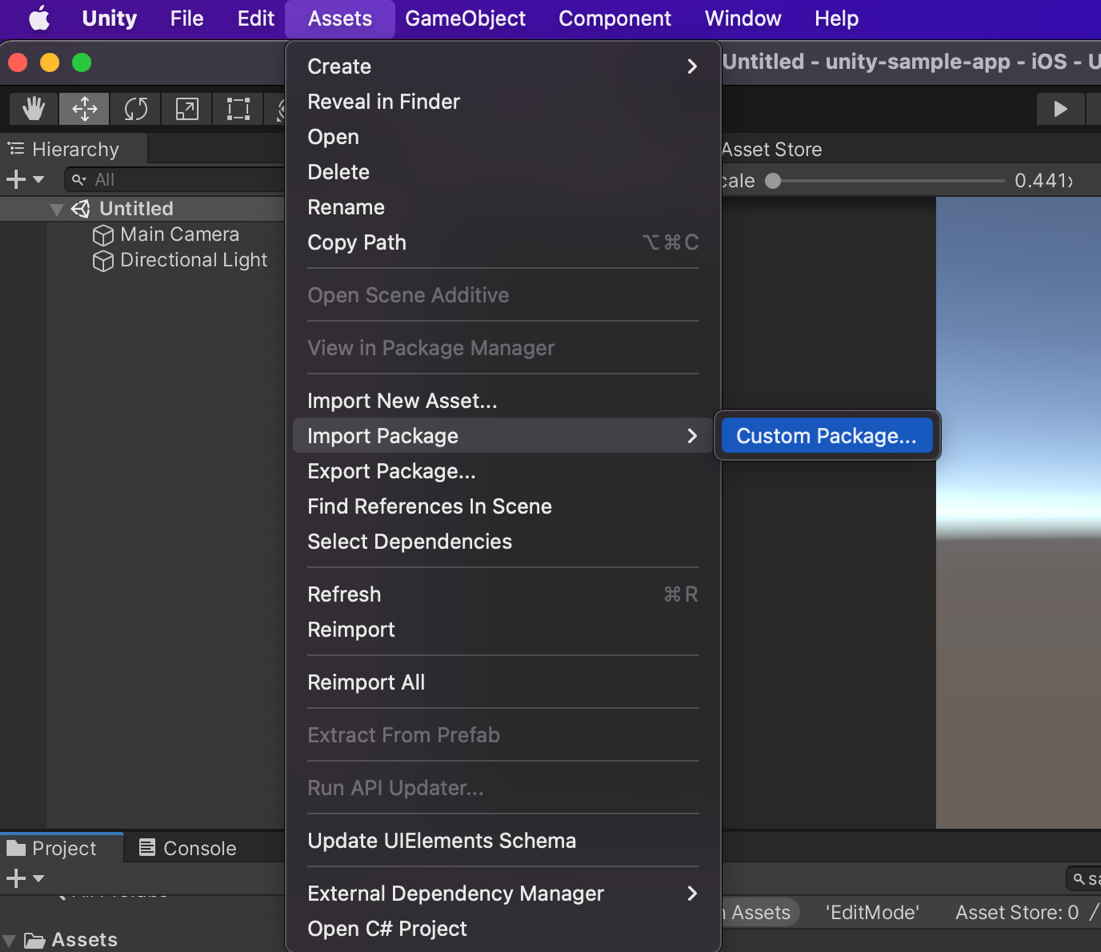
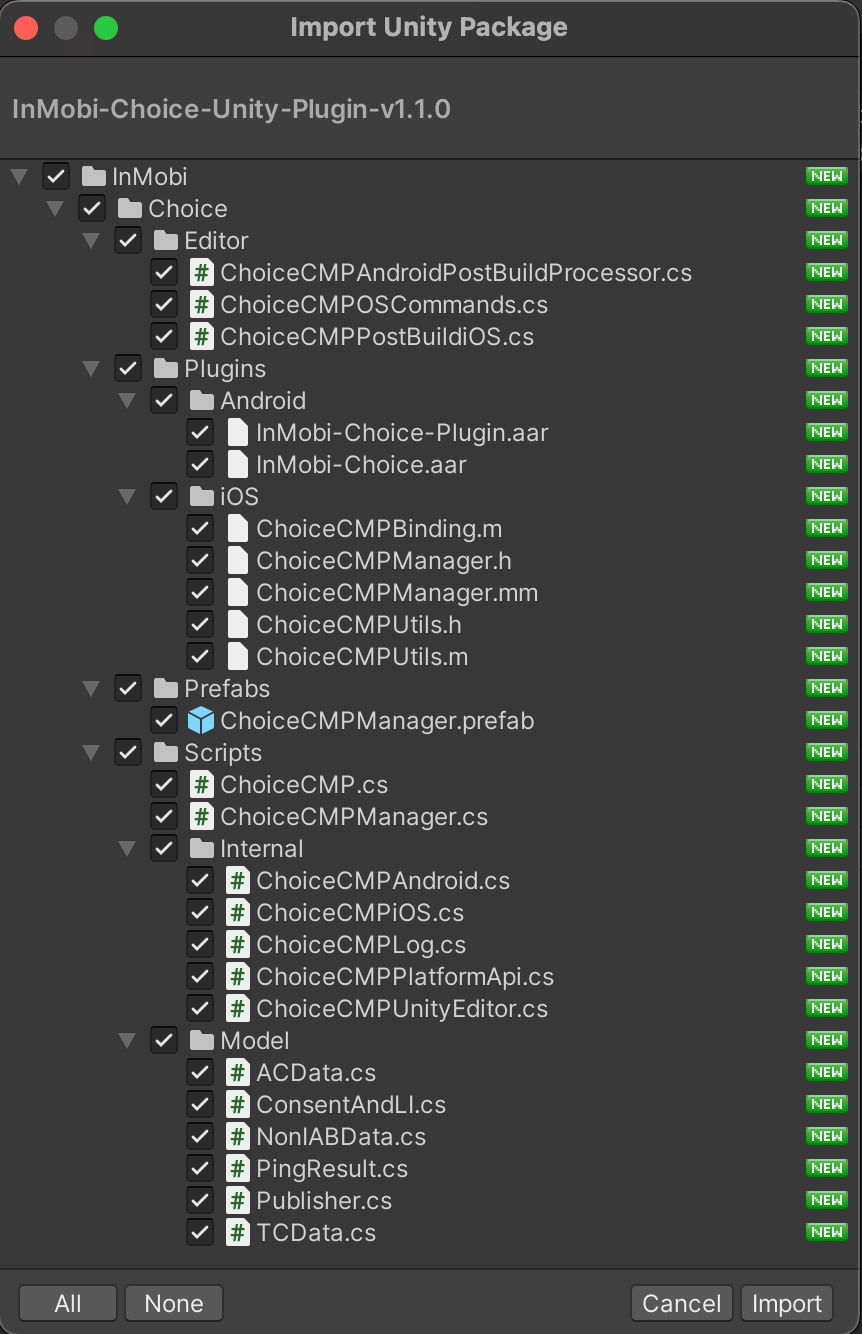
Click here to download the InMobi CMP Unity Package.
To initialize the SDK, you must provide your account's p-code for proper identification. After you log in to the InMobi CMP portal, you can see the p-code at the top right corner of the screen. However, as shown below, you must omit the initial two characters ("p-") when copying the code for use elsewhere.
StartChoice() method within the ChoiceCMP class. Ensure you provide the PCode obtained from the InMobi CMP portal as an argument.
public void StartChoice()
{
    ChoiceCMP.StartChoice(pCode, false);
}
shouldDisplayIDFA to show the Allow tracking popup on iOS. By default, the value is true.By employing the StartChoice() method, the user can solely view the consent dialog during the initial launch. Subsequent launches will not display the dialog if the user has previously consented unless the user uninstalls the app or clears data on his/her Android device. The next instance the popup will appear is when modifications are made in the portal, and you specify the interval after which the popup should reappear.
To forcibly display the popup, utilize the ForceDisplayUI() function.
public void ForceDisplayUI()
{
    ChoiceCMP.ForceDisplayUI();
}
After invoking the StartChoice() method, use the ForceDisplayUI() method to display the popup.
To present the CCPA consent popup, initiate the process by calling the StartChoice() method. Subsequently, invoke the ShowCCPA() method whenever you wish to display the popup. Unlike the GDPR consent popup, the ShowCCPA() popup will appear each time the method is called.
public void ShowCCPA()
{
    ChoiceCMP.ShowCCPA();
}
To retrieve the TCString, employ the GetTCString() method.
public void GetTCString()
{
    string TCString = ChoiceCMP.GetTCString();
}
You also have the option to specify the desired level of log output. The available log levels are as follows:
ChoiceCMP.ChoiceLogLevel to None. This represents the default log level and can be implemented as follows: ChoiceCMP.ChoiceLogLevel = ChoiceCMP.LogLevel.None;.ChoiceCMP.ChoiceLogLevel to Error. You can implement as follows: ChoiceCMP.ChoiceLogLevel = ChoiceCMP.LogLevel.Error;.ChoiceCMP.ChoiceLogLevel to Debug. You can implement as follows: ChoiceCMP.ChoiceLogLevel = ChoiceCMP.LogLevel.Debug;.Subscribe to callbacks to monitor CMP events. Below is an example demonstrating how to subscribe to the callbacks within your class:
void Start()
{
    ChoiceCMPManager.CMPDidLoadEvent += delegate (PingResult pingResult)
    {
        // Fired when the SDK has finished loading
    };

    ChoiceCMPManager.CMPDidErrorEvent += delegate (string error)
    {
        // Fired when SDK fails to load
    };

    ChoiceCMPManager.CMPDidShowEvent += delegate (PingResult pingResult)
    {
        // Fired when popup is shown
    };

    ChoiceCMPManager.CMPDidReceiveAdditionalConsentEvent += delegate (ACData acData)
    {
        // Fired when on receiving the Additional Consent
    };

    ChoiceCMPManager.CMPDidReceiveCCPAConsentEvent += delegate (string ccpaConsent)
    {
        // Fired when on receiving the CCPA Consent
    };

    ChoiceCMPManager.CMPDidReceiveIABVendorConsentEvent += delegate (TCData tcData)
    {
        // Fired when on receiving the IAB Vendor Consent
    };

    ChoiceCMPManager.CMPDidReceiveNonIABVendorConsentEvent += delegate (NonIABData nonIABData)
    {
        // Fired when on receiving the NON IAB Vendor Consent
    };
}
Follow the instructions below to set up the Android project for Unity:

You can now view the mainTemplate file in your Plugins/Android folder.

Incorporate the following set of dependencies into your mainTemplate.gradle file:
dependencies {
    implementation fileTree(dir: 'libs', include: ['*.jar'])

    // Android UI and appcompat
    implementation 'androidx.appcompat:appcompat:1.4.1'
    implementation 'androidx.constraintlayout:constraintlayout:2.1.3'
    implementation 'androidx.recyclerview:recyclerview:1.2.1'
    implementation 'androidx.cardview:cardview:1.0.0'
    implementation 'com.google.code.gson:gson:2.10.1'
    implementation 'com.google.android.material:material:1.3.0'

    // KTX
    implementation "androidx.lifecycle:lifecycle-livedata-ktx:2.4.1"
    implementation "androidx.lifecycle:lifecycle-viewmodel-ktx:2.4.1"

**DEPS**}
Follow the instructions below to set up the iOS project for Unity:


By installing this SDK update, you agree that your Children Privacy Compliance setting remains accurate or that you will update that setting, whenever there is a change in your app's audience. You may update the app's Children Privacy Compliance settings at https://publisher.inmobi.com/my-inventory/app-and-placements.
 Support Center


