If Kochava is your preferred MMP, you need to integrate Kochava with InMobi DSP before the campaign starts.
Before starting the integration, make sure you have:
The integration of Kochava and DSP is a one-time process and applicable to all the further campaigns. The integration steps are:
On the right side of the header, select your required account. Then, select the app for which you want to run the campaign.
You need to create a tracker link and share it with your InMobi Account Manager. The InMobi team uses the Kochava tracker in your campaigns, which allows data postback from InMobi DSP to your Kochava account.
Under the Tracker & Network Set Up section, enter a tracker name.
The Tracker Name field fills up with a system-generated name when you click Add a Tracker. It’s suggested you change the name to your preferred name.
Select Acquisition in the TRACKER TYPE drop-down. For the Re-engagement campaign, select Reengagement.
![]()
Under the Destination URL section, select Landing Page.
Refer to Kochava’s Landing Page Creation and Maintenance Support documentation for more information on creating and using Landing Pages.
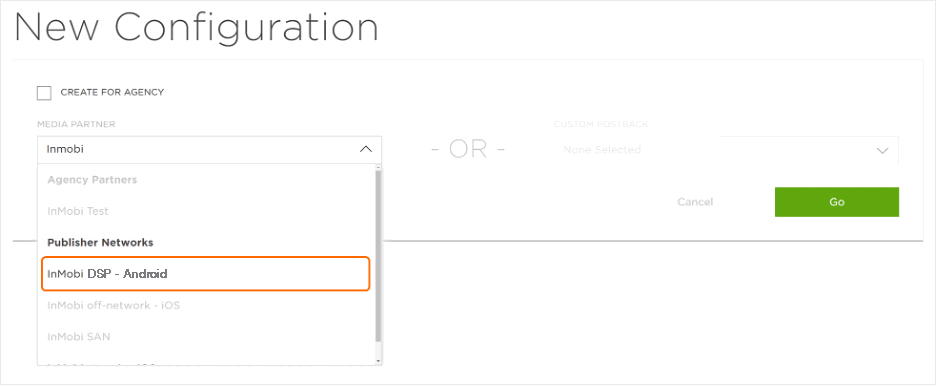
A postback—also called a callback—is data communication between two servers (Kochava and InMobi DSP in the current scenario) following an in-app event, such as an app installation or user activity. This system enables the InMobi team to get real-time updates on user interactions, drops, or any issues regarding the campaign. Configure the postbacks for InMobi DSP as follows:
Go to Apps & Assets > Partner Configuration in the left menu bar.

Click Go.
Click Install > Postback Tools ( •
•
• ) > Edit. The Edit Postback Install page opens.
Enter or select the DSP recommended values in the following fields:
| Field | DSP recommended value | Description |
|---|---|---|
| PROPERTY NAME | advertiser_id | Identifier for the DSP campaigns. |
| IMPRESSION CONVERSION DELIVERY | - | Determines if impression-matched install postbacks are limited. |
| PACKAGE NAME/BUNDLE ID | - | |
| DELIVERY DELAY | Realtime Delivery | Enables real-time postback delivery to InMobi DSP. |
| RETRY ATTEMPTS | 3 | Configures the number of attempts for redelivery in case of a failure. |
| DELIVERY METHOD | Deliver All | Provides unattributed data access to the DSP. |
By installing this SDK update, you agree that your Children Privacy Compliance setting remains accurate or that you will update that setting, whenever there is a change in your app's audience. You may update the app's Children Privacy Compliance settings at https://publisher.inmobi.com/my-inventory/app-and-placements.
 Support Center


