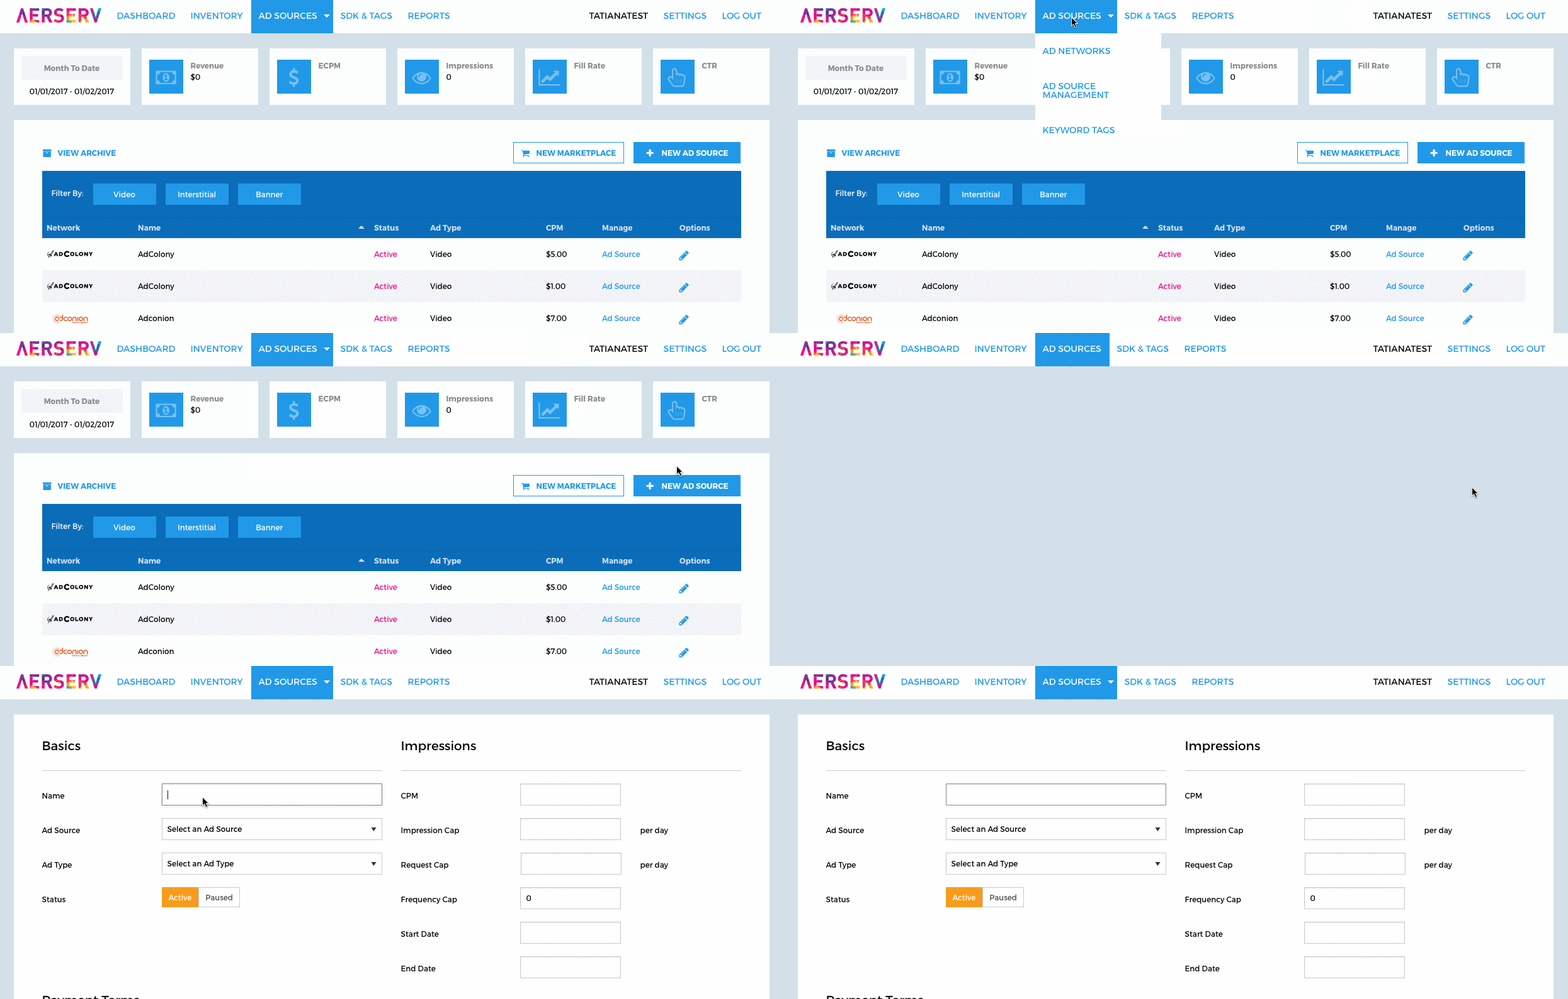
Step 1: Log on to http://platform.aerserv.com/ and click on the Ad Sources link at the top of the page.
Step 2: Click the + or the Add New Ad Source button on the page
Step 3: Enter a Name for the ad source(example:AdColonyInterstitial)
Step 4: Select AdColony as the ad source
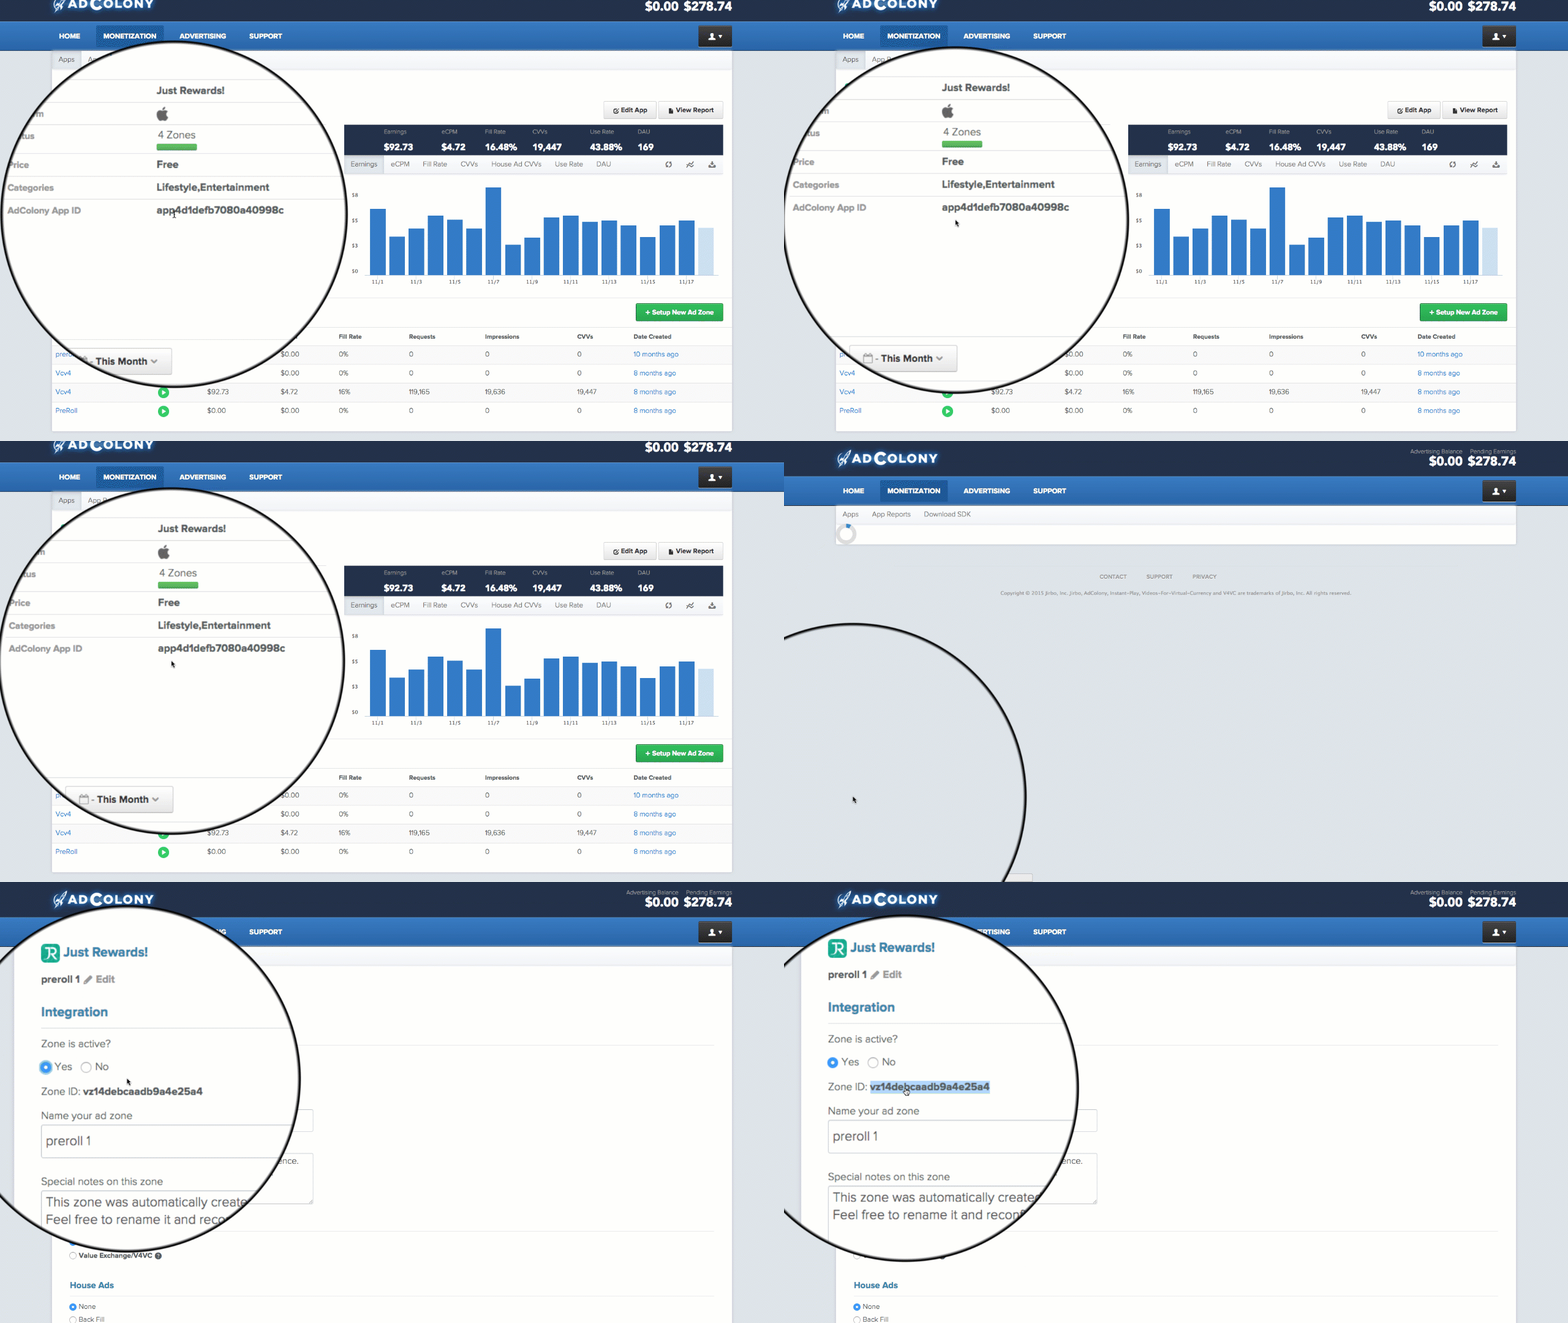
Step 5: Enter the following fields that are specific to the AdColony ad source:

| FIELD | DESCRIPTION | REQUIRED/OPTIONAL | EXAMPLE |
|---|---|---|---|
| Application ID | The Application ID assigned by AdColony | Required | app185a7e71e1714831a49ec7 |
| Zone ID | A comma separated list of zone IDs | Required | vz06e8c32a037749699e7050, vz06e8c32a037749699e7050 |
Step 6:Enter aCPM (example:3.50)
Step 7: Select a placement(s) to assign this ad source to
Step 8: Select any desired geo or device targeting
Step 9: Click the Save button
Step 10: Download the AerServ SDK
Step 1. Locate the AdColony filesinside network-support/Adcolony/
Step 2. Add adcolony.jar to your app's lib folder, i.e. [Project Name]/app/libs
Step 3. Add the following folders to your app's lib folder as necessary:
armeabi, armeabi-v7a, arm64-v8a, x86_64, and x86
Step 4. Add the following settings inside your application's build.gradle:
  android {
...
    sourceSets {
        main{
            jniLibs.srcDirs = ['libs']
        }
    }
}
...
dependencies {
    compile 'com.google.android.gms:play-services-ads:10.0.1'
    compile 'com.android.support:support-annotations:25.0.1'
}
Step 5. Add the following permissions to your AndroidManifest.xml:
<!-- Required by AdColony -->
<uses-permission android:name="android.permission.INTERNET">
<uses-permission android:name="android.permission.ACCESS_NETWORK_STATE">

<!-- Optional, but Recommended by AdColony -->
<uses-permission android:name="android.permission.WRITE_EXTERNAL_STORAGE">
<uses-permission android:name="android.permission.VIBRATE"></uses-permission></uses-permission></uses-permission></uses-permission>
Step 6. Add the following activityto your AndroidManifest.xml:
  <activity android:configchanges="keyboardHidden|orientation|screenSize" android:hardwareaccelerated="true" android:name="com.adcolony.sdk.AdColonyInterstitialActivity">
<activity android:configchanges="keyboardHidden|orientation|screenSize" android:hardwareaccelerated="true" android:name="com.adcolony.sdk.AdColonyAdViewActivity"></activity></activity>
Step 1. Add the Adcolony SDK in the folder network-support/AdColony/AdColony.framework into your project frameworks.
Add the following libraries and frameworks to Target > Build Phases > Link Binary With Libraries:
libz.1.2.5.tbd
AdColony.framework
AdSupport.framework
AudioToolbox.framework
AVFoundation.framework
CoreMedia.framework
CoreTelephony.framework
JavaScriptCore.framework
MessageUI.framework
MobileCoreServices.framework
SafariServices.framework (Set to Optional)
Social.framework (Set to Optional)
StoreKit.framework (Set to Optional)
SystemConfiguration.framework
WatchConnectivity.framework (Set to Optional)
WebKit.framework (Set to Optional)
Step 2. Add the following entry into your info.plist:
<key>NSCalendarsUsageDescription</key>
<string>Some ad content may create a calendar event.</string>
<key>NSMotionUsageDescription</key>
<string>Some ad content may require access to accelerometer for interactive ad experience.</string>
<key>LSApplicationQueriesSchemes</key>
<array>
    <string>fb</string>
    <string>instagram</string>
    <string>tumblr</string>
    <string>twitter</string>
</array>